> ## Documentation Index
> Fetch the complete documentation index at: https://hc.saas-manager.biz.nuro.jp/llms.txt
> Use this file to discover all available pages before exploring further.
# Google Ads
> To integrate Google Ads, add the service account as a member, confirm the workspace key, and register it in the Admina integrations screen.
## Supported Features
Account Deletion Account Creation
To integrate a Google Ads workspace, you need to add the Admina service account as a member.
"Read-only" permission is sufficient for user aggregation only. "Admin" permission is required for provisioning and deprovisioning.
The Google Ads API provides no way to determine whether an account has been deleted. [Mute](/en/it-management/retired/j61yplowpw-mute#alert-mute) accounts of departed employees instead.
## Prerequisites
### How to Add the Service Account
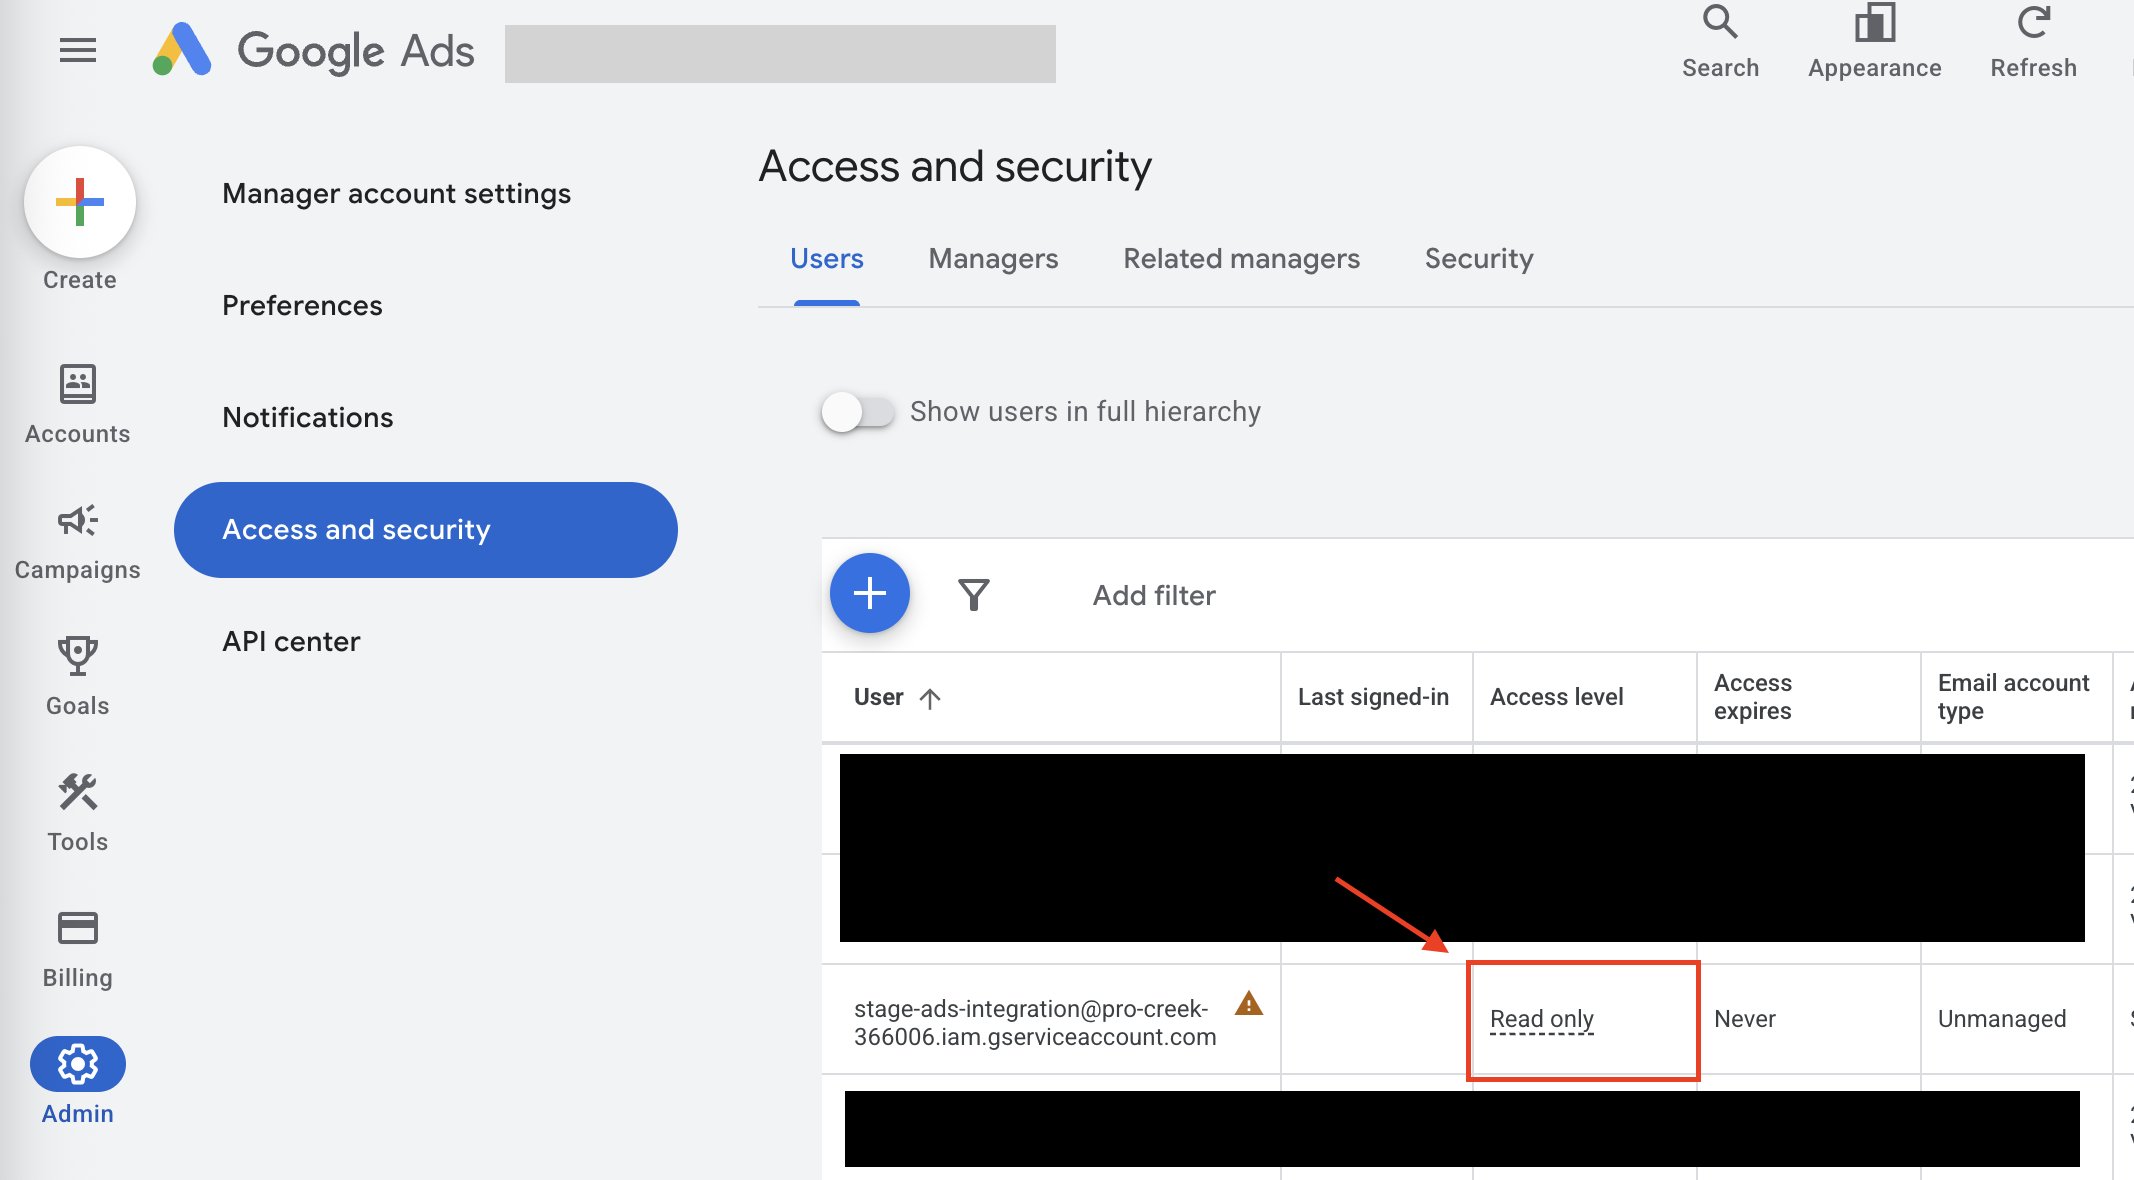
After logging in to Google Ads, click **Admin** > **Access and security** > **+ button** in the left menu.
 Enter the service account email address `google-ads-integration@money-forward-itmc.iam.gserviceaccount.com`.
Select **Read only** for the account access level.
*This email address is for the production environment only. For staging, use the following address instead:*
`stage-ads-integration@pro-creek-366006.iam.gserviceaccount.com`
Admin permission cannot be selected on this screen. You will need to change it afterward.
You can optionally set an expiration date, but the integration will stop when the date is reached.
Enter the service account email address `google-ads-integration@money-forward-itmc.iam.gserviceaccount.com`.
Select **Read only** for the account access level.
*This email address is for the production environment only. For staging, use the following address instead:*
`stage-ads-integration@pro-creek-366006.iam.gserviceaccount.com`
Admin permission cannot be selected on this screen. You will need to change it afterward.
You can optionally set an expiration date, but the integration will stop when the date is reached.
 (Optional) **Admin** permission is required for provisioning and deprovisioning. If needed, change the access level from the user list.
If the user list does not update, you may need to refresh the page.
(Optional) **Admin** permission is required for provisioning and deprovisioning. If needed, change the access level from the user list.
If the user list does not update, you may need to refresh the page.
 ### How to Find Your Workspace Key
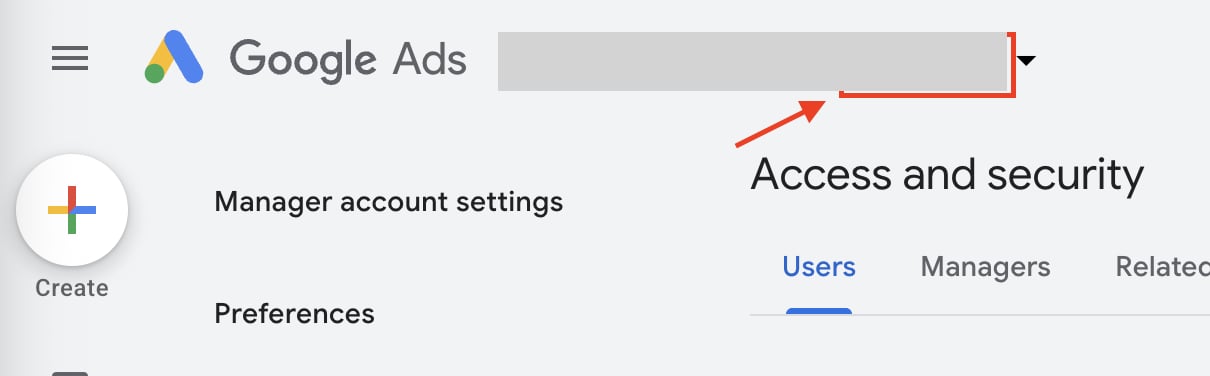
After adding the service account to Google Ads, check the number displayed near the Google Ads account name.
This number is your **workspace key**.
(The workspace key is valid with or without hyphens.)
### How to Find Your Workspace Key
After adding the service account to Google Ads, check the number displayed near the Google Ads account name.
This number is your **workspace key**.
(The workspace key is valid with or without hyphens.)
 ## Integration Setup
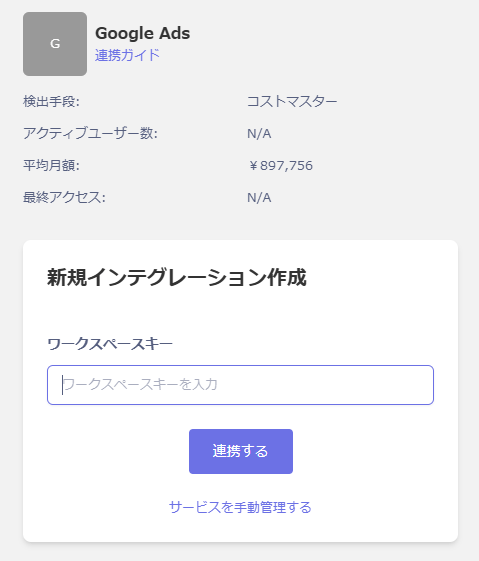
In the integrations screen, search for **Google Ads**.
Enter the **workspace key** confirmed in the previous step, then click **Connect**.
## Integration Setup
In the integrations screen, search for **Google Ads**.
Enter the **workspace key** confirmed in the previous step, then click **Connect**.
 Once the integration is successful, the registered user information will appear in the account list.
If the integration fails, click **Edit** on the Status tab of the integrations screen and try again.
If the issue persists, please contact us via chat.
Once the integration is successful, the registered user information will appear in the account list.
If the integration fails, click **Edit** on the Status tab of the integrations screen and try again.
If the issue persists, please contact us via chat.