> ## Documentation Index
> Fetch the complete documentation index at: https://hc.saas-manager.biz.nuro.jp/llms.txt
> Use this file to discover all available pages before exploring further.
# CloudGate UNO
> Obtain the workspace key and client ID from the CloudGate UNO admin site, then integrate with Admina.
## Supported Features
Account Creation Account Deletion
## Prerequisites
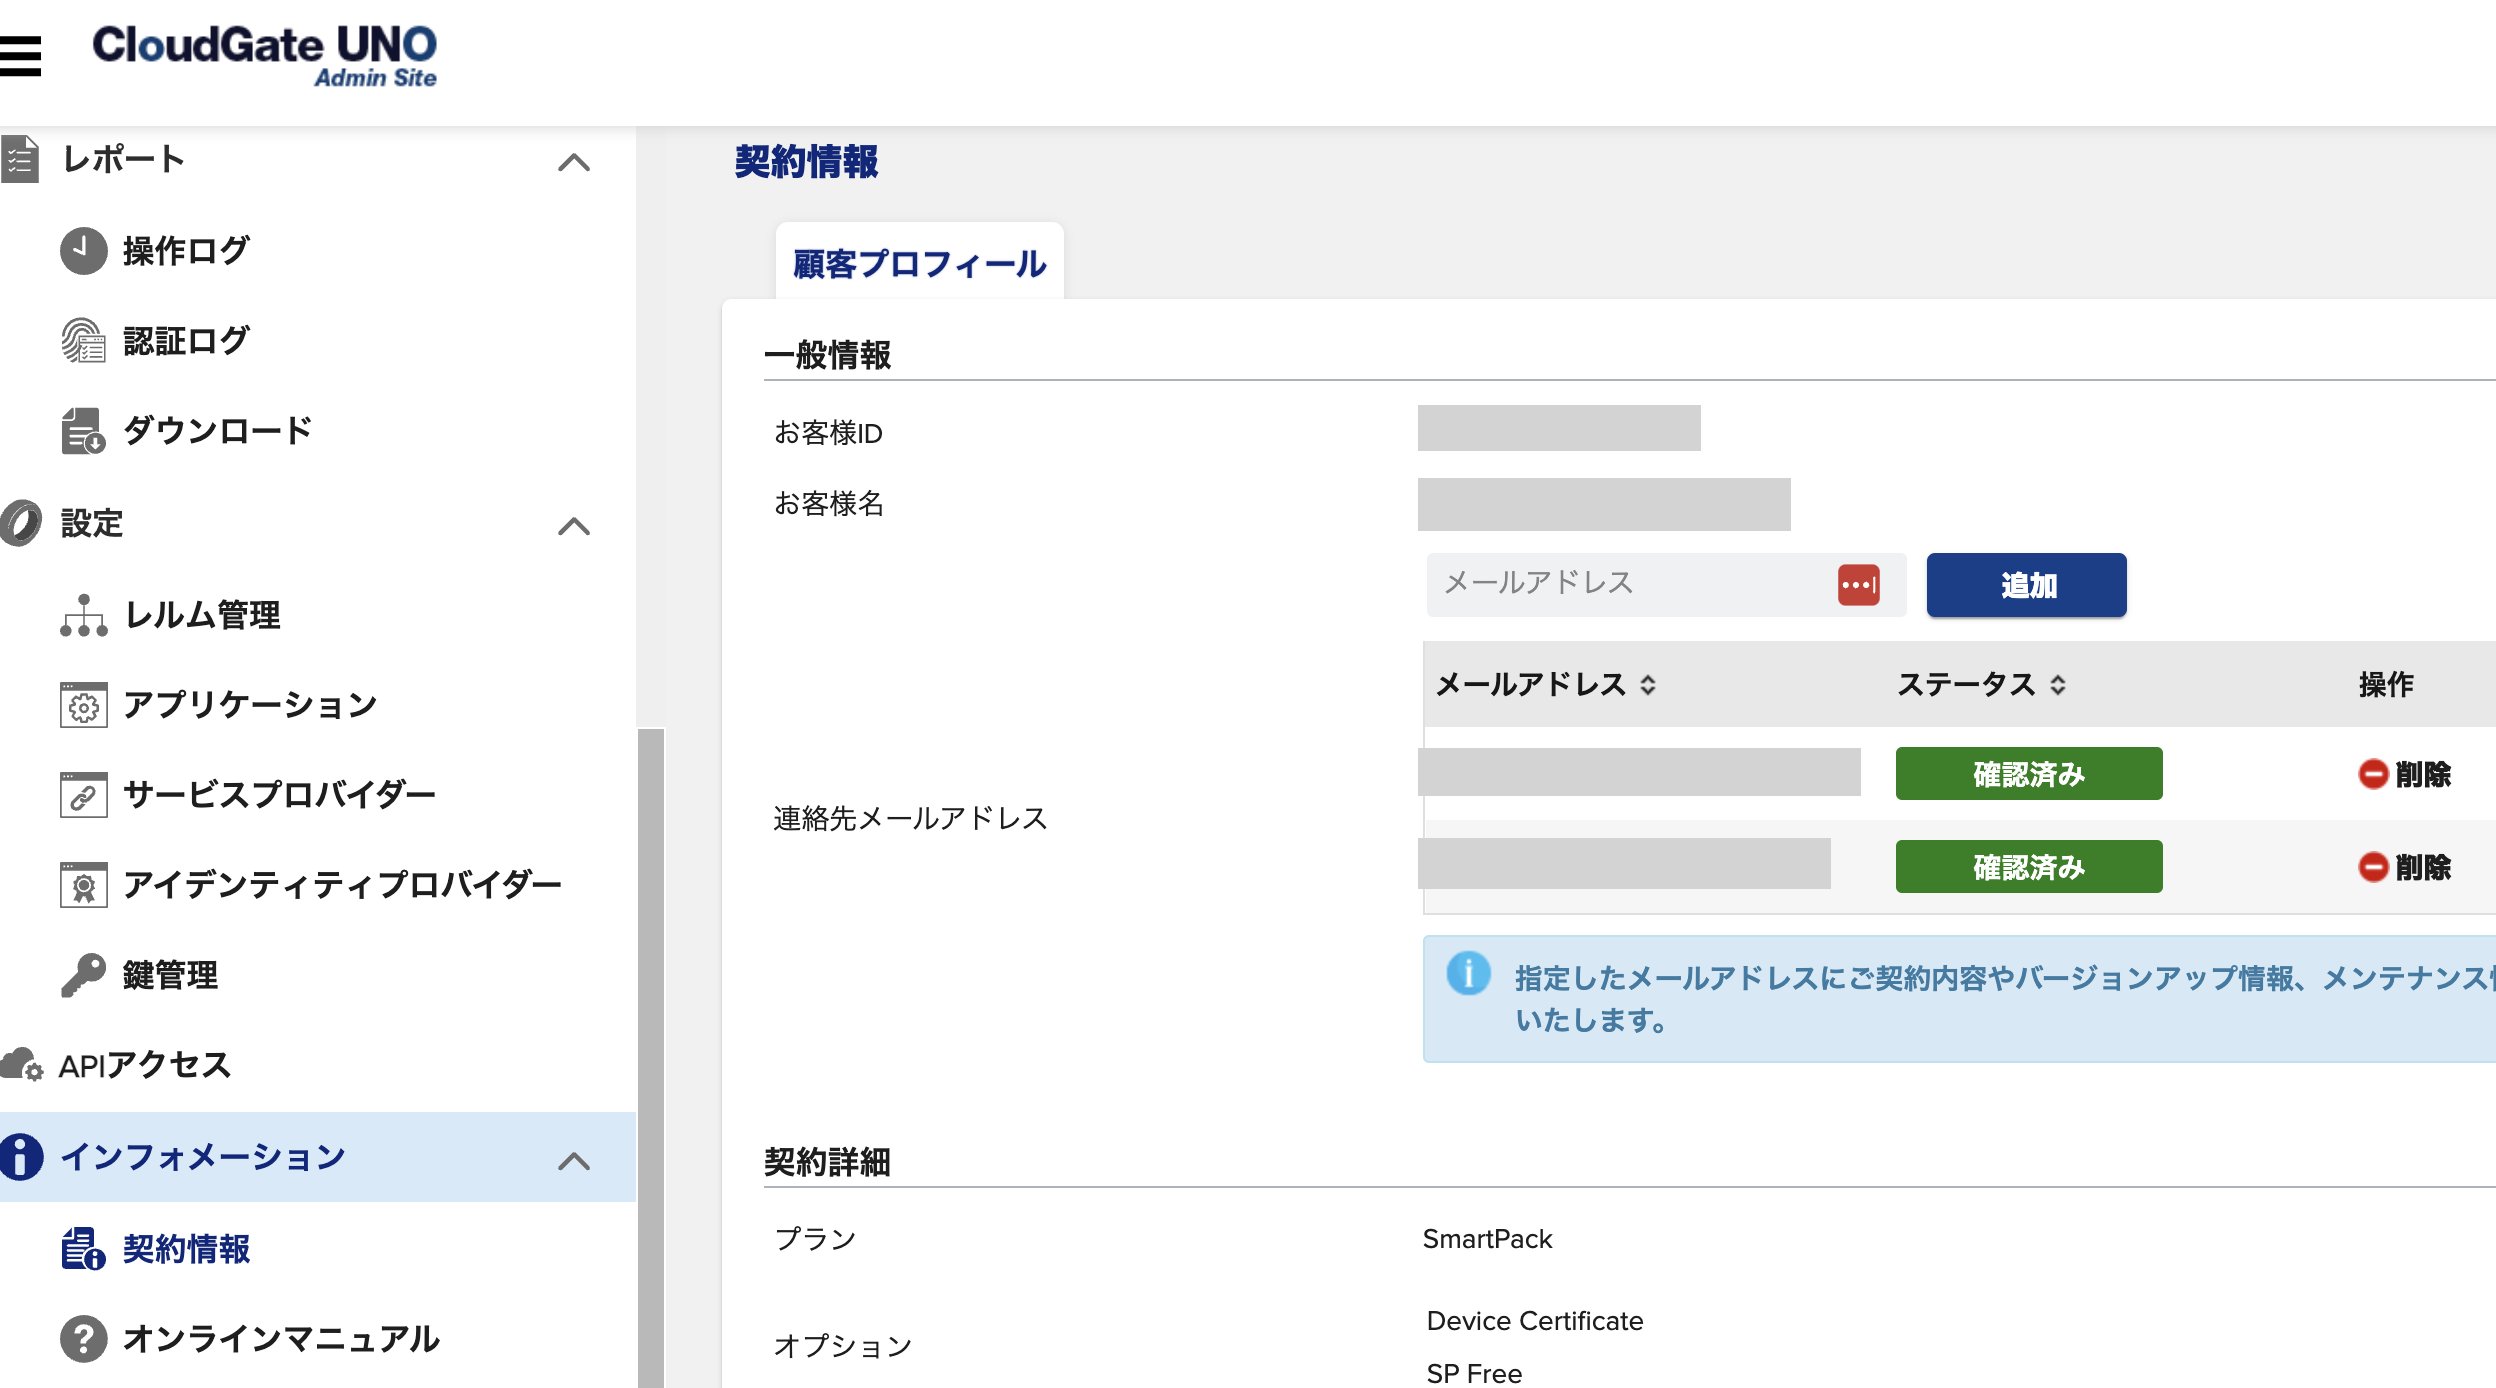
### How to Find the Workspace Key
Log in to the **CloudGate UNO admin site**.
Go to **Information** > **Contract Information** > **General Information** > **Customer ID**.
This **Customer ID** is your **workspace key**.
 ### How to Obtain the Client ID and Client Secret
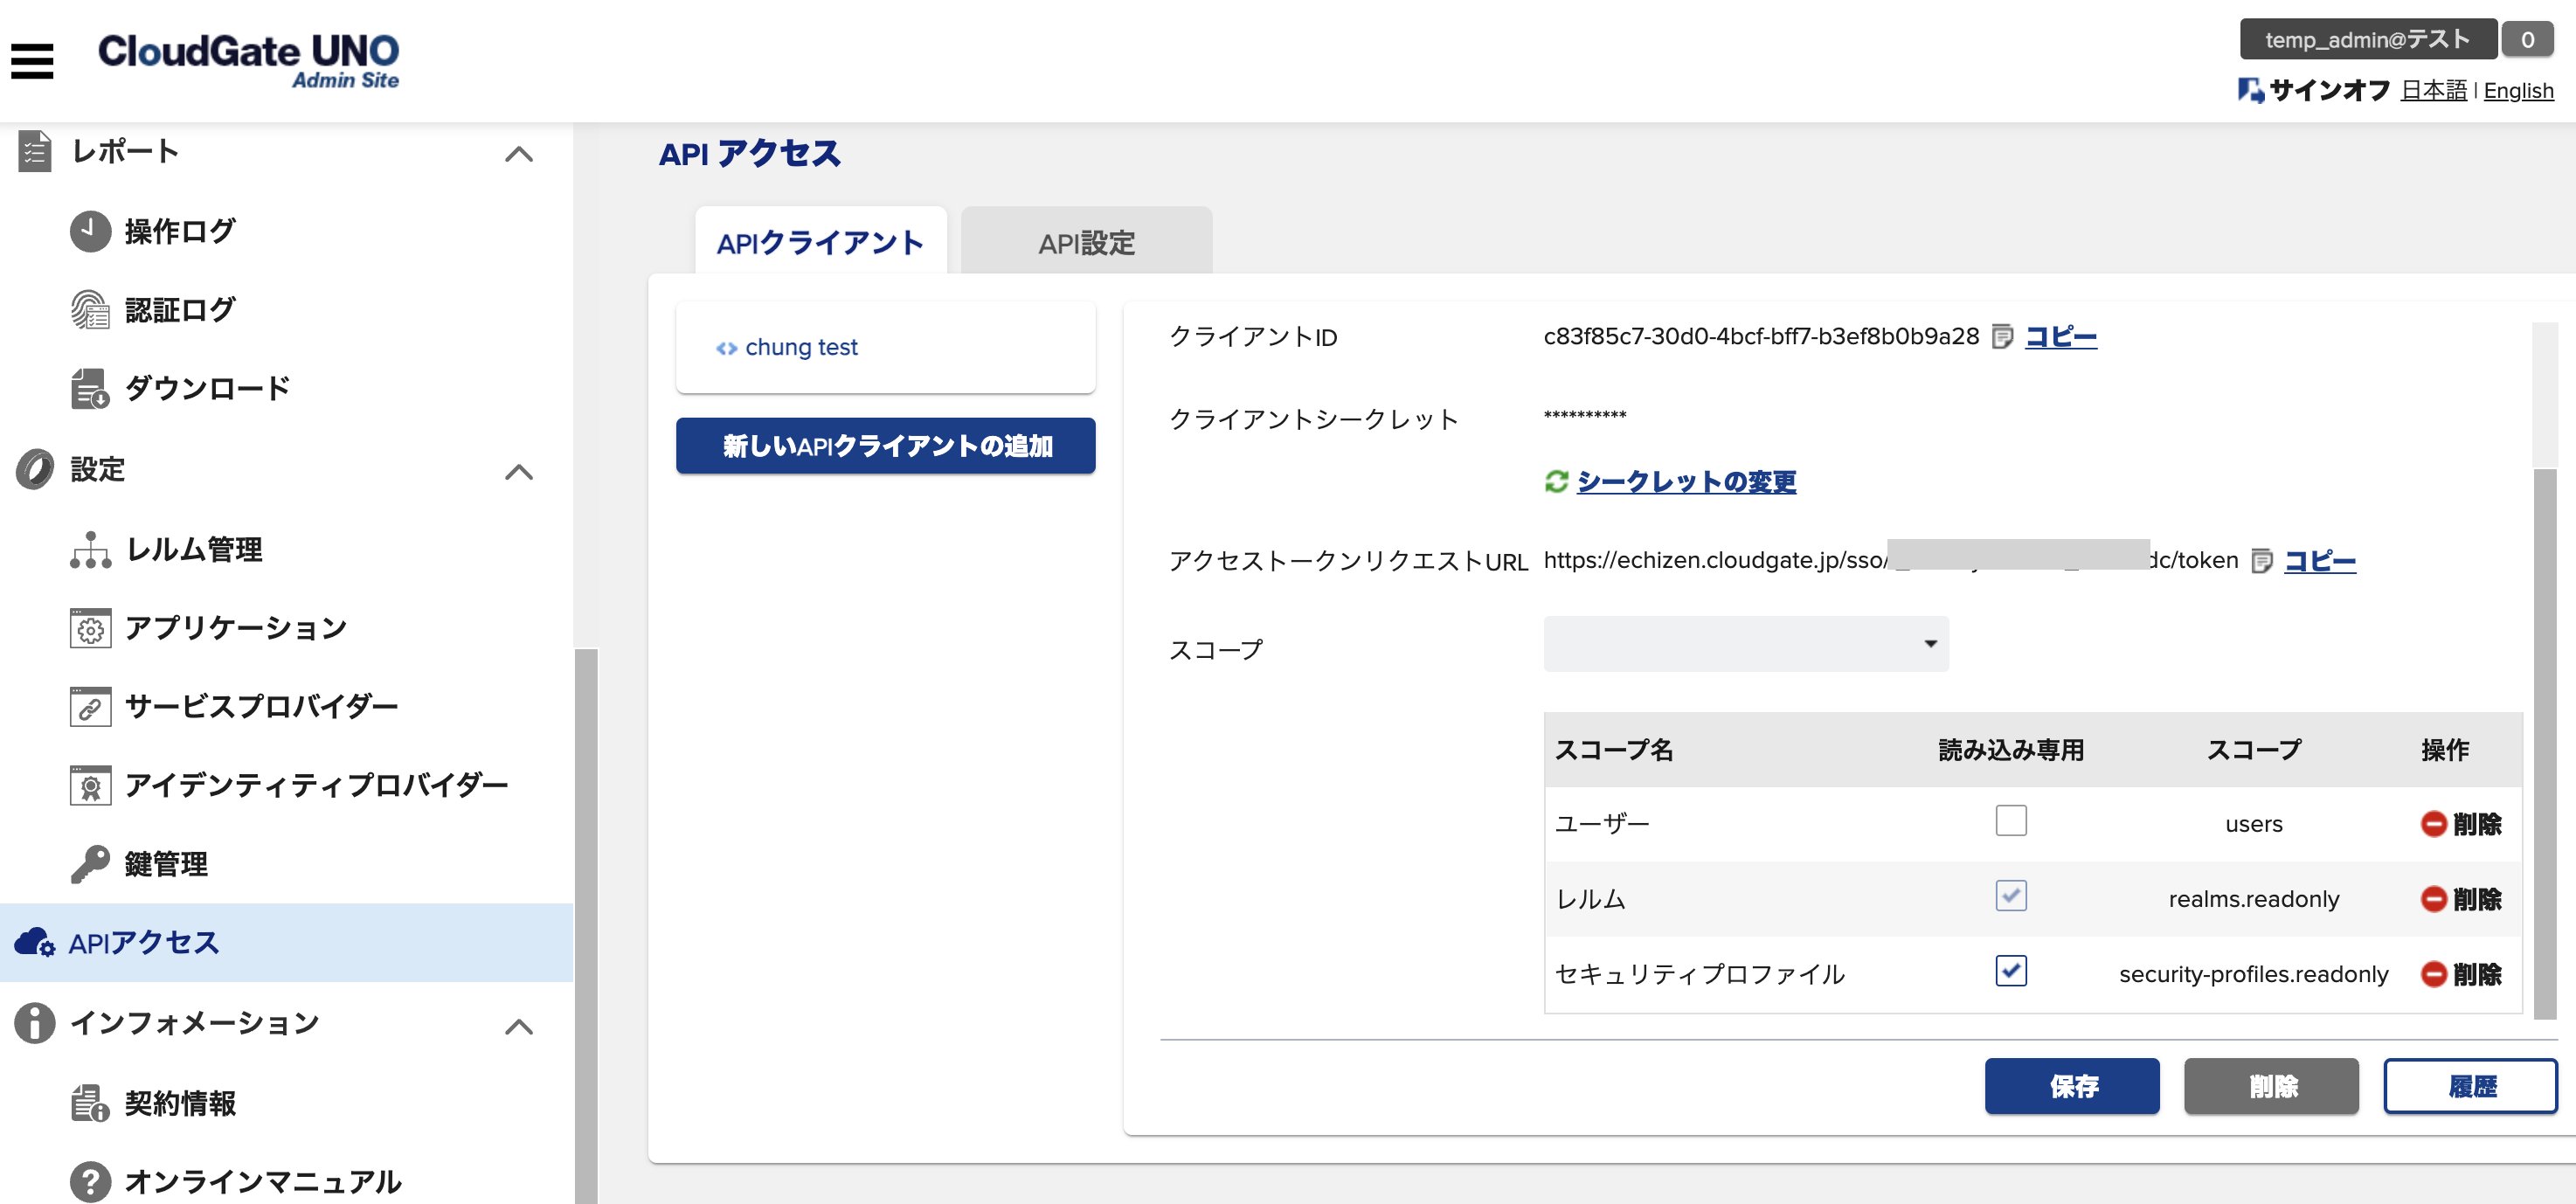
Click **API Access** > **Add New API Client**.
Copy the displayed **Client ID** and **Client Secret**.
The **Client Secret** is only displayed **once** immediately after adding the API client. Please take note of it carefully.
You can generate a new one via **Change Secret**, but doing so will invalidate the previous client secret.
### How to Obtain the Client ID and Client Secret
Click **API Access** > **Add New API Client**.
Copy the displayed **Client ID** and **Client Secret**.
The **Client Secret** is only displayed **once** immediately after adding the API client. Please take note of it carefully.
You can generate a new one via **Change Secret**, but doing so will invalidate the previous client secret.
 ## Integration Setup
In the MoneyForward Admina integration screen, search for **CloudGate UNO**.
Enter the **workspace key**, **client ID**, and **client secret** obtained in the previous steps, then click **Connect**.
## Integration Setup
In the MoneyForward Admina integration screen, search for **CloudGate UNO**.
Enter the **workspace key**, **client ID**, and **client secret** obtained in the previous steps, then click **Connect**.
 Once the integration is successful, the registered user information will appear in the account list.
If the process does not complete successfully, click **Edit** from the Status tab on the integration screen and try connecting again.
If the issue persists, please contact us via chat.
Once the integration is successful, the registered user information will appear in the account list.
If the process does not complete successfully, click **Edit** from the Status tab on the integration screen and try connecting again.
If the issue persists, please contact us via chat.