> ## Documentation Index
> Fetch the complete documentation index at: https://hc.saas-manager.biz.nuro.jp/llms.txt
> Use this file to discover all available pages before exploring further.
# 2-0. Pre-configure Automation (Mapping)
> Learn how to configure service connection settings (mapping) for automation.
**Permission for this service:** This feature requires **Admin** or **Automation Manager** permissions.
**SaaS status:** The target SaaS must be connected with administrator privileges (including API permissions) sufficient to create and delete accounts.
Automation can provision accounts when employees join. It can also deprovision (delete or deactivate) accounts when employees leave. Before enabling this, configure which SaaS and which environment (workspace) to use. Then configure which permissions and which groups to include in the automation.
This page explains the service connection settings (mapping).
#### Check supported SaaS for automation
Check which connected SaaS, and which environment (workspace) for each, you want to include in the automation.
You can check which SaaS support automation on the following screens.
| **Automation screen (supported SaaS)** | Go to **Automation Center** > **Services** > **\[Add service]** > **Select service** (step 2 of [Setup steps](#setup-steps)). This service continues to expand the services supported for Provisioning and Deprovisioning. |
| -------------------------------------- | -------------------------------------------------------------------------------------------------------------------------------------------------------------------------------------------------------------------------- |
| **Services screen (supported SaaS)** | For support status on the Services screen, see the "Account Lifecycle" section of the [**Supported SaaS & Feature List**](/en/integrations/ey32ki15er-function#saa_s). |
Mapping methods
Configure which permission, group, or role to include in the automation.
This service offers two mapping methods to match your operations. The fields available for static or dynamic mapping vary by service. You can typically configure roles, groups, teams, permissions, and licenses.
| Method | What it does | Best for |
| ------------------- | --------------------------------------------------------------------------------------------------------------------------------------------------------------------------------------------- | ------------------------------------------------------------------------------------------------------ |
| **Static mapping** | Assigns the **same value** (a specific role or group) to every user. | Simple setups, such as adding everyone to a "General" group. |
| **Dynamic mapping** | Automatically assigns different values based on user information (department, job title, work location, etc.). You can find this information under **Directory** > **People** > user details. | Controlling access by attribute, such as granting view access to Sales and edit access to Engineering. |
Setup steps
1. Go to **Automation Center** > **Services** > **Connection settings**, then click **\[Add connection]**.
 2. Select a service on the **Add service** screen.
The services listed under **Select service** are the currently supported services. Services not listed are not yet supported.
2. Select a service on the **Add service** screen.
The services listed under **Select service** are the currently supported services. Services not listed are not yet supported.
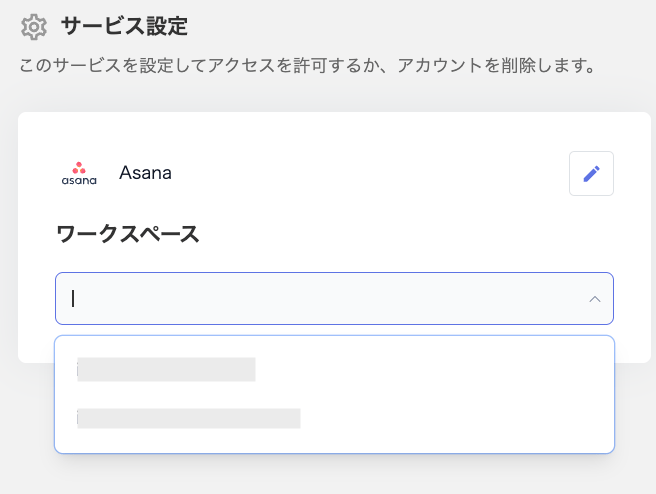
 3. Select a workspace on the **Service settings** screen.
If you have multiple workspaces, configure each one separately.
3. Select a workspace on the **Service settings** screen.
If you have multiple workspaces, configure each one separately.
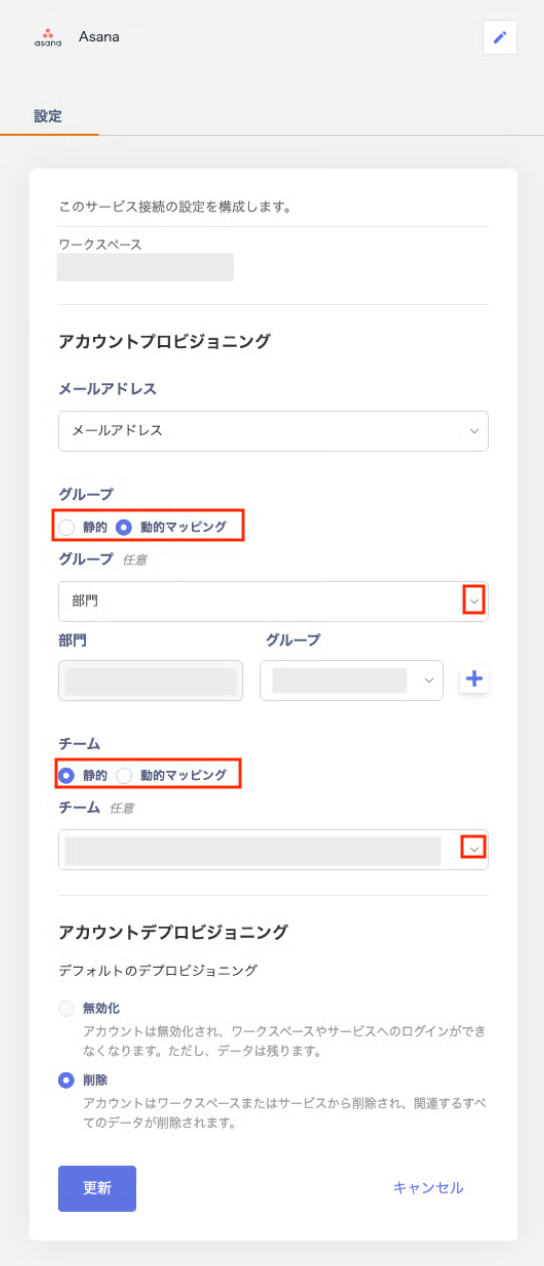
 4. Configure each field on the **Service settings** screen, then click **\[Save]**.
Select **static** or **dynamic mapping** with the radio button, then configure it in the dropdown menu that appears below.
For details on static and dynamic mapping, see [Mapping methods](#mapping-methods). For custom fields, see the [configuration steps](/en/it-management/workflows/rdeflerejh-automation-custom).
4. Configure each field on the **Service settings** screen, then click **\[Save]**.
Select **static** or **dynamic mapping** with the radio button, then configure it in the dropdown menu that appears below.
For details on static and dynamic mapping, see [Mapping methods](#mapping-methods). For custom fields, see the [configuration steps](/en/it-management/workflows/rdeflerejh-automation-custom).
 5. The mapped service appears on the **Connection settings** screen under the **Services** tab.
 #### Next steps
After you complete this pre-configuration, create a workflow that matches your operations.
* [**Set up a workflow for new employee onboarding**](/en/it-management/workflows/ygzni03g1c-admina-automation-wic-ggx)
* [**Set up a workflow for employee offboarding**](/en/it-management/workflows/clsb6alwrc-admina-automation-rtp)
For setup steps, see also [Getting Started with Automations](/en/it-management/workflows/90k8f1lee0-workflows).
#### Next steps
After you complete this pre-configuration, create a workflow that matches your operations.
* [**Set up a workflow for new employee onboarding**](/en/it-management/workflows/ygzni03g1c-admina-automation-wic-ggx)
* [**Set up a workflow for employee offboarding**](/en/it-management/workflows/clsb6alwrc-admina-automation-rtp)
For setup steps, see also [Getting Started with Automations](/en/it-management/workflows/90k8f1lee0-workflows).