> ## Documentation Index
> Fetch the complete documentation index at: https://hc.saas-manager.biz.nuro.jp/llms.txt
> Use this file to discover all available pages before exploring further.
# 3-1. Configure a Workflow for New Employee Onboarding
> Learn how to configure a workflow for new employee onboarding (provisioning).
**Required permission for this service:** This feature requires **Admin** or **Automation Manager** permission.
**SaaS status:** The target SaaS must be connected and integrated with administrator privileges (including API access) required for account creation and deletion.
This page explains how to configure a workflow that automatically provisions SaaS accounts when a new employee joins. It also explains how to send notifications via Slack or email.
#### Configuration flow
After completing [prerequisites](/en/it-management/workflows/90k8f1lee0-workflows), configure the workflow in three main steps:
1. [**Pre-configure automation (mapping)**](/en/it-management/workflows/ms4wo45v27-admina-automation-wic): Configure the mapping with connected services.
2. Create and publish the workflow: Set the workflow conditions and activate the workflow you created.
3. Notification: Check the notification delivered via your chosen method ([Slack](/en/it-management/workflows/ygzni03g1c-admina-automation-wic-ggx) or Email).
Steps to configure new employee onboarding
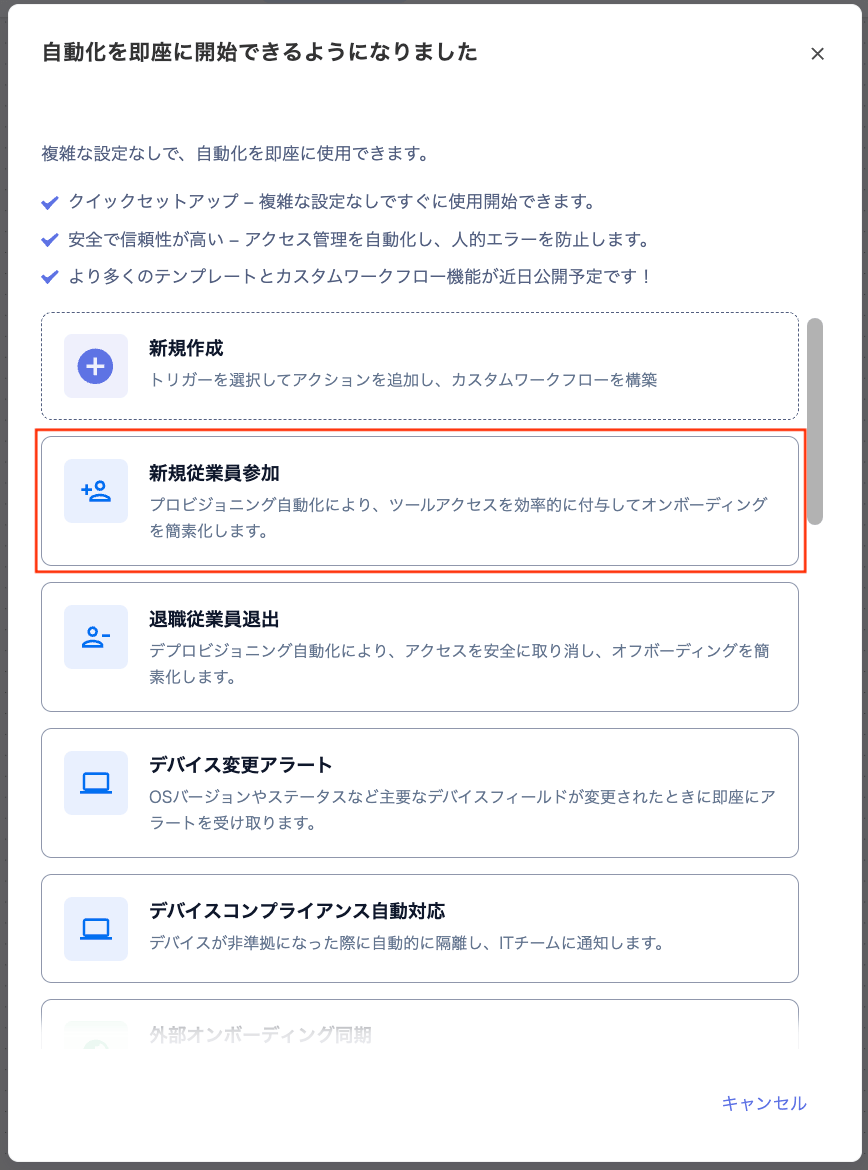
1. Go to **Automation** > **\[Create automation]**. A list of automation templates appears. Select **"New employee onboarding"** from the list.
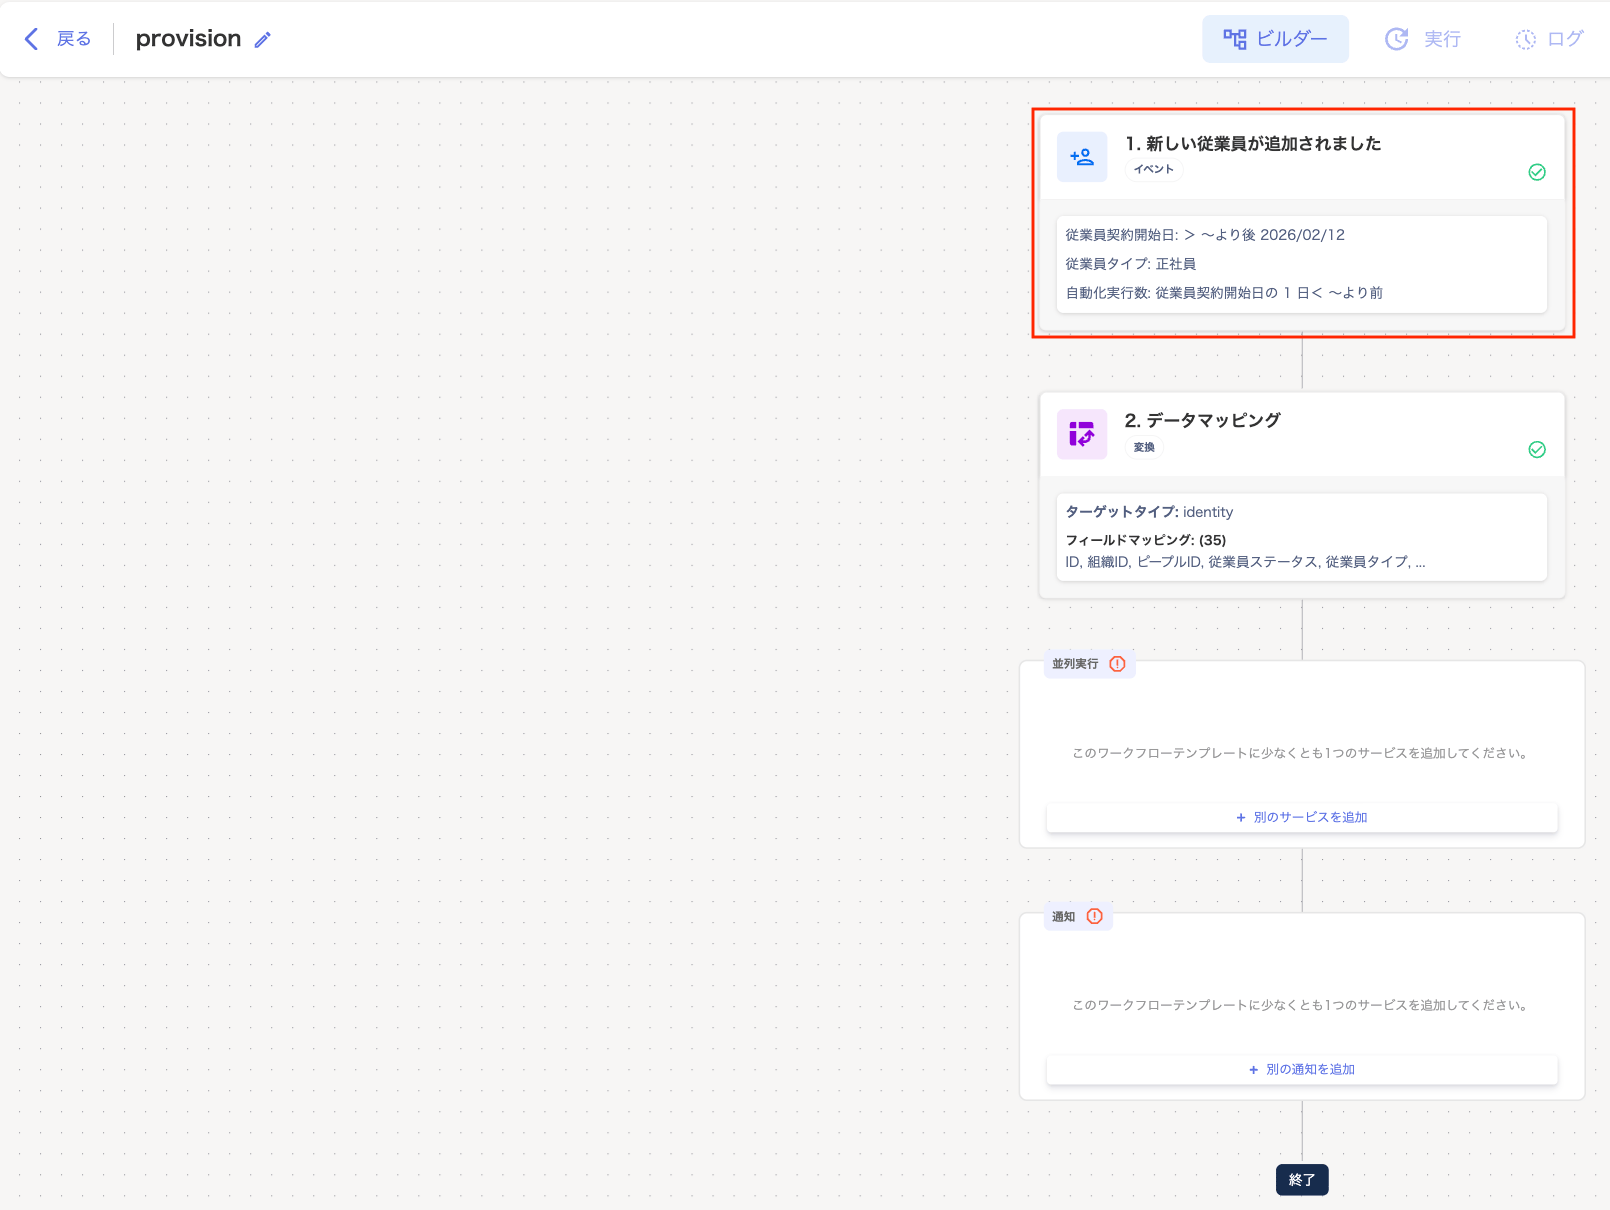
 2. On the **"provision"** builder screen, click **"1. A new employee was added"**.
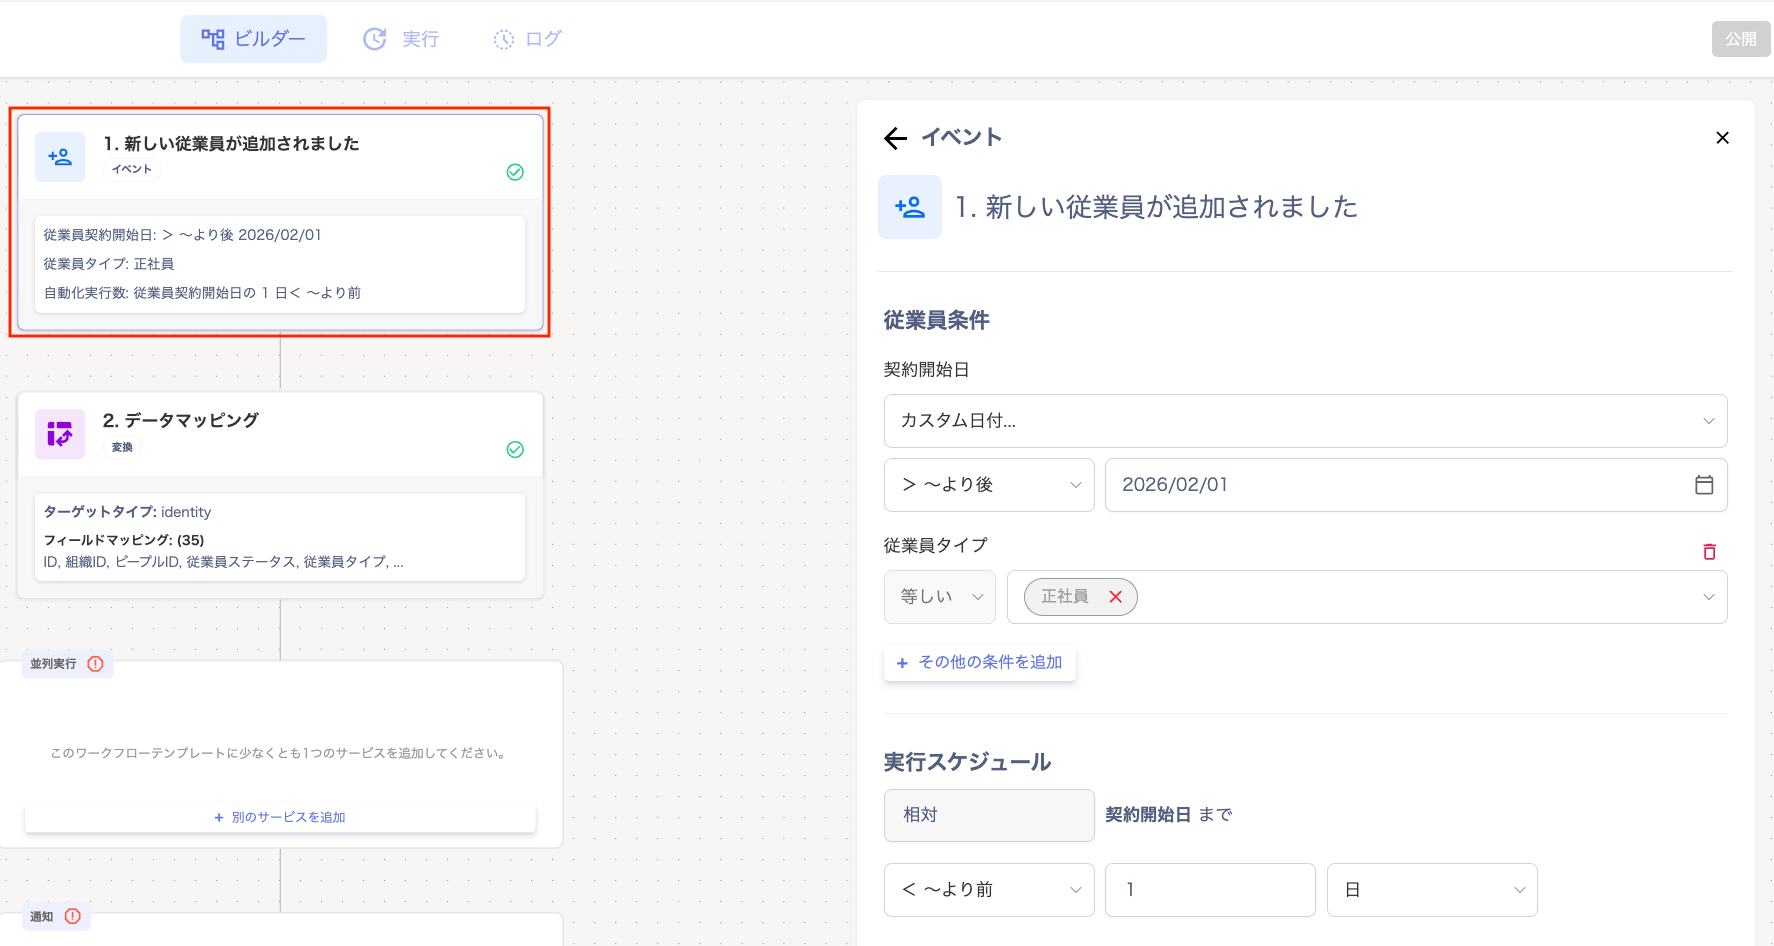
 3. Set the workflow trigger conditions (contract start date, employee type) and the execution schedule.
Example: Target employees with a start date of February 1, 2026, who run indefinitely (employment type: full-time). Provisioning is issued 1 day before the start date.
Values: `Contract start date: > After, 2026/02/01 | Employment type: Full-time | Execution schedule: < Before, 1, Day`
3. Set the workflow trigger conditions (contract start date, employee type) and the execution schedule.
Example: Target employees with a start date of February 1, 2026, who run indefinitely (employment type: full-time). Provisioning is issued 1 day before the start date.
Values: `Contract start date: > After, 2026/02/01 | Employment type: Full-time | Execution schedule: < Before, 1, Day`
 | Item | Description |
| ------------------------------ | --------------------------------------------------------------------------------------------------------------------------------------------------------------------------------------------------------------------------------------------------------------------------------------------------------------------------------------------------------------------------------------------------------------------------------------------------------------------------------------- |
| **Contract start date** | Select \[Any date / Custom date] and pick a date from the calendar. When you select a custom date, the specified date itself is excluded. Choose from the dropdown: `Within / Before / After`. "Within" specifies a date range. |
| **\[+ Add another condition]** | You can add conditions for employee type / employee status / department. You can also add conditions for job title / work location / manager ID. You can also add conditions for company name / alternate email / display name / first name / last name. You can also add conditions for email address / employee number / notes / number of services / number of devices. You can also add conditions for [`custom fields`](/en/it-management/workflows/rdeflerejh-automation-custom). |
| **Execution schedule** | Select `[number][day/week][After / Before / Date]` from the dropdown. This sets when the workflow runs relative to the contract start date. |
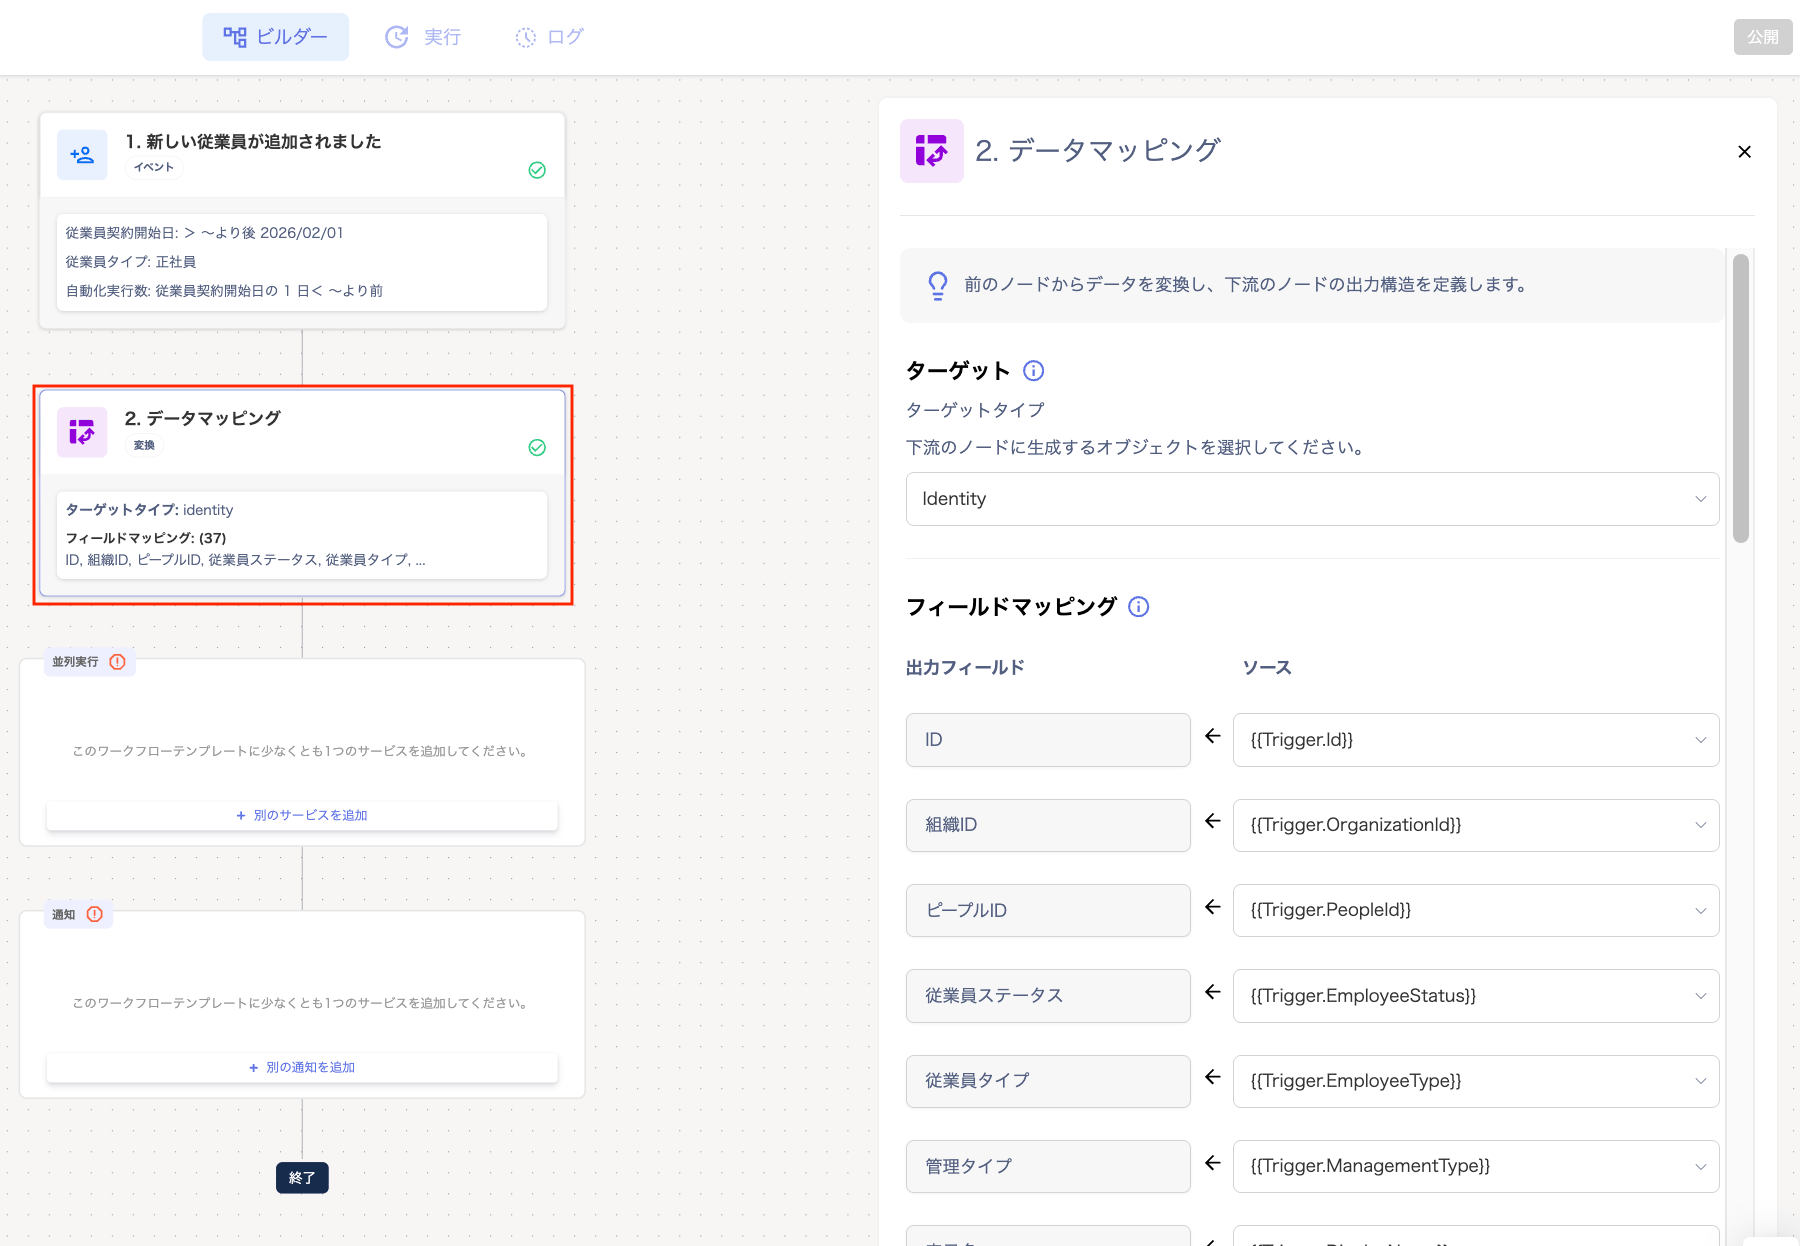
4. Click **"2. Data mapping"**.
Configure where to retrieve data from and how to transform it.
| Item | Description |
| ------------------------------ | --------------------------------------------------------------------------------------------------------------------------------------------------------------------------------------------------------------------------------------------------------------------------------------------------------------------------------------------------------------------------------------------------------------------------------------------------------------------------------------- |
| **Contract start date** | Select \[Any date / Custom date] and pick a date from the calendar. When you select a custom date, the specified date itself is excluded. Choose from the dropdown: `Within / Before / After`. "Within" specifies a date range. |
| **\[+ Add another condition]** | You can add conditions for employee type / employee status / department. You can also add conditions for job title / work location / manager ID. You can also add conditions for company name / alternate email / display name / first name / last name. You can also add conditions for email address / employee number / notes / number of services / number of devices. You can also add conditions for [`custom fields`](/en/it-management/workflows/rdeflerejh-automation-custom). |
| **Execution schedule** | Select `[number][day/week][After / Before / Date]` from the dropdown. This sets when the workflow runs relative to the contract start date. |
4. Click **"2. Data mapping"**.
Configure where to retrieve data from and how to transform it.
 | Item | Description |
| ----------------- | ------------------------------------------------------------------------------------------------------------------------------------------------------------------------ |
| **Target** | Currently, only "identity" is available. |
| **Field mapping** | Define transformation rules from the data source to the target fields. You can also configure [custom fields](/en/it-management/workflows/rdeflerejh-automation-custom). |
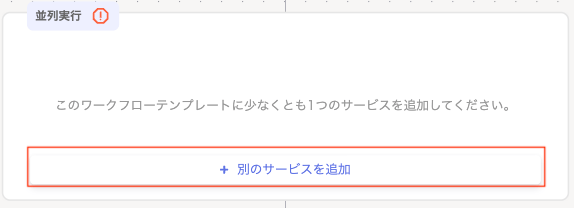
5. Click **"Parallel execution"** and add the services to include in the workflow.
1. Click **\[+ Add another service]**.
| Item | Description |
| ----------------- | ------------------------------------------------------------------------------------------------------------------------------------------------------------------------ |
| **Target** | Currently, only "identity" is available. |
| **Field mapping** | Define transformation rules from the data source to the target fields. You can also configure [custom fields](/en/it-management/workflows/rdeflerejh-automation-custom). |
5. Click **"Parallel execution"** and add the services to include in the workflow.
1. Click **\[+ Add another service]**.
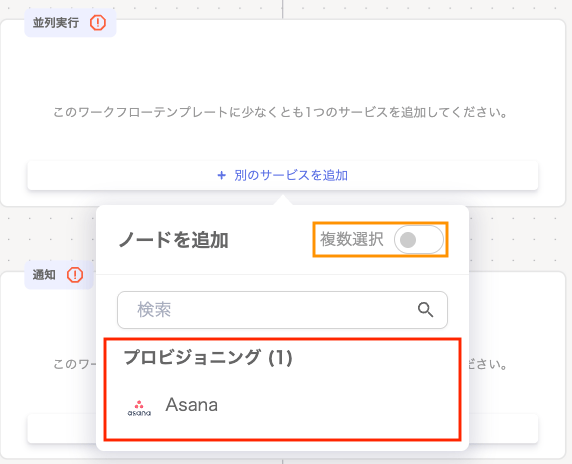
 2. Select a service displayed under **"Provisioning"**.
The services shown under "Provisioning" are those you [pre-configured (mapped)](/en/it-management/workflows/ms4wo45v27-admina-automation-wic).
To add multiple services to the workflow, turn on **"Multiple selection"**.
2. Select a service displayed under **"Provisioning"**.
The services shown under "Provisioning" are those you [pre-configured (mapped)](/en/it-management/workflows/ms4wo45v27-admina-automation-wic).
To add multiple services to the workflow, turn on **"Multiple selection"**.
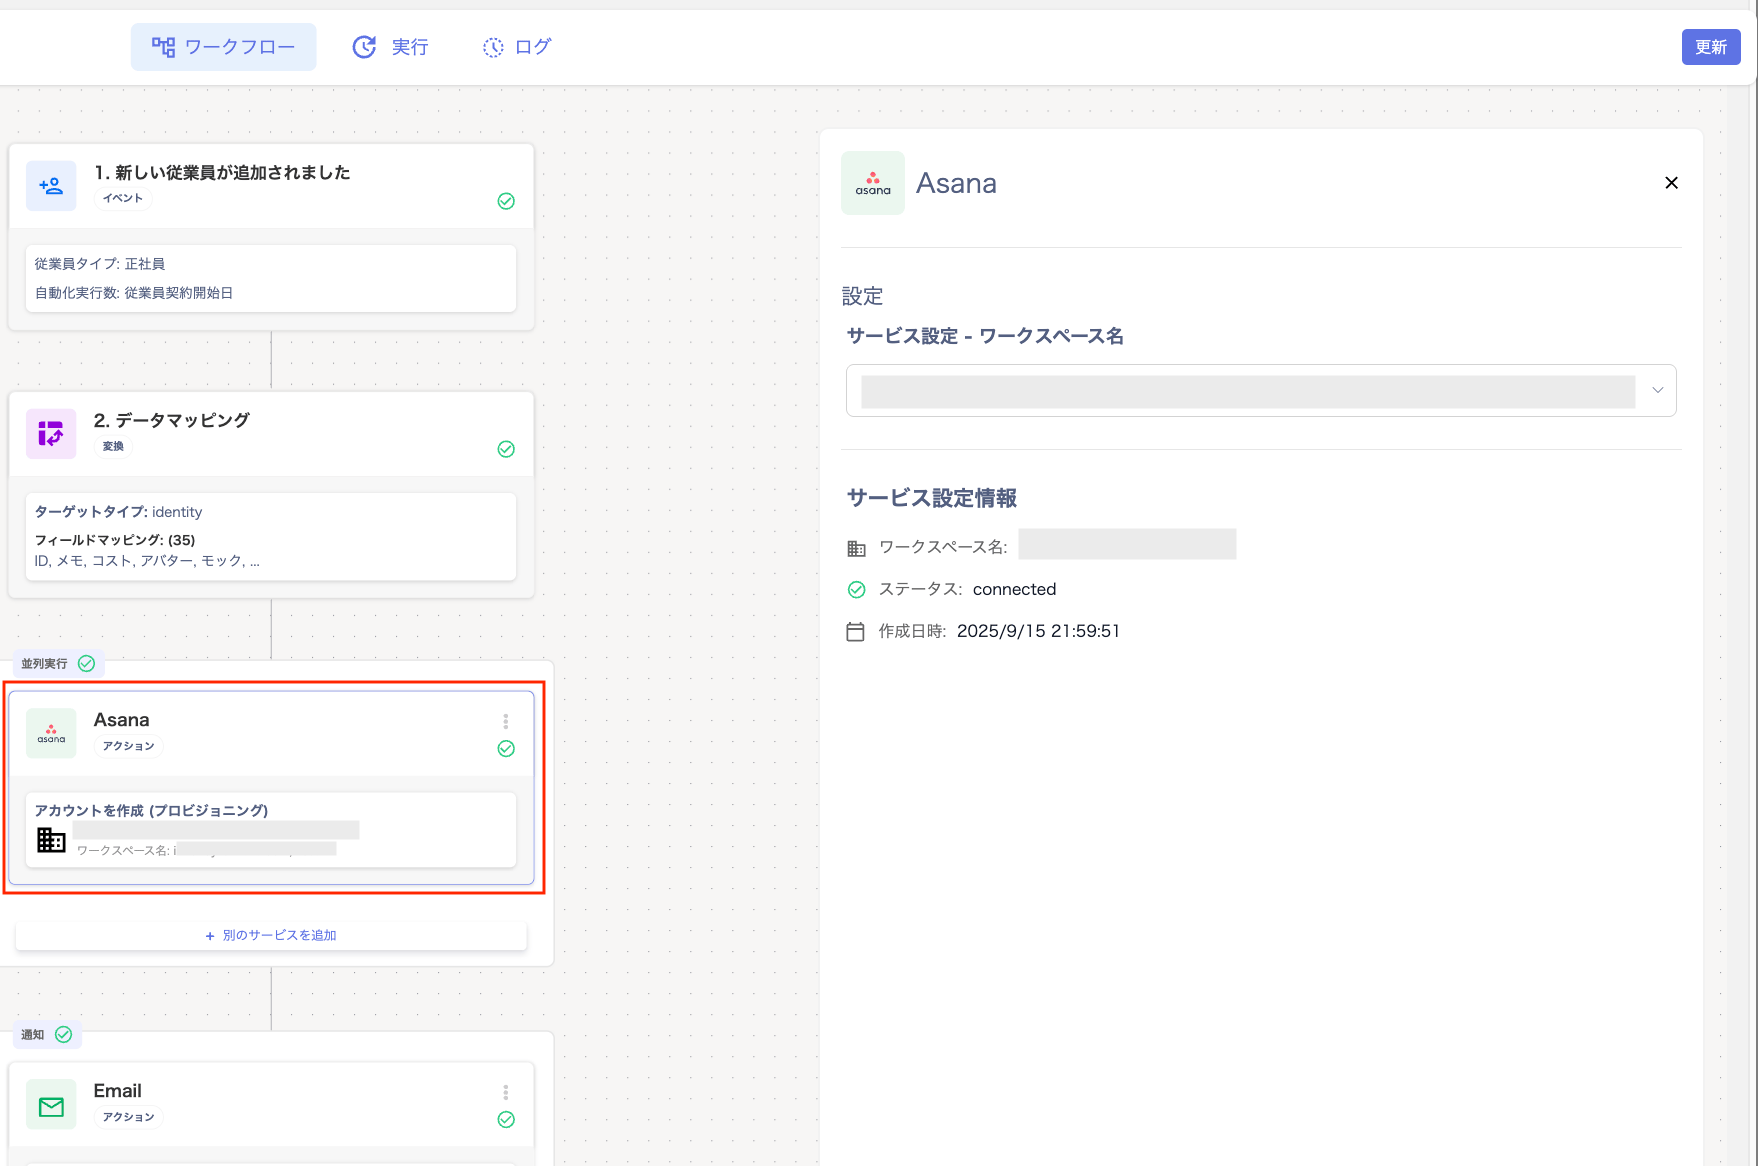
 3. On the **"Parallel execution"** screen, click a selected service to open its **"Settings"** panel on the right.
Select the workspace name from the **"Service settings - Workspace name"** dropdown.
To configure multiple services, use **\[+ Add another service]**.
3. On the **"Parallel execution"** screen, click a selected service to open its **"Settings"** panel on the right.
Select the workspace name from the **"Service settings - Workspace name"** dropdown.
To configure multiple services, use **\[+ Add another service]**.
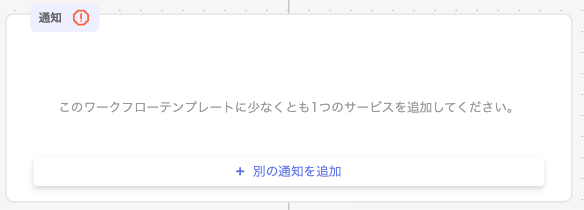
 6. Click **"Notification"**.
1. Click **\[+ Add another notification]**.
6. Click **"Notification"**.
1. Click **\[+ Add another notification]**.
 2. On the **"Message"** screen, select the notification method: **Slack** or **Email**.
To configure multiple notifications, turn on **"Multiple selection"**.
For Slack setup steps, see [Steps to configure Slack notifications](#slack).
2. On the **"Message"** screen, select the notification method: **Slack** or **Email**.
To configure multiple notifications, turn on **"Multiple selection"**.
For Slack setup steps, see [Steps to configure Slack notifications](#slack).
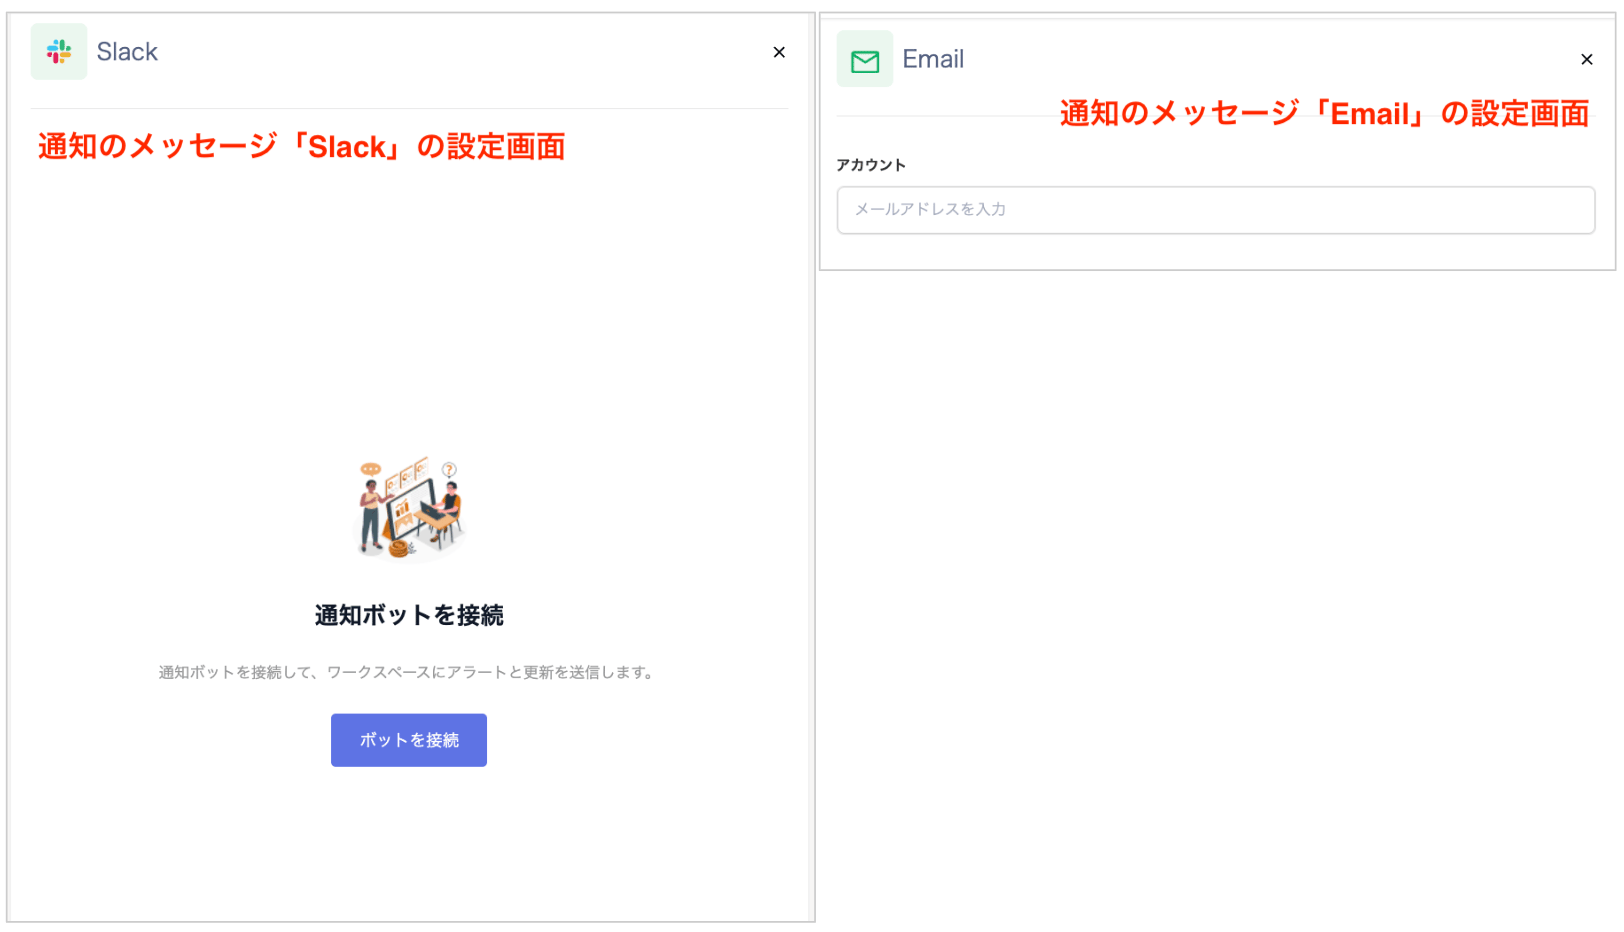
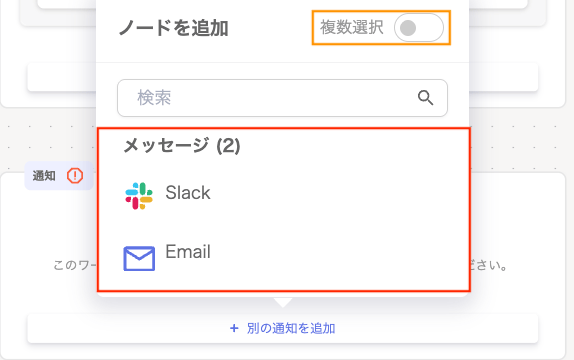 3. On the **"Notification"** screen, click a selected message to open its **"Settings"** panel on the right.
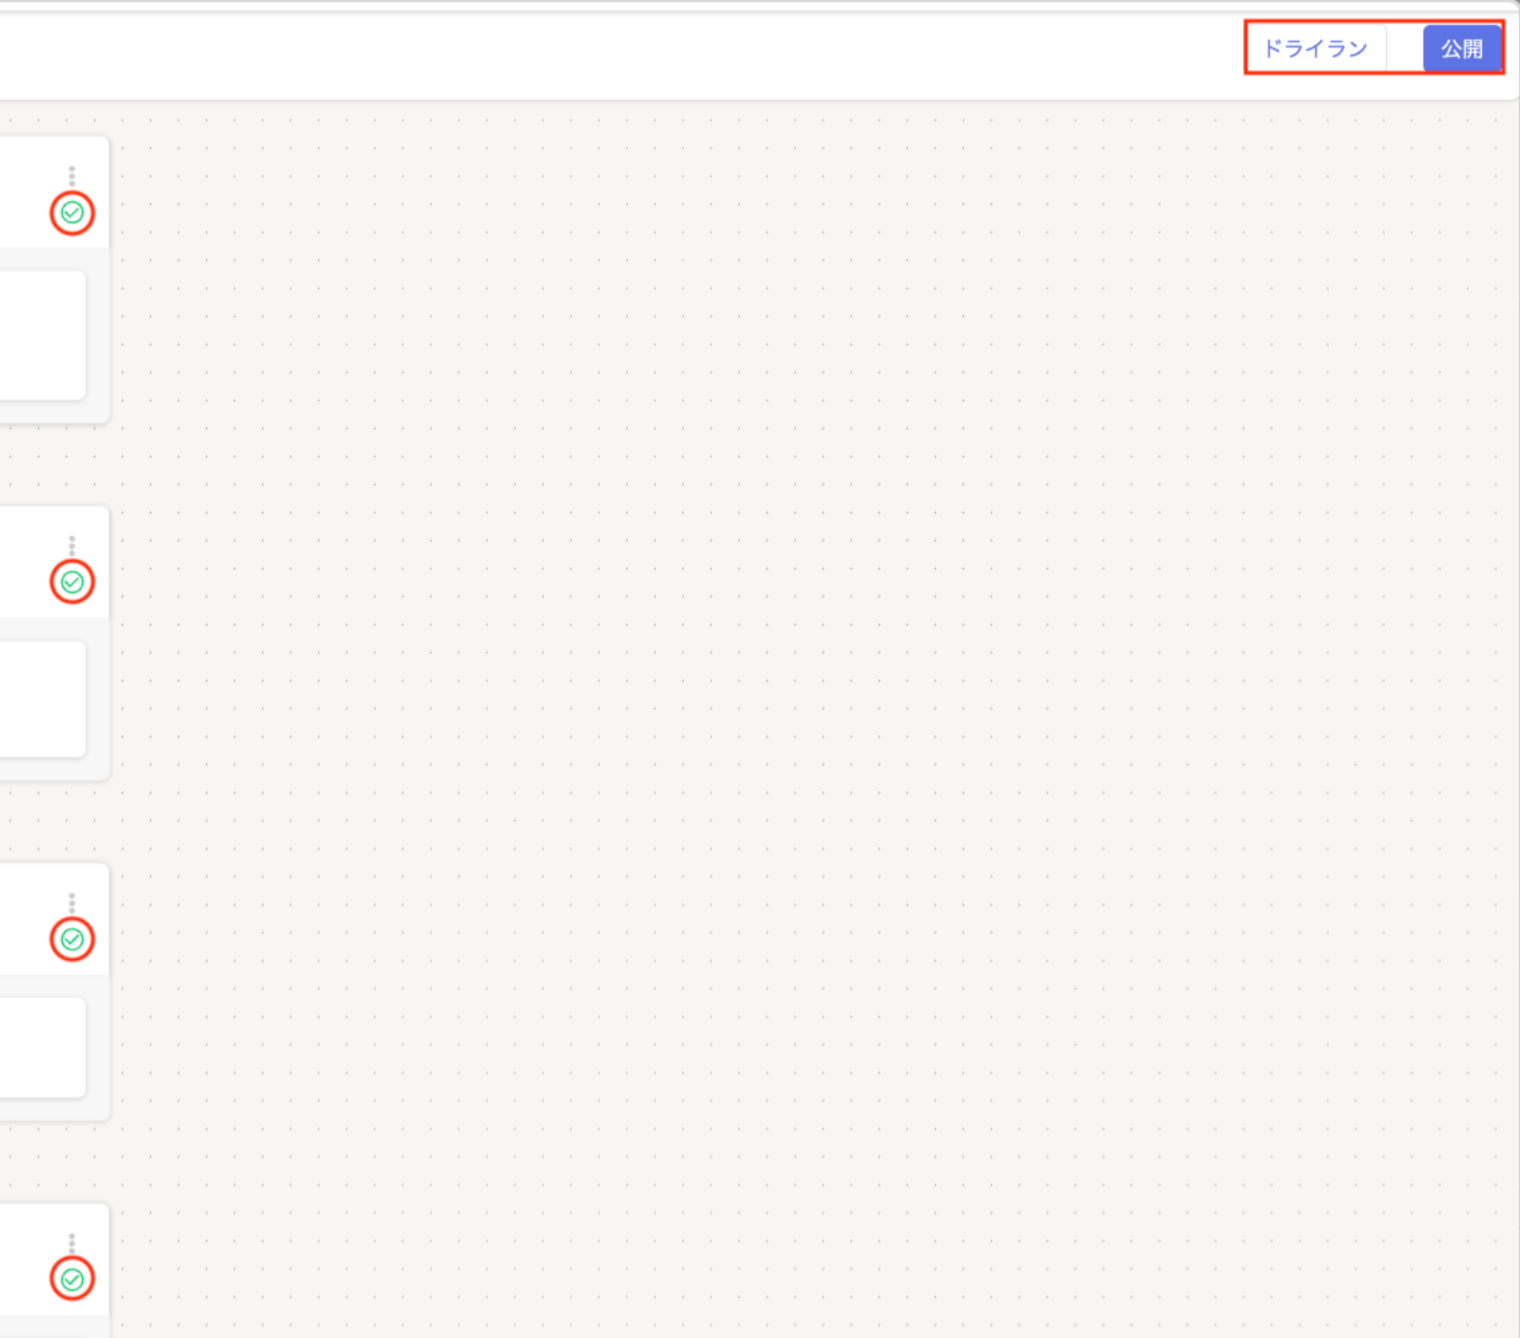
 7. After all settings are complete, all checks in the builder turn green. Click **\[Publish]** or **\[Dry Run]**.
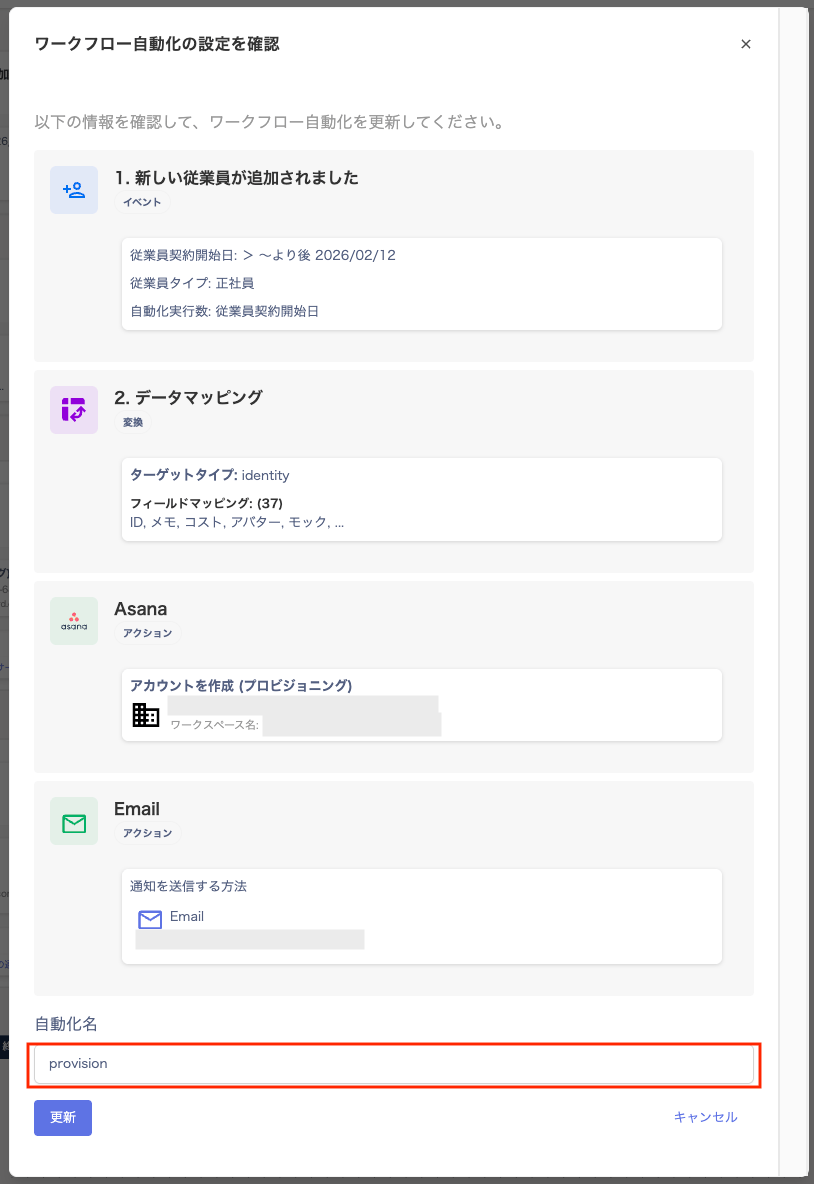
 8. The **"Confirm workflow automation settings"** screen appears. Enter the automation name and click **\[Publish]**.
Note: You cannot use a name that is already registered.
8. The **"Confirm workflow automation settings"** screen appears. Enter the automation name and click **\[Publish]**.
Note: You cannot use a name that is already registered.
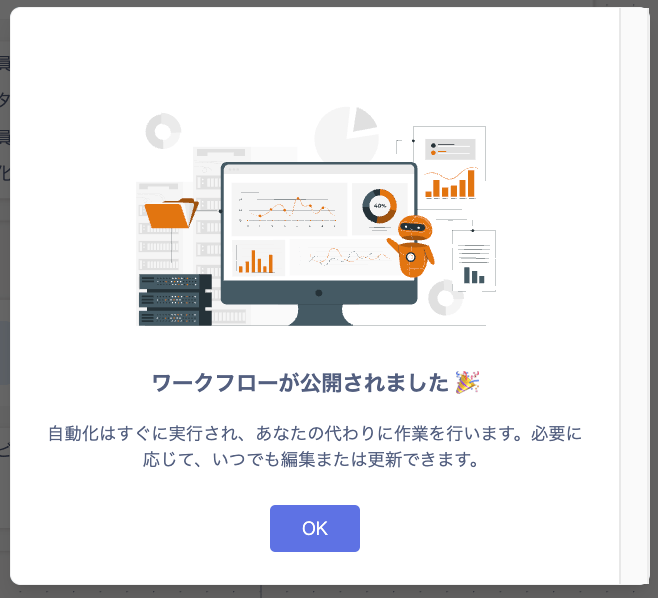
 9. When **"Workflow has been published"** appears, click **\[OK]**.
Steps to configure Slack notifications
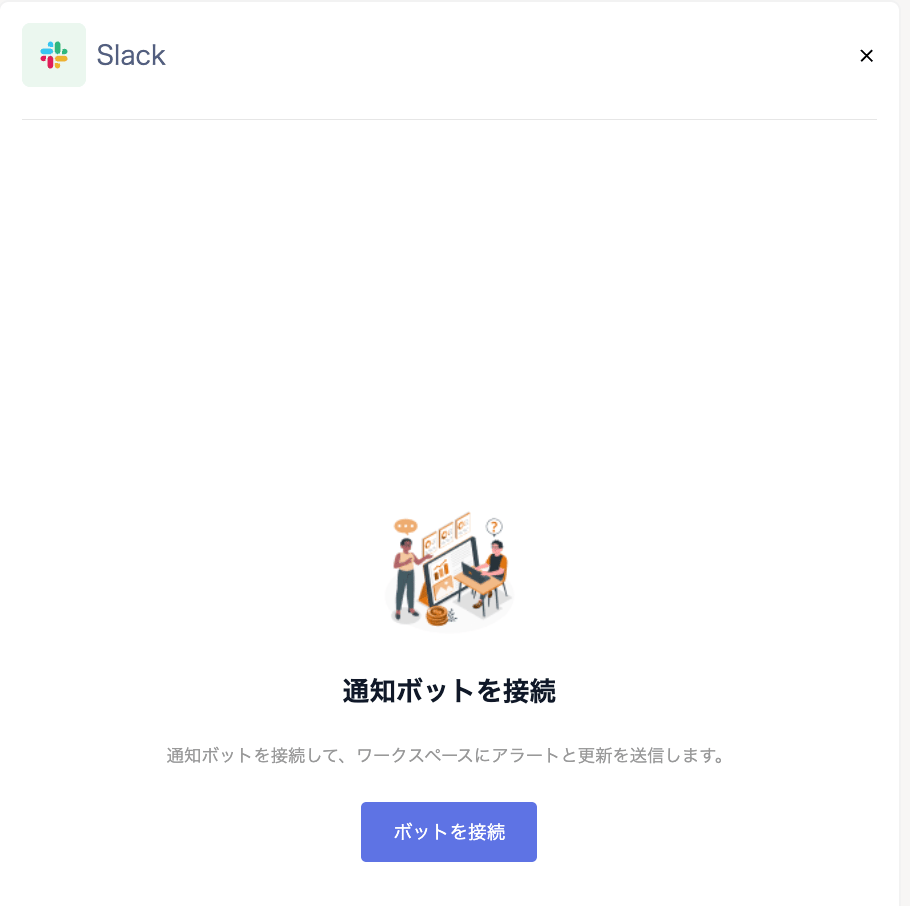
1. From screen ⑤-(C) in the [new employee onboarding steps](#new-employee-onboarding-steps), the **"Connect notification bot"** screen appears. Click **\[Connect bot]**.
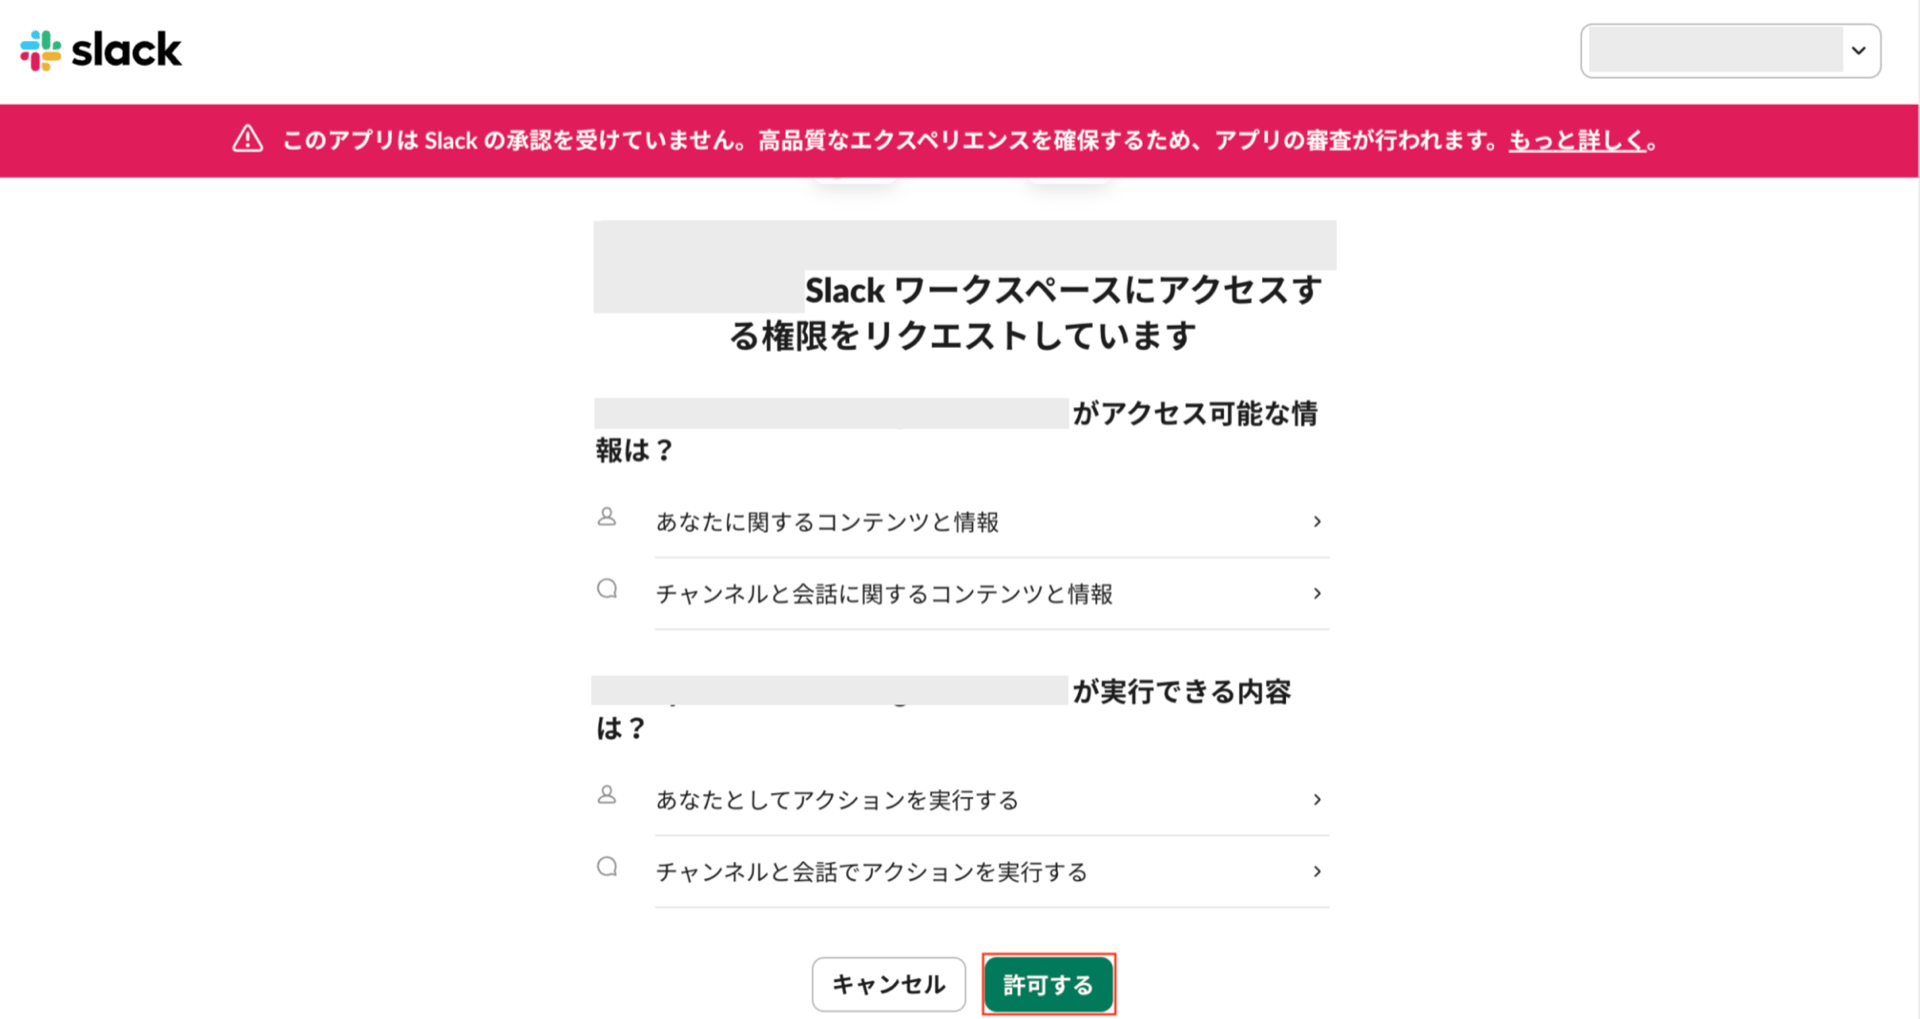
 2. The **"Requesting permission to access the Slack workspace"** screen appears. Review the details and click **\[Allow]**.
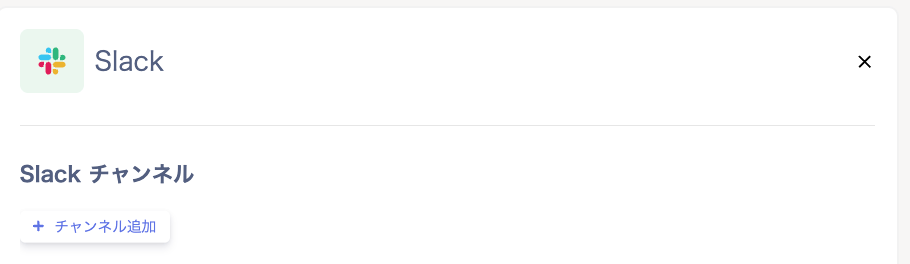
 3. The **"Notification channels"** screen appears. Click **\[+ Add channel]**.
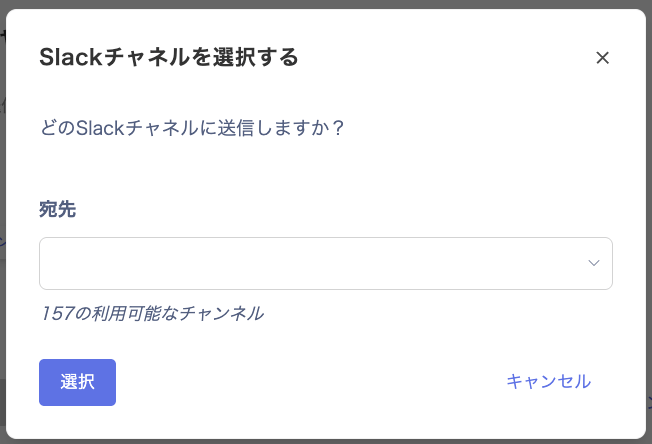
 4. On the **"Select a Slack channel"** screen, specify the destination and click **\[Select]**.
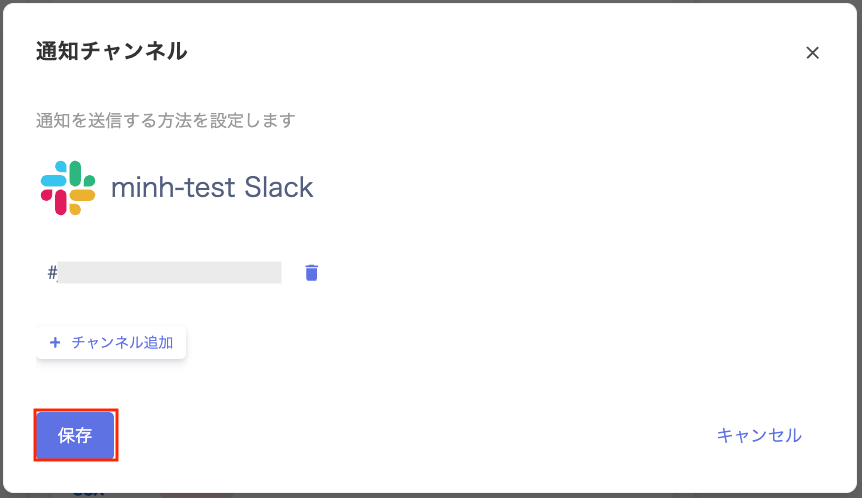
 5. Review the **"Notification channels"** screen and click **\[Save]**.
 #### Notification content
After configuration, the workflow runs on the scheduled date and sends a notification. For details on when workflows execute, see [**Workflow execution timing**](/en/it-management/workflows/n2msl3q9um-admina-automation).
#### Slack notifications
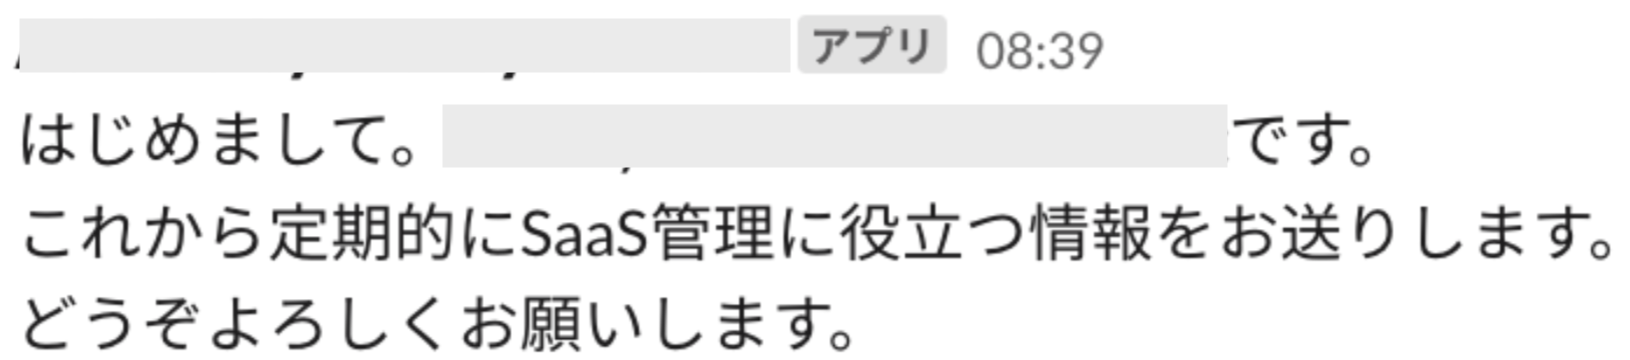
* **First-time connection notification:** A channel-added notification is sent to the specified Slack channel.
#### Notification content
After configuration, the workflow runs on the scheduled date and sends a notification. For details on when workflows execute, see [**Workflow execution timing**](/en/it-management/workflows/n2msl3q9um-admina-automation).
#### Slack notifications
* **First-time connection notification:** A channel-added notification is sent to the specified Slack channel.
 * **Execution result notification:** On the configured execution schedule date, a notification is sent. The notification goes to the specified Slack channel.
 For setup steps, see [Getting started with Automations](/en/it-management/workflows/90k8f1lee0-workflows).