> ## Documentation Index
> Fetch the complete documentation index at: https://hc.saas-manager.biz.nuro.jp/llms.txt
> Use this file to discover all available pages before exploring further.

# Zoho Desk

> 管理者権限で組織IDを確認、OAuthアプリ登録後、Zoho Deskをインテグレーション

## サポートする機能

<Badge color="blue">アカウント削除</Badge> <Badge color="blue">アカウント無効化</Badge> <Badge color="blue">アカウント作成</Badge>

## 事前準備

<Info>
  連携には管理者権限のアカウントが必要です。
</Info>

### ログイン方法

[Zoho Deskログインページ](https://accounts.zoho.jp/signin?servicename=ZohoSupport\&signupurl=https://www.zoho.com/desk/signup.html\&serviceurl=https%3A%2F%2Fdesk.zoho.jp%3Fref_value%3Dgoogle%253Adeveloper%257Cdirect%253Adesk%257Ckagi.com%253Adesk%252Chttps%253A%252F%252Fwww.zoho.com%252Fdesk%252F%252C%252CDesktop%252Chttps%253A%252F%252Fwww.zoho.com%252Fdesk%252F)にて、メールアドレス・パスワードを入力し、ログインします。
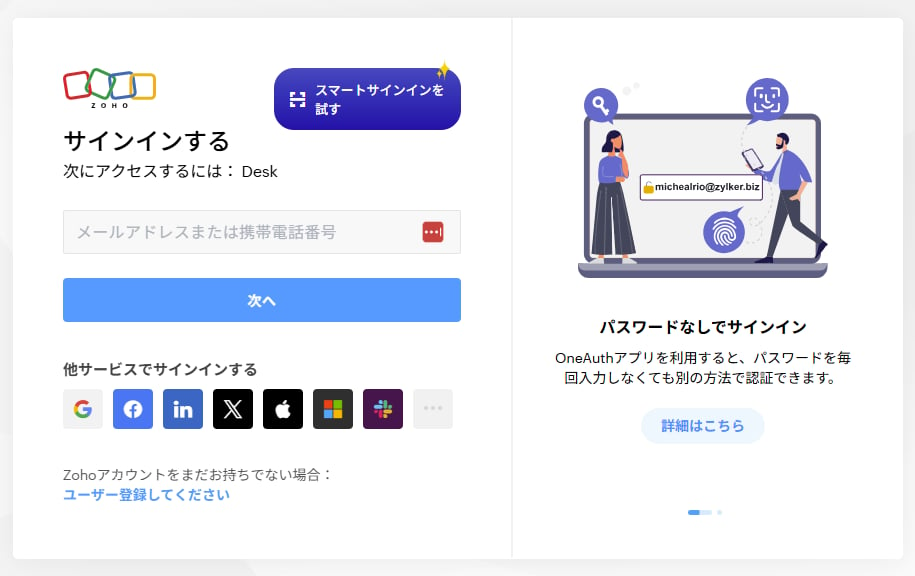
<img src="https://mintcdn.com/admina-sbn/rieddIsrTkQrdBA8/images/integrations/bg6ovvnk3l/2025-12-17-143402.png?fit=max&auto=format&n=rieddIsrTkQrdBA8&q=85&s=1dd77e8a2264fcbcc87bf21a37e74115" alt="Zoho Deskログイン画面" width="915" height="576" data-path="images/integrations/bg6ovvnk3l/2025-12-17-143402.png" />

### 組織IDの確認方法

Zoho Expenseログイン後、右上の **Setup** をクリックします。
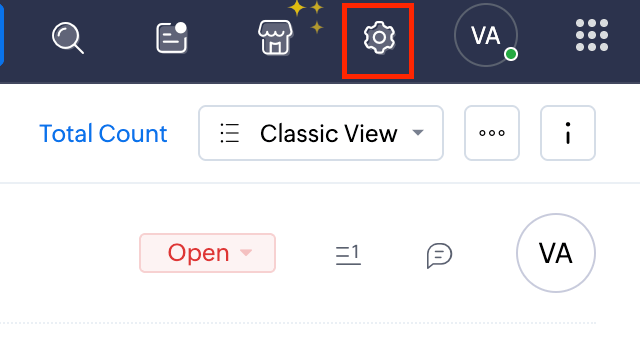
<img src="https://mintcdn.com/admina-sbn/rieddIsrTkQrdBA8/images/integrations/bg6ovvnk3l/screenshot-2025-12-04-at-18-39-28.png?fit=max&auto=format&n=rieddIsrTkQrdBA8&q=85&s=c97d34b29e1673e17cfdba7dddf947d4" alt="Setup画面" width="640" height="358" data-path="images/integrations/bg6ovvnk3l/screenshot-2025-12-04-at-18-39-28.png" />

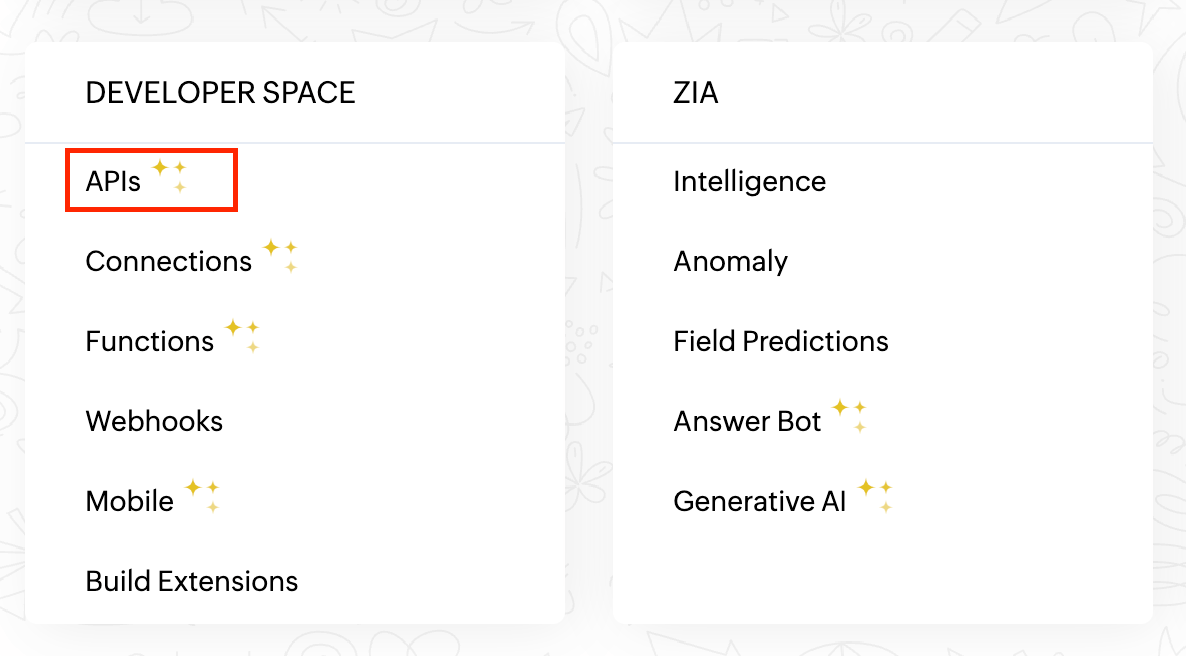
**APIs** をクリックします。

<img src="https://mintcdn.com/admina-sbn/rieddIsrTkQrdBA8/images/integrations/bg6ovvnk3l/screenshot-2025-12-04-at-18-40-11.png?fit=max&auto=format&n=rieddIsrTkQrdBA8&q=85&s=a87bcd42053706ff4889dea4aec9561f" alt="APIs画面" width="1186" height="656" data-path="images/integrations/bg6ovvnk3l/screenshot-2025-12-04-at-18-40-11.png" />

**Org ID** が **組織ID** です。

<img src="https://mintcdn.com/admina-sbn/rieddIsrTkQrdBA8/images/integrations/bg6ovvnk3l/screenshot-2025-12-04-at-18-40-29.png?fit=max&auto=format&n=rieddIsrTkQrdBA8&q=85&s=b842312d0ac00522cadc068fadd4d230" alt="Org ID確認画面" width="2096" height="362" data-path="images/integrations/bg6ovvnk3l/screenshot-2025-12-04-at-18-40-29.png" />

### OAuthアプリを登録する

[`https://api-console.zoho.com/`](https://api-console.zoho.com/) にサインインします。

<img src="https://mintcdn.com/admina-sbn/qJjJh1wxF6j7EyS6/images/integrations/7voeaxzynv/2025-12-15-190445.png?fit=max&auto=format&n=qJjJh1wxF6j7EyS6&q=85&s=3125fc87bd19447c929e8305136ed8dc" alt="Zoho API Console" width="526" height="555" data-path="images/integrations/7voeaxzynv/2025-12-15-190445.png" />

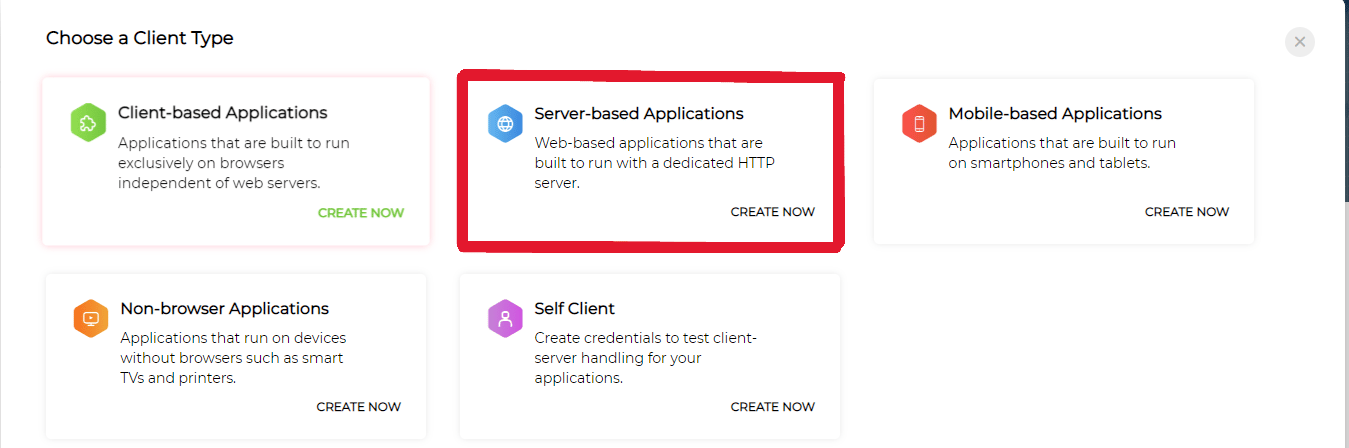
**ADD CLIENT** > **Server-Based Applications** をクリックします。
<img src="https://mintcdn.com/admina-sbn/qJjJh1wxF6j7EyS6/images/integrations/7voeaxzynv/untitled.png?fit=max&auto=format&n=qJjJh1wxF6j7EyS6&q=85&s=37f7f0968d95c2725fa71a82748dbb96" alt="ADD CLIENT画面" width="1349" height="448" data-path="images/integrations/7voeaxzynv/untitled.png" />

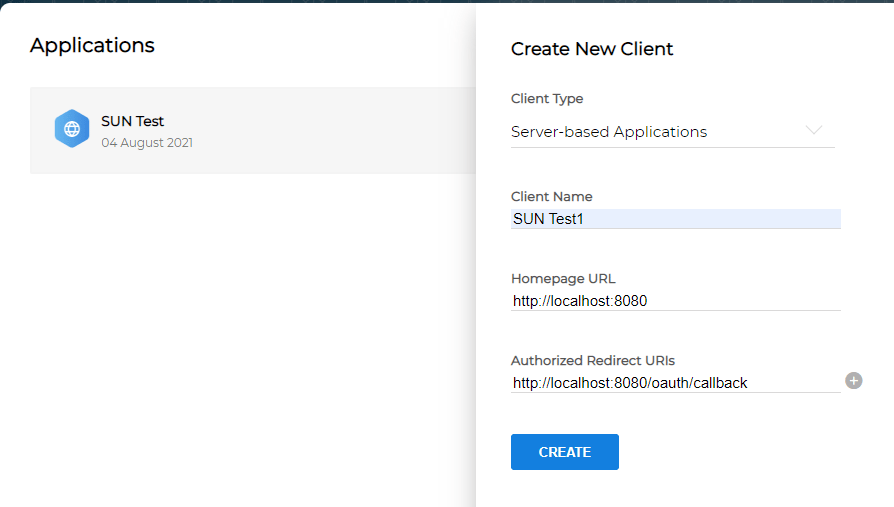
必要な情報を入力し、**CREATE** をクリックします。

<img src="https://mintcdn.com/admina-sbn/qJjJh1wxF6j7EyS6/images/integrations/7voeaxzynv/untitled-1.png?fit=max&auto=format&n=qJjJh1wxF6j7EyS6&q=85&s=094aed8bc555f82d909d16c9c6aaaa37" alt="クライアント作成画面" width="894" height="507" data-path="images/integrations/7voeaxzynv/untitled-1.png" />

**Settings** > **Use the same Oauth credentials for all data centers** にチェックを入れます。

<img src="https://mintcdn.com/admina-sbn/qJjJh1wxF6j7EyS6/images/integrations/7voeaxzynv/untitled-2.png?fit=max&auto=format&n=qJjJh1wxF6j7EyS6&q=85&s=47f0f686b5c151dff2a0261a4b5553e8" alt="Settings画面" width="945" height="593" data-path="images/integrations/7voeaxzynv/untitled-2.png" />

## インテグレーションのセットアップ

インテグレーション画面にて、**Zoho Desk** で検索します。

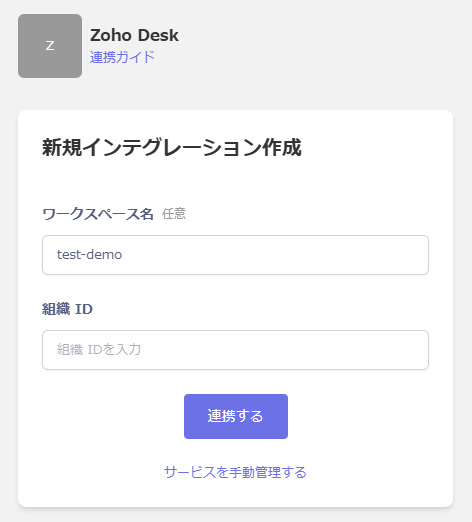
任意の**ワークスペース名**、前の手順で確認した**組織ID**を入力し、**連携する**をクリックします。
<img src="https://mintcdn.com/admina-sbn/rieddIsrTkQrdBA8/images/integrations/bg6ovvnk3l/2025-12-17-144957.png?fit=max&auto=format&n=rieddIsrTkQrdBA8&q=85&s=0d04c7b9d9a48e0afa6ed6aa527b4440" alt="Zoho Deskインテグレーション設定画面" width="472" height="522" data-path="images/integrations/bg6ovvnk3l/2025-12-17-144957.png" />

連携に成功すると、アカウント一覧に登録済みのユーザー情報が表示されます。

正常に完了しない場合は、インテグレーション画面のステータスタブから**編集**し、再度連携をお試しください。

解決しない場合はチャットにてお問い合わせください。