> ## Documentation Index
> Fetch the complete documentation index at: https://hc.saas-manager.biz.nuro.jp/llms.txt
> Use this file to discover all available pages before exploring further.

# Cisco Umbrella

> Cisco Umbrella連携手順：管理者ログイン、APIキー取得、Admina設定で簡単インテグレーション

## サポートする機能

<Badge color="blue">アカウント削除</Badge> <Badge color="blue">アカウント作成</Badge>

## 事前準備

### ログイン方法

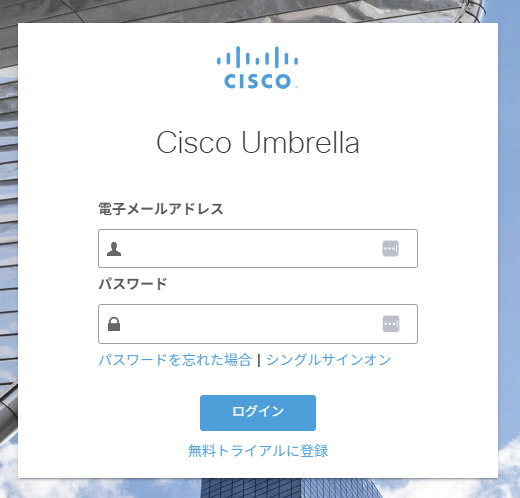
[Cisco Umbrellaログインページ](https://dashboard.umbrella.com)にて、**メールアドレス**・**パスワード**を入力し、**ログイン**します。
<img src="https://mintcdn.com/admina-sbn/ibHAD7VhlI5mZAsA/images/integrations/yyed0q40i0/2025-05-30-152400.png?fit=max&auto=format&n=ibHAD7VhlI5mZAsA&q=85&s=774b547d9c685599018b955ab247b5ba" alt="Cisco Umbrellaログイン画面" width="520" height="498" data-path="images/integrations/yyed0q40i0/2025-05-30-152400.png" />

### クライアントID・クライアントシークレットの確認方法

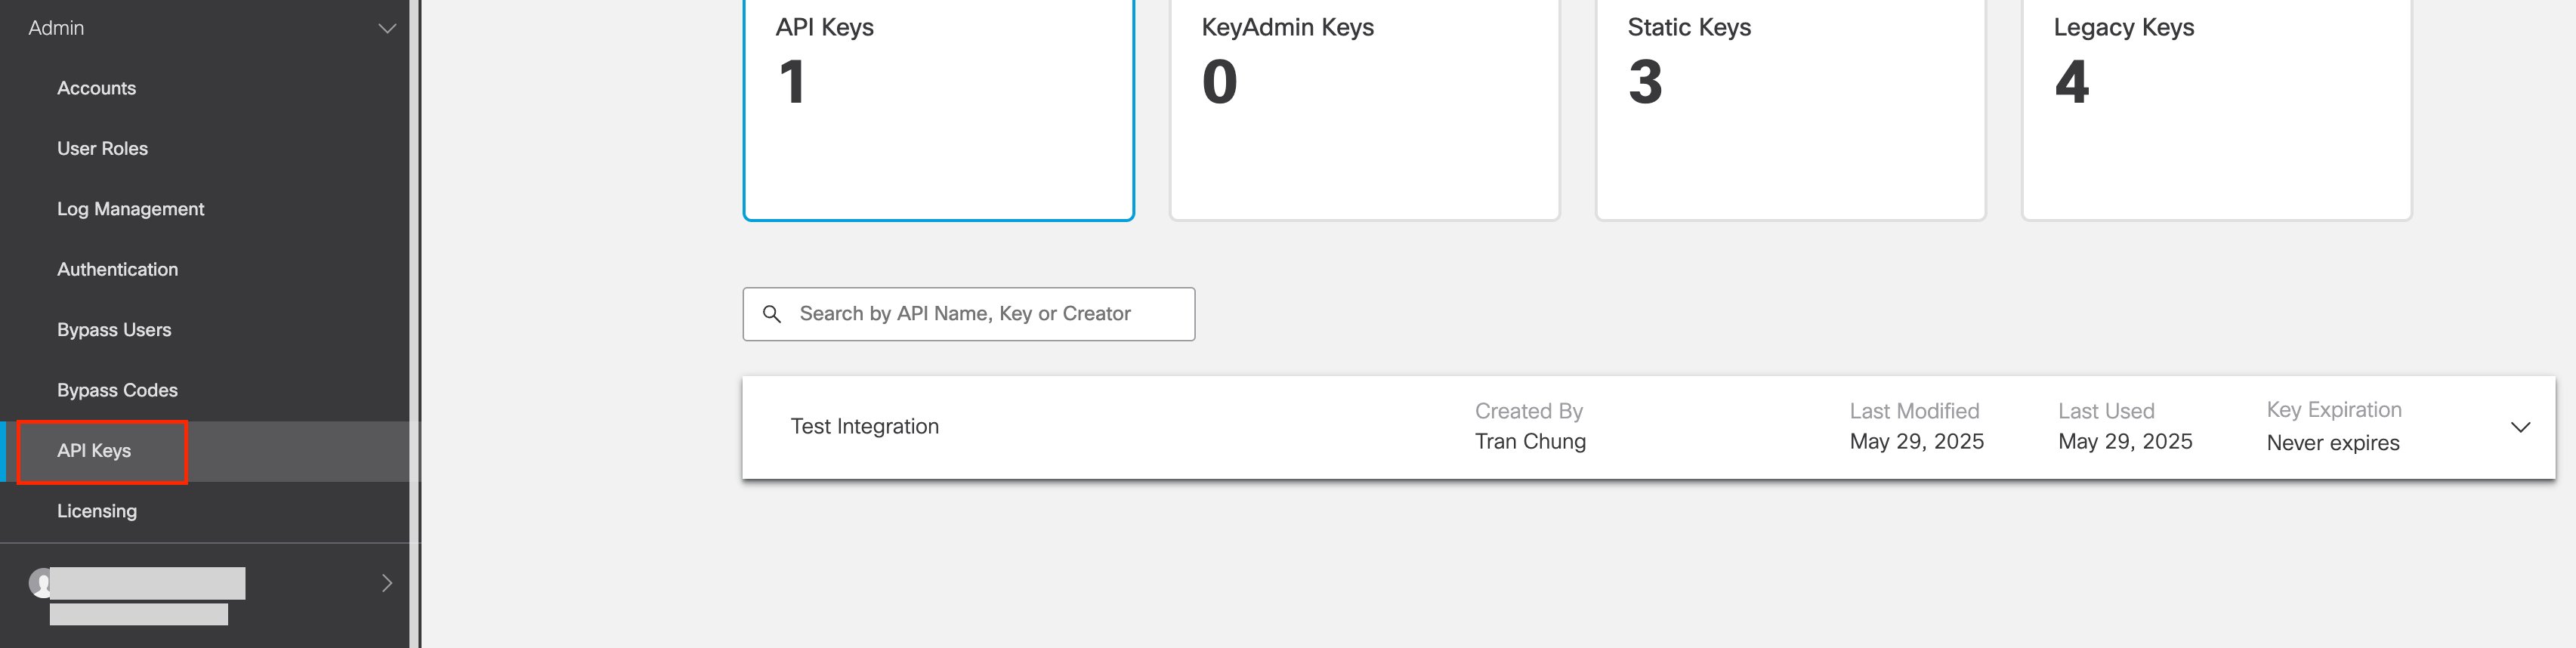
**Cisco Umbrella**にログイン後、左側メニューの **Admin** > **API Keys** をクリックします。
<img src="https://mintcdn.com/admina-sbn/ibHAD7VhlI5mZAsA/images/integrations/yyed0q40i0/screenshot-2025-05-29-at-11-40-21.png?fit=max&auto=format&n=ibHAD7VhlI5mZAsA&q=85&s=06d0f3c9eae2d5ca8630eee690c2cc66" alt="Admin > API Keysメニュー" data-og-width="3410" width="3410" data-og-height="858" height="858" data-path="images/integrations/yyed0q40i0/screenshot-2025-05-29-at-11-40-21.png" data-optimize="true" data-opv="3" srcset="https://mintcdn.com/admina-sbn/ibHAD7VhlI5mZAsA/images/integrations/yyed0q40i0/screenshot-2025-05-29-at-11-40-21.png?w=280&fit=max&auto=format&n=ibHAD7VhlI5mZAsA&q=85&s=571b80528ad87eec3f17f6f02f213096 280w, https://mintcdn.com/admina-sbn/ibHAD7VhlI5mZAsA/images/integrations/yyed0q40i0/screenshot-2025-05-29-at-11-40-21.png?w=560&fit=max&auto=format&n=ibHAD7VhlI5mZAsA&q=85&s=56630e3ed0d2d8d028ba581956ada97a 560w, https://mintcdn.com/admina-sbn/ibHAD7VhlI5mZAsA/images/integrations/yyed0q40i0/screenshot-2025-05-29-at-11-40-21.png?w=840&fit=max&auto=format&n=ibHAD7VhlI5mZAsA&q=85&s=fe10fe68831e80a1a230377fbaf1d645 840w, https://mintcdn.com/admina-sbn/ibHAD7VhlI5mZAsA/images/integrations/yyed0q40i0/screenshot-2025-05-29-at-11-40-21.png?w=1100&fit=max&auto=format&n=ibHAD7VhlI5mZAsA&q=85&s=64780fee033196e1725896466cbc4df3 1100w, https://mintcdn.com/admina-sbn/ibHAD7VhlI5mZAsA/images/integrations/yyed0q40i0/screenshot-2025-05-29-at-11-40-21.png?w=1650&fit=max&auto=format&n=ibHAD7VhlI5mZAsA&q=85&s=f165d7c145ad52a3c4d4fc5a67590bb0 1650w, https://mintcdn.com/admina-sbn/ibHAD7VhlI5mZAsA/images/integrations/yyed0q40i0/screenshot-2025-05-29-at-11-40-21.png?w=2500&fit=max&auto=format&n=ibHAD7VhlI5mZAsA&q=85&s=c812f3eabb69455839a91133d7f85d7f 2500w" />

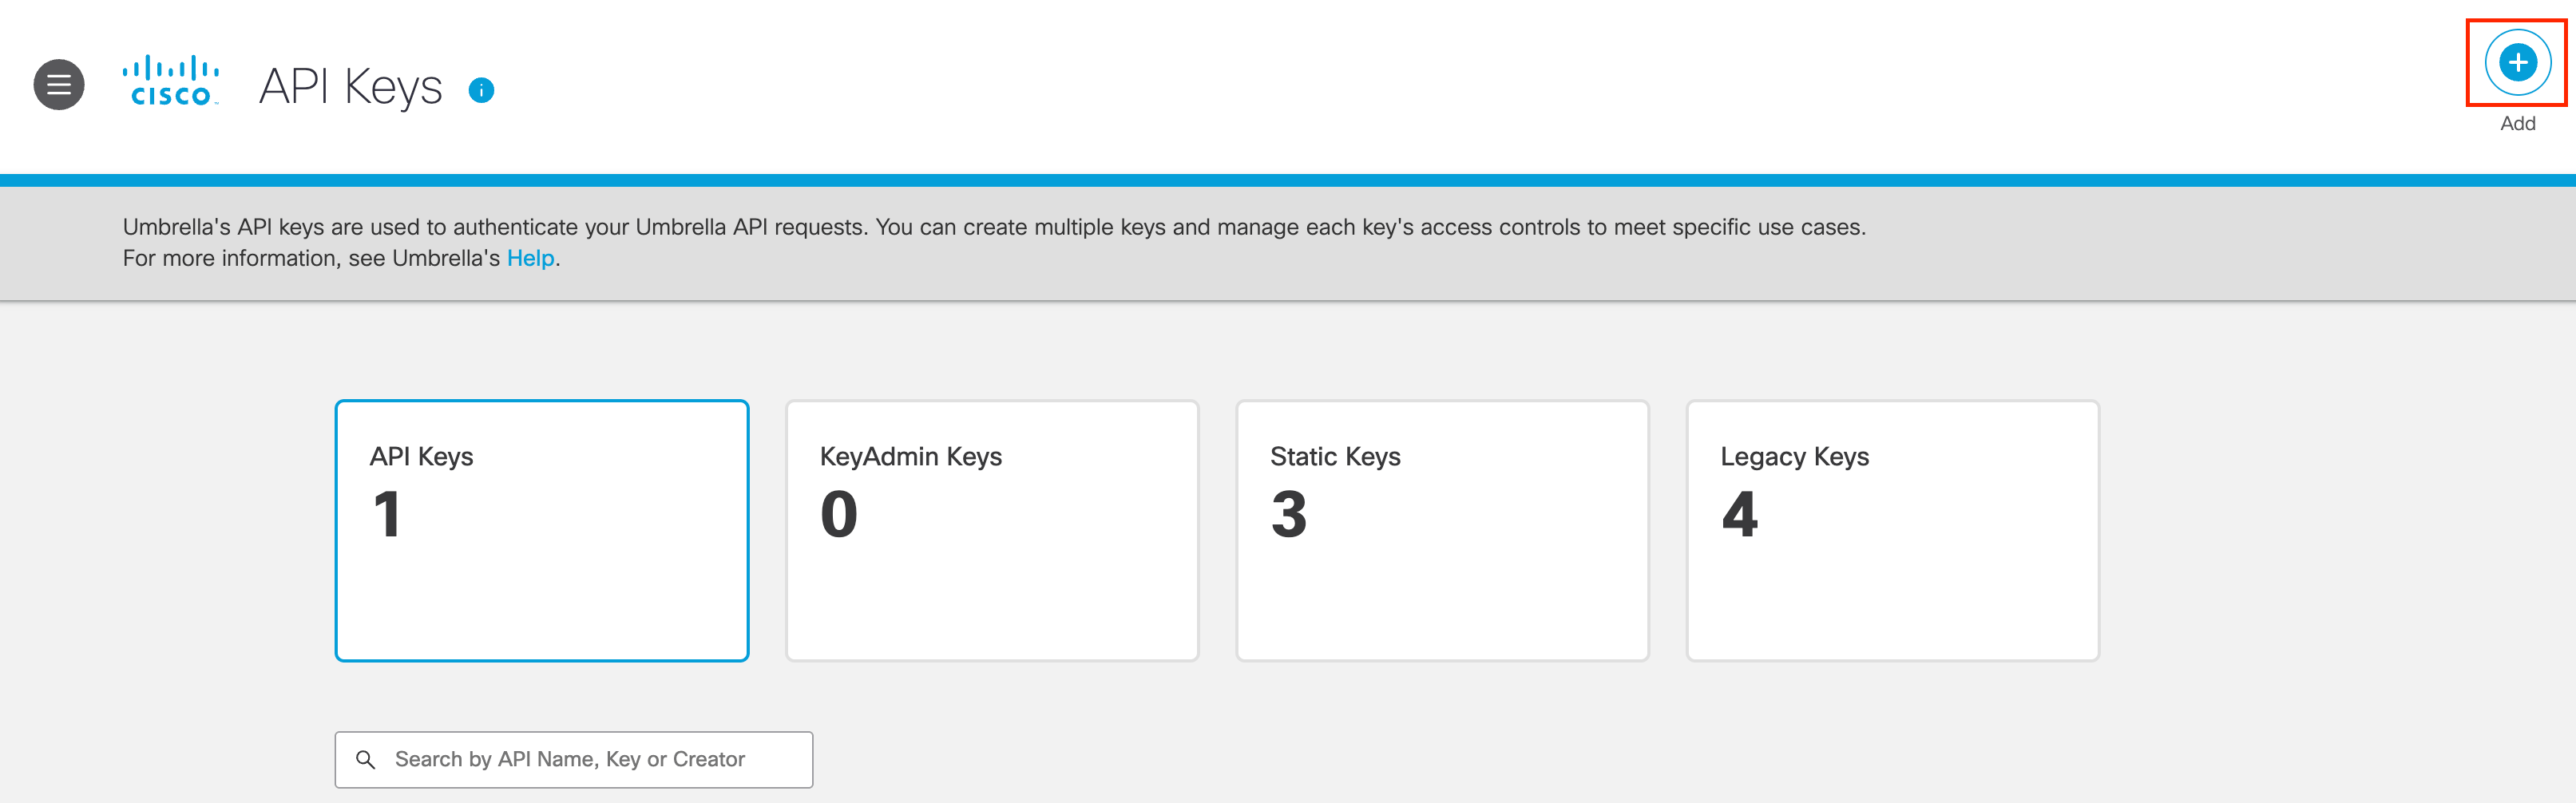
右上の\*\*プラス（＋）\*\*をクリックし、新しいAPIキーを追加します。

<img src="https://mintcdn.com/admina-sbn/ibHAD7VhlI5mZAsA/images/integrations/yyed0q40i0/screenshot-2025-05-29-at-11-41-13.png?fit=max&auto=format&n=ibHAD7VhlI5mZAsA&q=85&s=012fe069a9d0cb867601d96ed8c202ec" alt="API Key追加ボタン" width="3226" height="1006" data-path="images/integrations/yyed0q40i0/screenshot-2025-05-29-at-11-41-13.png" />

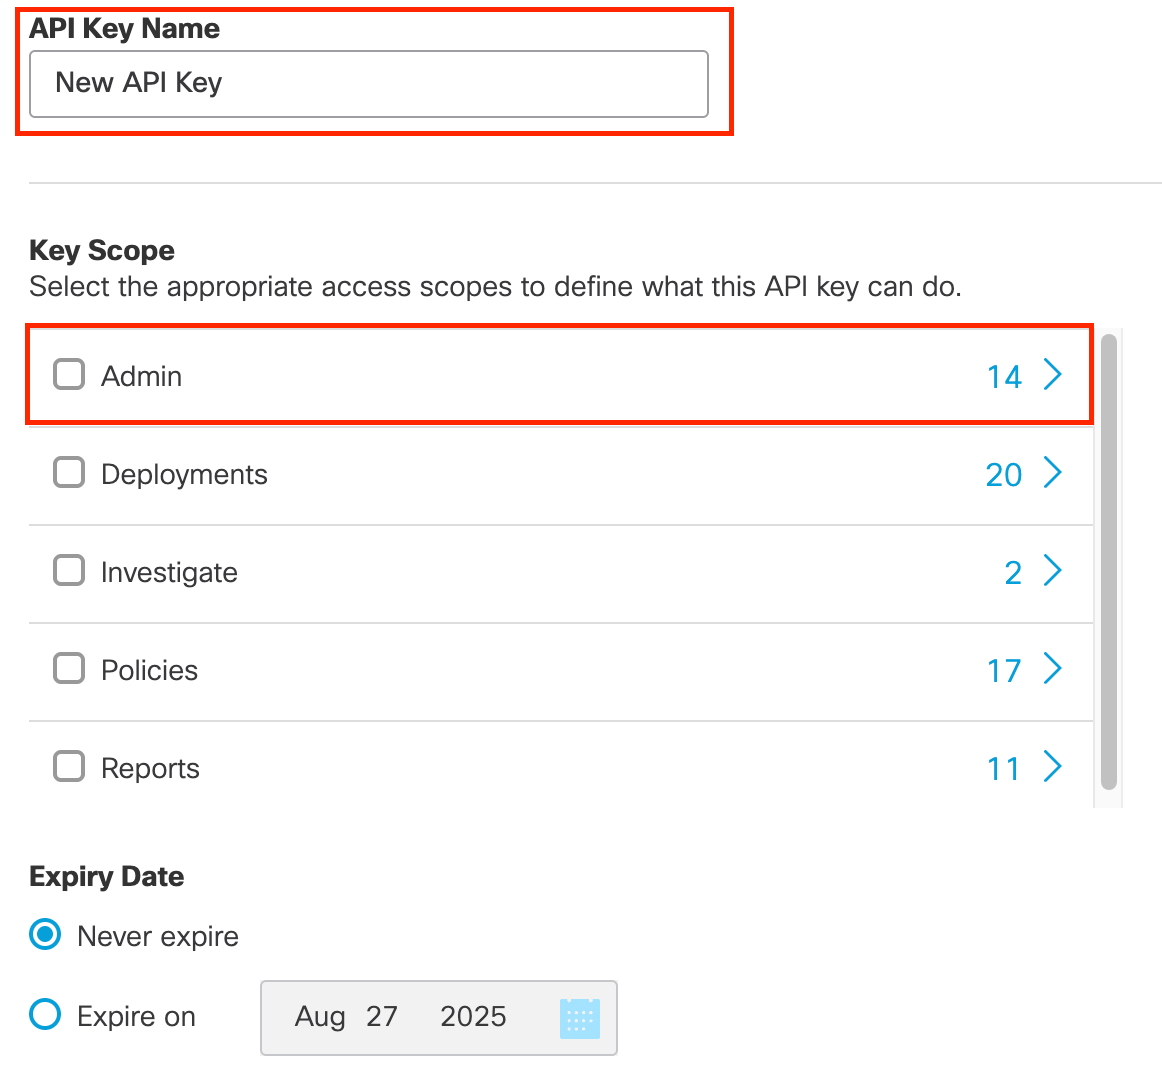
その後、「**API Key Name**」の欄に、新しいAPIキーの名前を入力します。

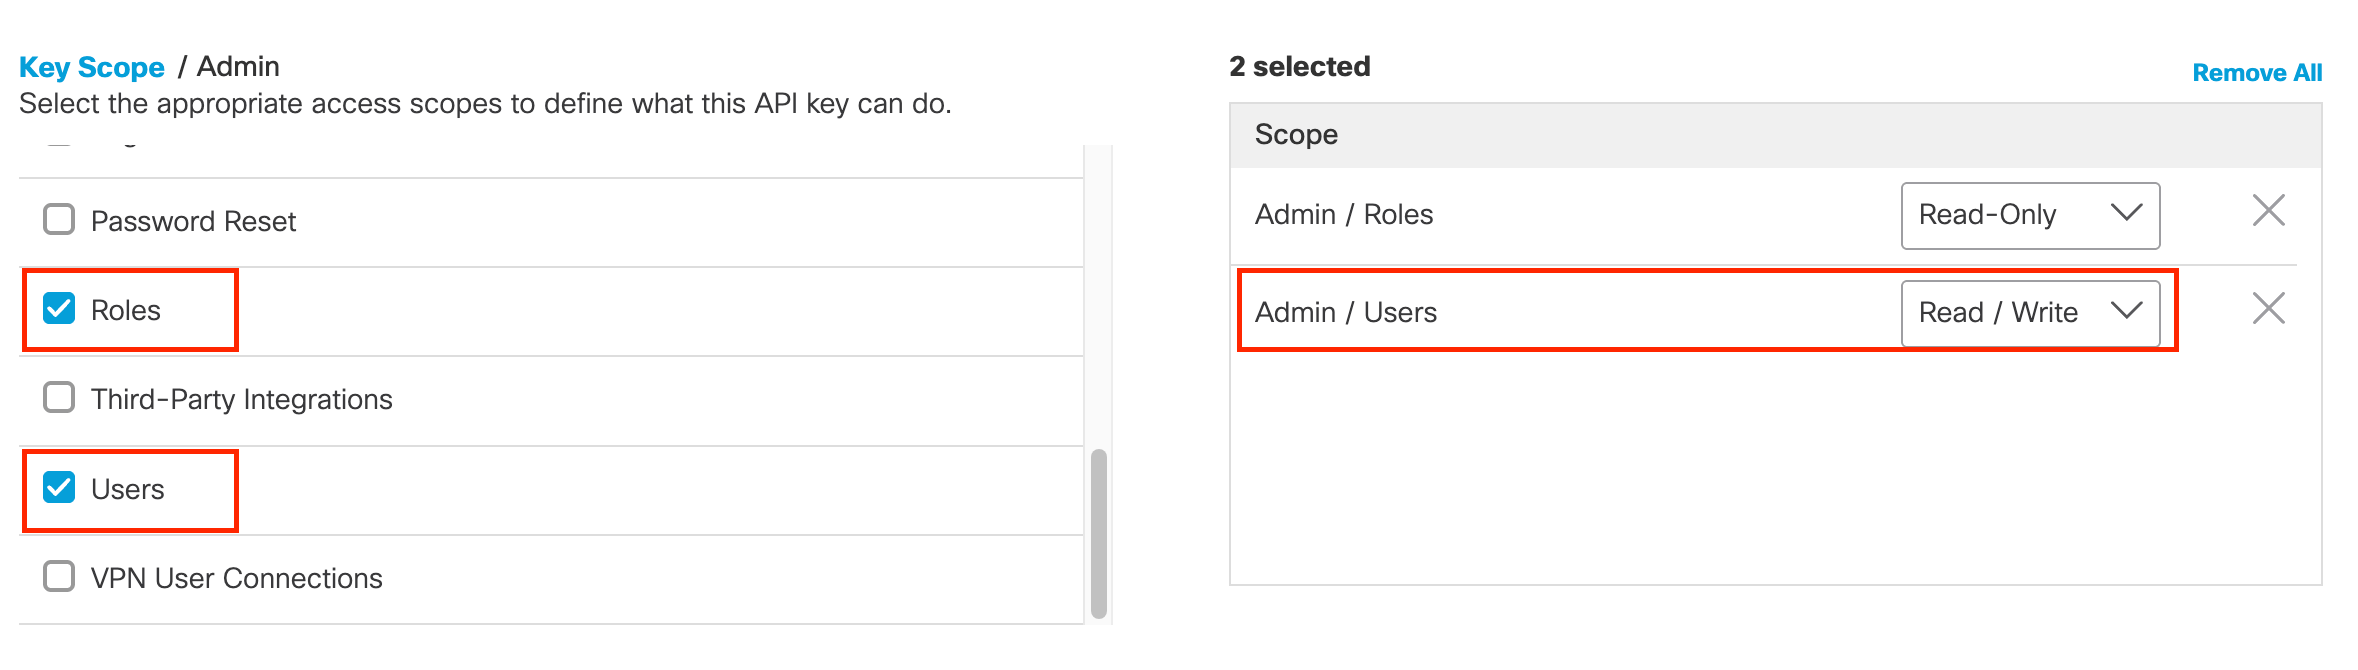
「**Key Scope**」の一覧から、**Admin** > **Users ・ Roles** にチェックを入れます。
<img src="https://mintcdn.com/admina-sbn/ibHAD7VhlI5mZAsA/images/integrations/yyed0q40i0/screenshot-2025-05-29-at-11-41-53.png?fit=max&auto=format&n=ibHAD7VhlI5mZAsA&q=85&s=2d1b1ad3b976bec15a288e69c09c01f1" alt="Key Scopeの設定" width="1162" height="1090" data-path="images/integrations/yyed0q40i0/screenshot-2025-05-29-at-11-41-53.png" />

デフォルトでは、**Admin/Users** は「**Read-Only**」に設定されています。

これを「**Read / Write**」に変更してください。
<img src="https://mintcdn.com/admina-sbn/ibHAD7VhlI5mZAsA/images/integrations/yyed0q40i0/screenshot-2025-05-29-at-11-42-55.png?fit=max&auto=format&n=ibHAD7VhlI5mZAsA&q=85&s=b50a900cfc3b141900ca64c79a16ade2" alt="Read/Writeに変更" width="2358" height="670" data-path="images/integrations/yyed0q40i0/screenshot-2025-05-29-at-11-42-55.png" />

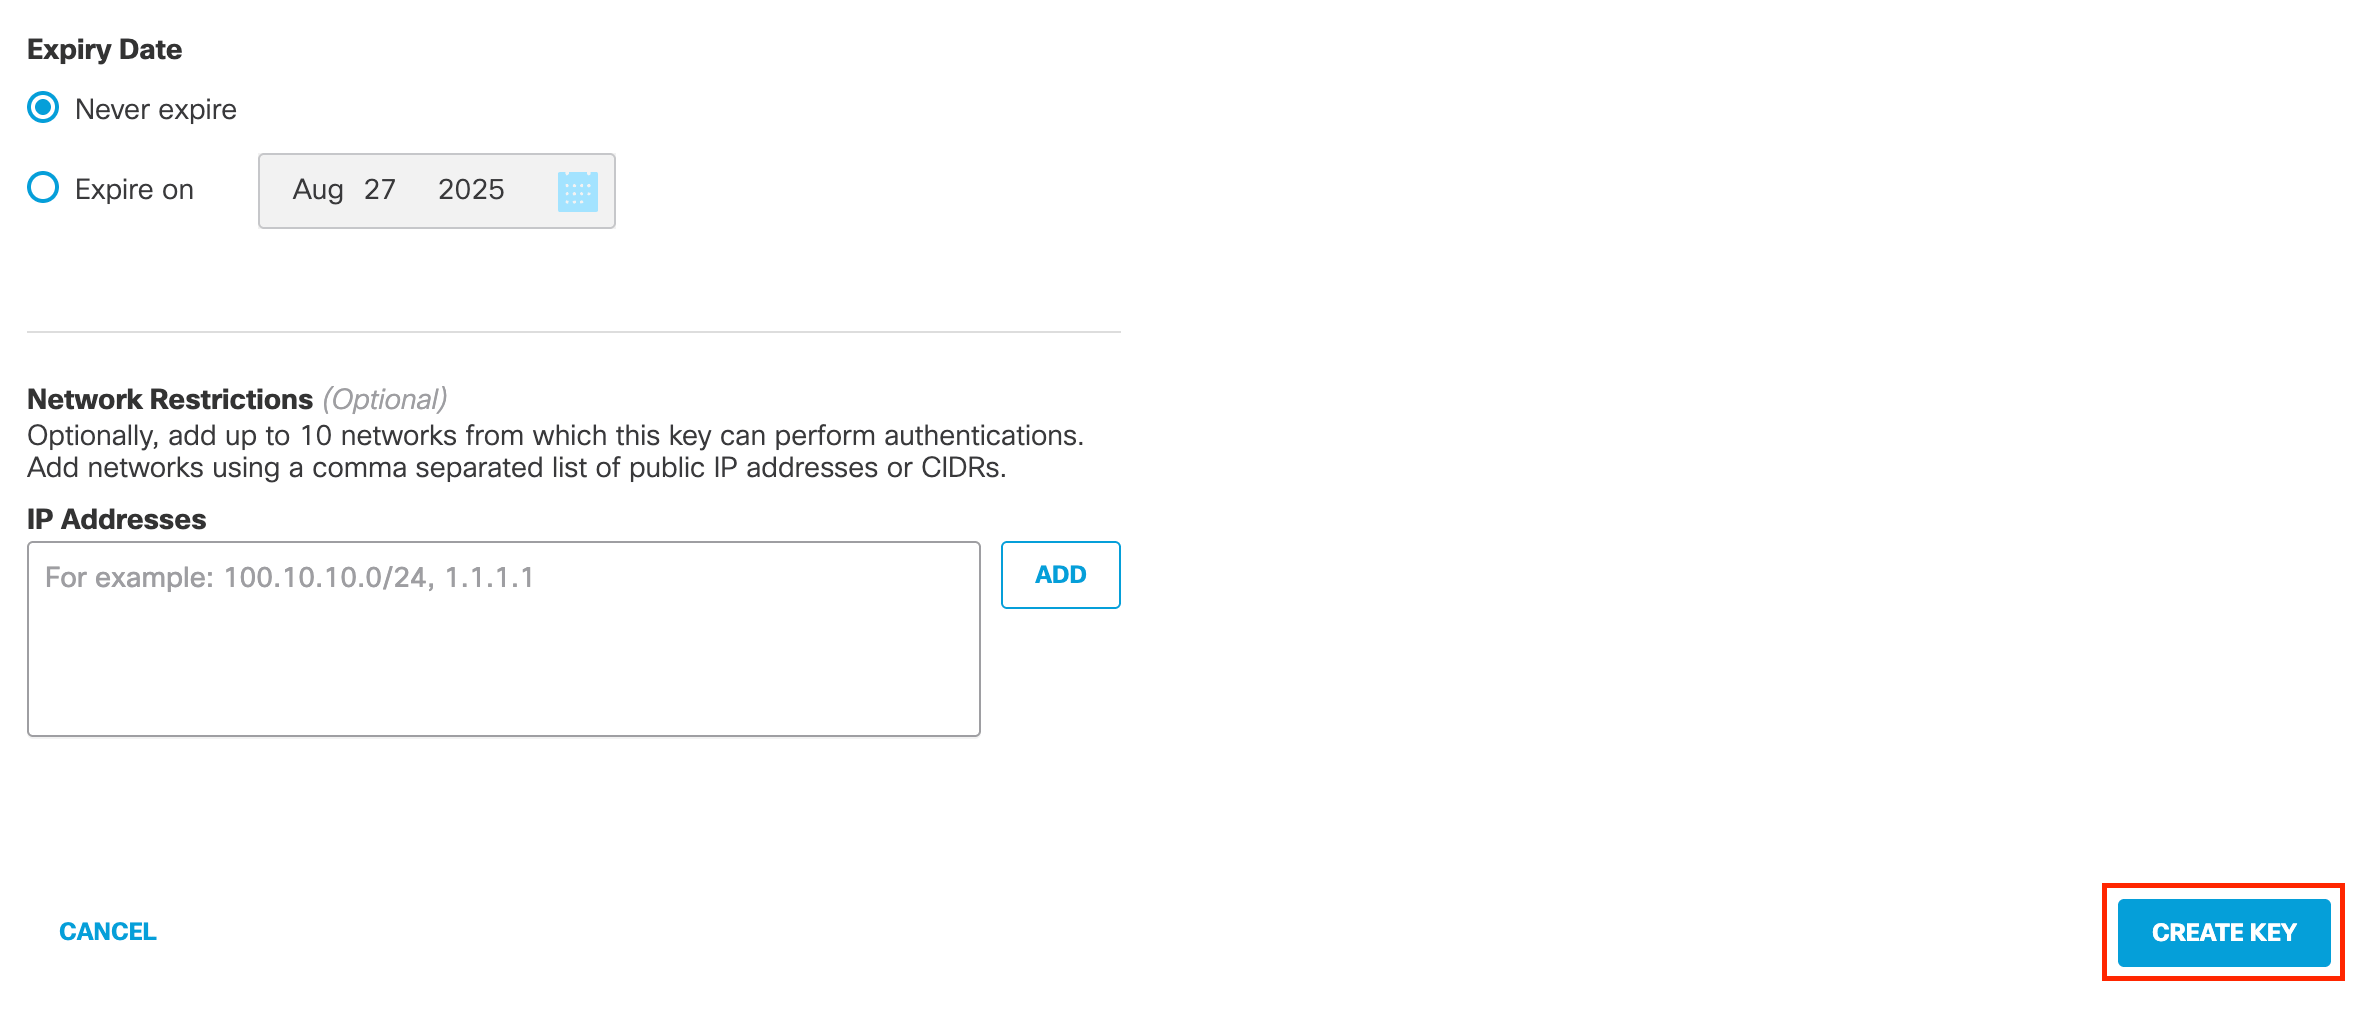
ページ下部にある 「**CREATE KEY**」 をクリックします。

<img src="https://mintcdn.com/admina-sbn/ibHAD7VhlI5mZAsA/images/integrations/yyed0q40i0/screenshot-2025-05-29-at-11-43-38.png?fit=max&auto=format&n=ibHAD7VhlI5mZAsA&q=85&s=f484277be069ad9a6432dfcb80745565" alt="CREATE KEYボタン" width="2370" height="1022" data-path="images/integrations/yyed0q40i0/screenshot-2025-05-29-at-11-43-38.png" />

表示された **API Key** と **Key Secret** をコピーしてください。

**API Key** が **クライアントID**、**Key Secret** が **クライアントシークレット**です。

<Info>
  キーシークレットは一度しか表示されません。ページを離れると再表示できなくなるため、必ず保管しておいてください。

</Info>

<img src="https://mintcdn.com/admina-sbn/ibHAD7VhlI5mZAsA/images/integrations/yyed0q40i0/screenshot-2025-05-29-at-11-44-04.png?fit=max&auto=format&n=ibHAD7VhlI5mZAsA&q=85&s=b4d06791b8069f12076eedc73f84238f" alt="API KeyとKey Secretの表示" width="1892" height="362" data-path="images/integrations/yyed0q40i0/screenshot-2025-05-29-at-11-44-04.png" />

## インテグレーションのセットアップ

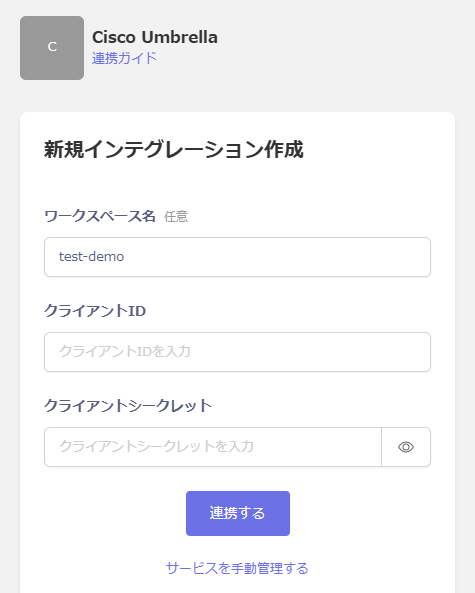
インテグレーション画面にて、**Cisco Umbrella**で検索します。

任意のワークスペース名、前の手順で取得した**クライアントID**(API Key)**・クライアントシークレット**(Key Secret)を入力し、**連携する**をクリックします。
<img src="https://mintcdn.com/admina-sbn/ibHAD7VhlI5mZAsA/images/integrations/yyed0q40i0/2025-06-02-165331.png?fit=max&auto=format&n=ibHAD7VhlI5mZAsA&q=85&s=89ab4c138dc64fb0cb29bf78e526312a" alt="Admina連携画面" width="475" height="593" data-path="images/integrations/yyed0q40i0/2025-06-02-165331.png" />

連携に成功すると、アカウント一覧に登録済みのユーザー情報が表示されます。

正常に完了しない場合は、インテグレーション画面のステータスタブから**編集**し、再度連携をお試しください。

解決しない場合はチャットにてお問い合わせください。