Feature Overview
You can now specify the data source for each field imported into the directory. Choose from the employee master or connected SaaS services. This allows you to designate which fields are managed manually and which are synced from a master source. The trusted data source may differ per user. This feature lets you customize fields to fit your organization’s needs.Feature Details
- Data Source for Directory Fields
- Creating Custom Input Fields
| Directory Field Data Source | Data Source Details |
|---|---|
| Directory field data source | - This service When the data source is this service, the field will not be overwritten by HRM sync. If an account is added in HRM, it will be added to the directory. Set the data source to “this service” to retain directory information. - Service set as employee master (HRM) When the data source is HRM, HRM data will overwrite the field on sync. - Connected SaaS When the data source is a connected SaaS, HRM data will overwrite the field on sync. |
| Directory field display | - After the feature is added, a popup will appear when you open the directory When an employee master is configured - Shown when setting up under Settings > Organization > Employee Master Settings When no employee master is configured - Directory settings screen When setting or changing directory fields |
| Update timing | - Manual sync - Automatic sync (nightly) |
Please back up your directory data before syncing.
Export a CSV from the export feature and save it as a backup.If you skip the directory field settings screen, the data source will be set to this service.
Note that fields with this service as the data source will not be synced.
When an Employee Master Is Configured
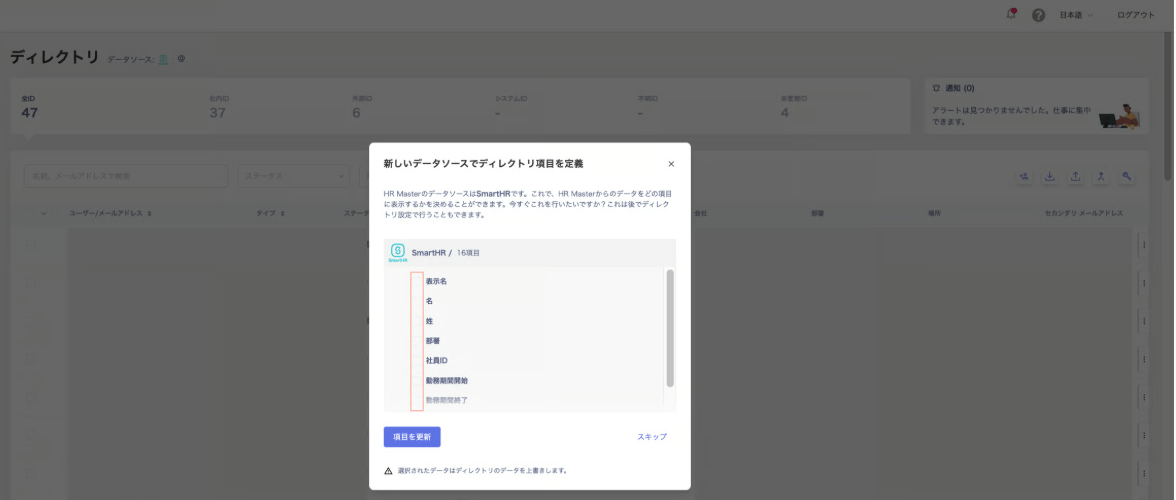
After we release the feature, a “Define directory fields with new data source” prompt will appear in the directory. This happens only on first access. The following screenshots show the screen displayed when SmartHR is set as the HR Master data source.Steps to Set Up “Define directory fields with new data source”
-
The “Define directory fields with new data source” prompt appears in the directory.
-
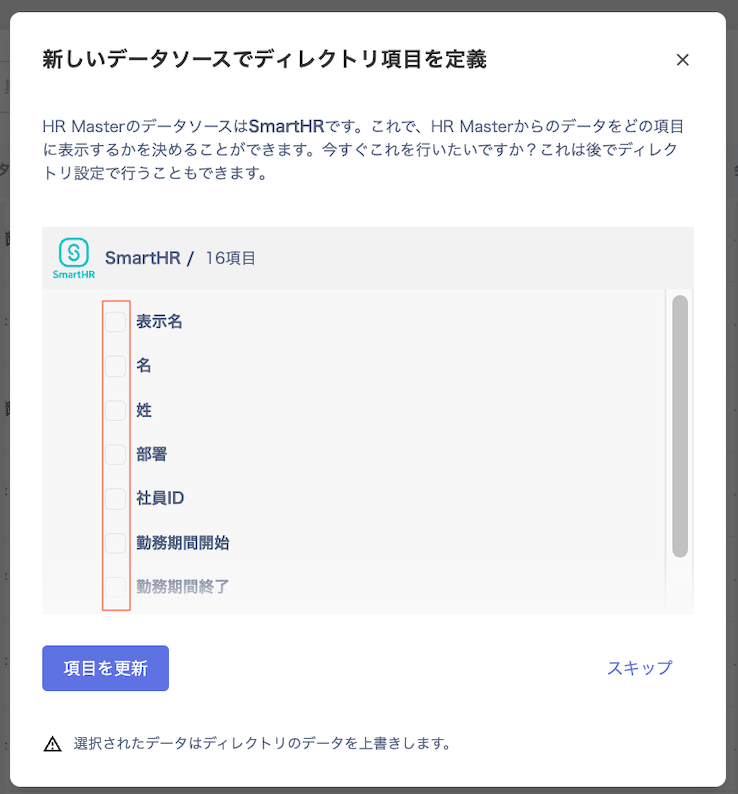
On the initial screen, check the checkbox next to each field you want to configure a data source for.
Checked fields: data source will be set to the service configured as the employee master.
Unchecked fields: data source will be set to this service.
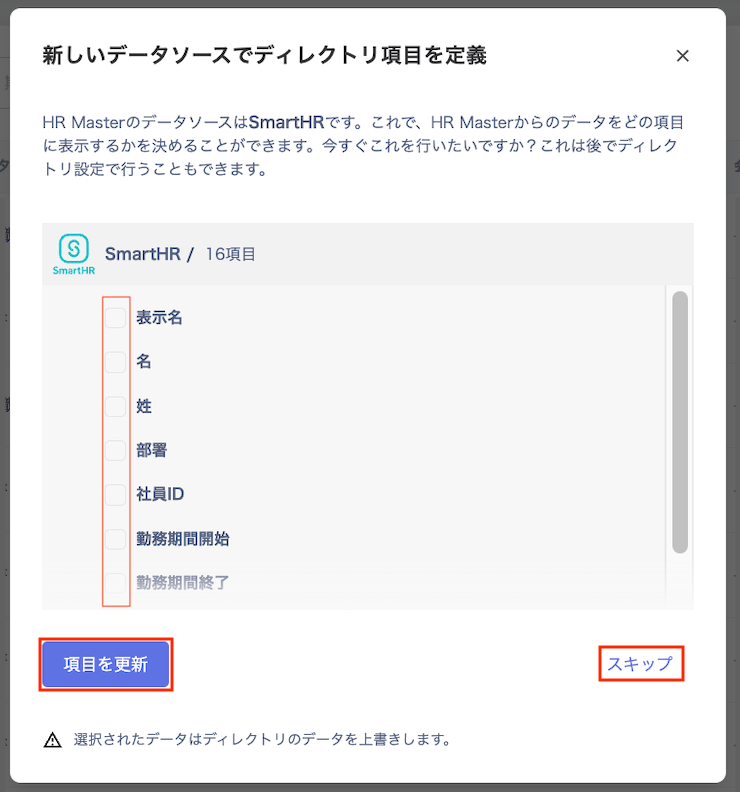
- Configure and click [Update Fields]. Click “Skip” to configure later. If skipped, this service will be set as the data source. To configure directory fields later, see When setting or changing directory fields.
When No Employee Master Is Configured
If no employee master is configured, you will set the data source when configuring one. Go to Integrations > Integrations and connect the service you want to set as the employee master. After connecting the service, configure it under Settings > Organization > Employee Master Settings.Employee Master Setup Steps
-
Select the service to set as the employee master, choose a workspace, and click [Next].
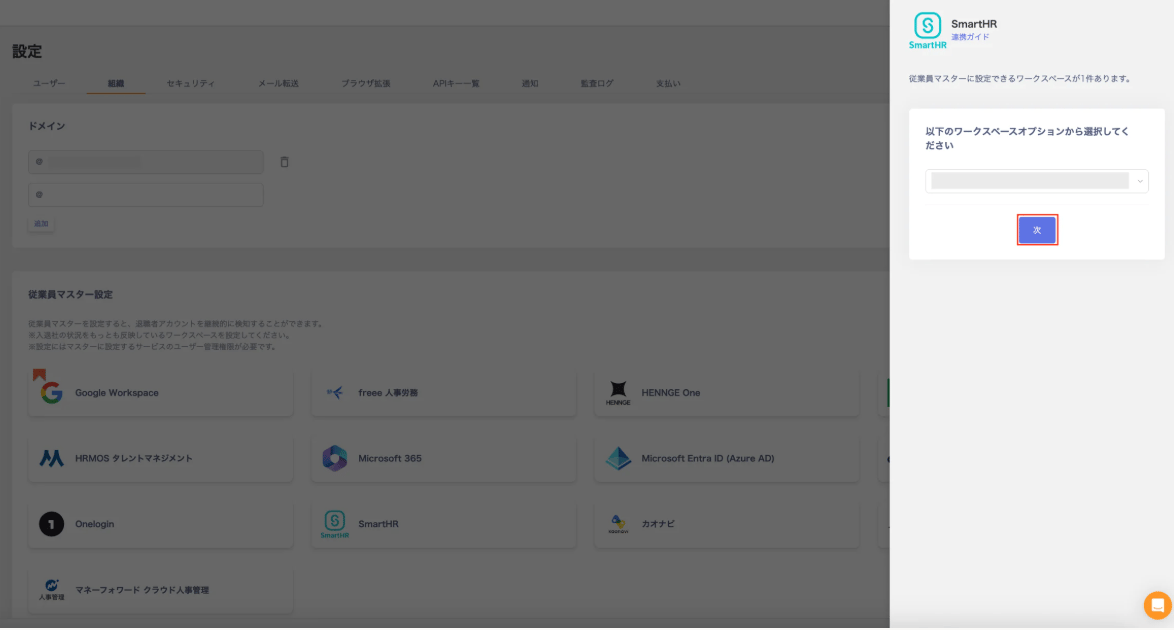
-
Under “Define directory fields with new data source,” complete the setup and click [Connect].
Checked fields: data source will be set to the service configured as the employee master.
Unchecked fields: data source will be set to this service.
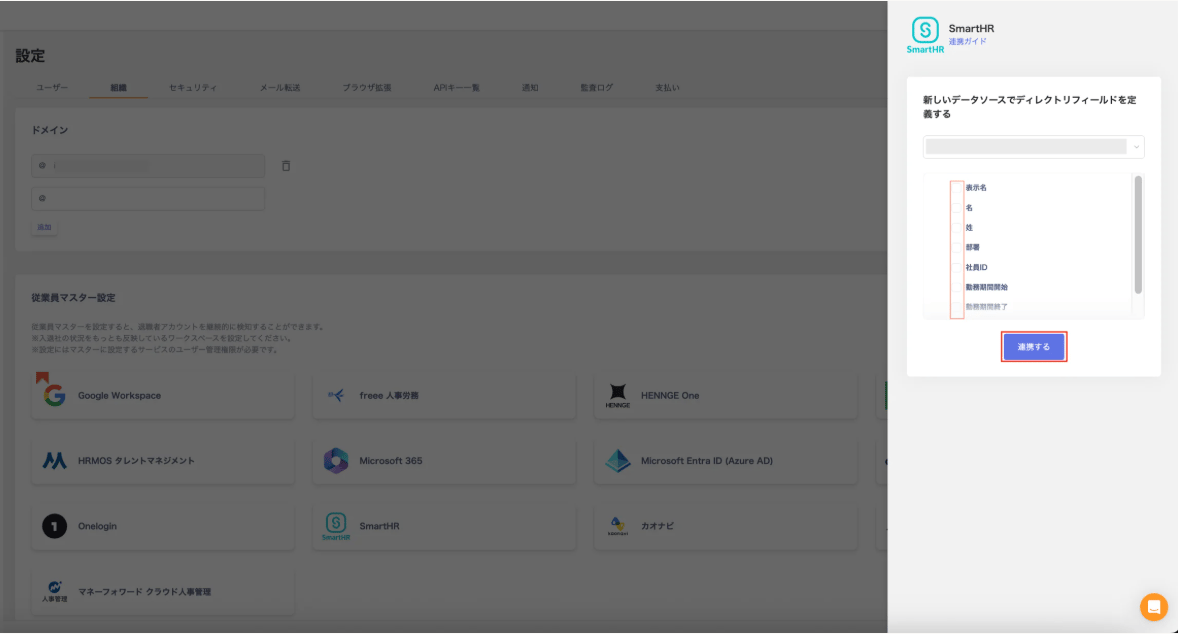
When Setting or Changing Directory Fields
-
Click the settings icon in the top-right corner of the directory.
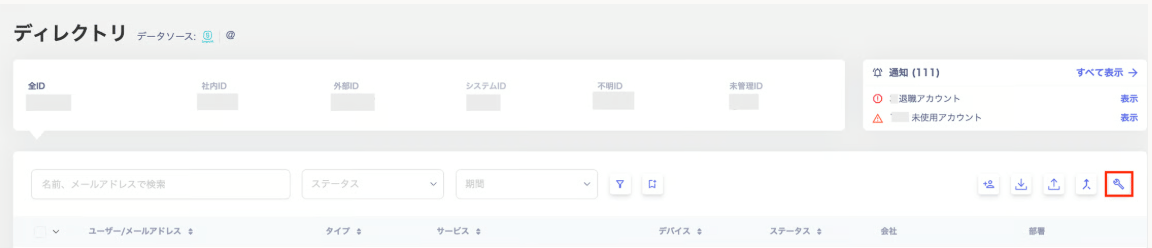
-
On the “Directory Fields” screen, you can set the data source for fields using the dropdown.
Select a data source and click [Apply].
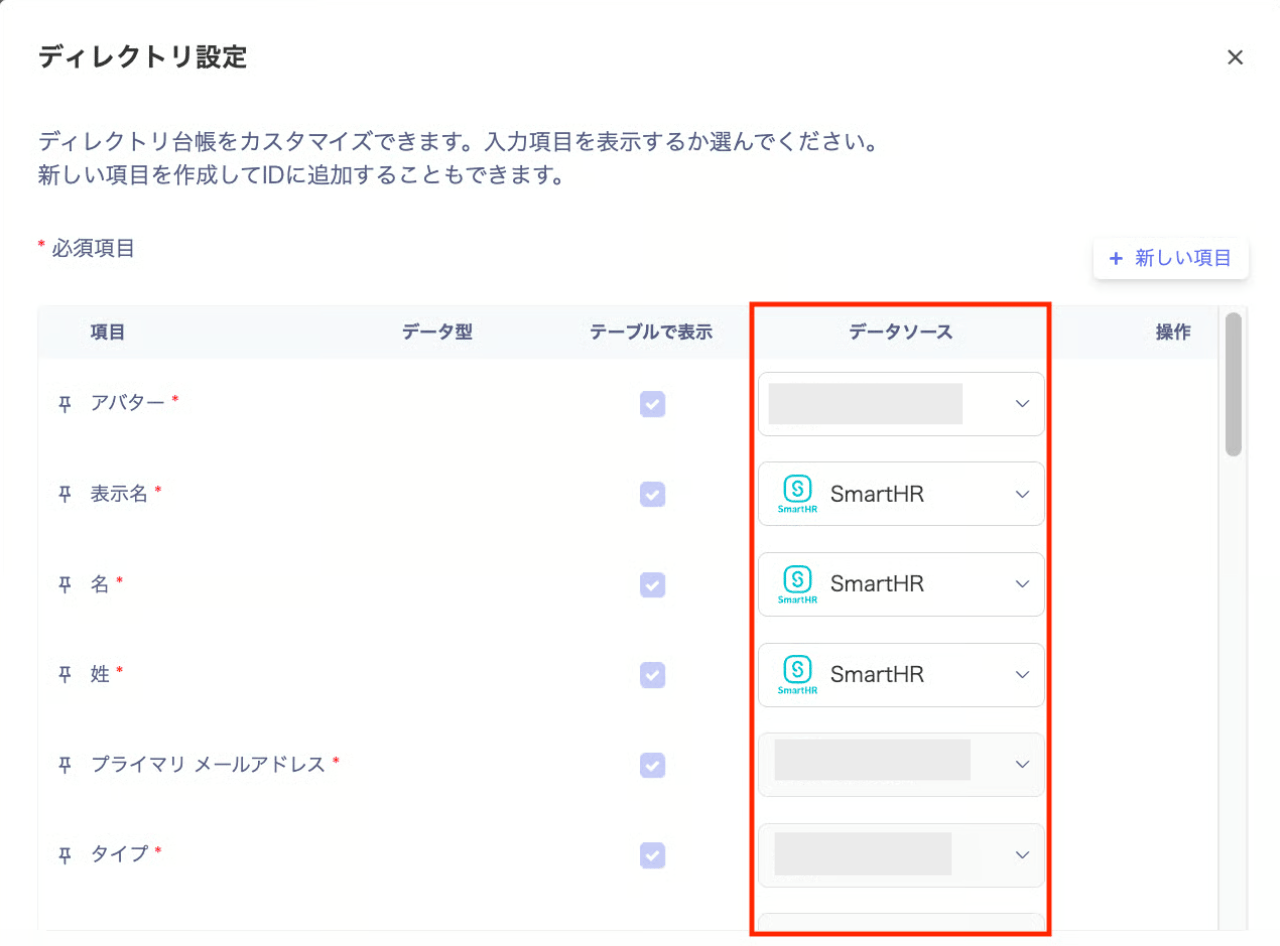
Creating Custom Input Fields
Create custom input fields to link HRM fields to this service. For the list of linkable fields, refer to the Available Custom Input Fields section.Custom Input Field Setup Steps
-
Click [New Field] in the directory settings.
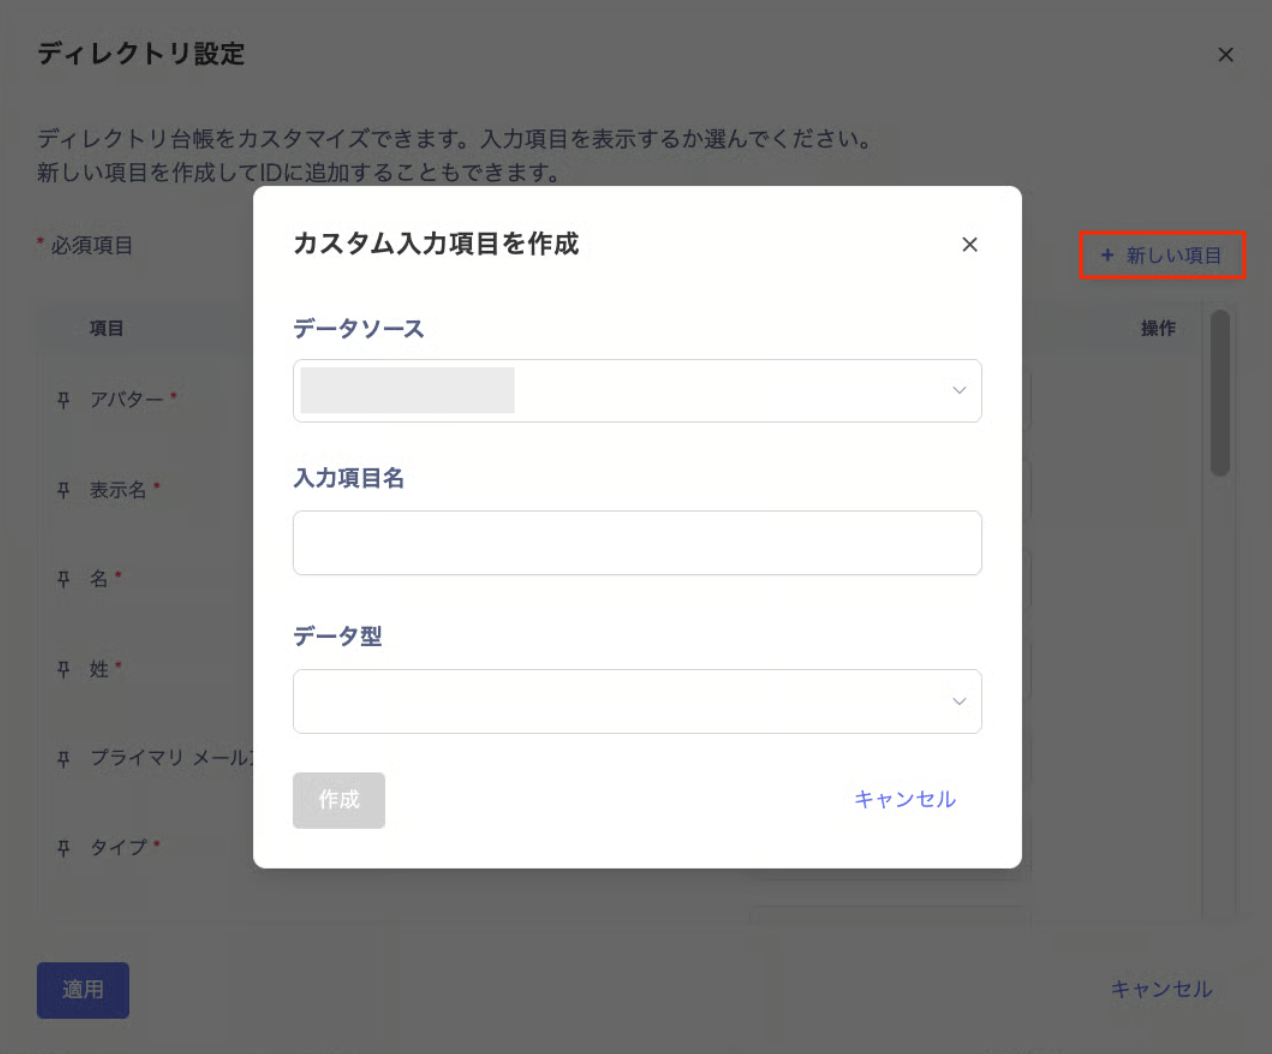
-
Under “Create Custom Input Field,” select a “Data Source” from the dropdown.
Data source: only the service set as the employee master can be selected.
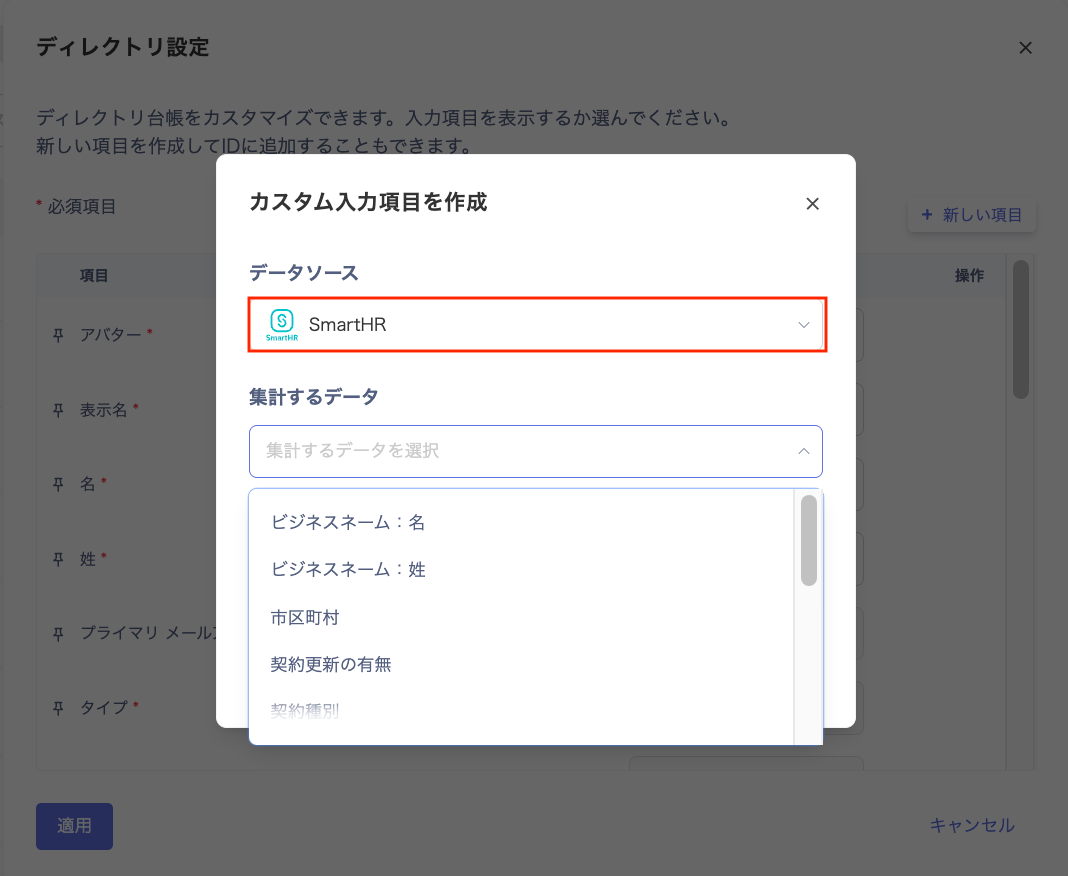
-
Select the data to aggregate from the dropdown, optionally rename the field, and click [Create].
Data to aggregate: sets which field from the HRM service to retrieve.
Field name: sets the custom field name for the retrieved data.
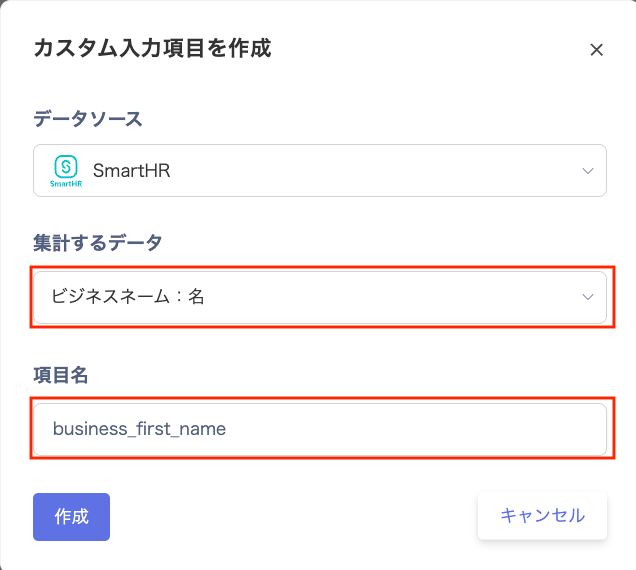
-
After creation, “New custom field added” will be displayed.

- The added custom field will show “(Custom)” next to the field name. To edit or delete, use the Edit/Delete options in the “Actions” column.
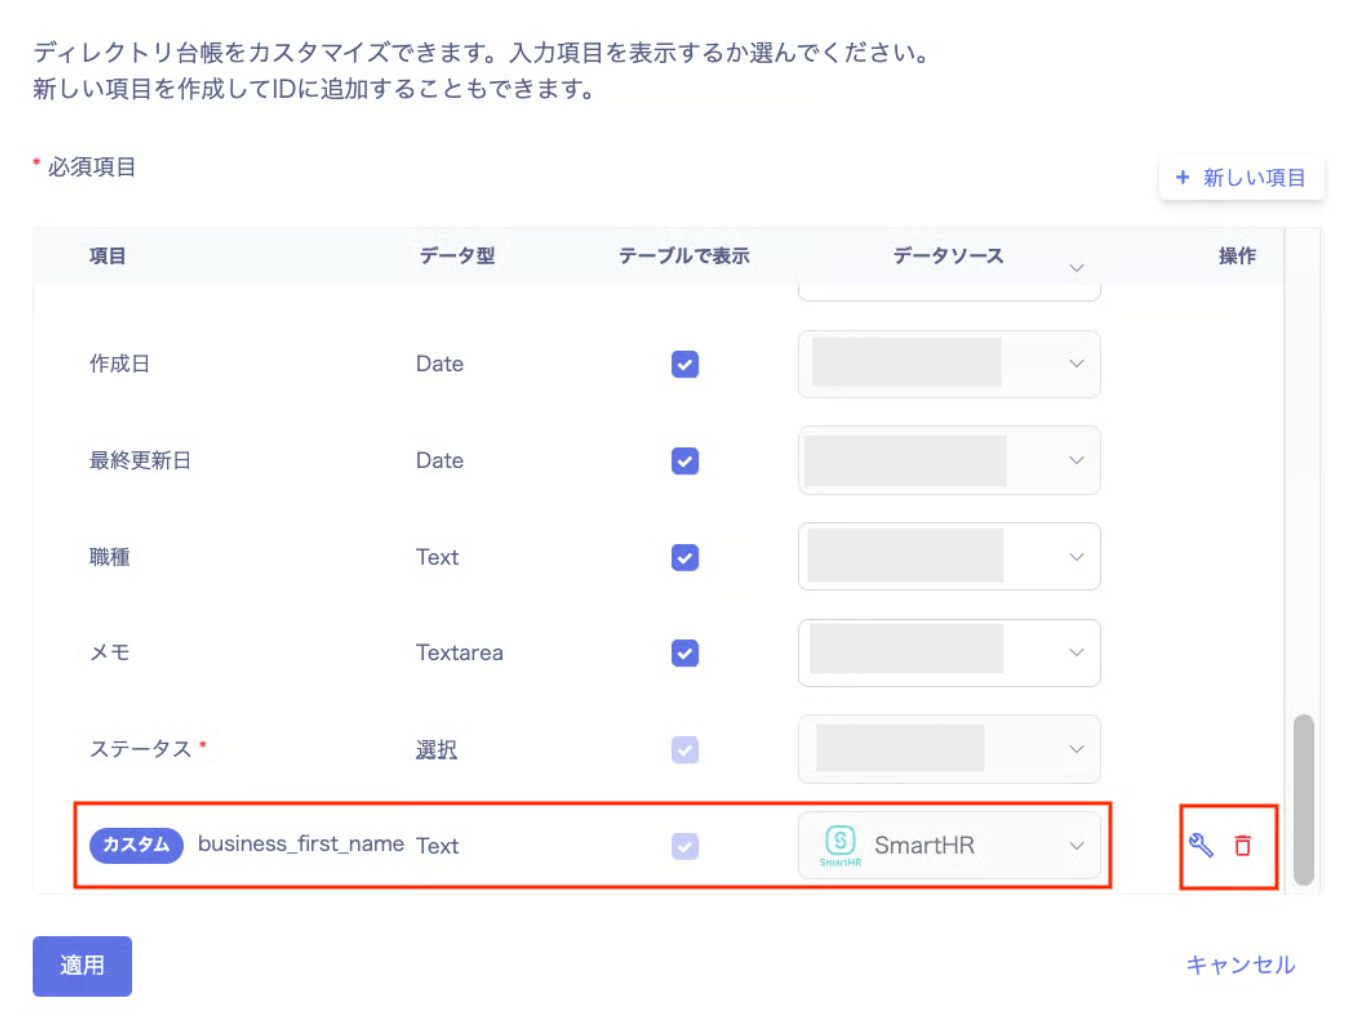
Displaying and Editing Custom Input Fields
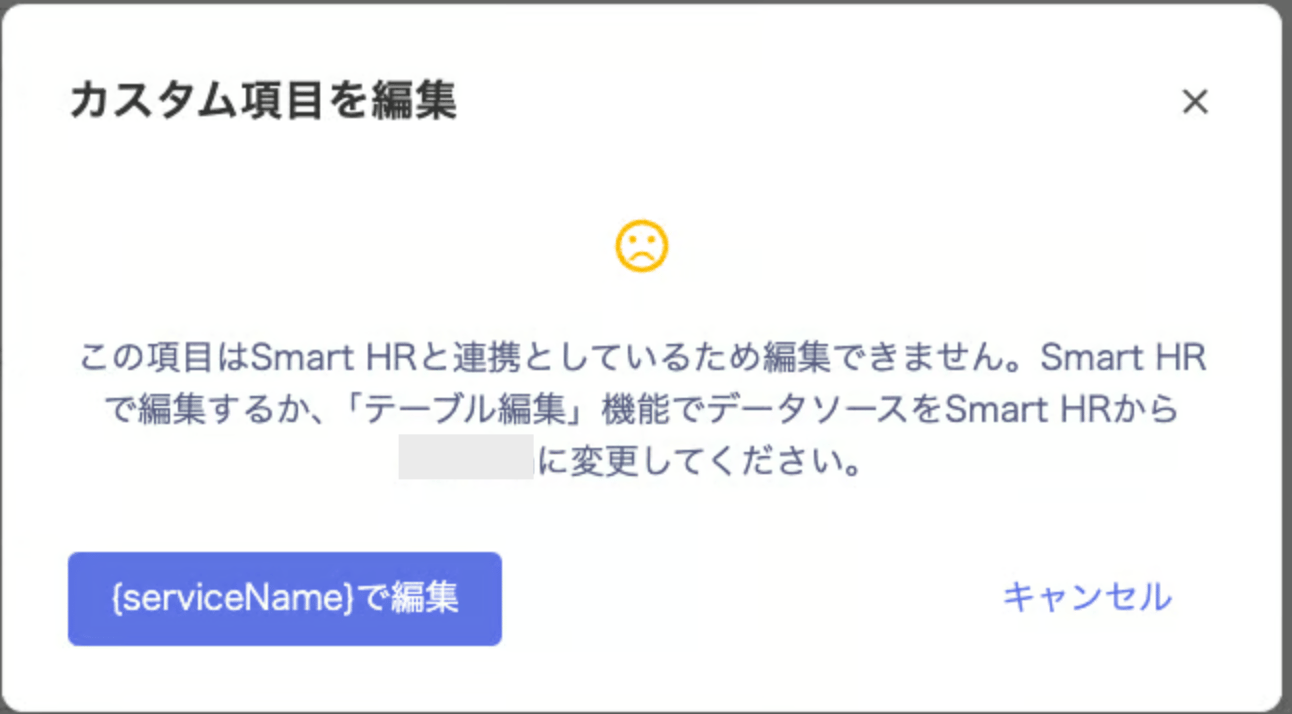
After setup, custom input fields appear under User Info > Custom Fields. Fields with the employee master icon cannot be edited on this service.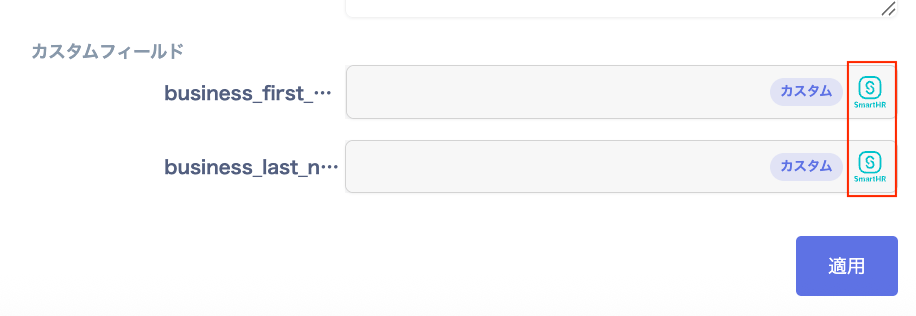
Available Custom Input Fields
The custom input fields available for linking vary depending on the service set as the employee master.FAQ
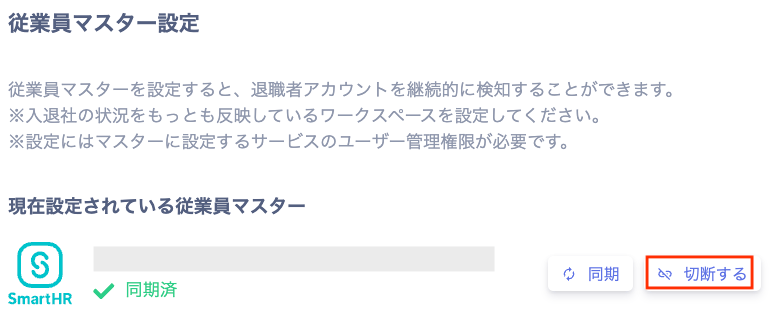
Q. If I disconnect the employee master, will the settings be deleted? A. No, the settings will remain.