

The Device plan (paid subscription) is required to use the device management feature. To request a trial, contact us via “Ask a support representative directly” in the chat.
Overview
This page explains the features and operation of the “Edit fields” screen under Device > Settings (Edit table). Customize your device list’s display name and management fields (custom fields) to match your organization’s asset management policy, improving the visibility and management efficiency of your device inventory.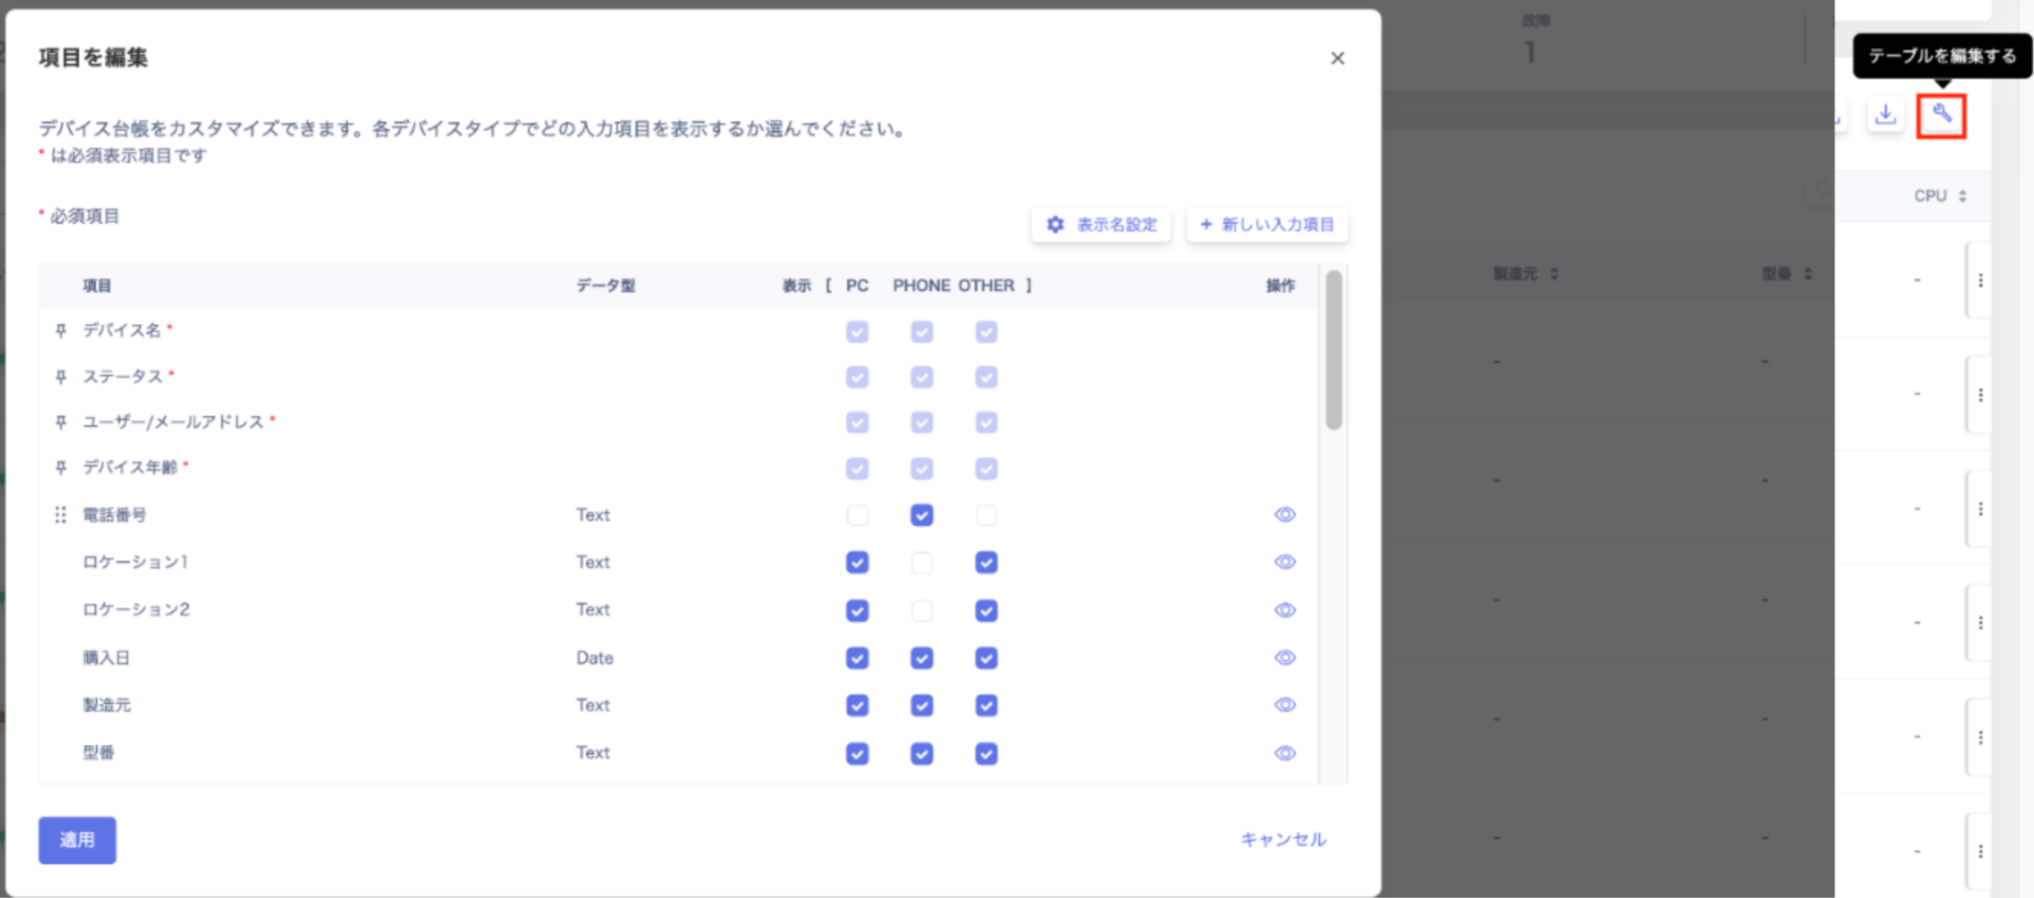
- Add a custom field
- Edit a custom field
- Delete a custom field
- Adjust management fields per device type
- Hide a field
- Show a hidden field
- Change the device display name
Add a custom field
You can add up to 25 custom attributes.
- Go to Device > Settings > “Edit fields” and click New input field in the upper right.
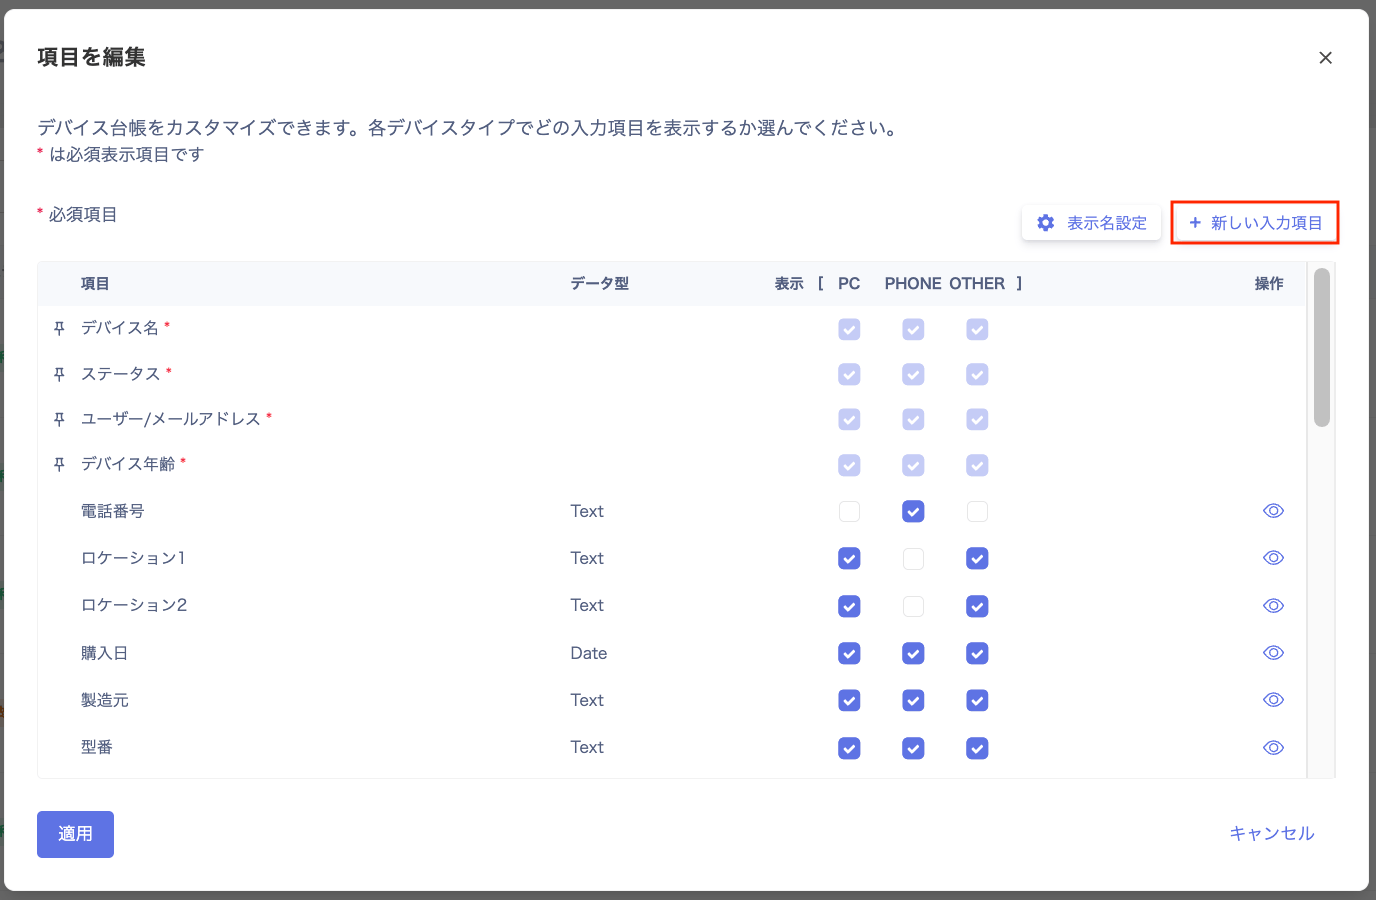
-
In the “Create custom input field” dialog, enter a field name and select a data type.
Data type Description Text Enter text. Date Enter or select a date from the calendar. For CSV imports, use the format YYYY-MM-DD or YYYY/MM/DD. Number Enter a number. Non-numeric input is not allowed. For CSV imports, entering a non-numeric value will display an error. Dropdown Set any options you want. Use line breaks to add multiple options. Note that blank lines will cause an error. 
-
A confirmation message appears and the field is registered.

Edit a custom field
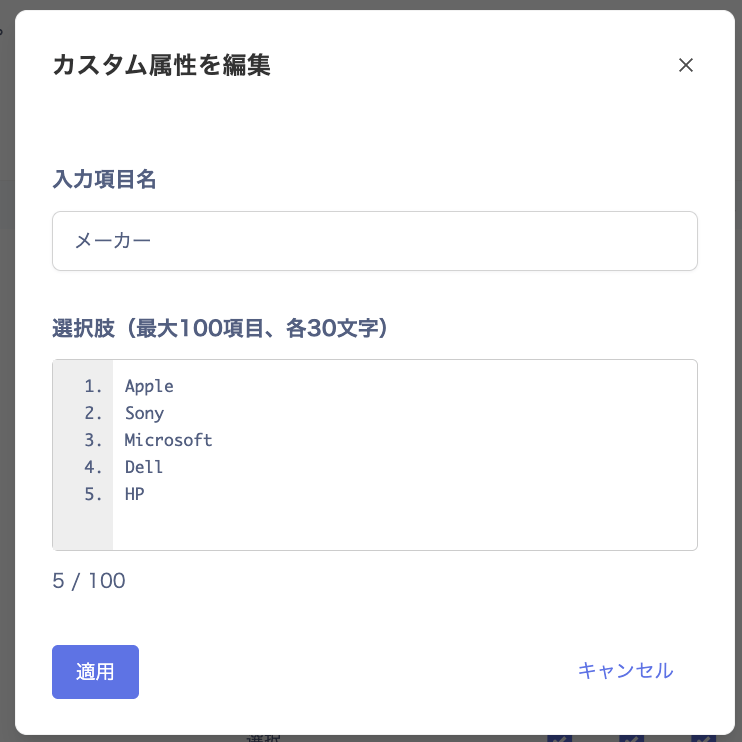
If you created a custom field with the “Dropdown” data type, use this procedure to add or change its options later.If you delete some options from a custom field (Dropdown type), take a backup before deleting the options.
-
Go to Device > Settings > “Edit fields” and click the Edit (wrench icon) in the Actions column.
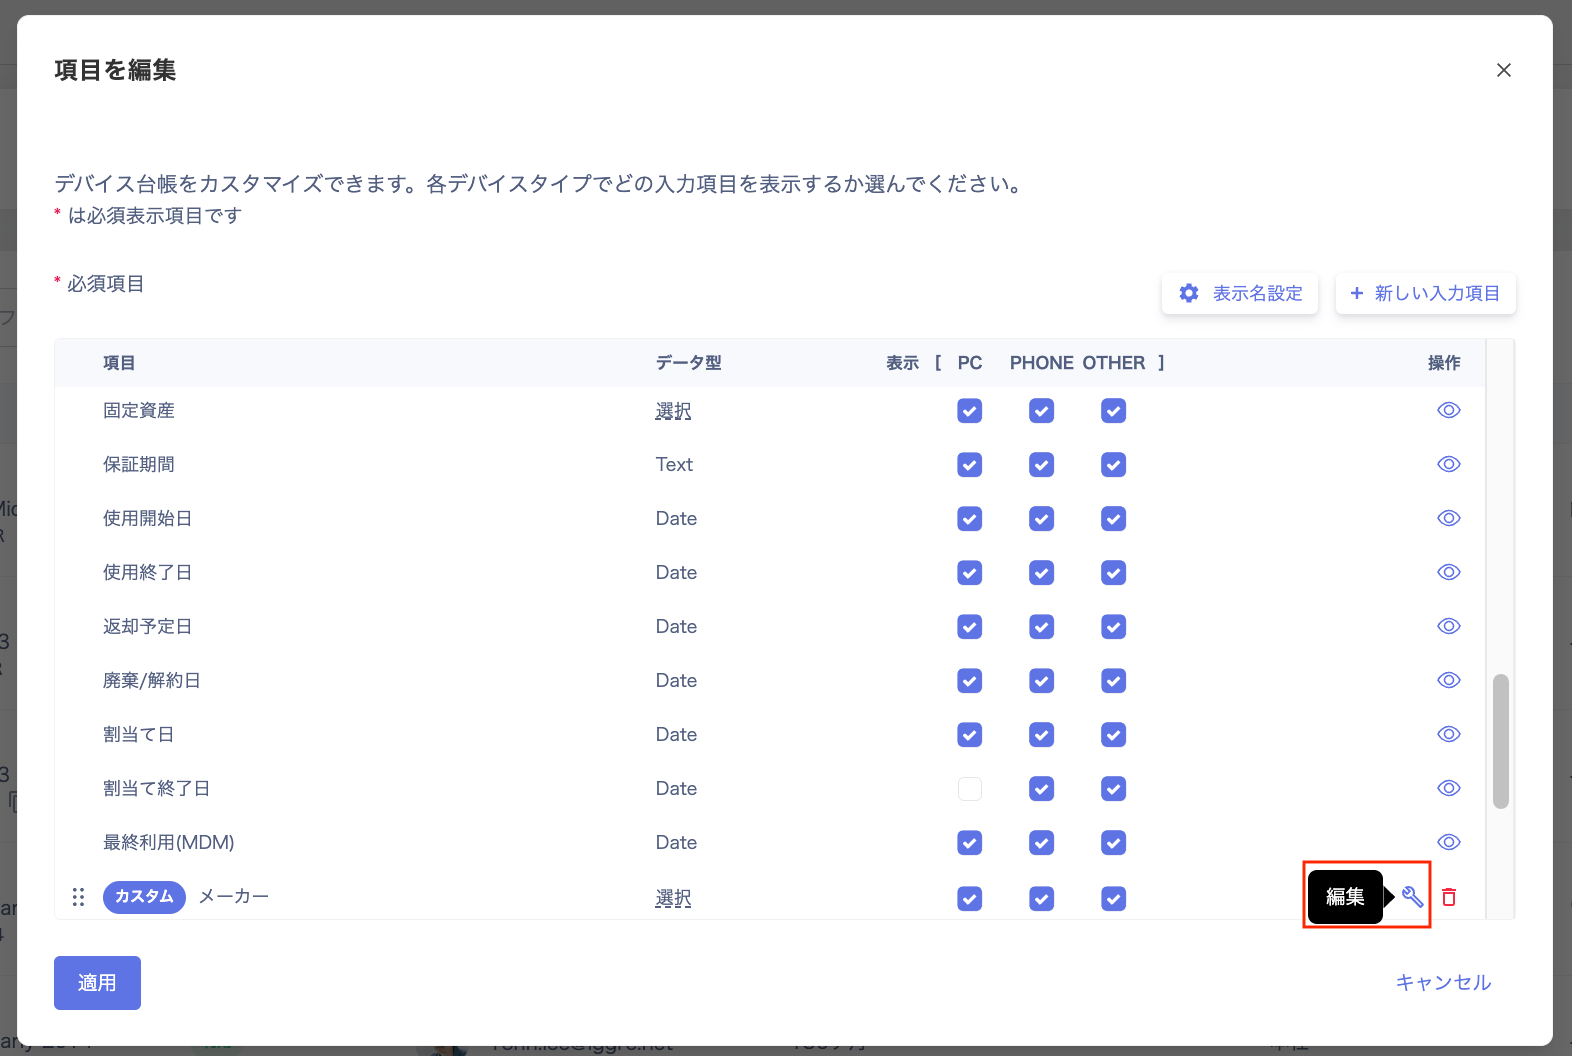
- In the “Edit custom attribute” dialog, add or edit options and click Apply.
Delete a custom field
If you created a custom field with the “Dropdown” data type, use this procedure to delete it later.-
Go to Device > Settings > “Edit fields” and click Delete in the Actions column.
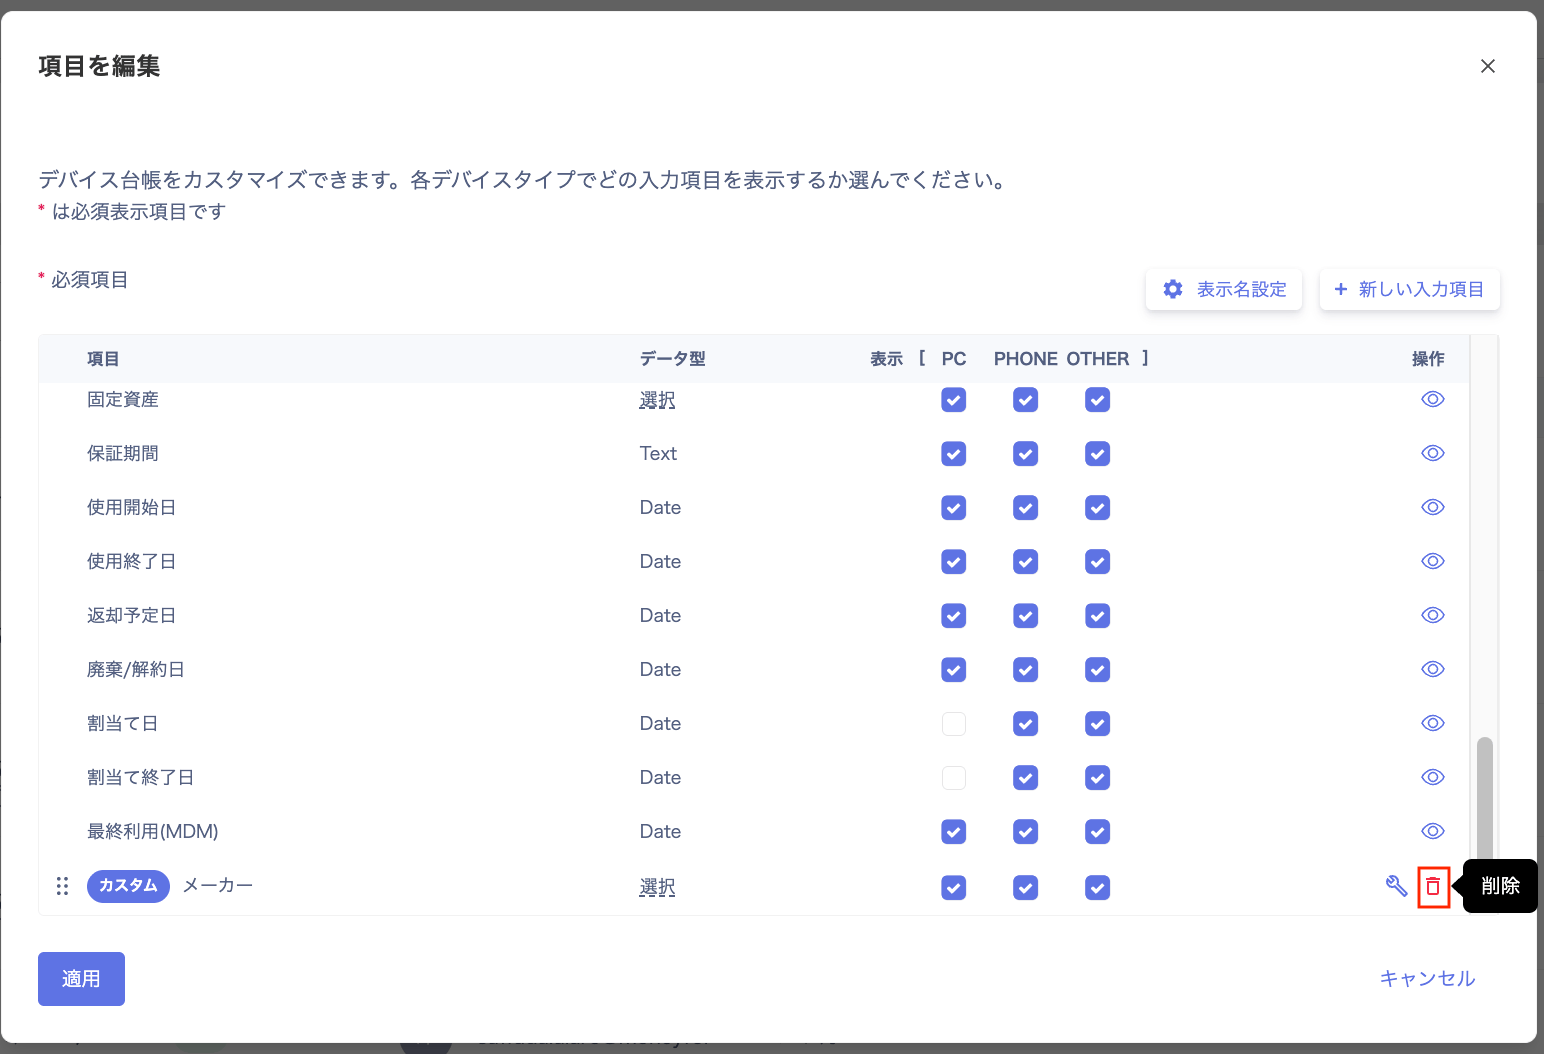
-
The “Confirm attribute deletion” dialog appears. Review the message and click Delete.
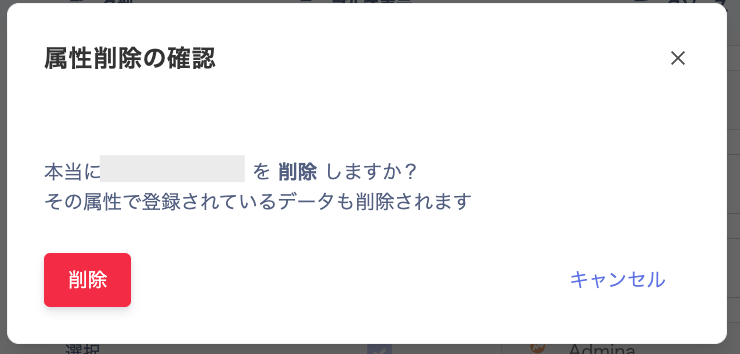
-
A confirmation message appears and the deletion is complete.

Adjust management fields per device type
Adjust management fields by device type:PC, PHONE, and OTHER. This handles cases such as:
- You want to track purchase price for PC, but not for PHONE or OTHER.
- You want to hide the warranty period field across all device types at once.
Hide a field
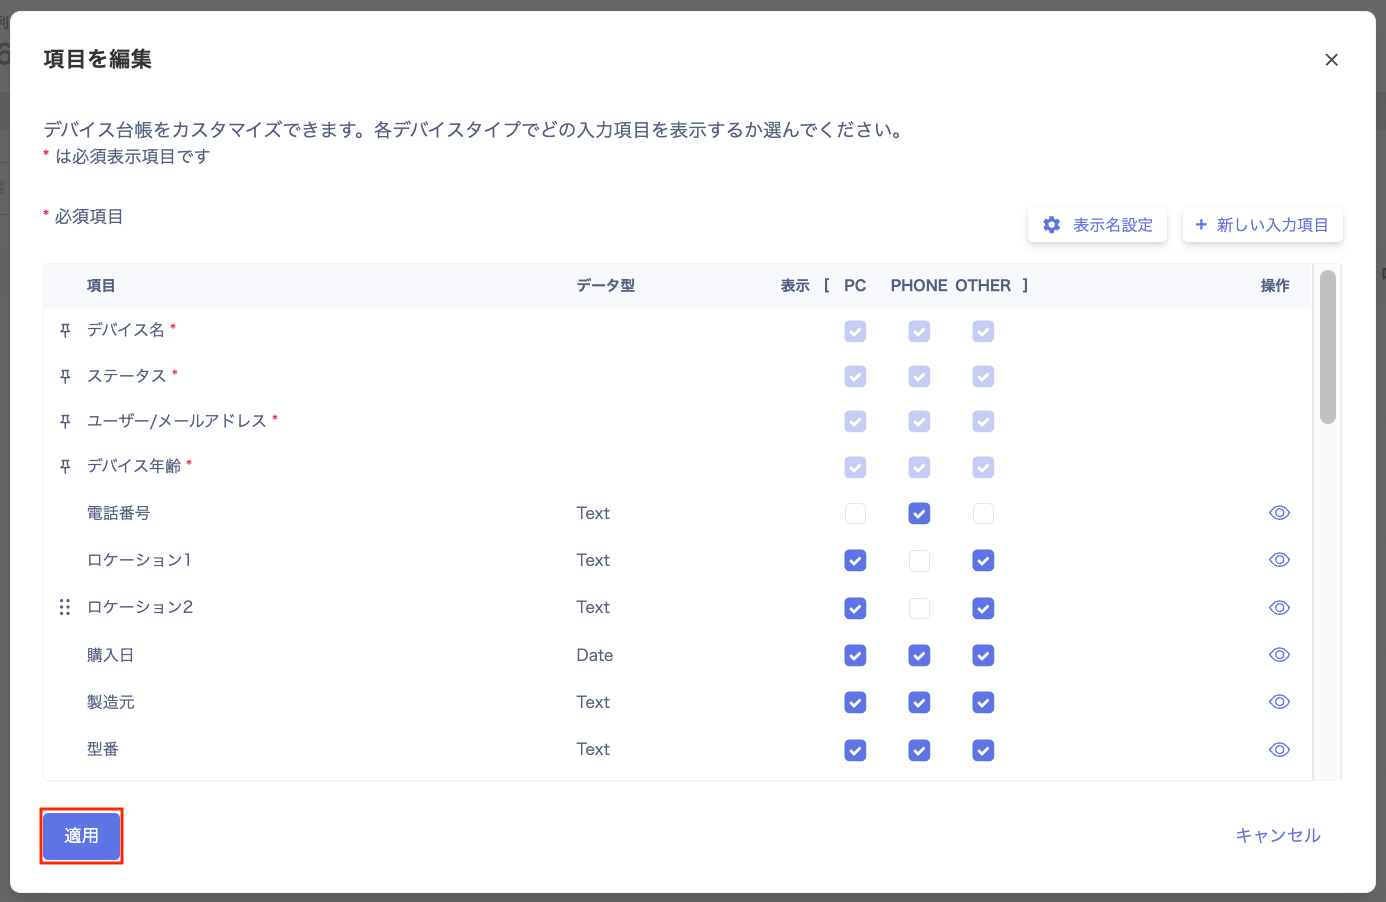
Click the 👁 icon to hide the field across all device types at once. Uncheck “PC/Phone/Other” to hide the field for that device type. Checking it again makes the field visible. When you uncheck a checkbox, the field is hidden on the “Register new device,” “Device list,” and “Device details” screens.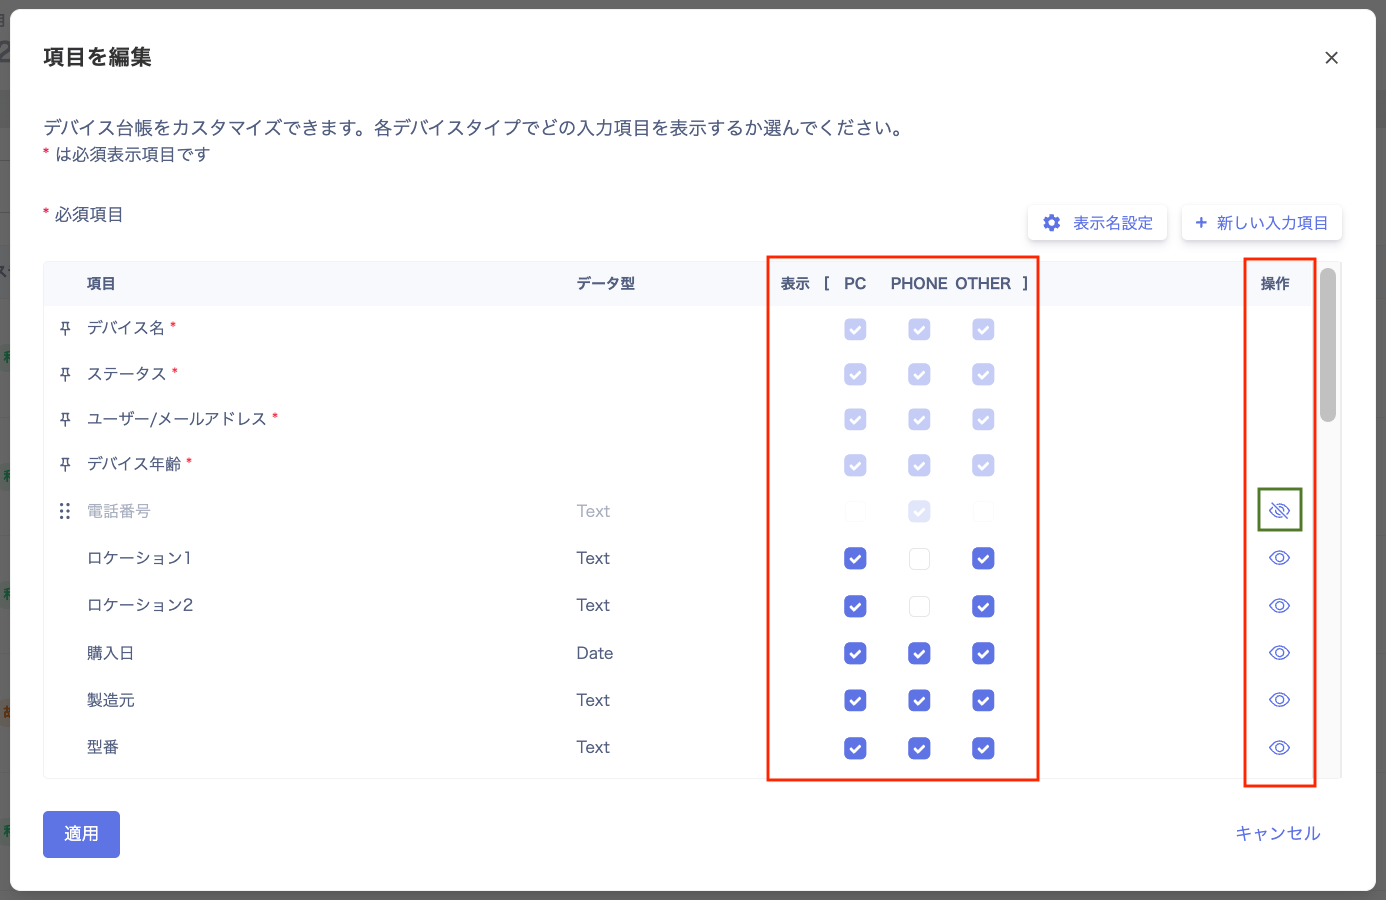
Hiding a field does not delete its data. The data is still saved; only the display is affected.The fields “Device name,” “Status,” “User / Email address,” and “Device age” cannot be hidden.
Show a hidden field
A field hidden using the 👁 icon can be shown again by clicking the 👁 icon. Check the “PC/Phone/Other” display checkbox to show the field again.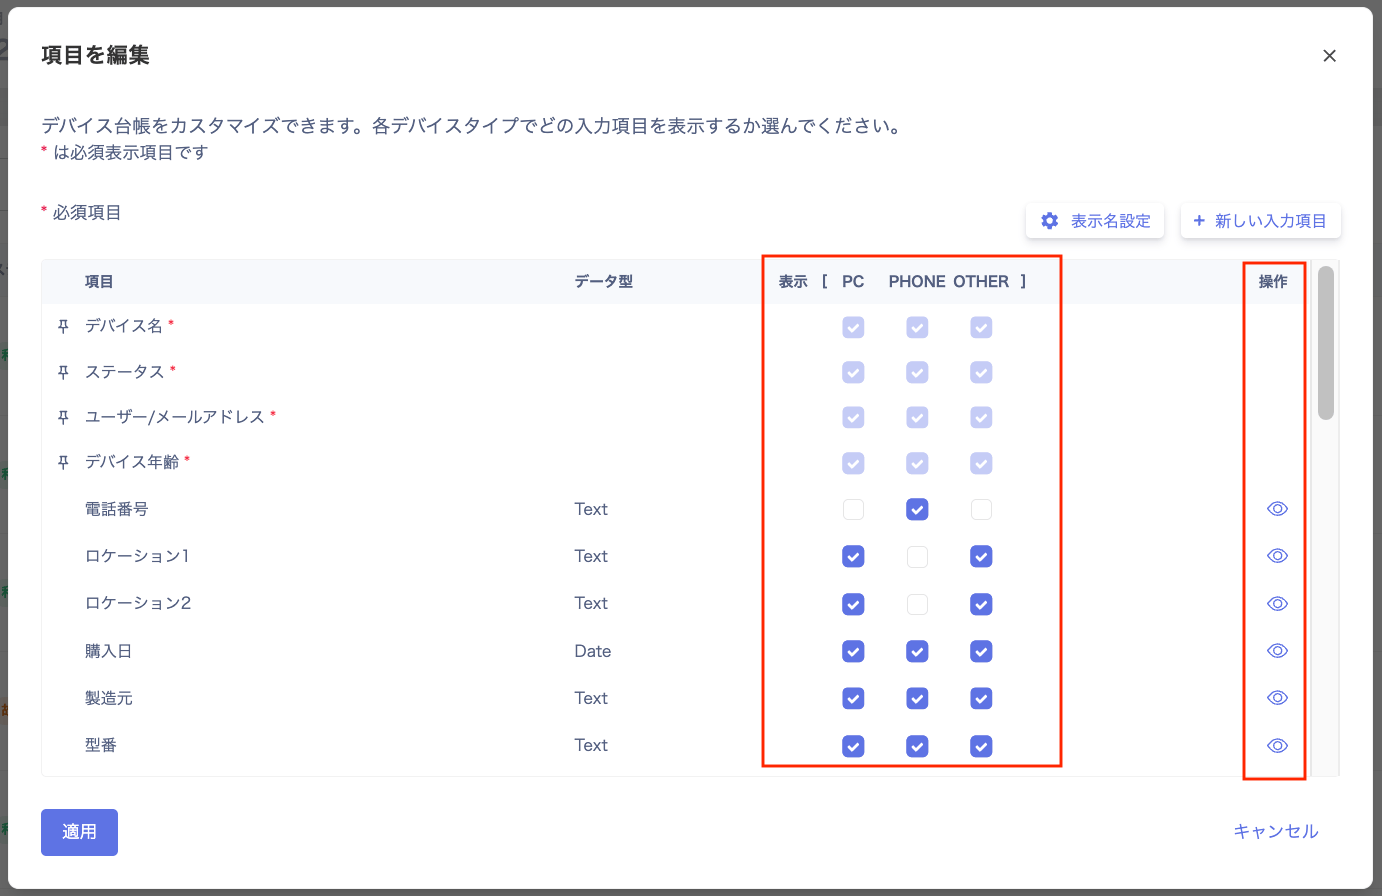
Change the device display name
Set any attribute to appear as the “Device name” in the device list. You can display easily identifiable information such as an asset number, hostname, or serial number as the “Device name.”-
Go to Device > Settings > “Edit fields” and click Display name settings in the upper right.

-
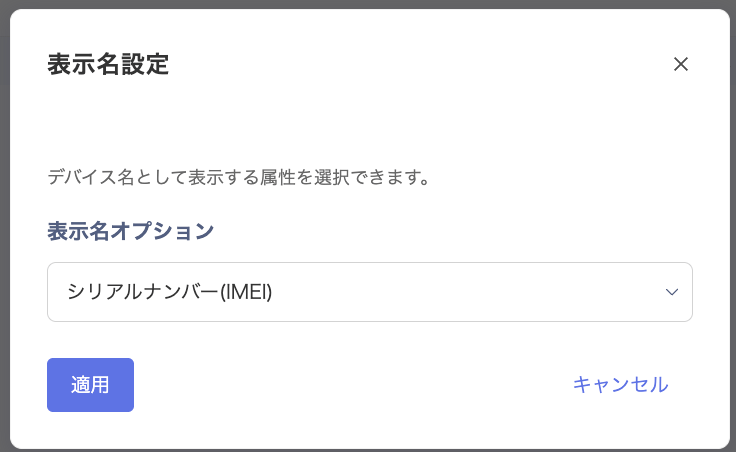
In the “Display name settings” dialog, select the attribute to display as the device name from the dropdown, then click Apply.
-
Click Apply on the “Edit fields” screen.
If you close the screen with Cancel (lower right) or × (upper right), the settings will not be applied.
-
The settings are applied. The selected attribute now appears as the “Device name” in Device > Device list.
