This feature lets the system automatically assign the next available number when you register a device.
This eliminates duplicate numbers and input errors from manual management, reducing administrative overhead.
What is auto-numbering?
Asset numbers are issued in the format fixed string (prefix)-number (suffix). (Examples: LAPTOP-101, Monitor-1001)
The system internally tracks the last issued number for each configured fixed string (prefix).
Each time a new device is registered, the system automatically assigns that number plus one.
Choose an assignment method
You can choose between two assignment methods — Shared or By device type — depending on your workflow.
| Assignment method | Description | Example |
|---|
| Shared | Uses a common fixed string (suffix) and sequential number across the entire organization, regardless of device type. Recommended when you want simple sequential management. | Device-101, Device-102… |
| By device type | Uses a different fixed string (suffix) for each device type (Desktop PC / Laptop PC / Smart Phone, etc.). Recommended when you want to identify the type of asset from the number alone. | DESKTOP-PC-101, DESKTOP-PC-102… |
Branching based on OS type (Windows/Mac, etc.) and automatic date insertion are not currently supported. A hyphen (-) is inserted between the fixed string and the number to improve readability.
-
Go to Devices and click Asset Number Prefix Settings.

-
On the “Asset Number Policy Settings” screen, configure the numbering rule for your organization.
Click Apply to save the settings.
-
Setting the assignment method: Shared
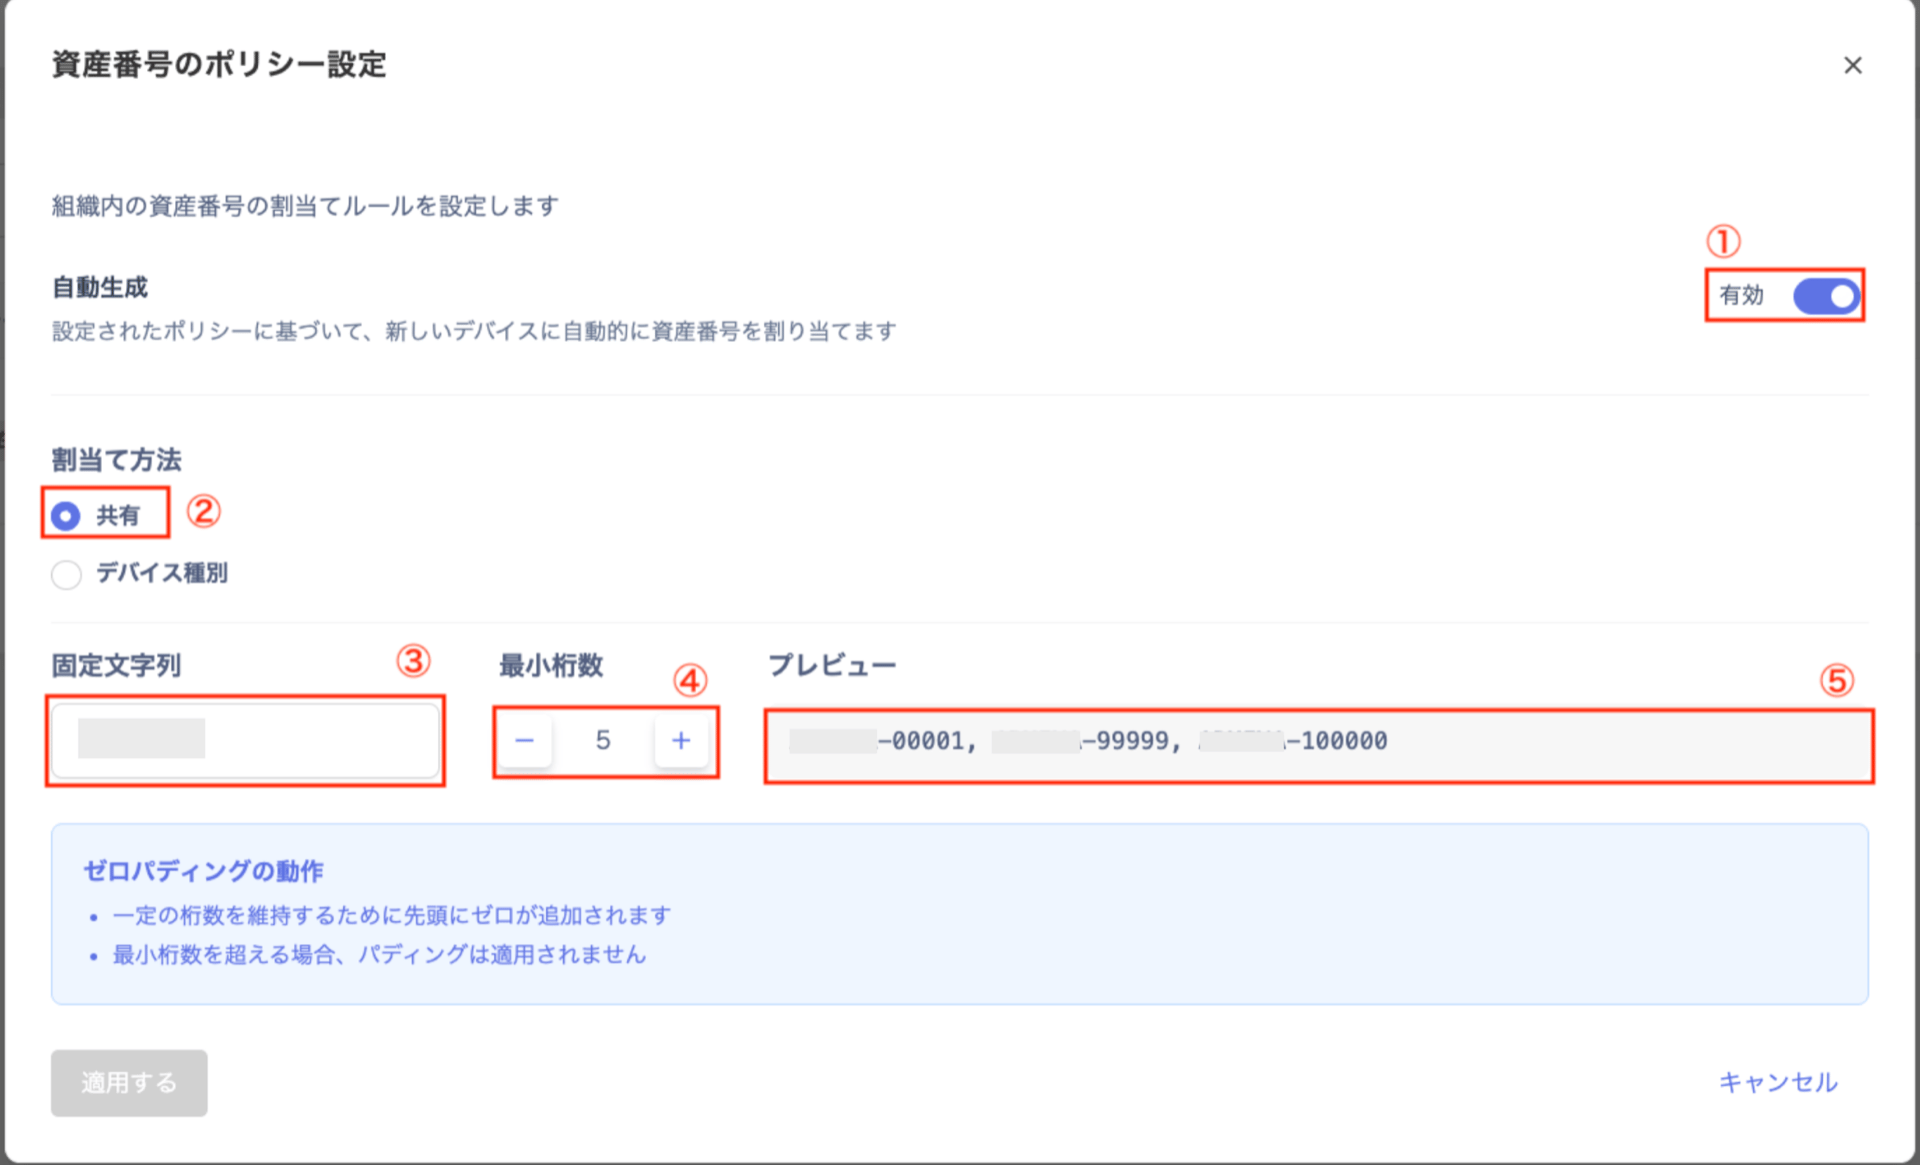
| # | Field | Description |
|---|
| 1 | Auto-generate | Automatically assigns asset numbers to new devices based on the configured policy. Toggle to the right to enable, left to disable. |
| 2 | Assignment method | Select Shared. |
| 3 | Fixed string | Enter the string to prepend to each number. (Example: Device) |
| 4 | Minimum digits | Specify the number of digits for the numeric portion. (Example: setting 5 produces 00001.) If the number has fewer digits than specified, the system automatically pads it with zeros. |
| 5 | Preview | Check a sample to see how numbers will be issued under the configured rule. |
-
Setting the assignment method: By device type
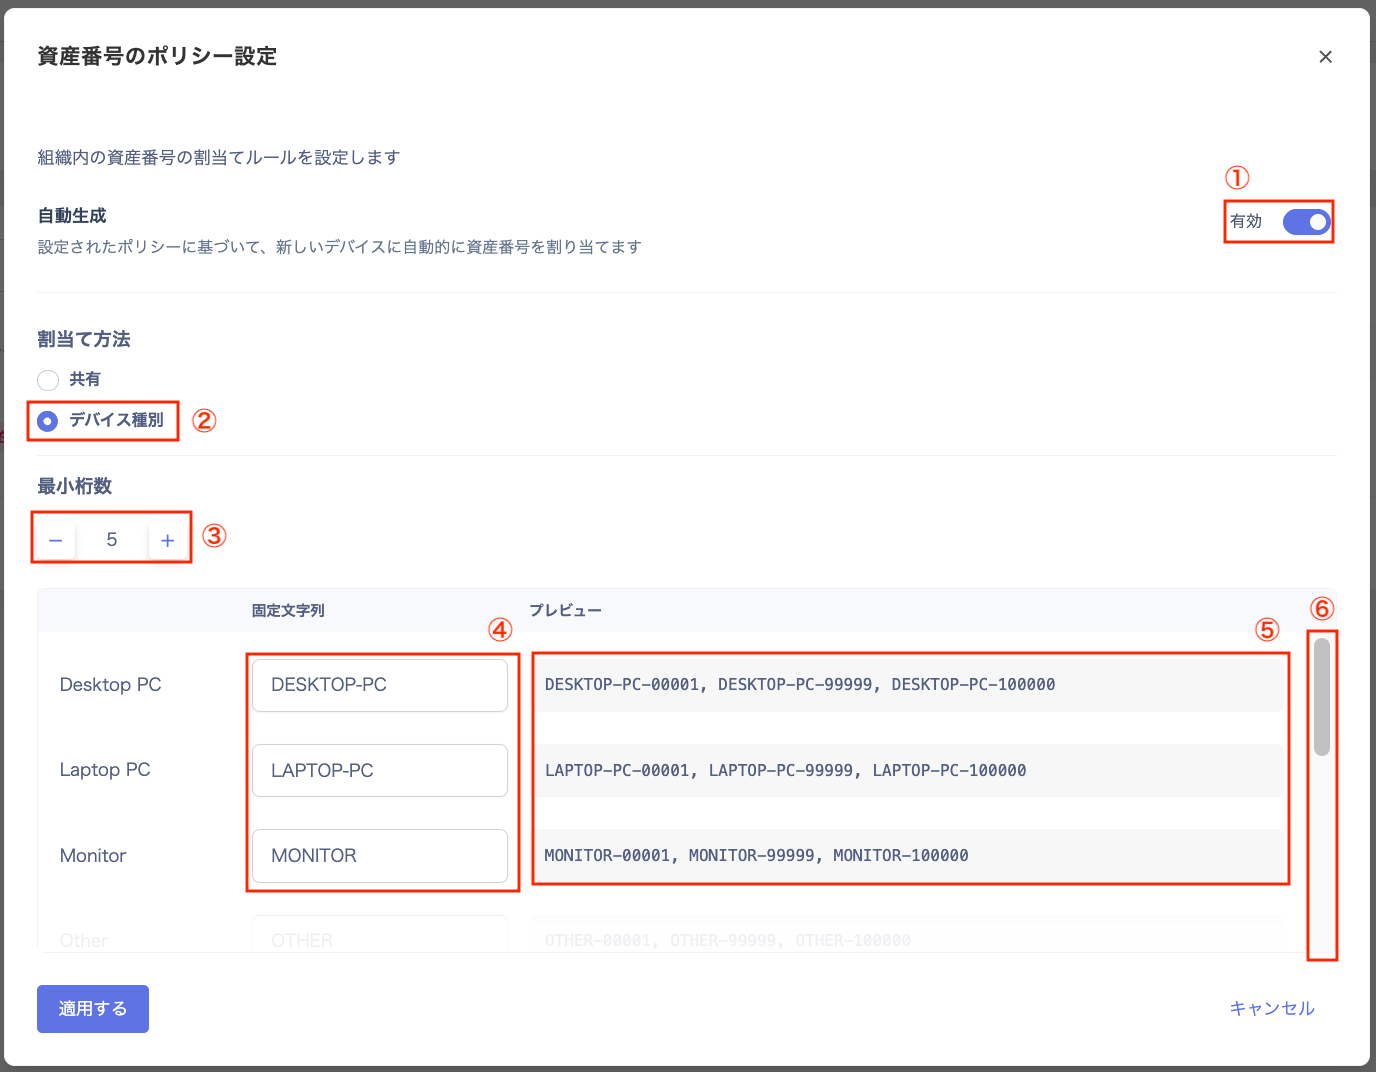
| # | Field | Description |
|---|
| 1 | Auto-generate | Automatically assigns asset numbers to new devices based on the configured policy. Toggle to the right to enable, left to disable. |
| 2 | Assignment method | Select By device type. |
| 3 | Fixed string | Enter the identifier to prepend to numbers for each device type. You can change the default value (e.g., DESKTOP-PC). |
| 4 | Minimum digits | Specify the number of digits for the numeric portion. (Example: setting 5 produces 00001.) If the number has fewer digits than specified, the system automatically pads it with zeros. |
| 5 | Preview | Check a sample to see how numbers will be issued under the configured rule. |
| 6 | Scroll bar | Use the scroll bar to view and edit all fixed string values. |
Check auto-assigned asset numbers
Check on the device registration screen
2-0. Using the Device Feature
-
Go to Devices and click New Device.

-
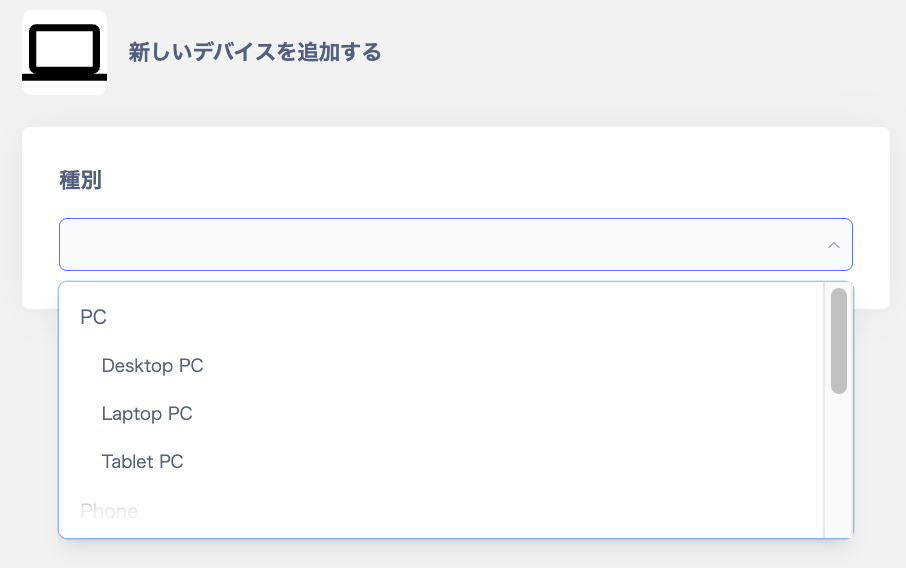
On the “Add New Device” screen, select a device type.
Choose from PC, Phone, or Other.
PC options include Desktop PC, Laptop PC, and Tablet PC.
Phone means Smart Phone.
Other includes Monitor, Peripheral Device, and Server.
-
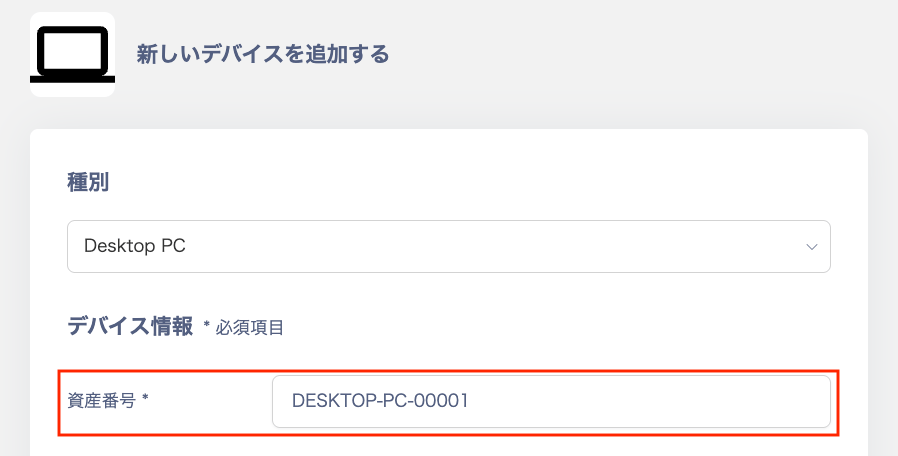
Verify the asset number. A number is automatically entered in the Asset Number field according to the configured policy. You can also change the auto-assigned asset number manually.
Once you apply the policy settings, auto-numbering becomes active on the Add New Device screen.
Example: Selecting Desktop PC as the type automatically sets DESKTOP-PC-00001.
Check in the device list
Select Asset Number in the filter on the Devices screen.
Enter a fixed string in the search field to find auto-assigned asset numbers.
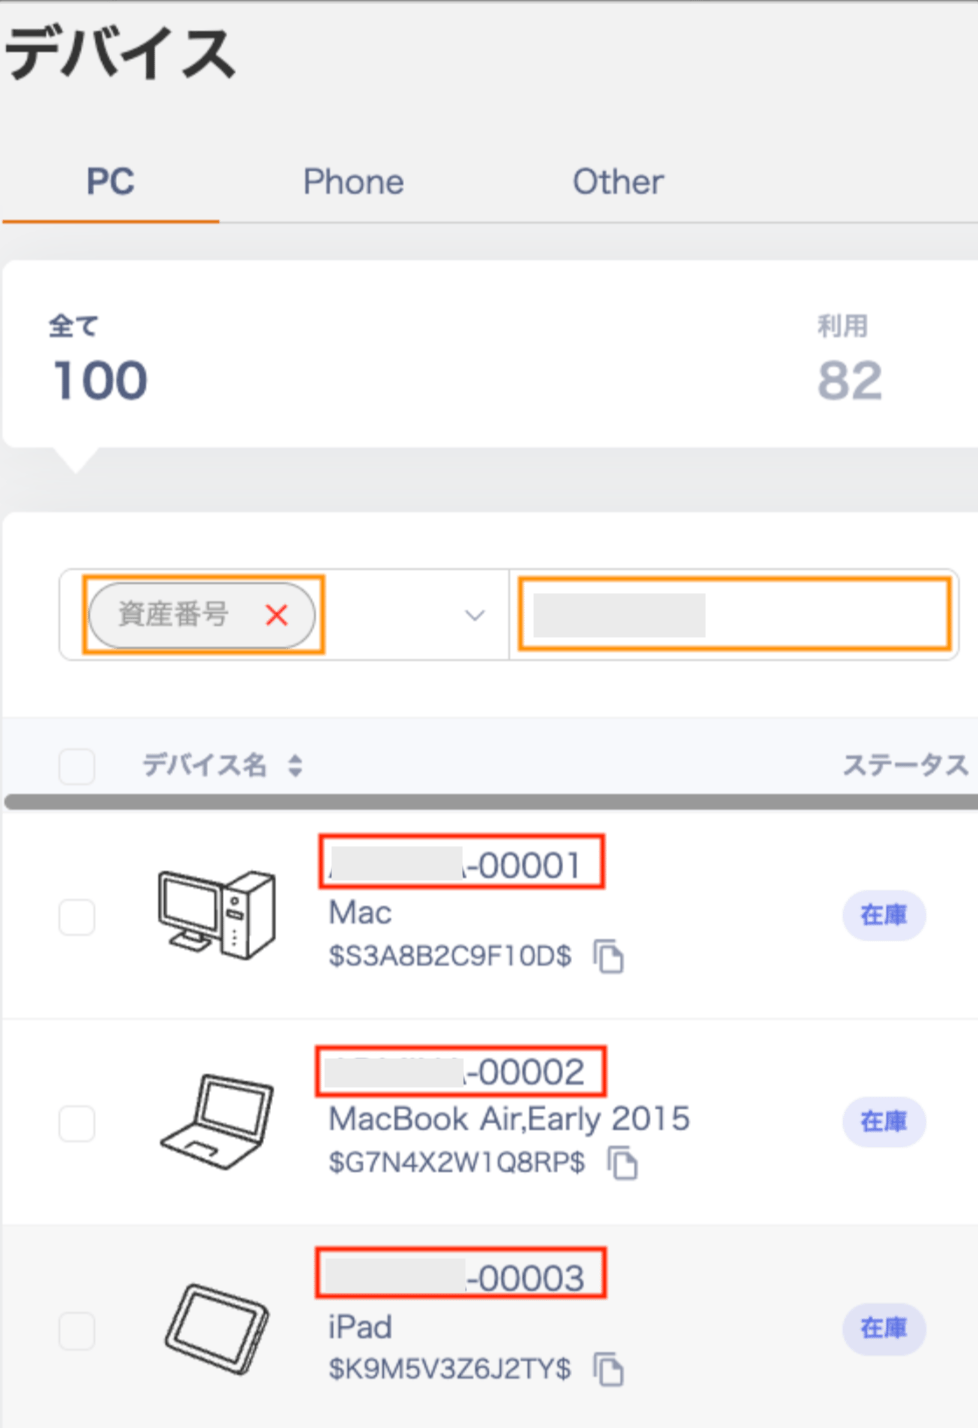
Auto-numbering by registration method
Devices can be registered via three methods: manual entry, MDM, or CSV import.
| Registration method | Description |
|---|
| Manual registration | The next available number is automatically assigned in the Asset Number field on the device registration screen during MDM sync. You can use the auto-assigned number as-is or change it manually. |
| MDM registration | When a new device is detected via MDM (Intune, Jamf, etc.), an asset number is automatically assigned based on the configured policy. This removes the need for administrators to enter numbers manually afterward. |
| Bulk registration via CSV import | The behavior when importing devices in bulk via a CSV file is as follows. If the asset number column is blank: the system automatically assigns sequential numbers based on the configured policy. If the asset number column has a value: the entered value takes priority. Numbers that conflict with the policy or contain duplicates may result in an error. |
FAQ
Q. What happens when a number exceeds the minimum digit count?
A. Zero-padding does not apply; the number simply increases in digit count.
Q. What happens if I change the minimum digit count midway?
A. The new digit count applies to devices registered after the change. Existing asset numbers are not automatically updated.
Q. Can I change the fixed string for each device type later?
A. Yes, you can change it.
Q. If I delete a device, does its number become a gap in the sequence?
A. Yes, it becomes a gap. As a rule, a number that has been issued once is not reused in subsequent registrations to avoid duplication.
Q. If I delete a device, is its gap number reused?
A. No, it is not reused. The system remembers the maximum number last issued.
Even if a device with a number in the middle is deleted, a new (higher) number is always issued.
This reliably prevents duplicate numbers.
Q. Are existing devices’ asset numbers updated in bulk?
A. No. Existing asset numbers are not changed. This feature only applies to newly registered devices. 
