

Configuring SAML via Okta Integration Network
The service now supports SAML configuration through the Okta Integration Network (OIN). You can add the application to Okta without configuring individual values manually.- Go to the service page on OIN.
-
Click the [Add this integration] button.

- After logging into the admin console, click [Done] on the screen below.
-
Confirm that the service appears in your Applications list.

- Go to the [Sign On] tab and click the Edit button under Settings.
-
Scroll to Advanced Sign-on Settings and enter the
SAML entity IDandSAML reply URL.
SAML entity IDandSAML reply URLin the service under Settings > SAML/SCIM.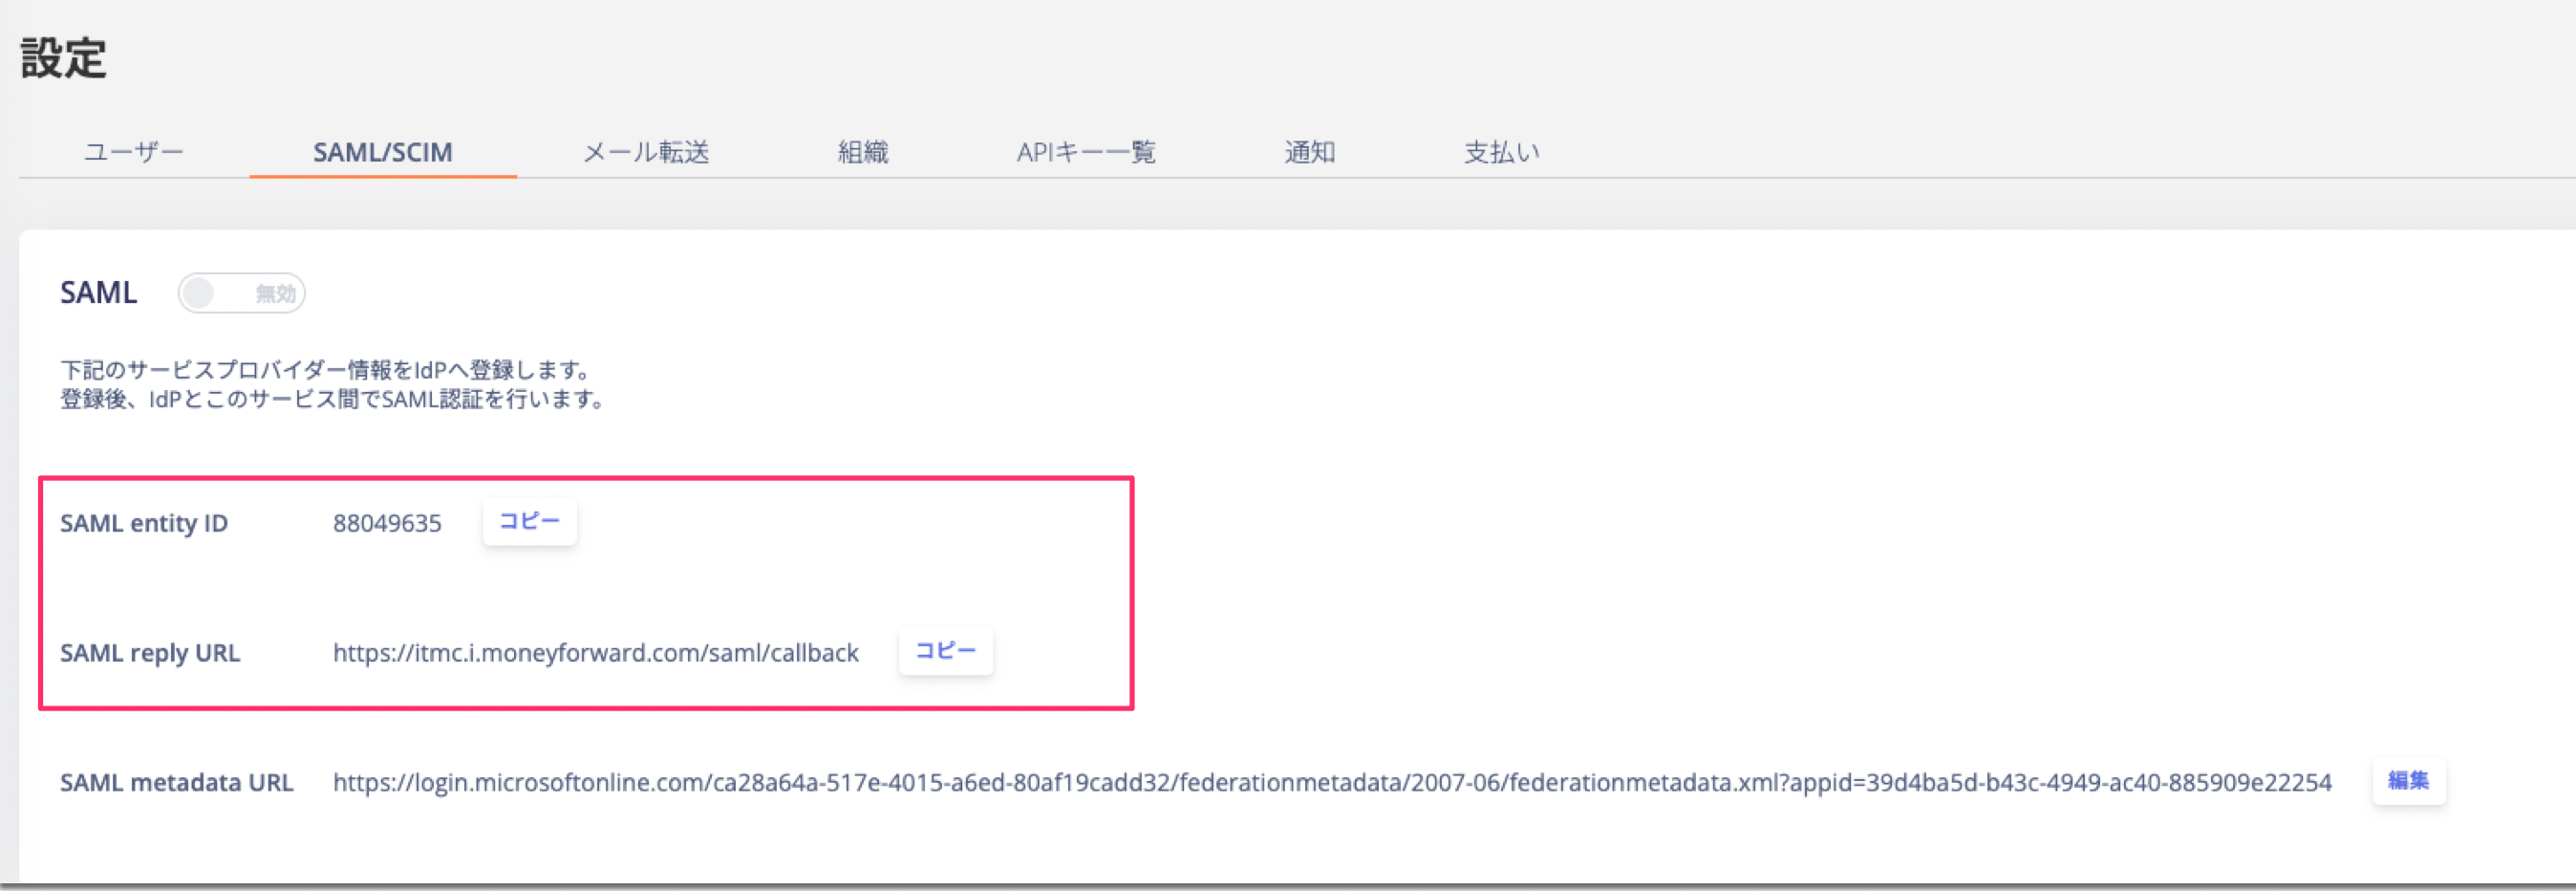
-
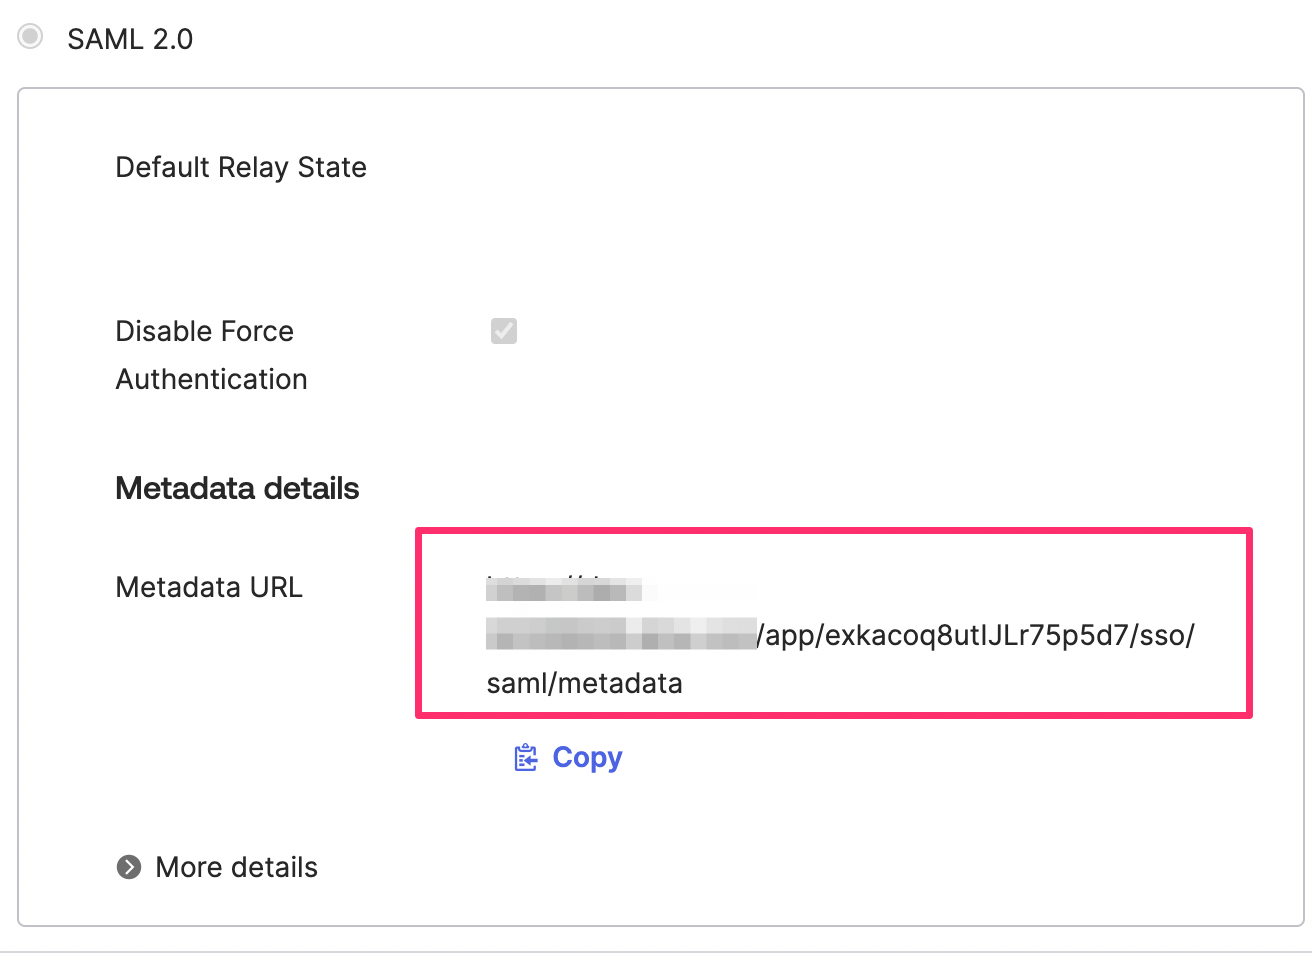
From the [Sign On] tab, copy the Metadata URL listed under SAML 2.0. Paste it into the
SAML metadata URLfield in the service under Settings > Security, then save.

Configuring SCIM via Okta Integration Network
Follow these steps to configure SCIM when using the Okta Integration Network (OIN). To configure SCIM with other services, see SCIM Setup.Supported features
- Create users: When a user is created in Okta, the service creates the user as well.
- Update user profiles: User information updated in Okta is reflected in the service.
- Deactivate (and reactivate) or delete users: Deactivation, reactivation, and deletion in Okta are reflected in the service.
Prerequisites
- To use SCIM provisioning via OIN, you must first add the service via OIN. This feature is not available with manually added applications.
Setup steps
Get the Tenant URL and Secret Token
Go to Settings > Security in the service to obtain the Tenant URL and Secret Token required for IdP configuration. If no Secret Token exists, click the generate button to create one. Only one SCIM secret token is available per organization. Generating a new token invalidates the previously generated token.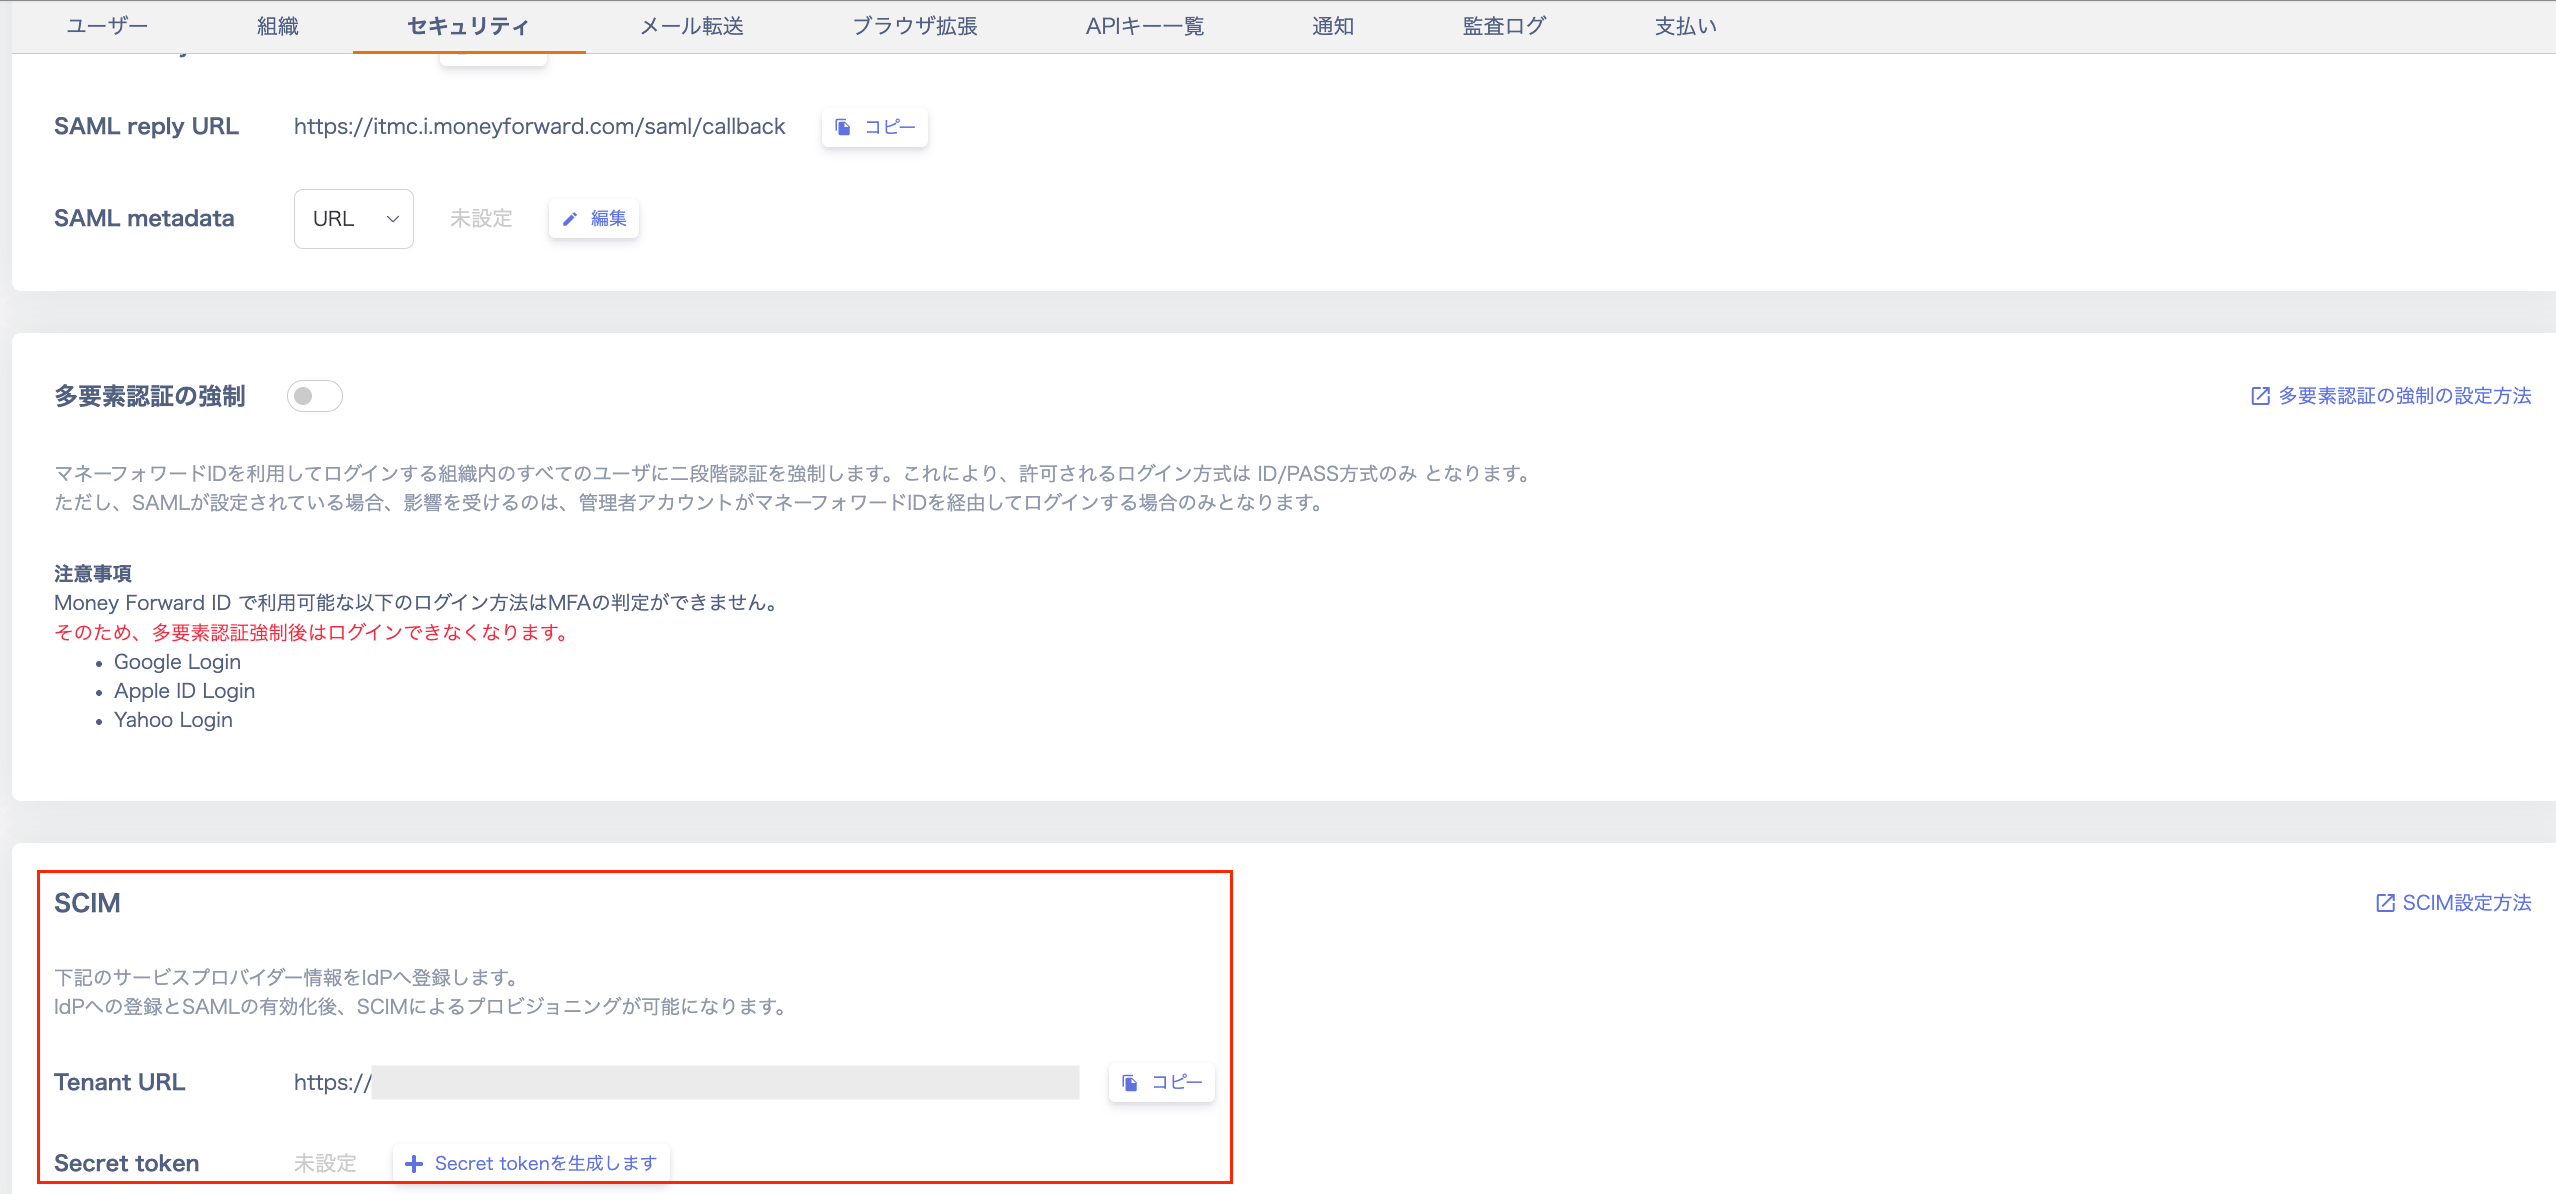
Configure settings in Okta
-
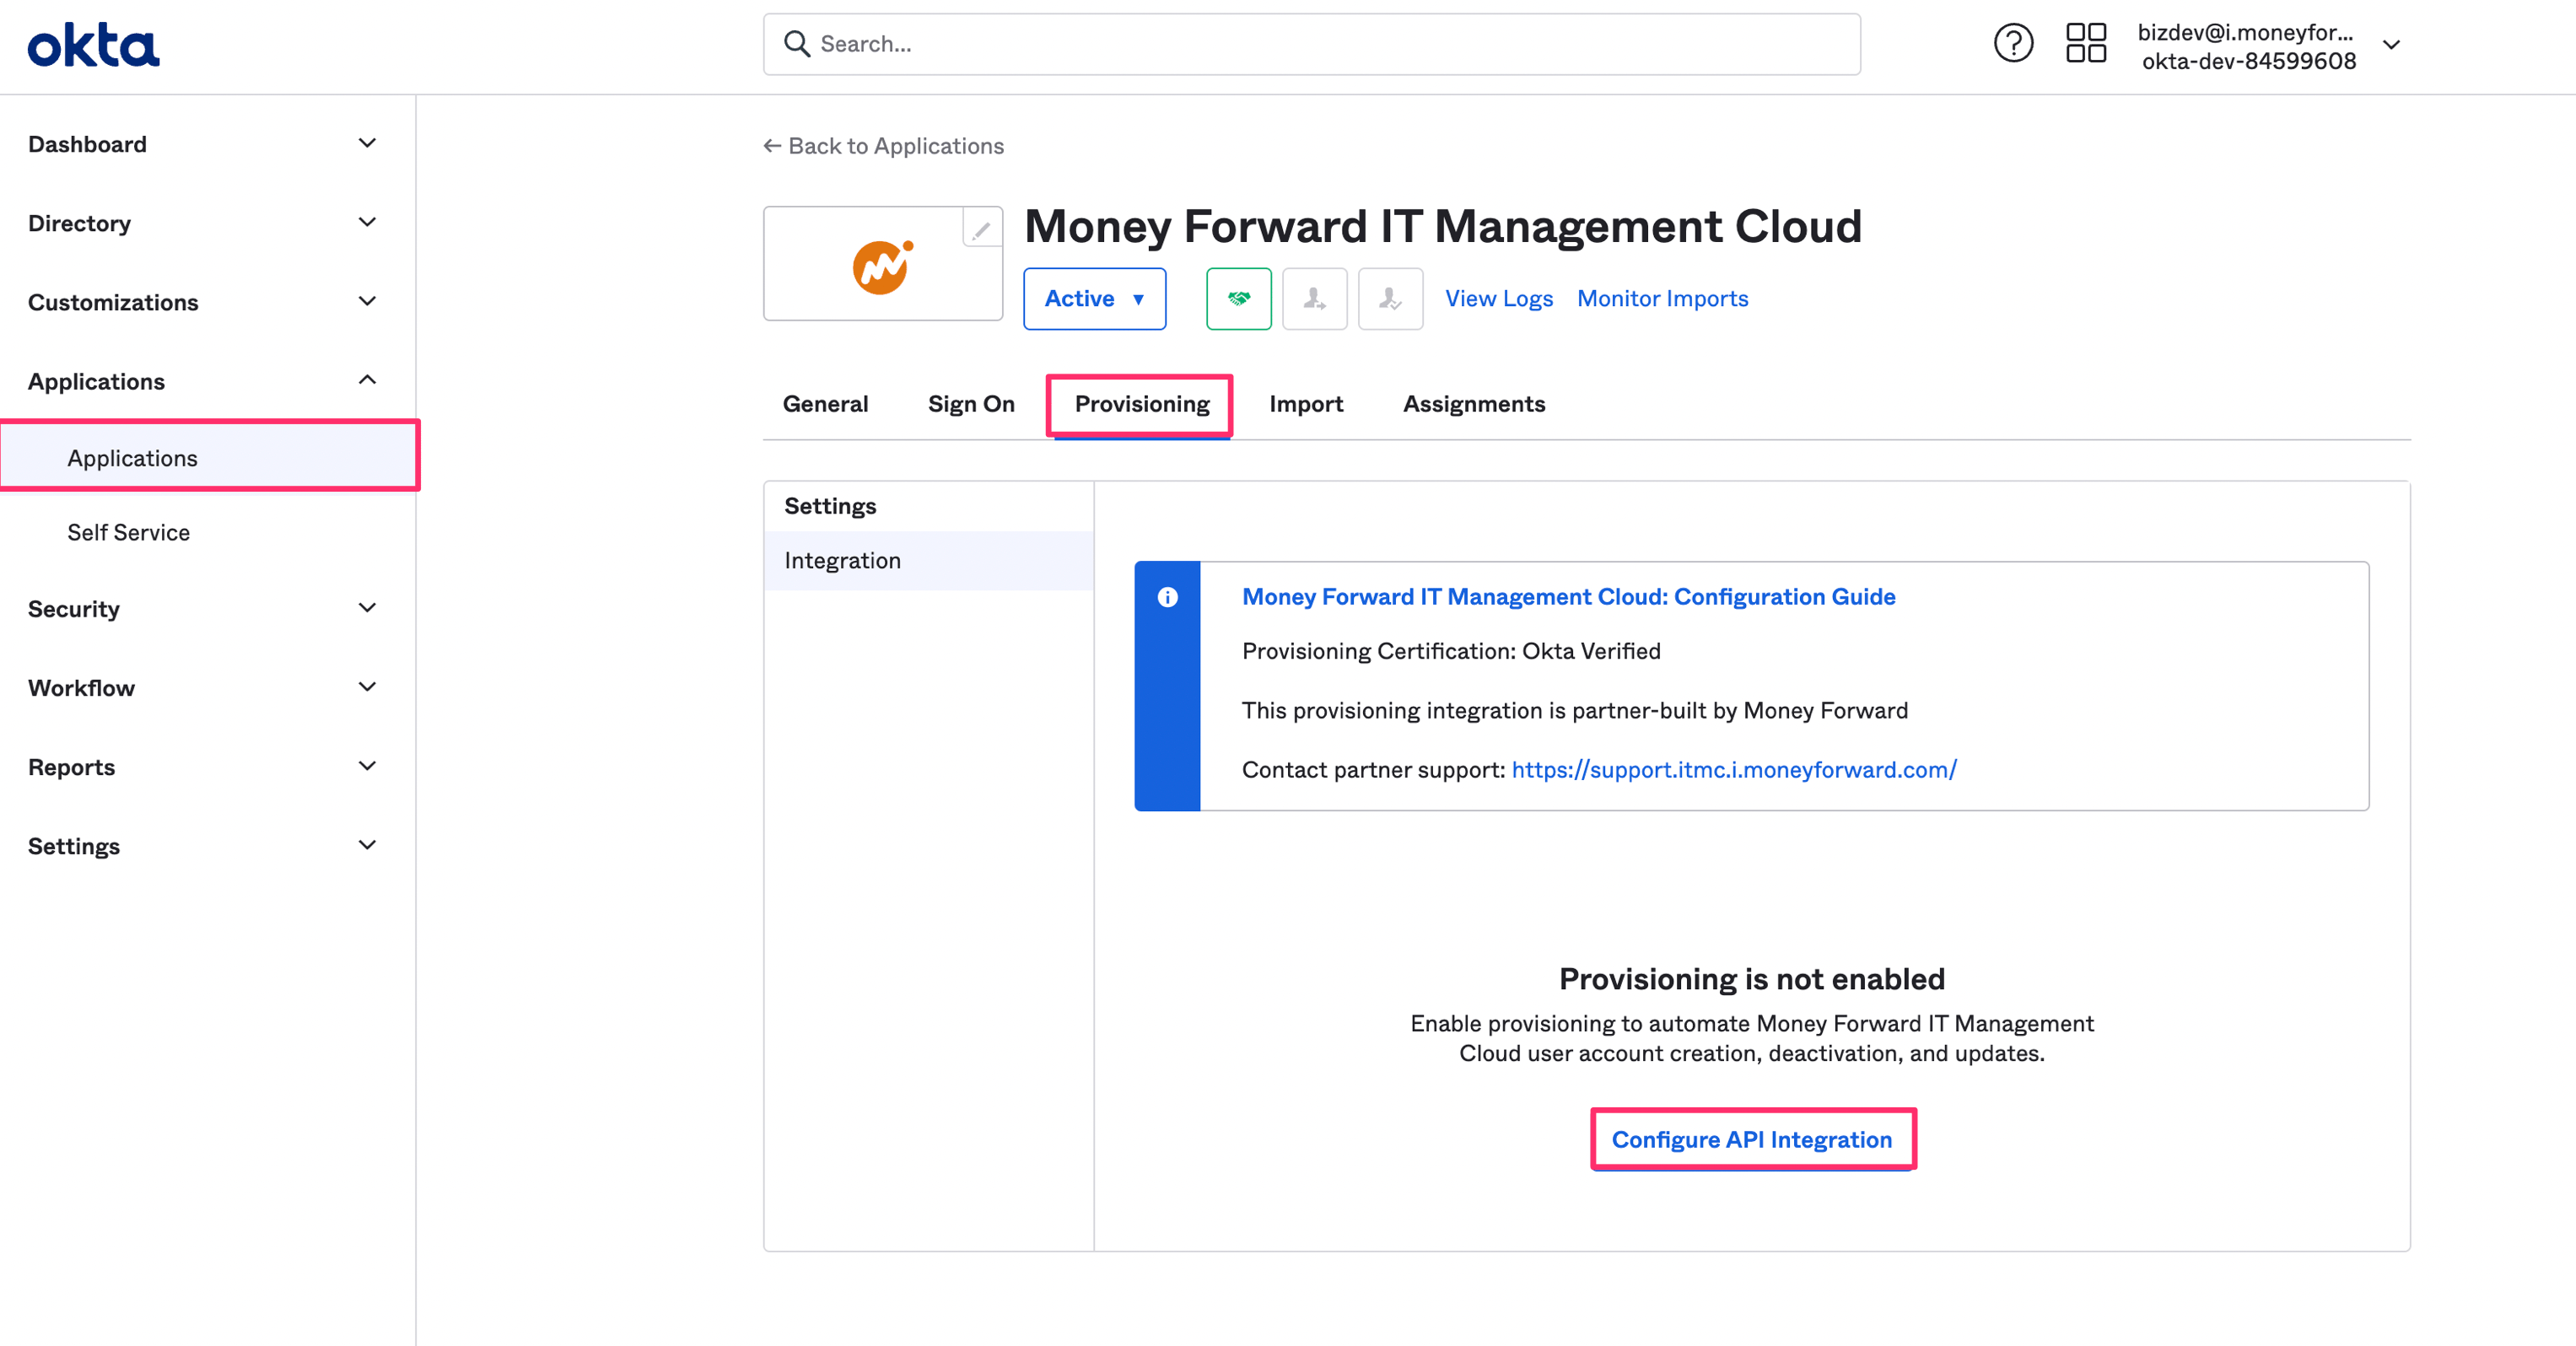
From Applications, select the application you added via OIN, then click the Provisioning tab.
Click Configure API Integration.
-
Check Enable API integration and enter the Base URL and API Token.
Base URL: Enter the Tenant URL you obtained.API Token: Enter the Secret Token you obtained.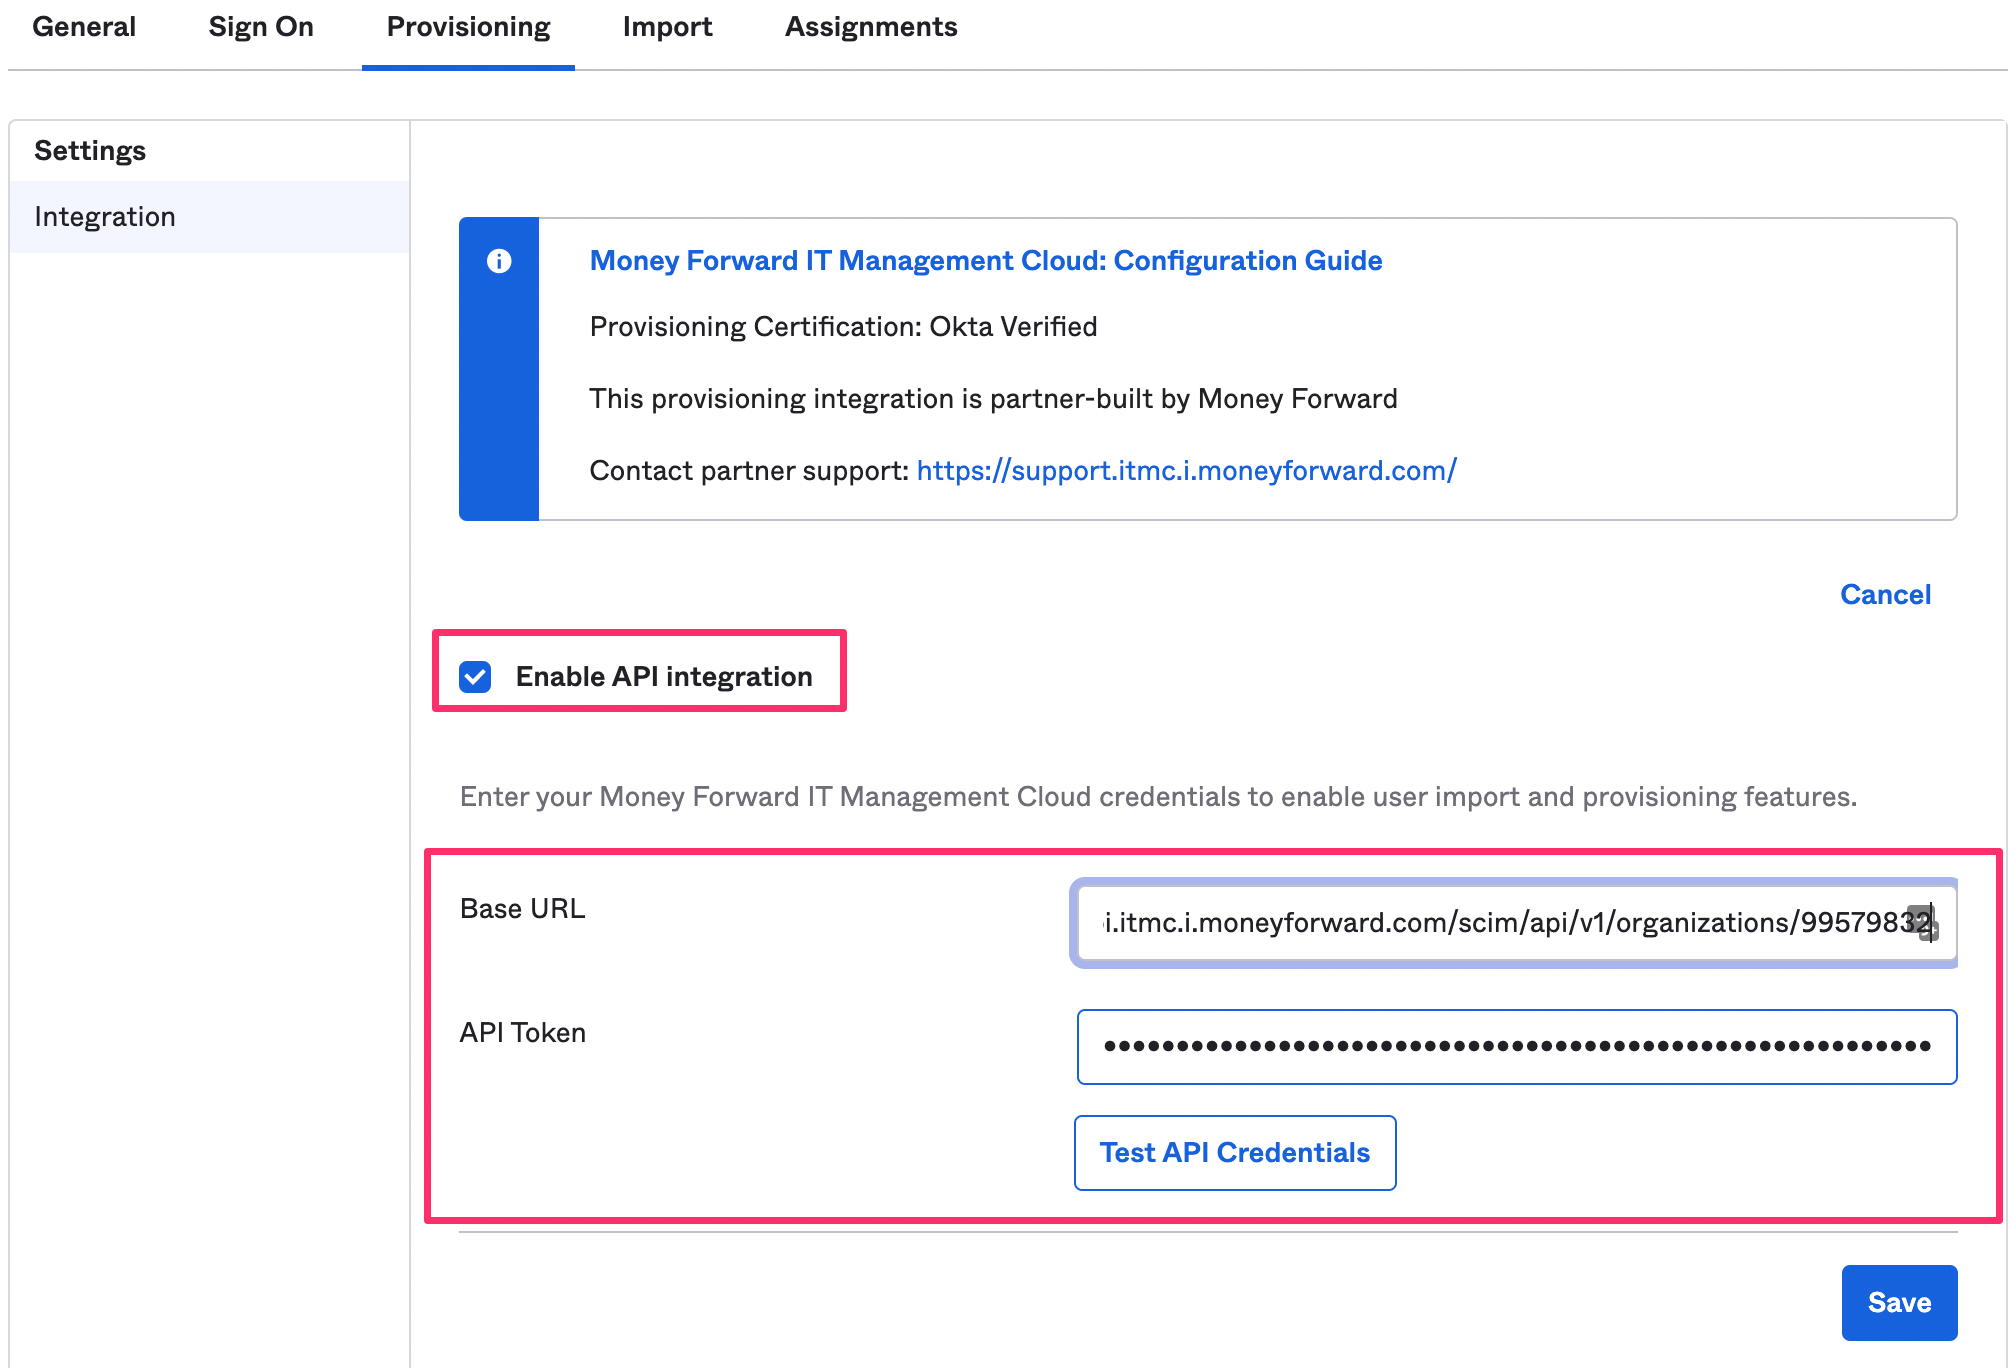
-
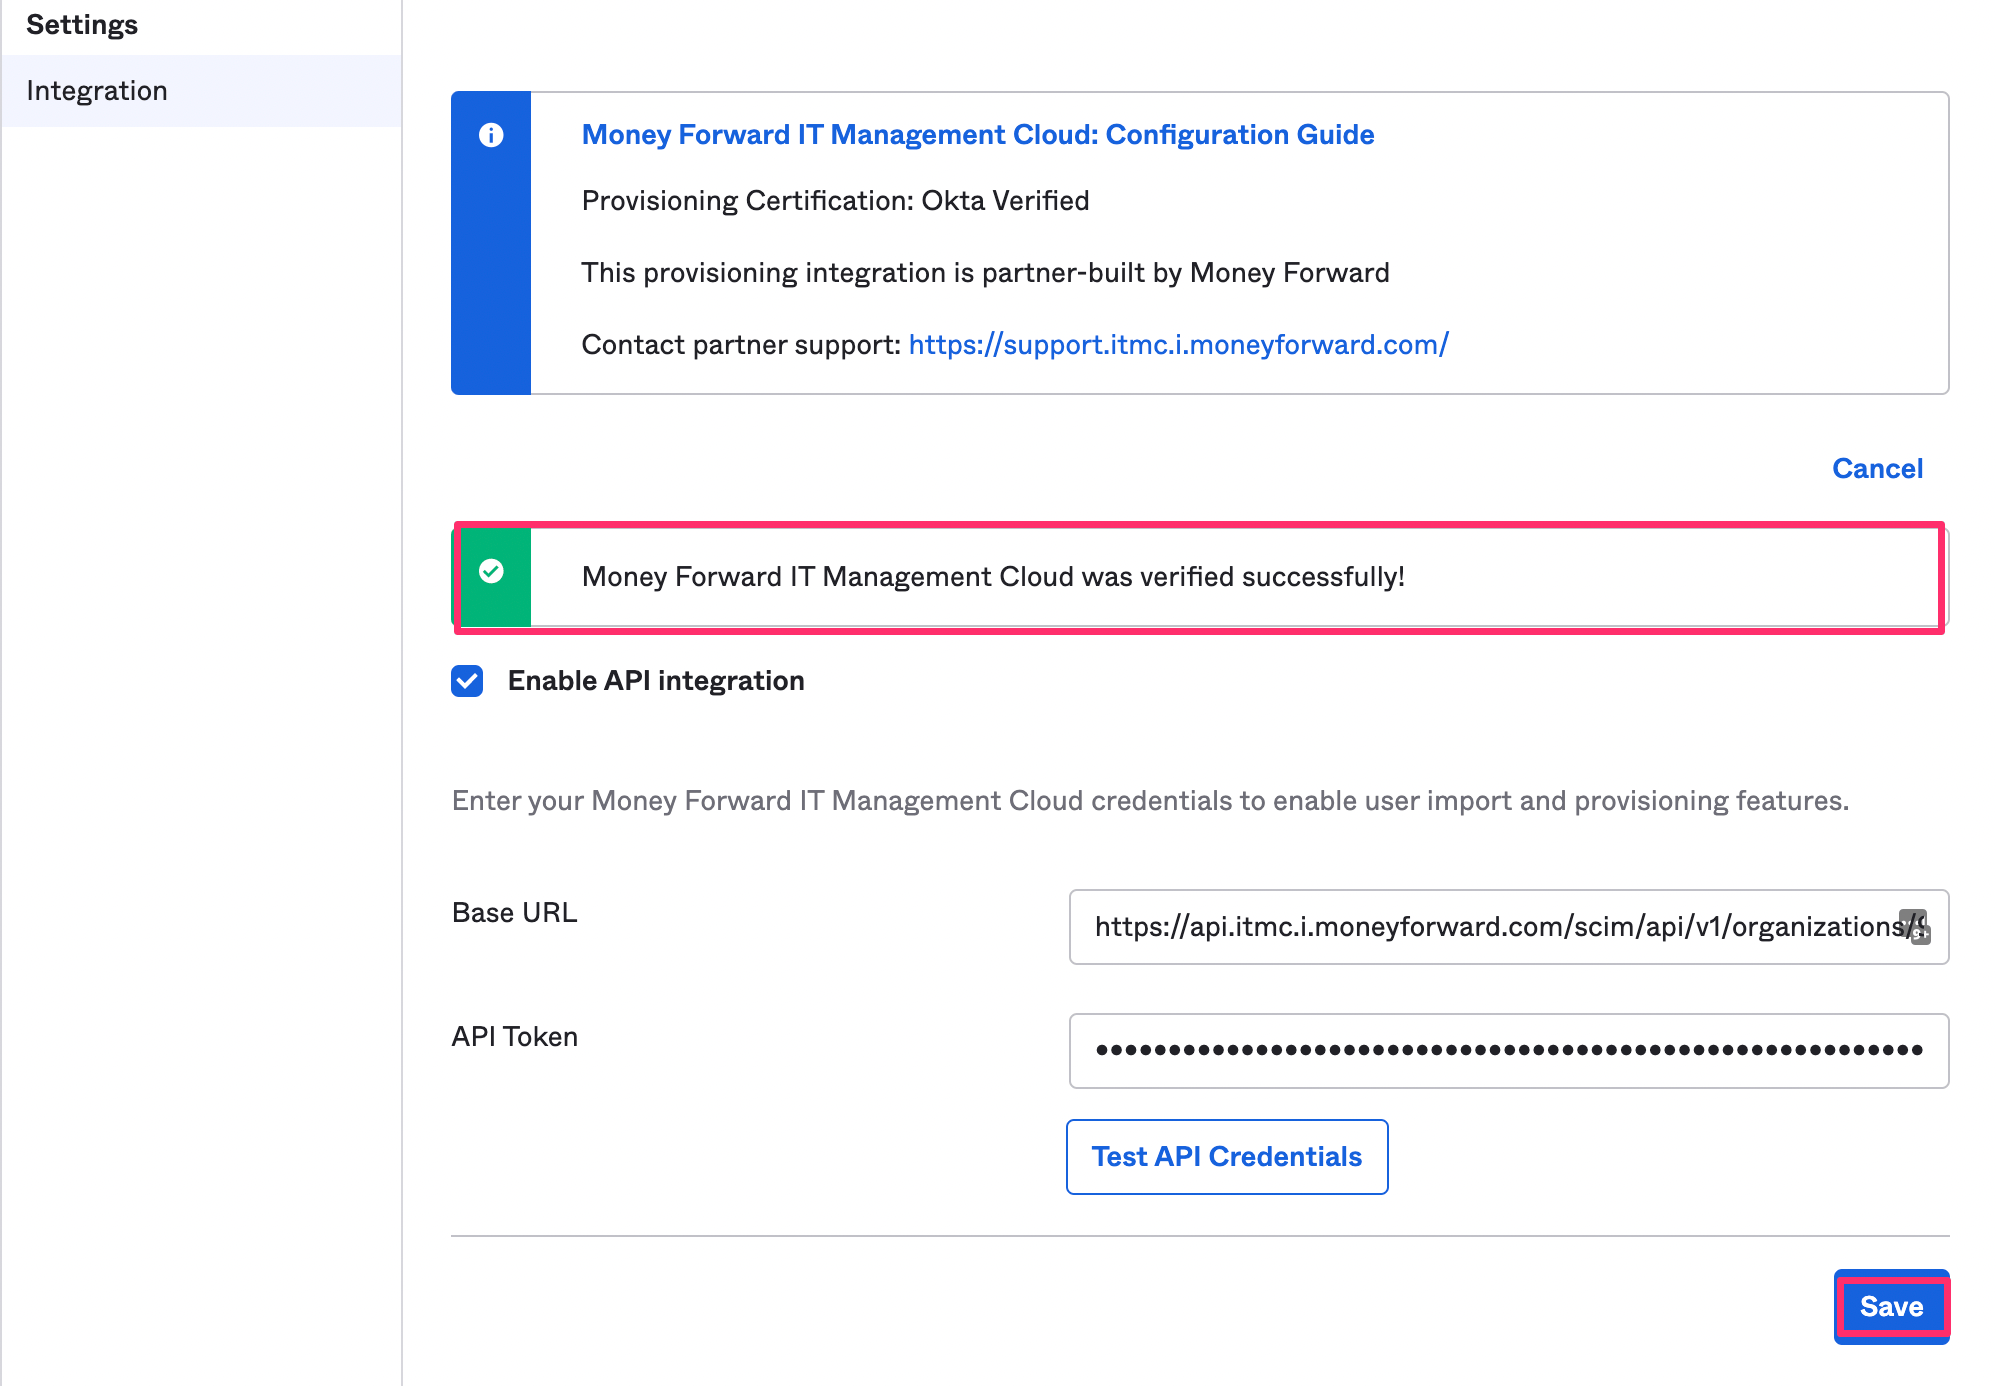
Click Test API Configuration and confirm that “the service was verified successfully!” appears. Then click Save.
-
Confirm the application was added. From the To App tab, click Edit, check Enable for
Create User,Update User Attributes, andDeactivate Users, then click Save.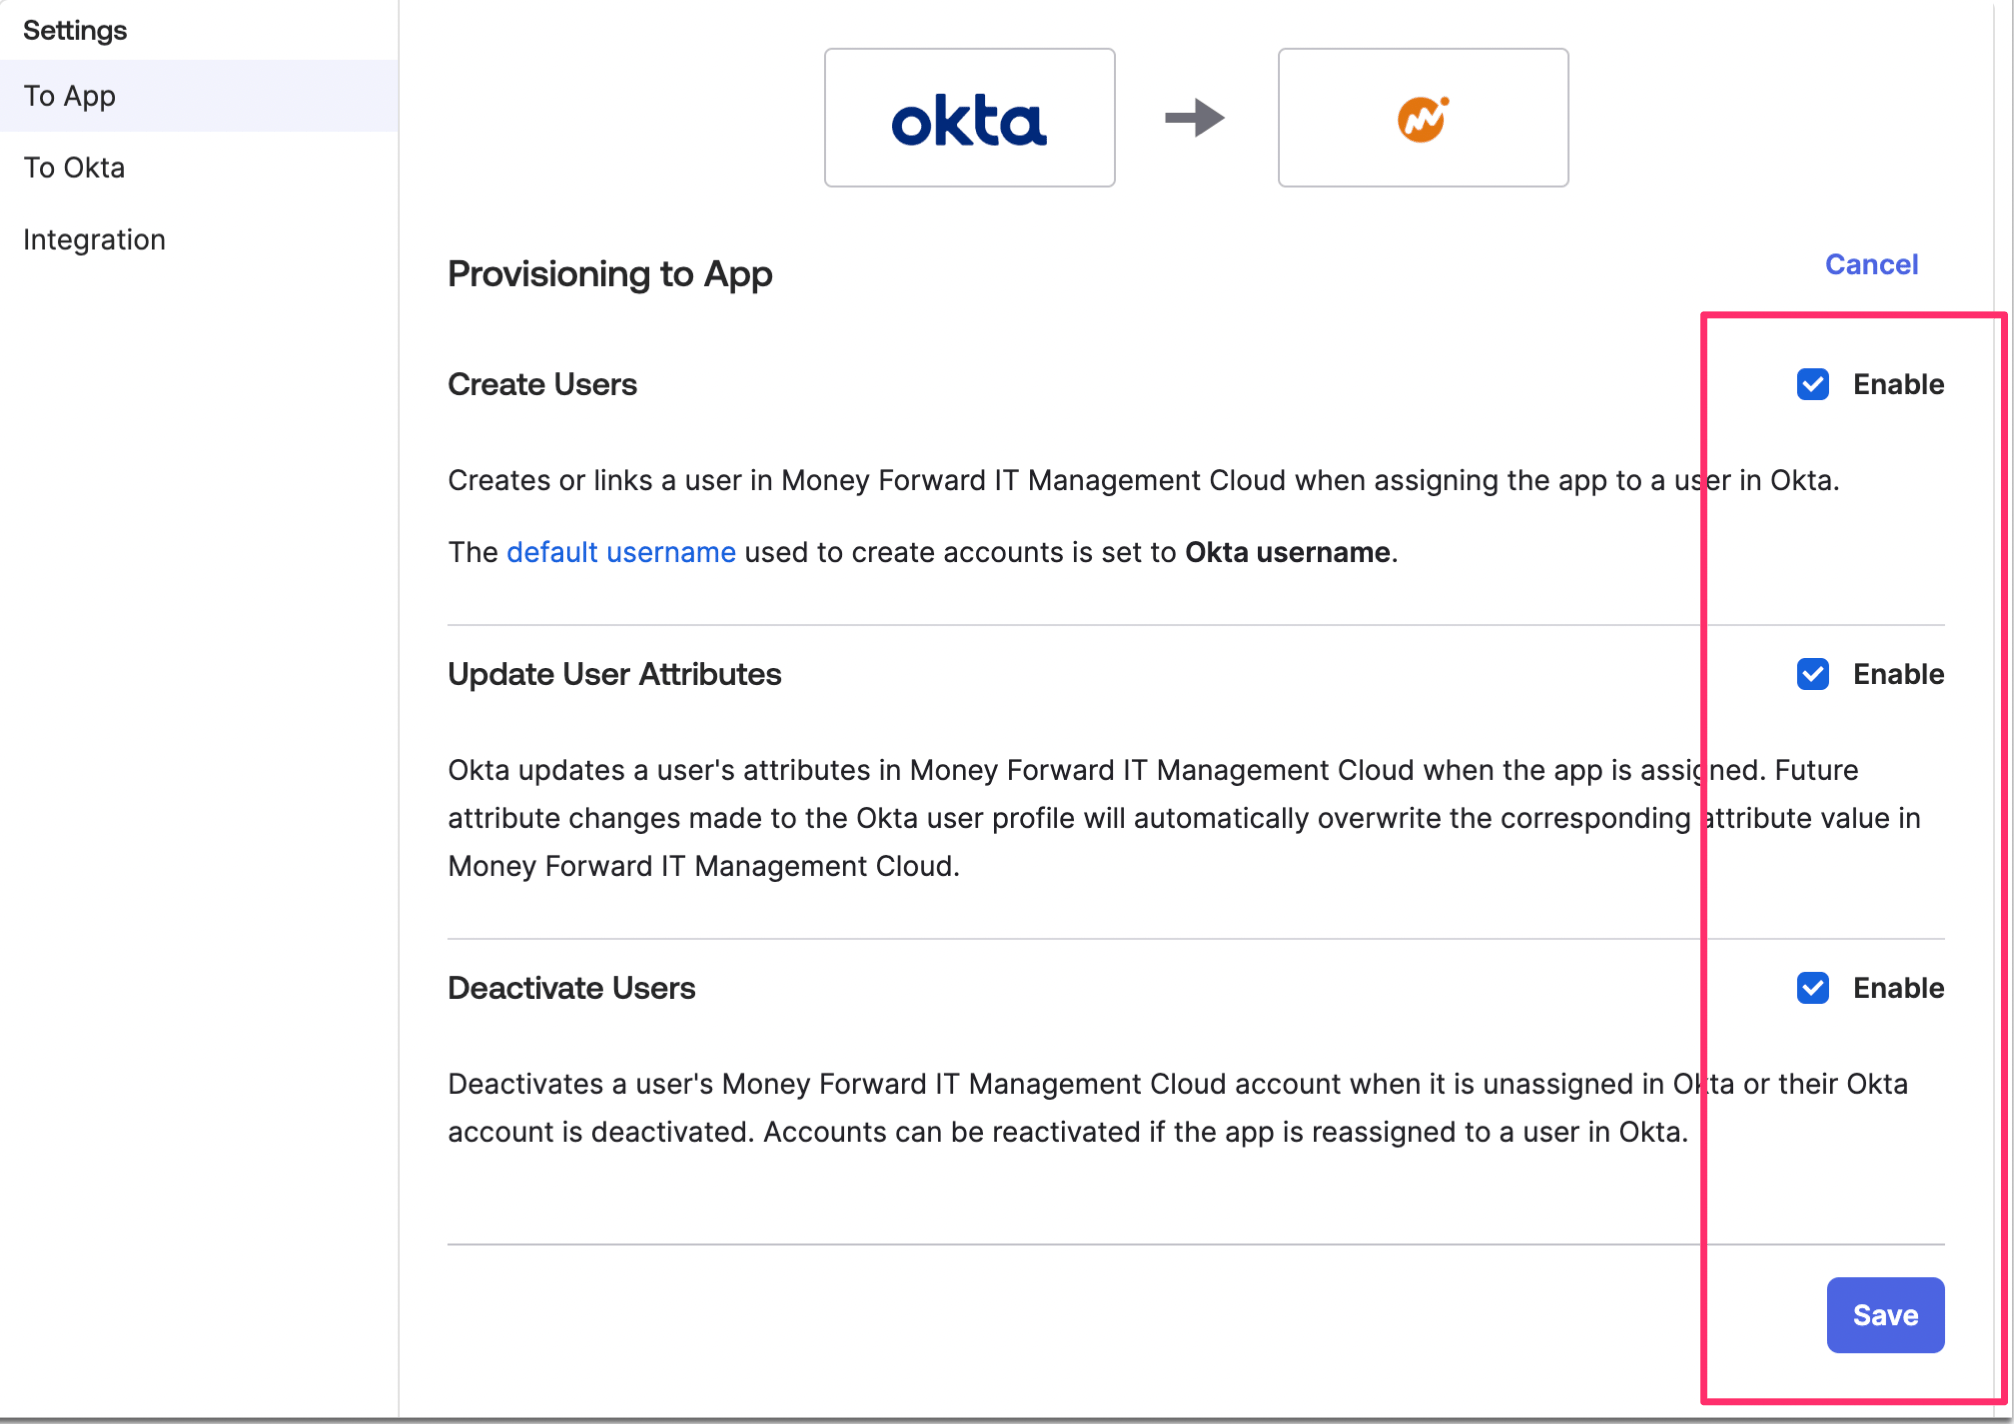
- Setup is complete. Users assigned to the application are automatically provisioned in the service.
Known issues and troubleshooting
- The service does not yet support provisioning from the app to Okta, so leave the “To Okta” settings at their default (disabled).
- If a user’s role in the service is Admin, SP-initiated access is not available. (This prevents login failures caused by misconfiguration.)