How to Use
Prerequisites
Complete the following steps to prepare before connecting Google Sheets.Prepare Google Sheets and Your Data
First, format your Google Sheets spreadsheet.| Header row (required) | Set headers in row 1 of the sheet. AI uses the headers for automatic column mapping. |
|---|---|
| Any format accepted | Use data exported directly from your SaaS as-is. AI identifies fields from the headers. |
| Email address (required) | Include a column for email addresses and fill in the email for each account. |
Share View/Edit Access
Add a dedicated service account as a shared member so the system can access your Google Sheets file.-
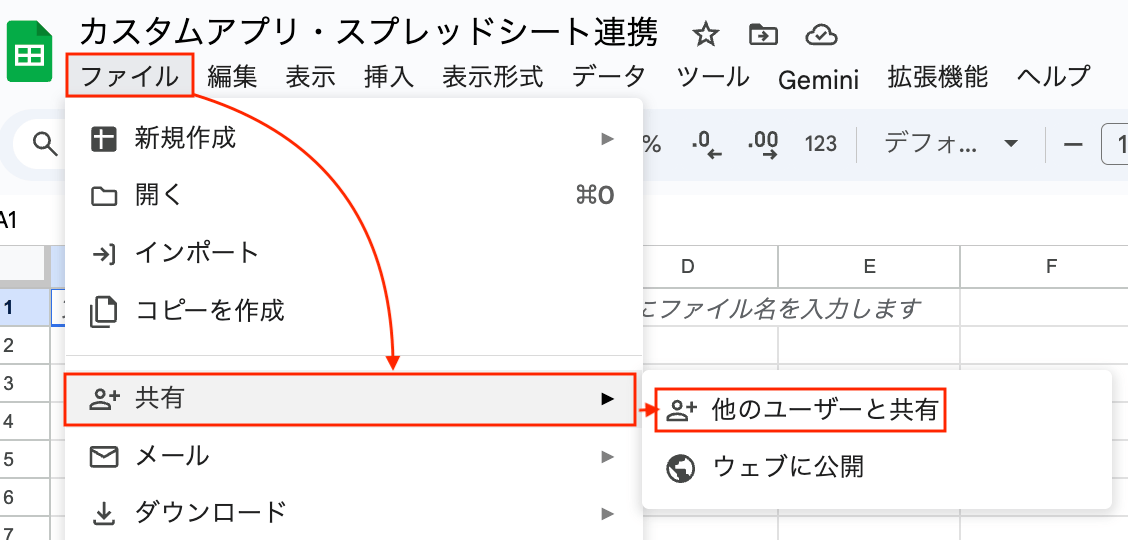
In Google Sheets, click File in the top-left corner, then Share > Share with others.
-
Paste
prod-sheets-reader@money-forward-itmc.iam.gserviceaccount.comin the Add people and groups field, then click Send.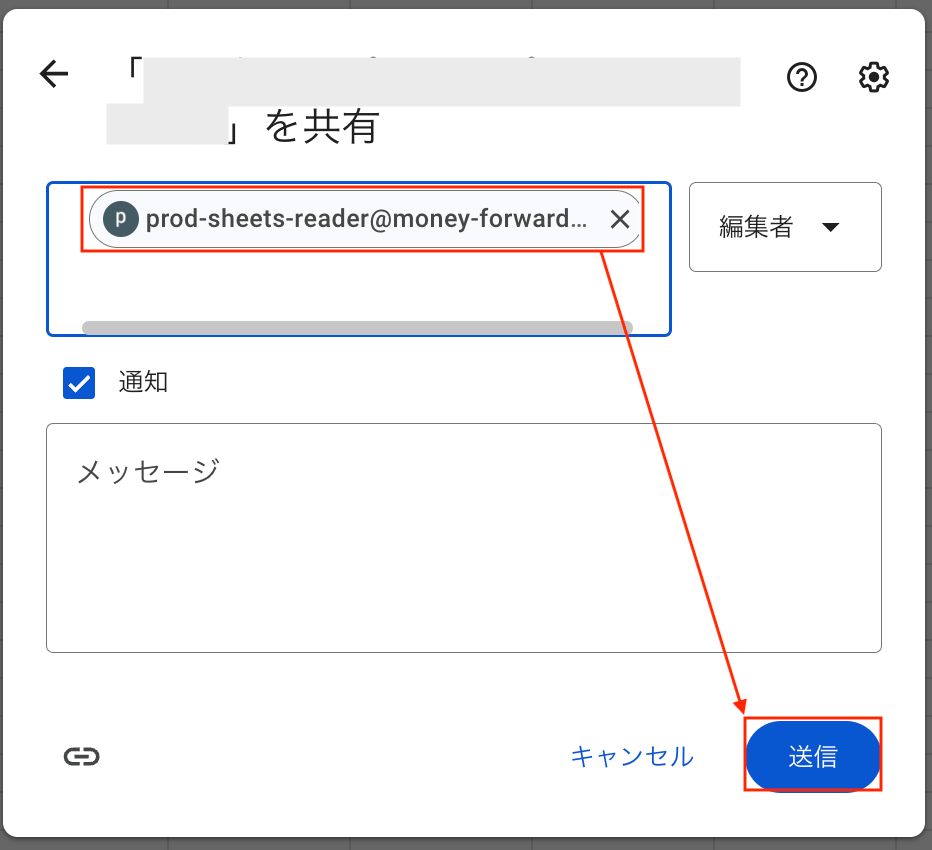
-
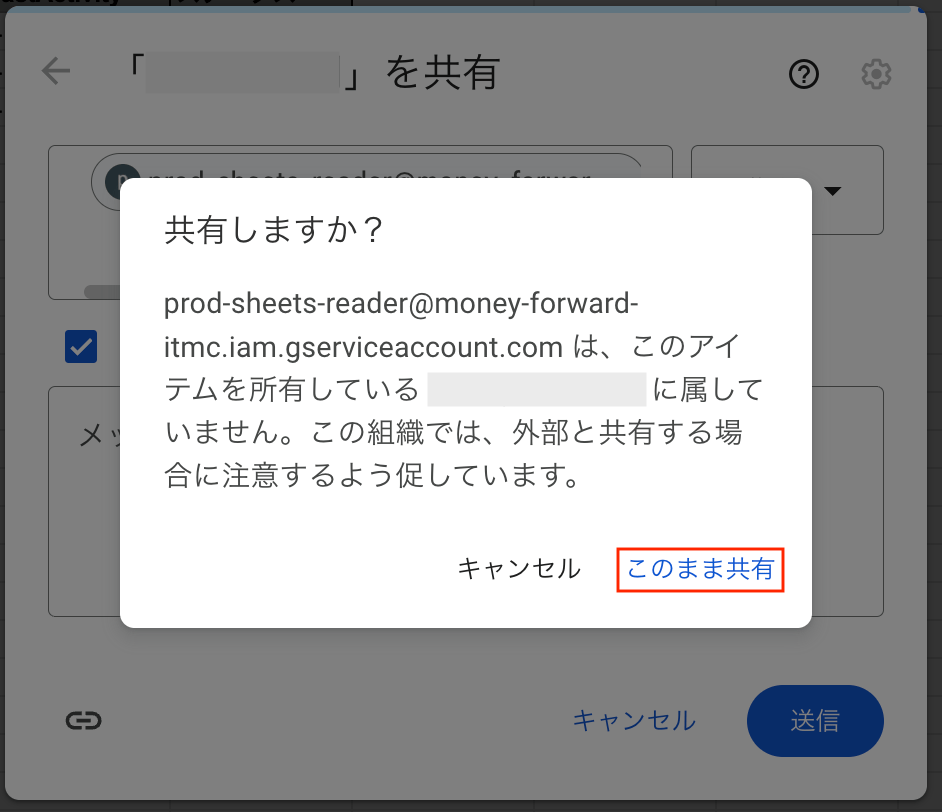
When prompted with “Share anyway?”, click Share anyway.
Create a New Custom App and Connect Google Sheets
-
Go to Integrations > Integrations and click Register and manage a service without integration.

-
On the “Register and manage a service without integration” screen, fill in the following fields and click Create.
Service search Search for and select a service, or enter any service name. Workspace name Enter any workspace name. Data source Select Google Sheets. 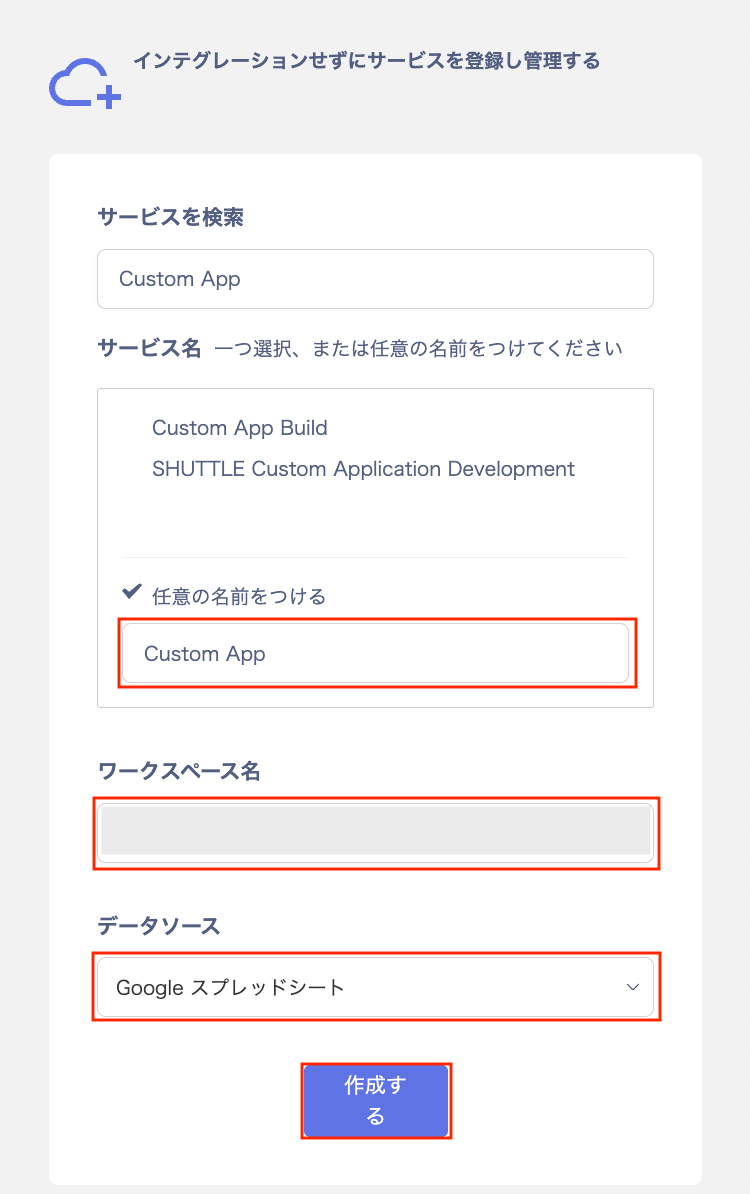
-
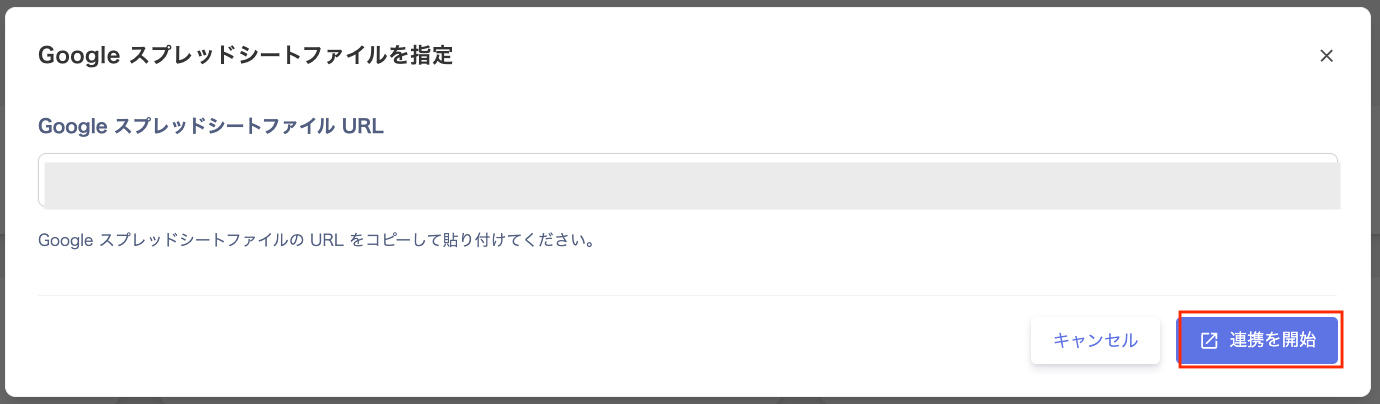
On the “Specify Google Sheets file” screen, enter the Google Sheets file URL and click Start integration.
Paste the URL of the Google Sheets file you prepared in the prerequisites.
-
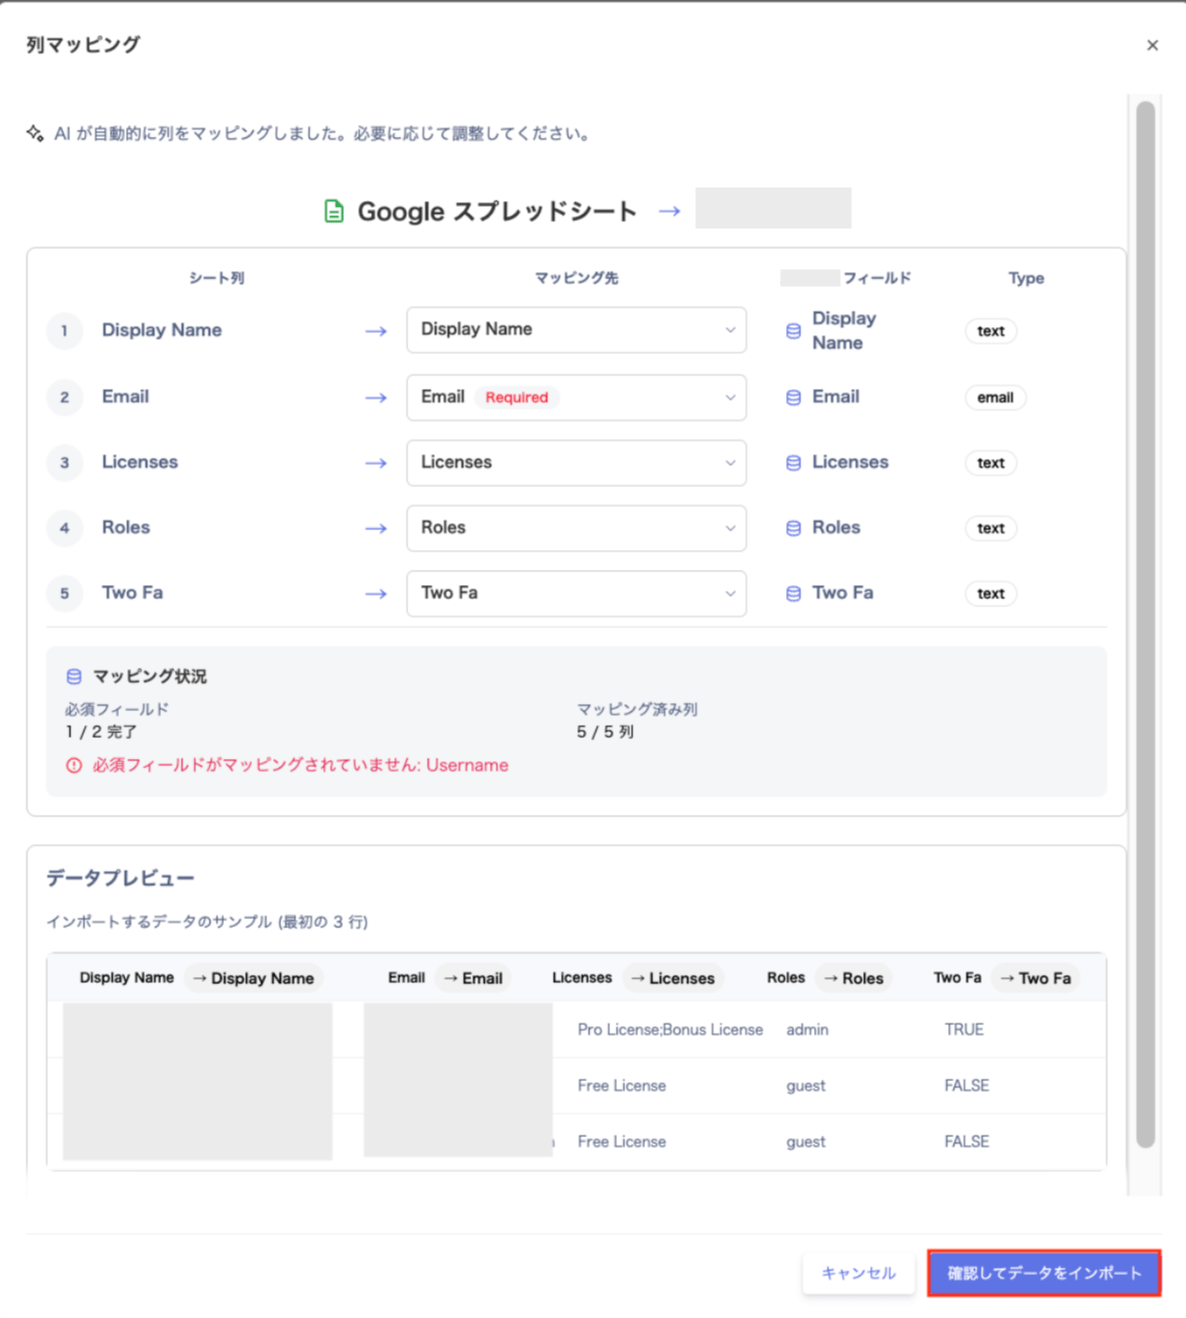
On the “Column mapping” screen, review the Mapping destination and Data preview, then click Confirm and import data.
On the “Column mapping” screen, AI automatically sets the mapping destinations. Change them as needed.Available mapping destinations include Saas User Id, Display Name, Roles, Licenses, and Username. Additional destinations are Email, Status, Two FaLast, Activity, and Do not map. Set columns you do not want to import as Do not map.
-
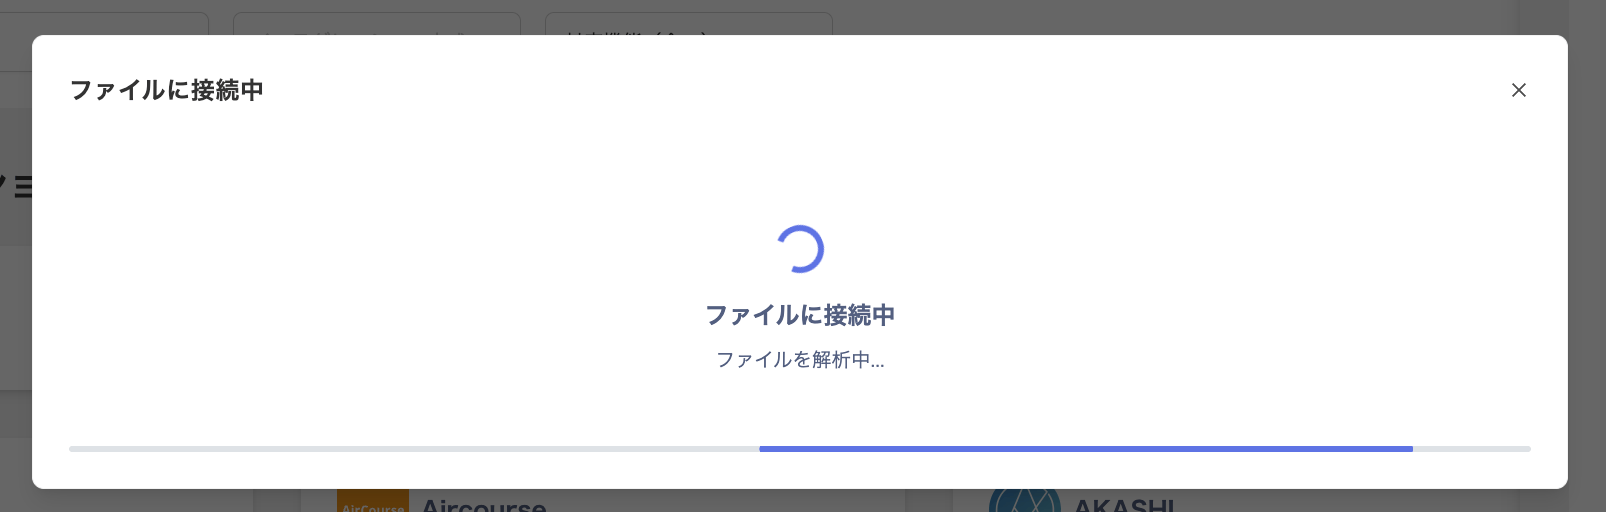
The “Connecting to file” screen appears.
-
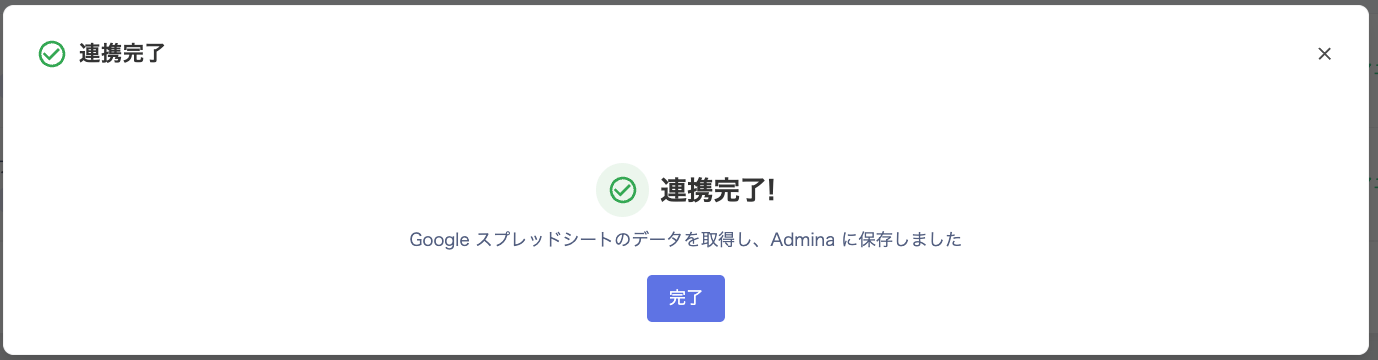
When the “Integration complete” screen appears, click Done.
You can verify the connected custom app on the Services screen.
Connect Google Sheets to an Existing Custom App
-
Go to Services > Custom App > Info and click + Create new integration.

-
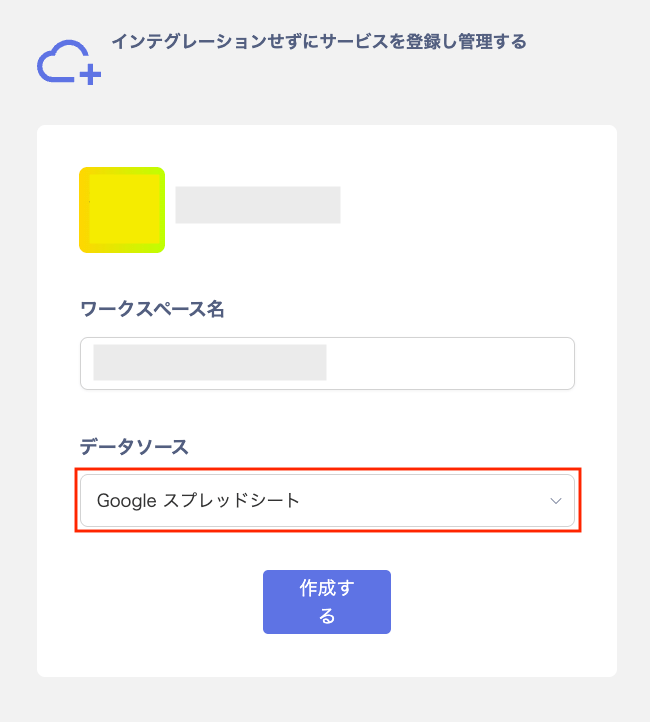
Enter a workspace name, select Google Sheets as the data source, and click Create.
-
On the “Specify Google Sheets file” screen, enter the Google Sheets file URL and click Start integration.
Paste the URL of the Google Sheets file you prepared in the prerequisites.
-
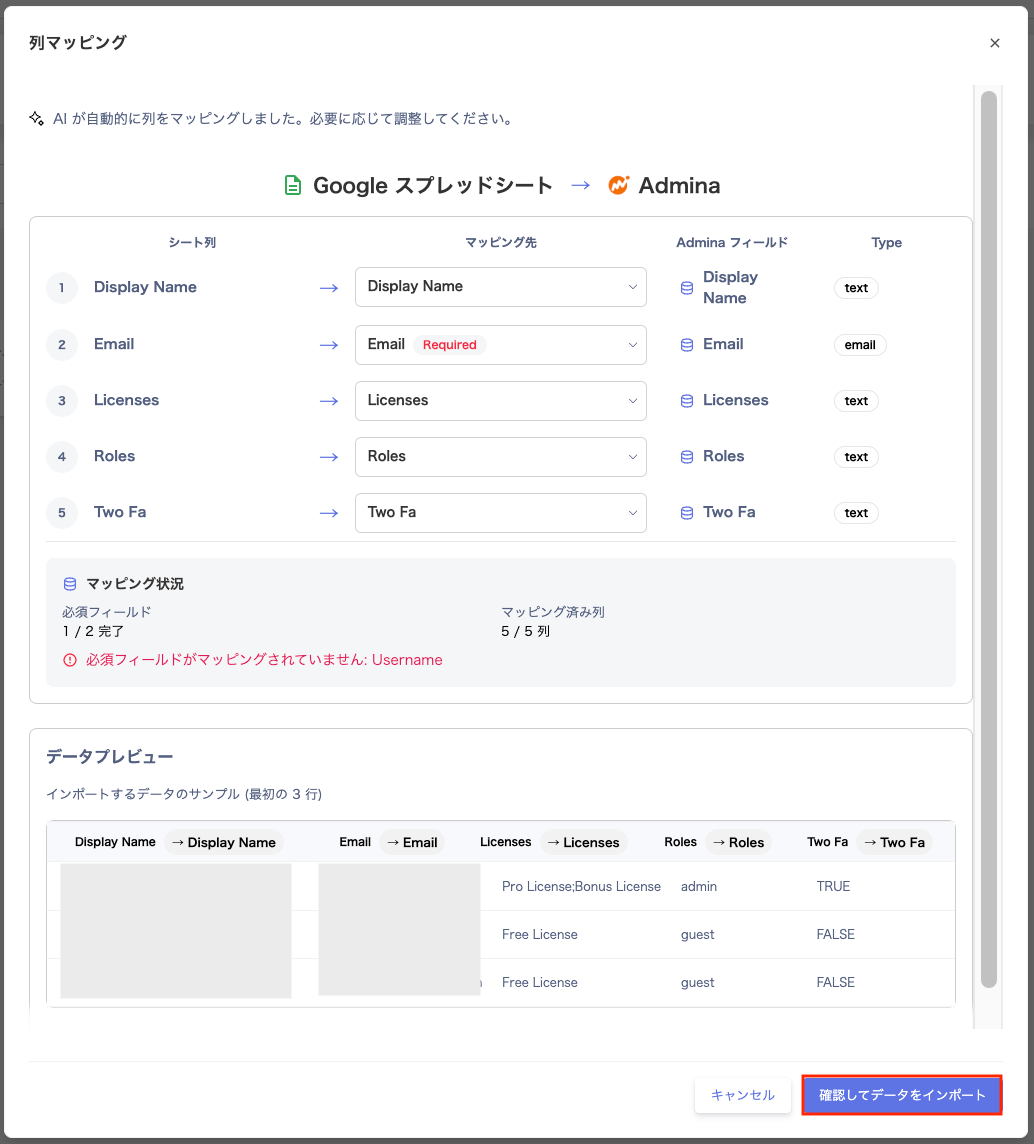
On the “Column mapping” screen, review the Mapping destination and Data preview, then click Confirm and import data.
On the “Column mapping” screen, AI automatically sets the mapping destinations. Change them as needed.Available mapping destinations include Saas User Id, Display Name, Roles, Licenses, and Username. Additional destinations are Email, Status, Two FaLast, Activity, and Do not map. Set columns you do not want to import as Do not map.
-
The “Connecting to file” screen appears.
-
When the “Integration complete” screen appears, click Done.
You can verify the connected custom app on the Services screen.
Re-connect Google Sheets
To change the column mapping, click the three-dot menu [︙] on the right side of the workspace under Info > Workspace. Then select Re-connect. After clicking Re-connect, follow step 3 onwards in Create a New Custom App and Connect Google Sheets.
Sync with Google Sheets
When you update your Google Sheets file, account information in the custom app updates through automatic or manual sync.| Automatic sync | Account information updates during the nightly automatic sync. |
|---|---|
| Manual sync | For manual sync steps, see Running a Sync. |
Delete a Workspace for a Registered Service
-
Go to Services > Service list and click the custom app.
Custom apps display as
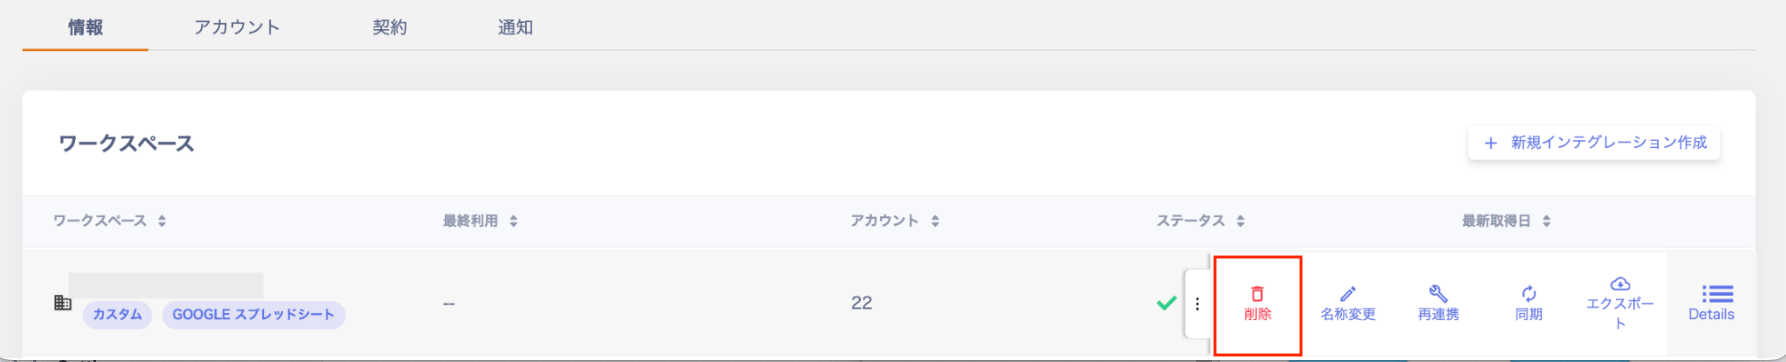
(Custom)under the left-side Services/Workspace item. - Under the service details Info tab, click the three-dot menu [︙] at the right end of the workspace row. Then click Delete.
FAQ
Q. Do I need any settings other than sharing under File > Share > Share with others in Google Sheets?
A. Add prod-sheets-reader@money-forward-itmc.iam.gserviceaccount.com under “Share with others”. No other settings are required. There are no restrictions on the type of access (Editor/Viewer) or the file storage location (Shared Drive/My Drive).Q. Is there a Google Sheets template available?
A. There is no dedicated template, but you can use the template from Bulk Account Registration. Any format works.Q. Can I update accounts via API?
A. API is not supported.Q. I want to manage accounts in one Google Sheets file with multiple sheets. Is multi-sheet management supported?
A. Yes. Each sheet has a different URL displayed in the browser. Paste the URL for each sheet to connect them individually.Q. Can I register multiple licenses or roles in the custom app Google Sheets integration?
A. Enter multiple values separated by commas (,) in the licenses and roles columns of your Google Sheets file. After saving, sync with Google Sheets to confirm the multiple entries appear in the custom app.
Example: To register three licenses “L1, L2, L3” in the licenses column, enter L1,L2,L3.
To register two roles “R1, R2” in the roles column, enter R1,R2.
Q. Is there a way to import only rows that match specific conditions from Google Sheets?
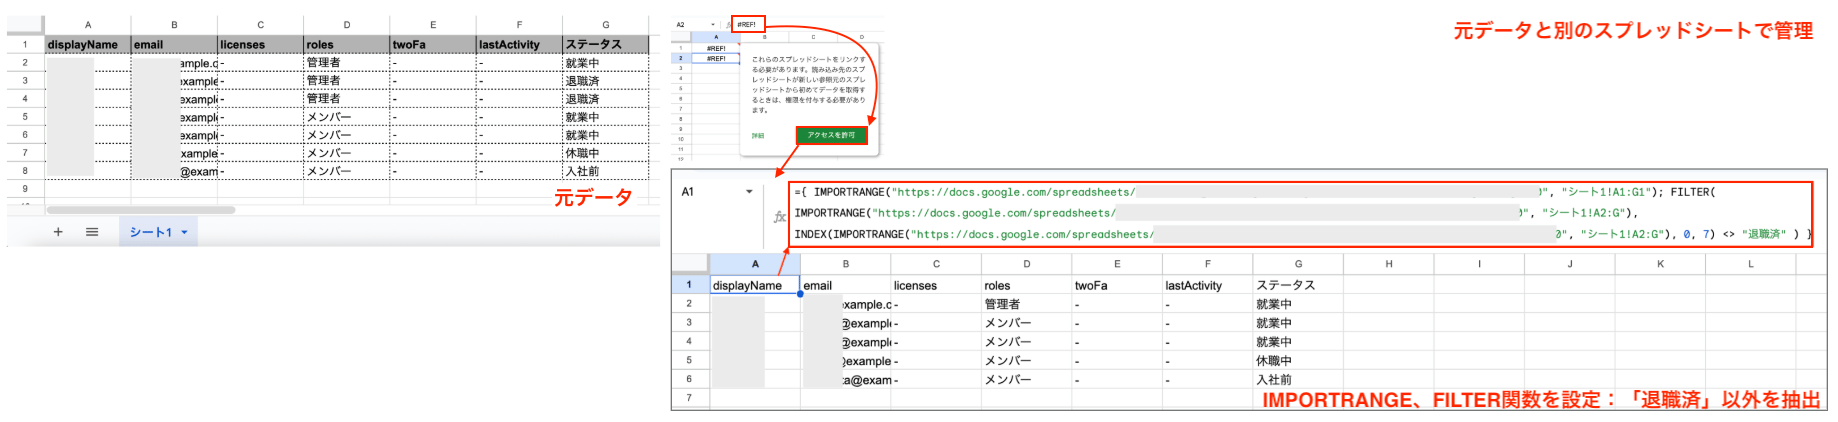
A. Use the Google Sheets FILTER function to extract only rows that match your criteria. This does not modify the source data. Configure a formula based on the examples below to match the conditions you want to extract.| Pattern | Formula | Operator meaning | Notes |
|---|---|---|---|
| Extract specific items only (e.g., Active only) | =FILTER(Sheet1!A:G, Sheet1!G:G = "Active") | = (equals) | Shows rows where column G matches the specified value. |
| Exclude specific items (e.g., exclude Terminated) | =FILTER(Sheet1!A:G, Sheet1!G:G <> "Terminated") | <> (not equal) | Shows rows where column G does not match the specified value. |
| Extract from another file while keeping headers (e.g., exclude Terminated) | ={ IMPORTRANGE("source-data-URL", "Sheet1!A1:G1"); FILTER( IMPORTRANGE("source-data-URL", "Sheet1!A2:G"), INDEX(IMPORTRANGE("source-data-URL", "Sheet1!A2:G"), 0, 7) <> "Terminated" ) } | <> (not equal) | Shows rows where column G is not “Terminated”. Fixes row 1 as the header. |