How to Register Multiple Licenses and Roles in a Custom App
Follow these steps to import a CSV file with multiple licenses and roles.- Prepare a CSV file for import. For details, see bulk operations.
-
In the
licensesandrolescolumns of the CSV, enter multiple values separated by ;. Example: to register licenses L1, L2, and L3 in thelicensescolumn, enter L1**;L2;**L3. To register roles R1 and R2 in therolescolumn, enter R1**;**R2.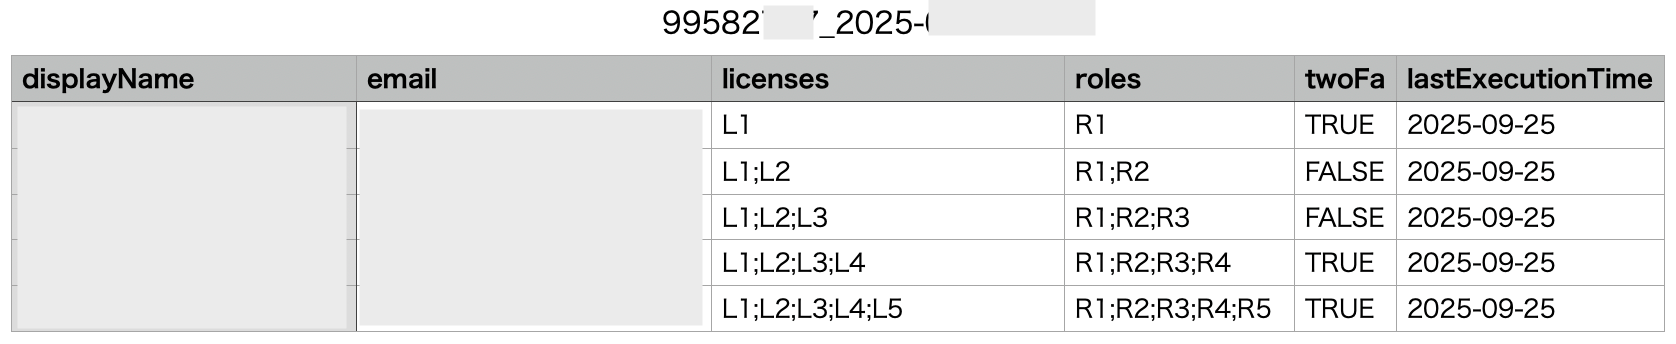
- Save the CSV file to the designated location.
- Go to Services > Custom App > Info, then click ︙ (three-dot menu) and select Accounts. Import the CSV file from the “Import Account List” screen.
- After importing, verify that the multiple licenses and roles appear correctly.
Verifying Registered Licenses and Roles
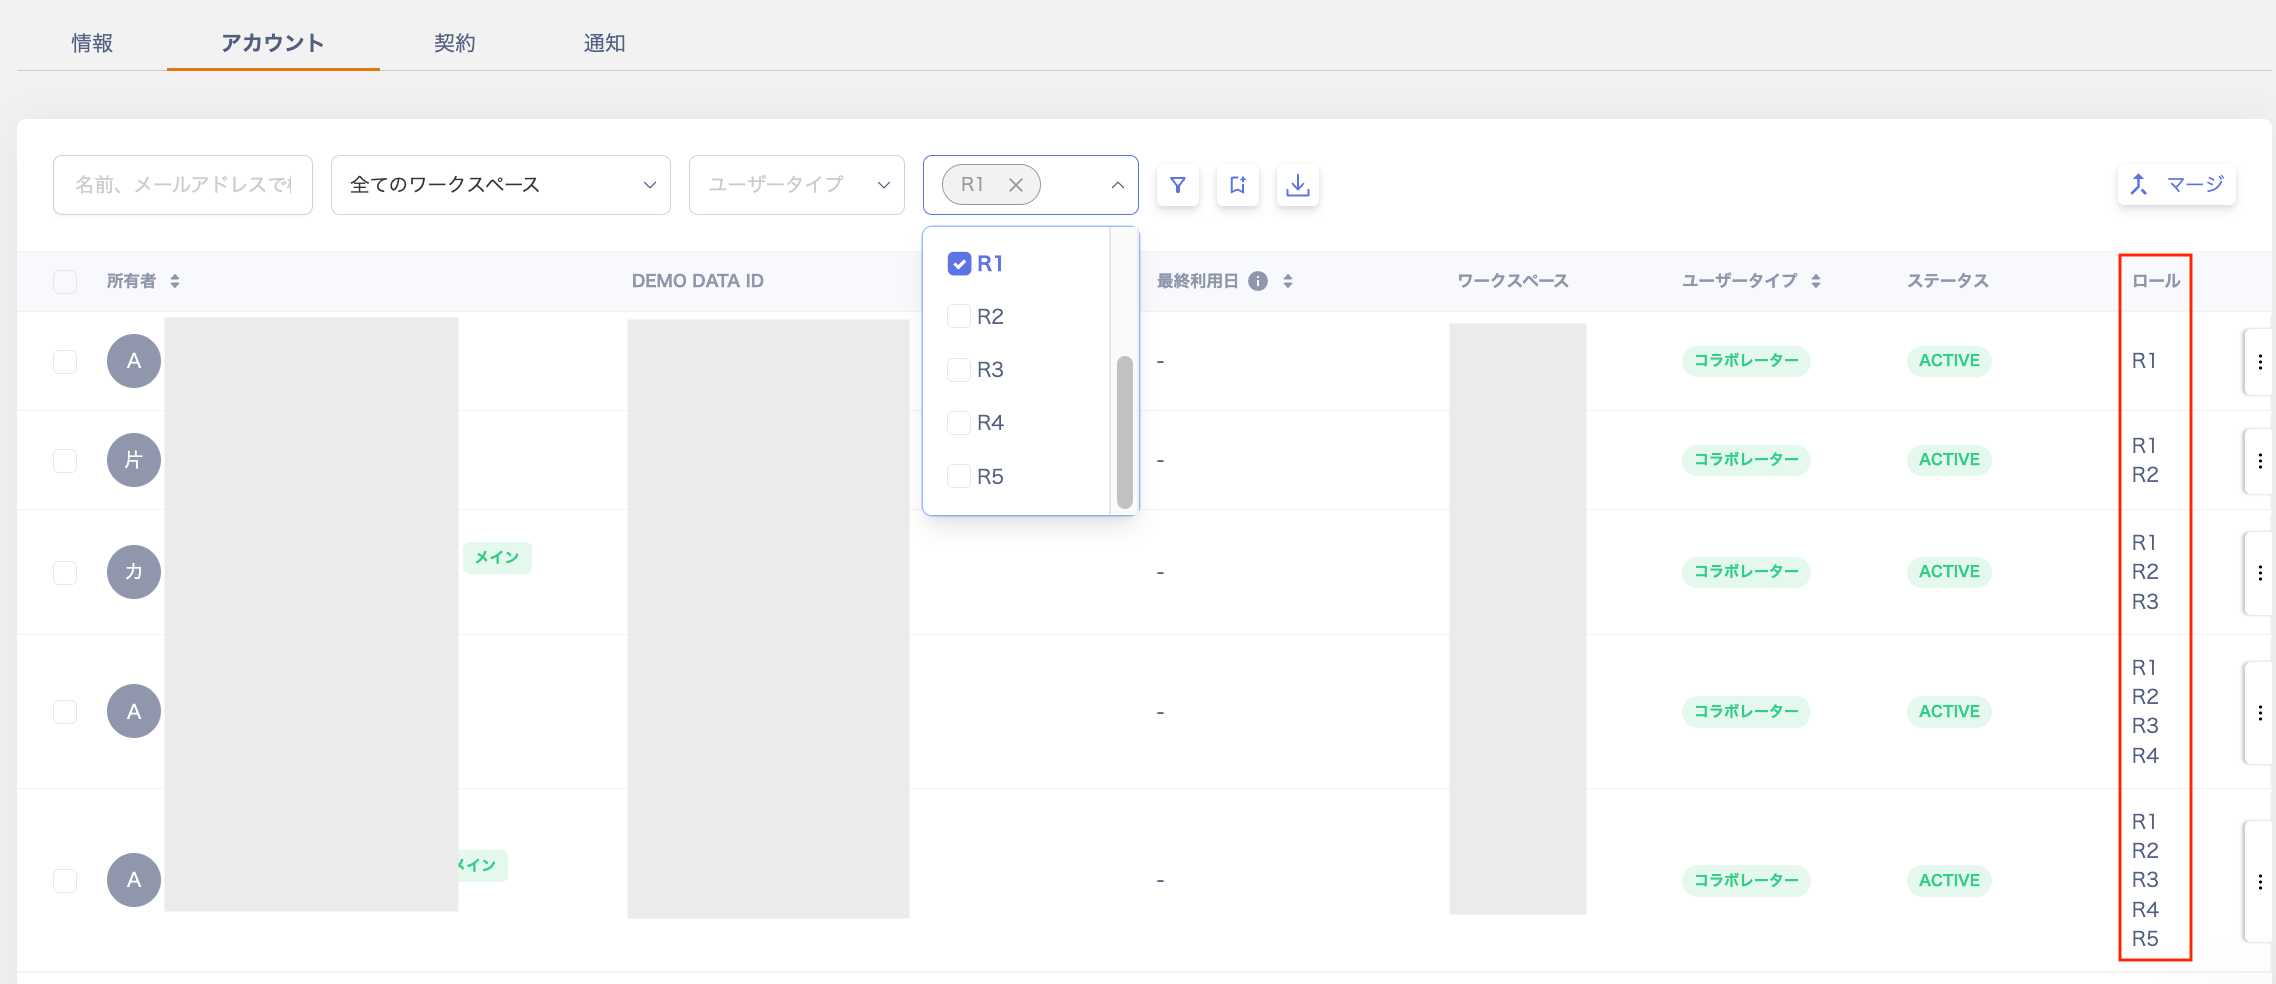
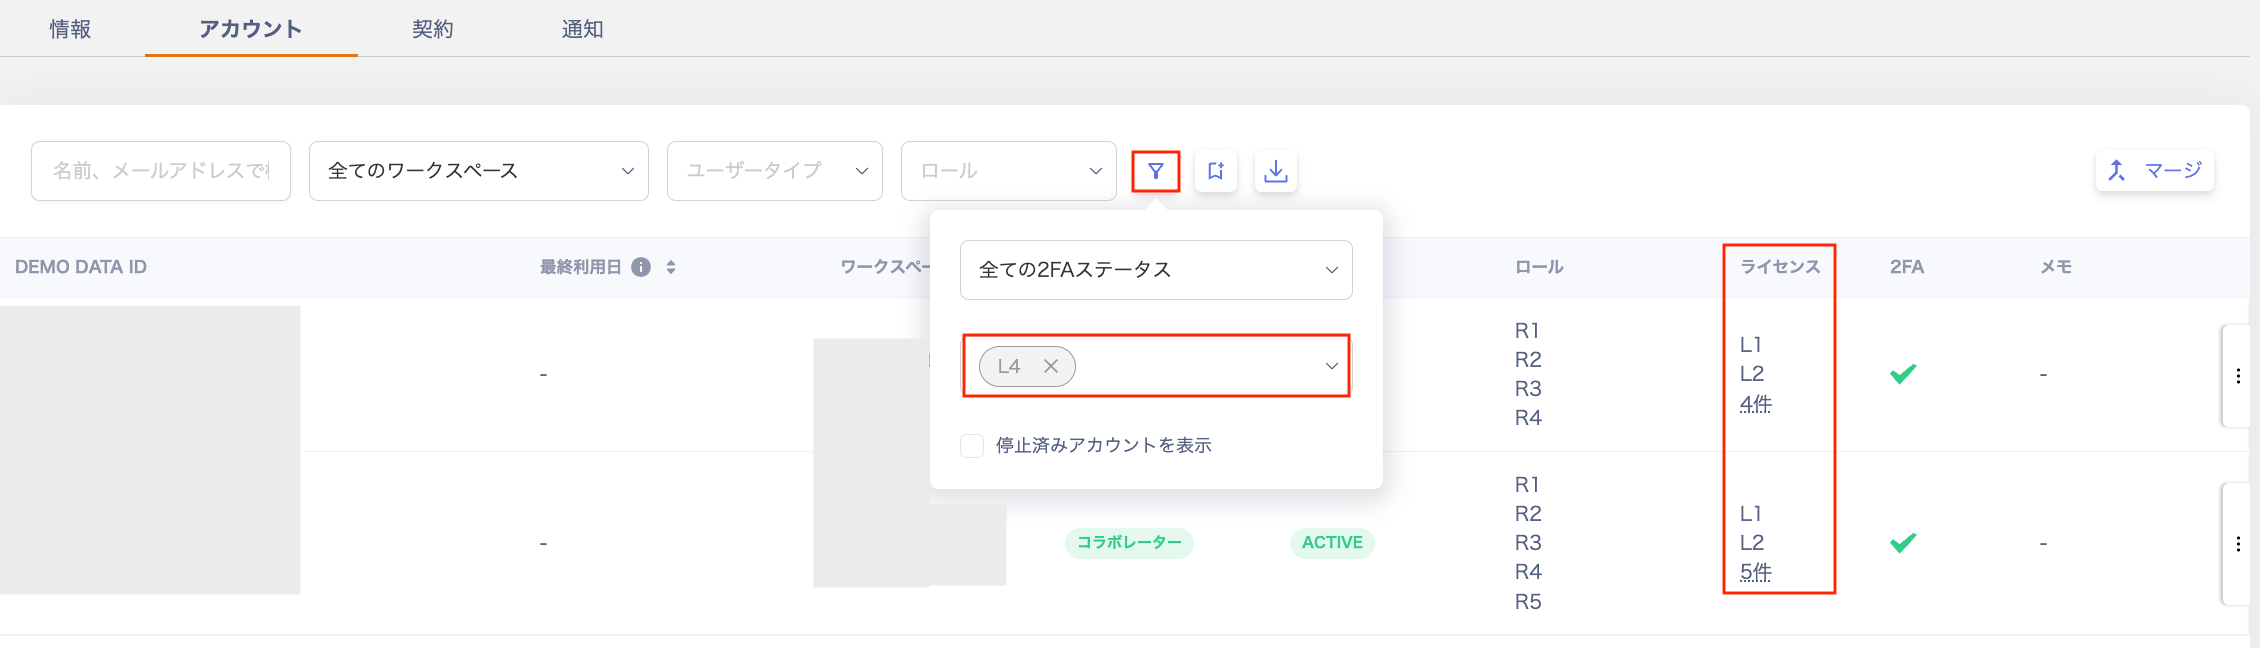
Go to Services > Custom App > Accounts and check the registered roles in the “Role” column. You can also filter accounts by role using the “Role” filter at the top of the screen.