

Feature Overview
This feature lets you mute alert notifications. You can exclude accounts that must remain active — such as employees on leave — from alert notifications.Checking Alerts
You can check alert notifications on the Services screen (Notifications). You can also check them on the Directory screen (the “Notifications” button in the top right).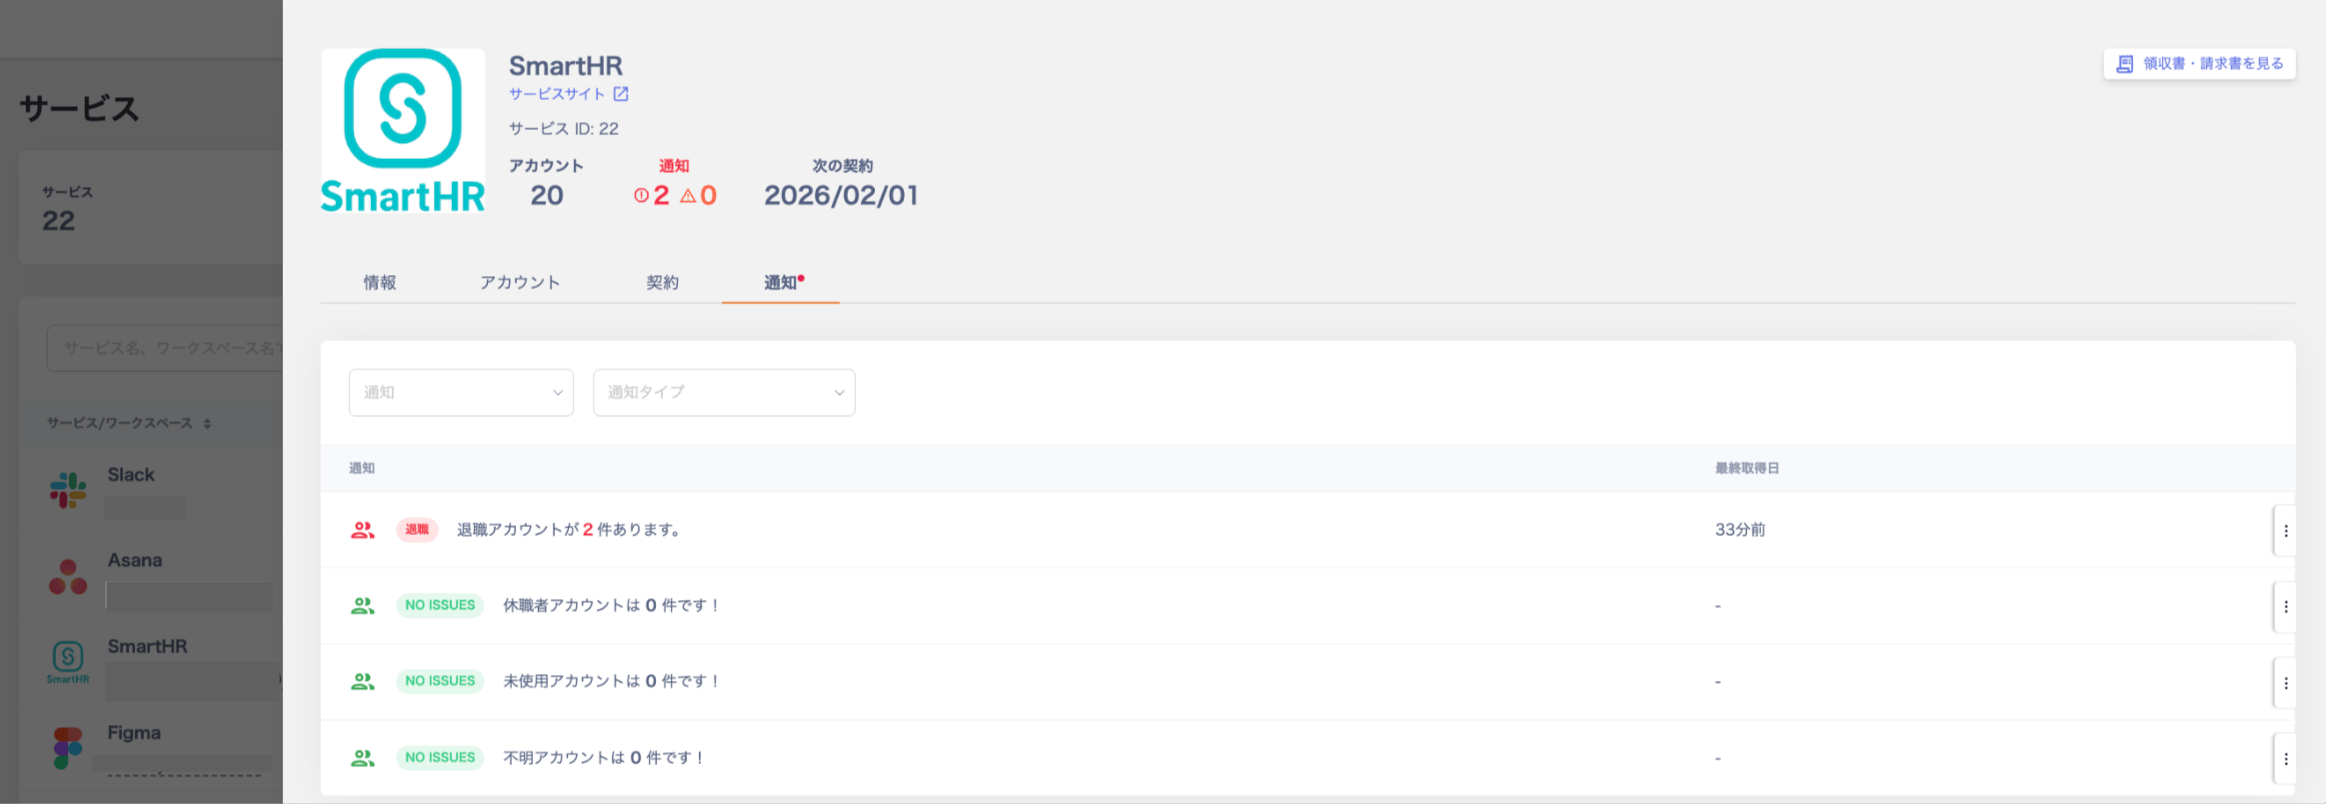
- Do any retired accounts remain?
- How to clean up retired-employee accounts
Stopping / Muting Alerts
You can mute a service and its notification targets when you want to stop alert notifications. Some services keep accounts intentionally without deleting them. For these, you can mute retirement alerts instead of sending them.Stopping Notifications from the Services Screen
-
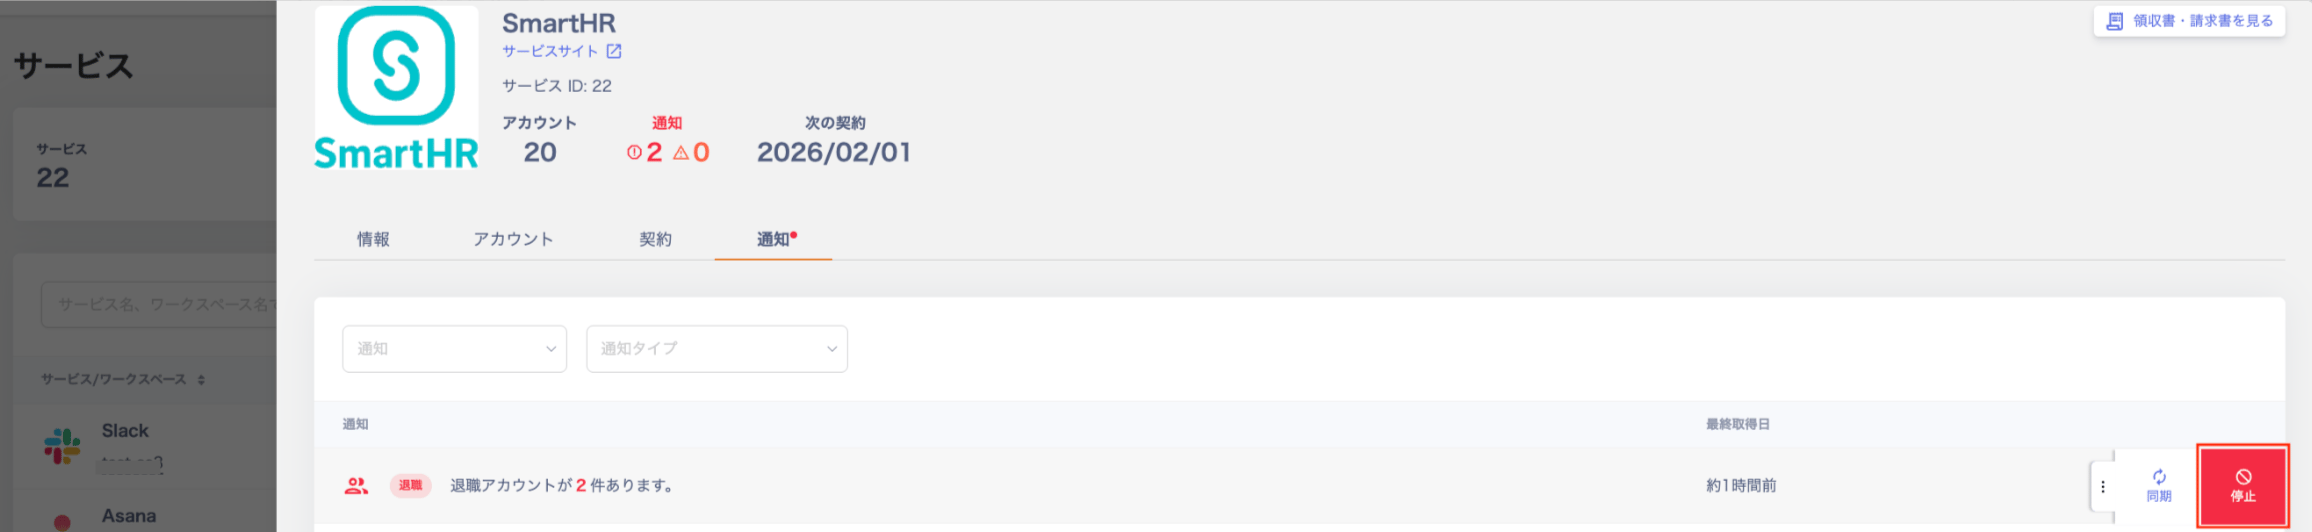
Go to Services, select a service, then select the notification type you want to stop under Notifications and click Stop.
-
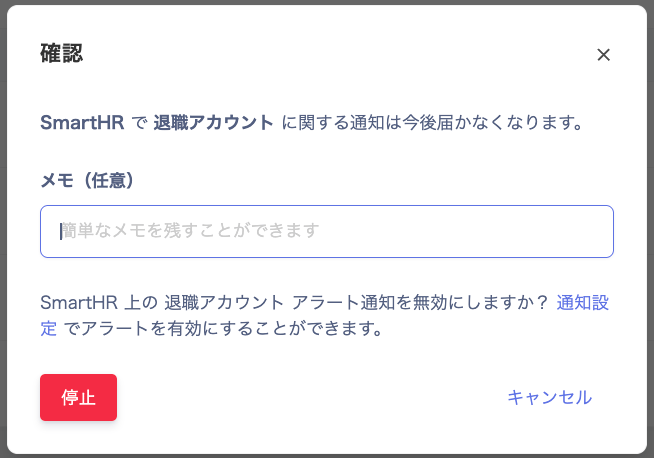
A confirmation dialog appears. Click Stop. You can optionally leave a brief note in the Memo field.
-
The status changes to “Notifications paused” and the alert is no longer sent. To resume, click Resume.

Muting Notifications from the Directory Screen
-
Click “View all →” in the Notifications area at the top right of the Directory screen.

-
Check the account you want to mute under the Alerts / Warnings / Muted notifications tabs. Clicking Settings takes you to Settings > Notifications. For details, see Enable/Disable alert notifications in bulk.

-
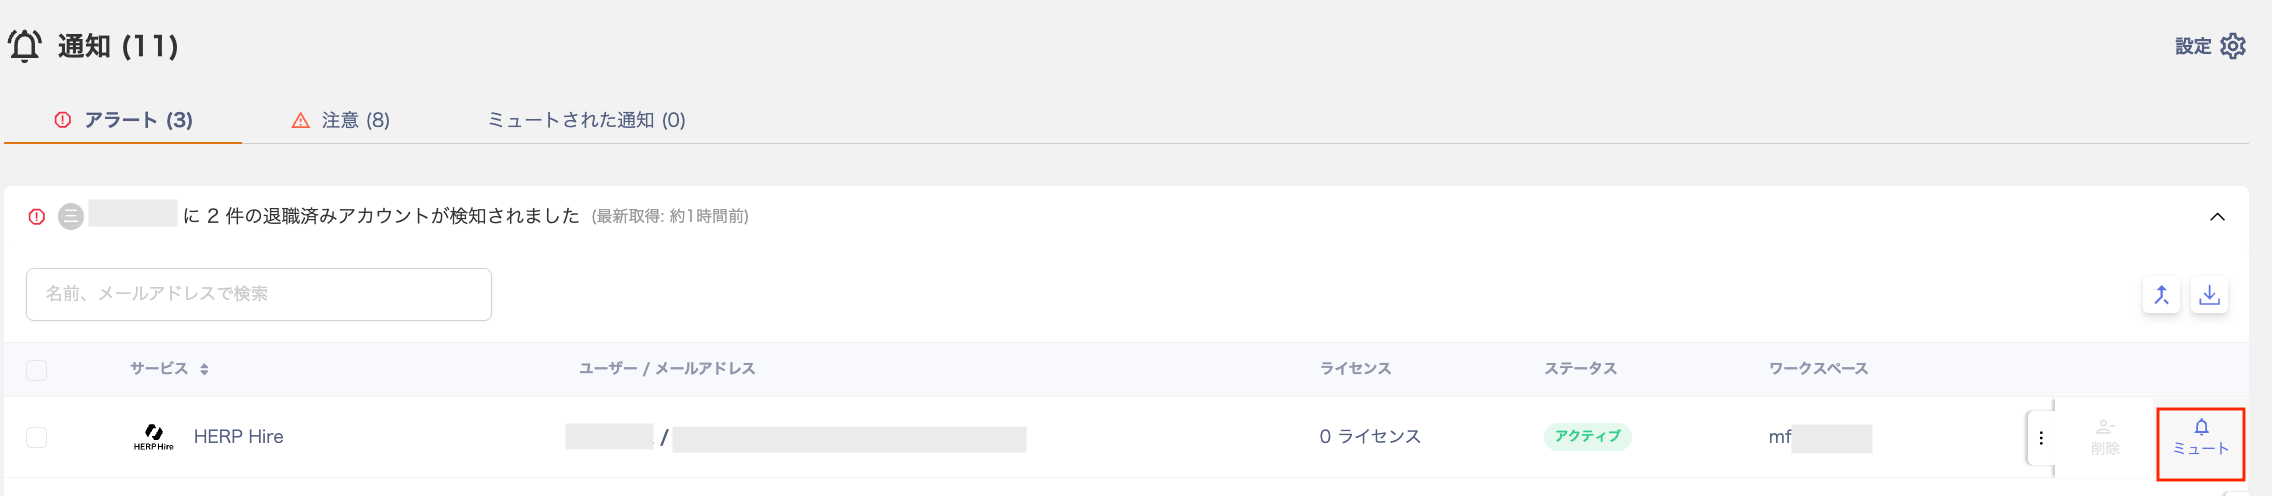
Click the three-dot menu [︙] at the right end of the account you want to mute, then click Mute. For Delete, see Delete or deactivate service accounts.
-
The “Confirm mute” dialog appears. Configure the following options and click Mute.
Option Description Selected notifications only Mute alerts only for the selected SaaS. All notifications linked to the selected account Mute alerts for all SaaS services associated with the selected account. Mute expiration date Set a date to automatically unmute. 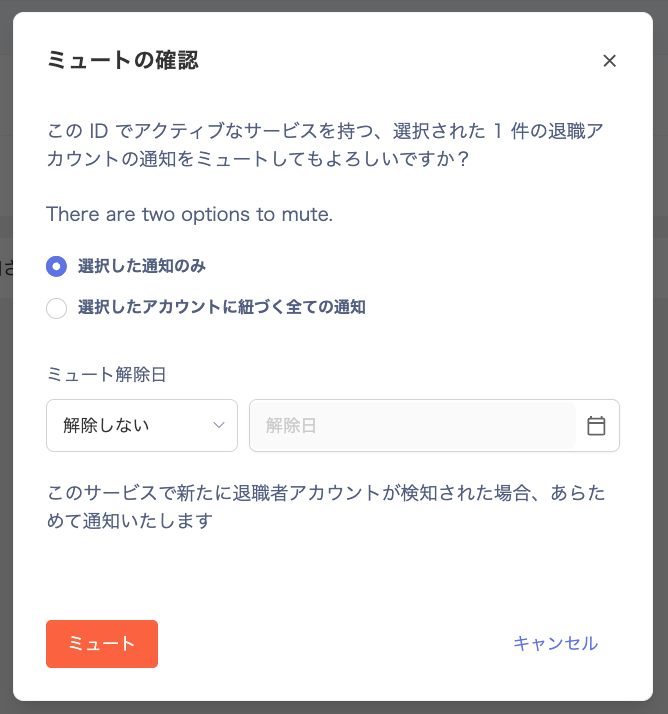
-
Muted notifications appear under “Muted notifications.”

Mute Expiration Date
Select the unmute date from the Mute expiration date dropdown. Choose “Never” to mute indefinitely, or choose “Specific date” and set a date in the Expiration date field.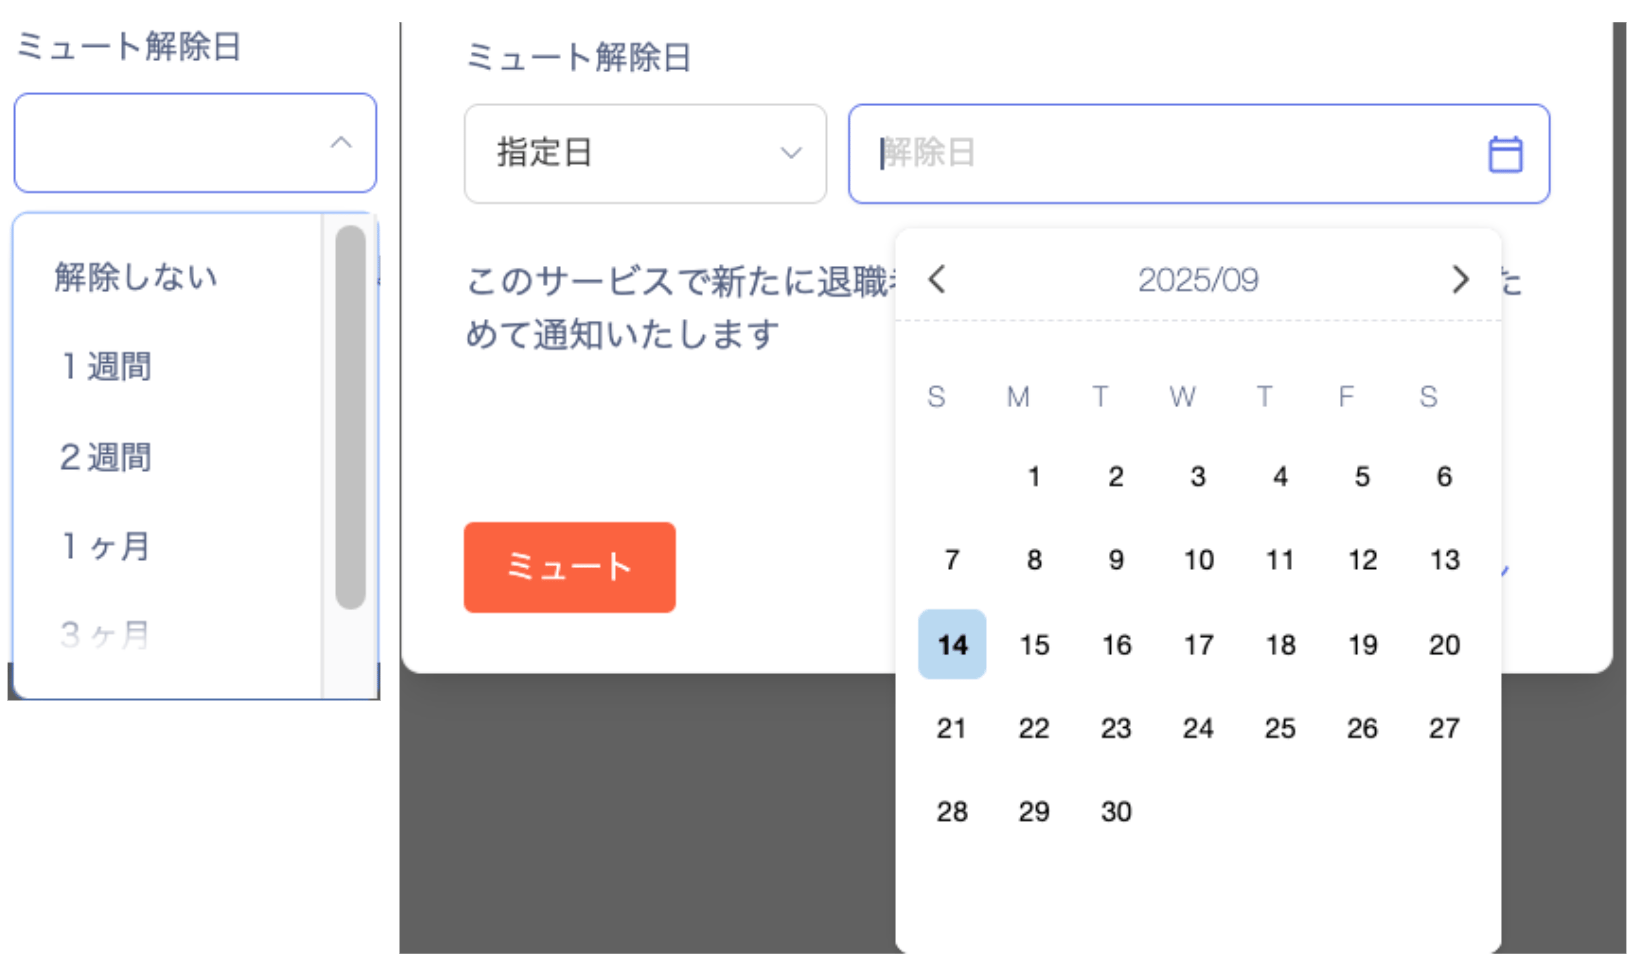
Muted Status
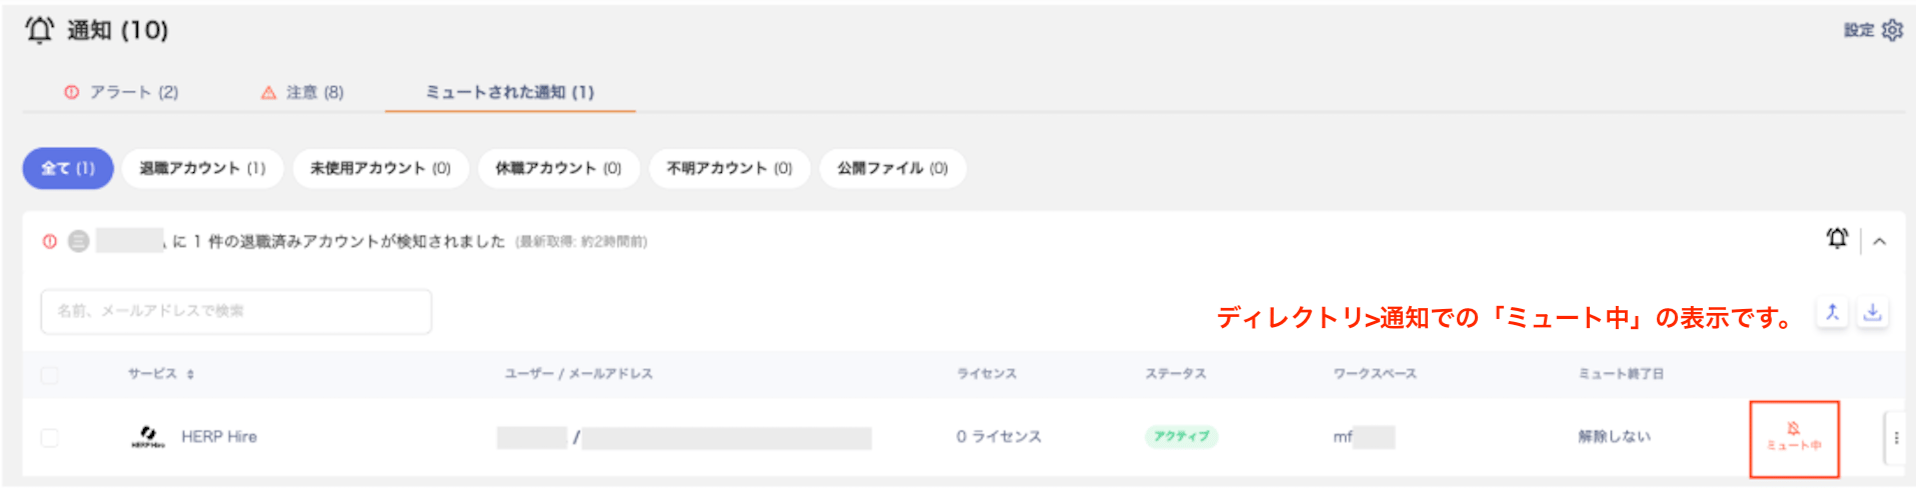
Muted accounts display a Muted badge. You can check them on the Services screen (Notifications) and the Directory screen (Notifications).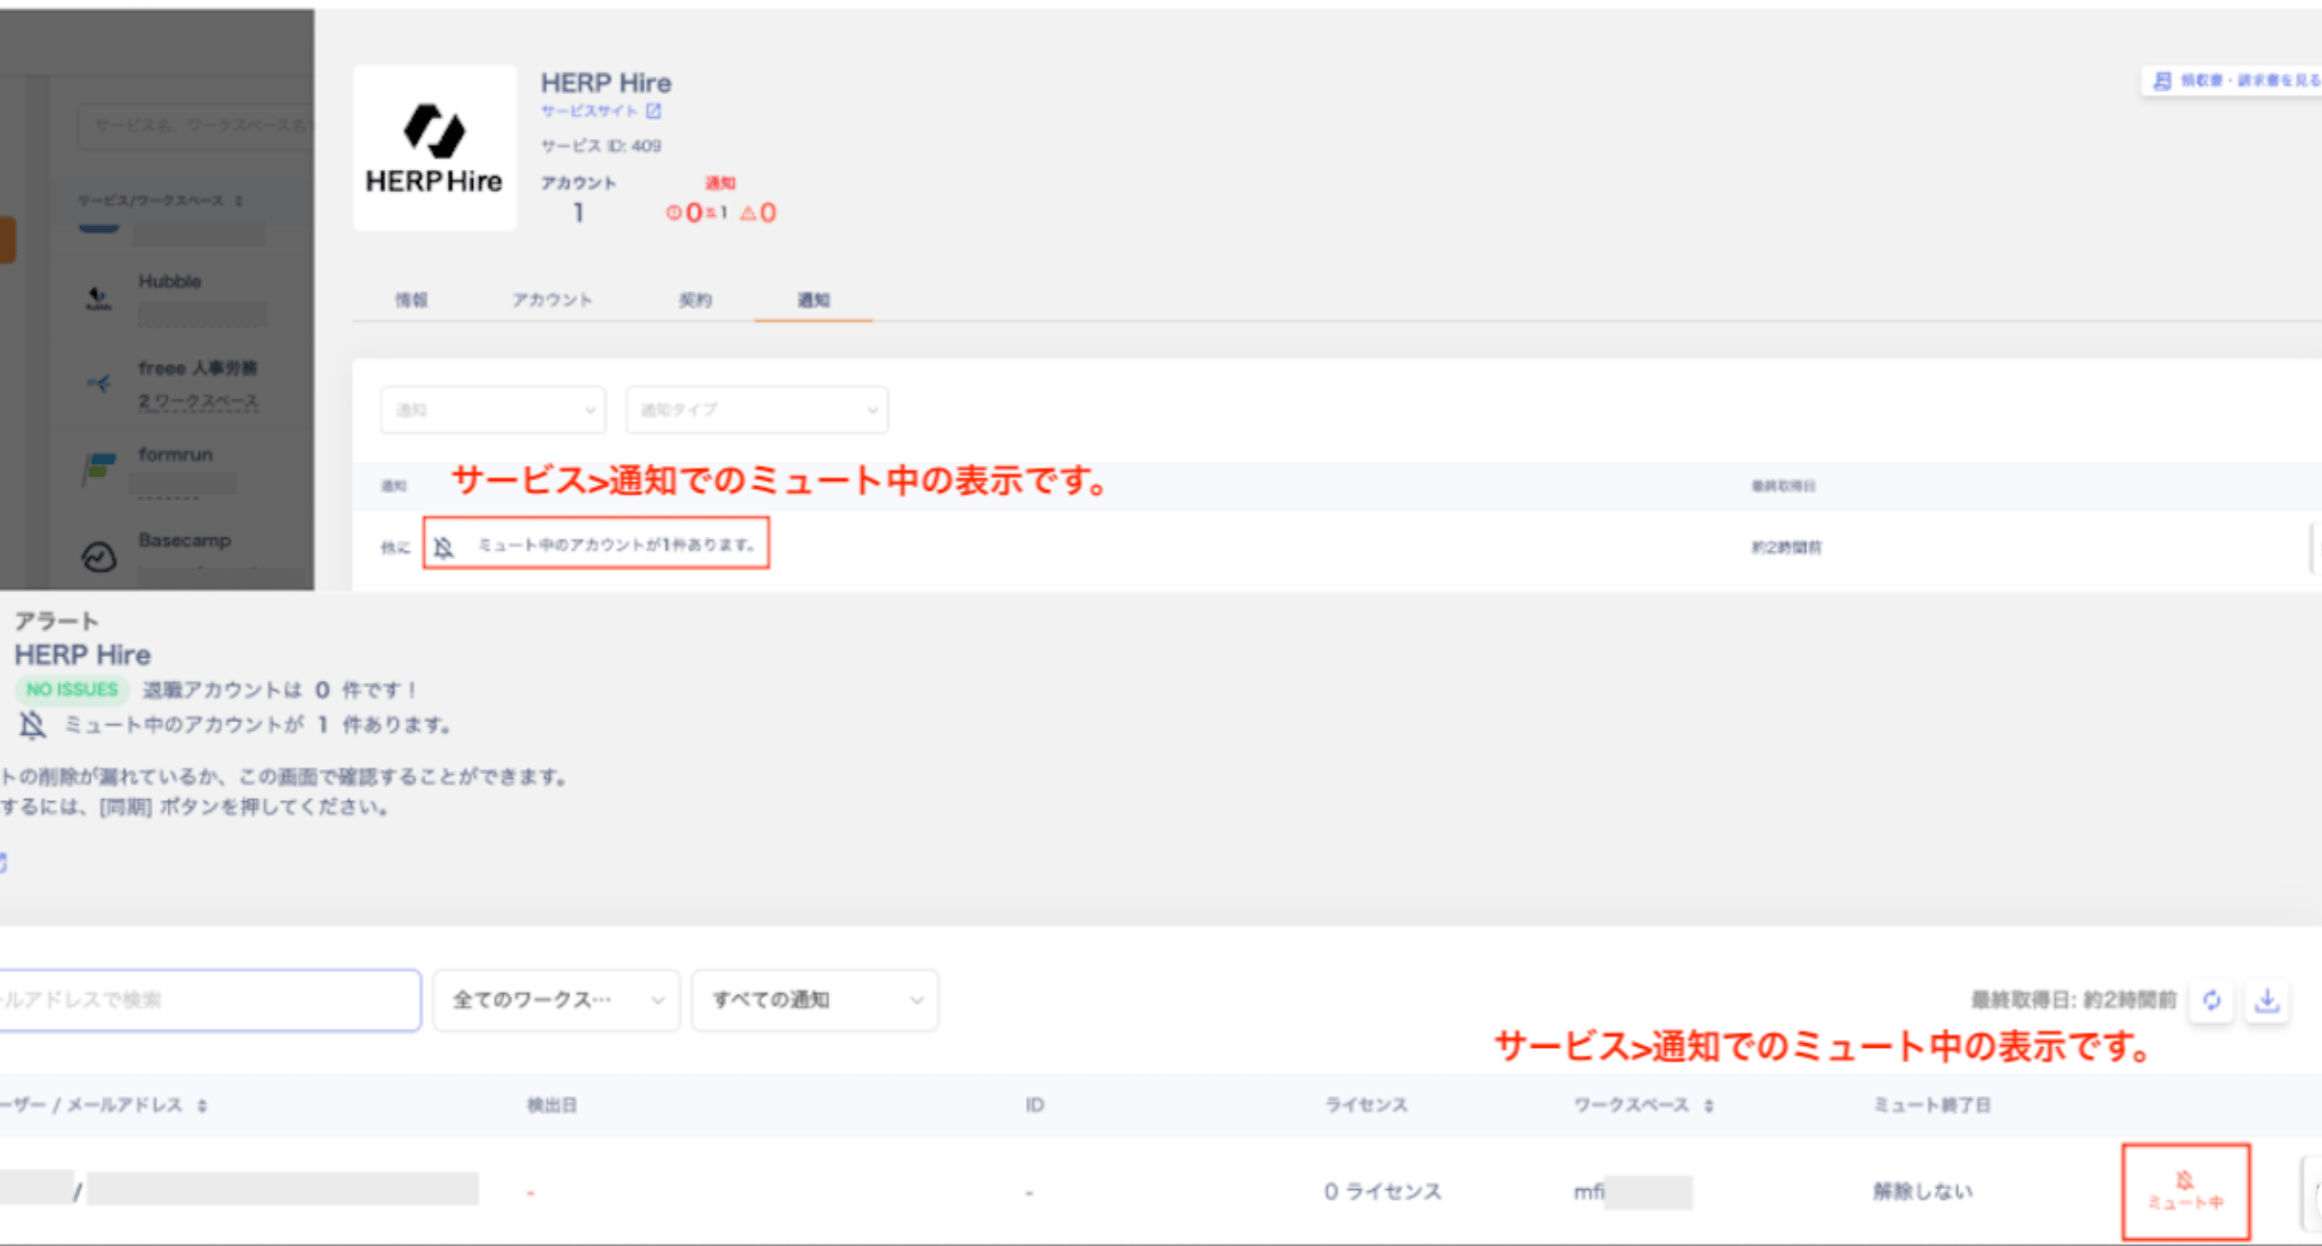
Unmuting
-
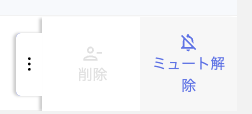
Find the account you want to unmute and click Unmute from the three-dot menu [︙]. See also Muted Status.
-
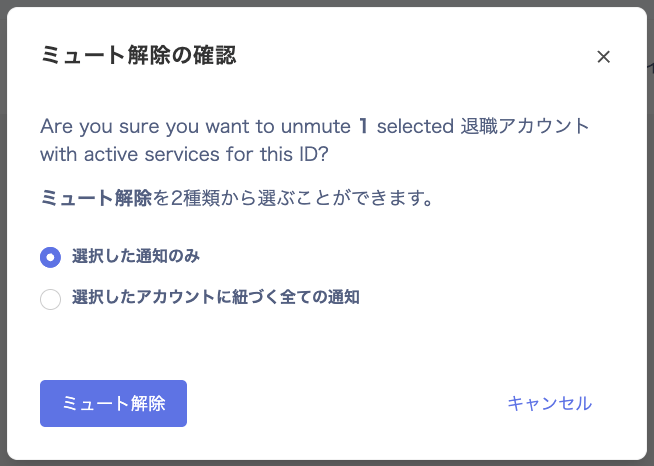
The unmute confirmation dialog appears. Choose one of the following options.
- Selected notifications only: Unmute alerts only for the selected SaaS.
- All notifications linked to the selected account: unmute alerts for every SaaS service linked to that account.
-
Click Unmute to complete the operation.
