

Safelist Feature Overview
The safelist feature marks public files detected by External Shared Content Management as safe. Once marked, these files are excluded from future detection alerts. The feature supports the following use cases. This page explains the setup steps for each one.| Use case | Description |
|---|---|
| Use case 1 | Mark all access to a specific public file as safe. |
| Use case 2 | Mark files shared with your company’s related domains or group company domains as safe. |
| Use case 3 | Mark files shared with a specific person (email address) as safe. |
Flow for Excluding Files from Detection
To exclude a file from detection, complete the following steps:- Create a safelist: Create a safelist to exclude files from detection.
- Add exclusion conditions: Set exclusion conditions (files, domains, email addresses, etc.) on the safelist you created.
- Activate the safelist: Sync the service to activate the safelist.
- Exclude from detection: After the sync completes, the safelist takes effect. Matching files are excluded from detection starting with the next sync.
How to Create a Safelist
Create a safelist from the Service > [Files] tab. There are two ways to create a safelist and add files to it.- Select a detected file and create or add it directly to a safelist.
- Check the file’s sharers, then create a safelist based on the sharers and add them.
Add a File Directly to a Safelist
-
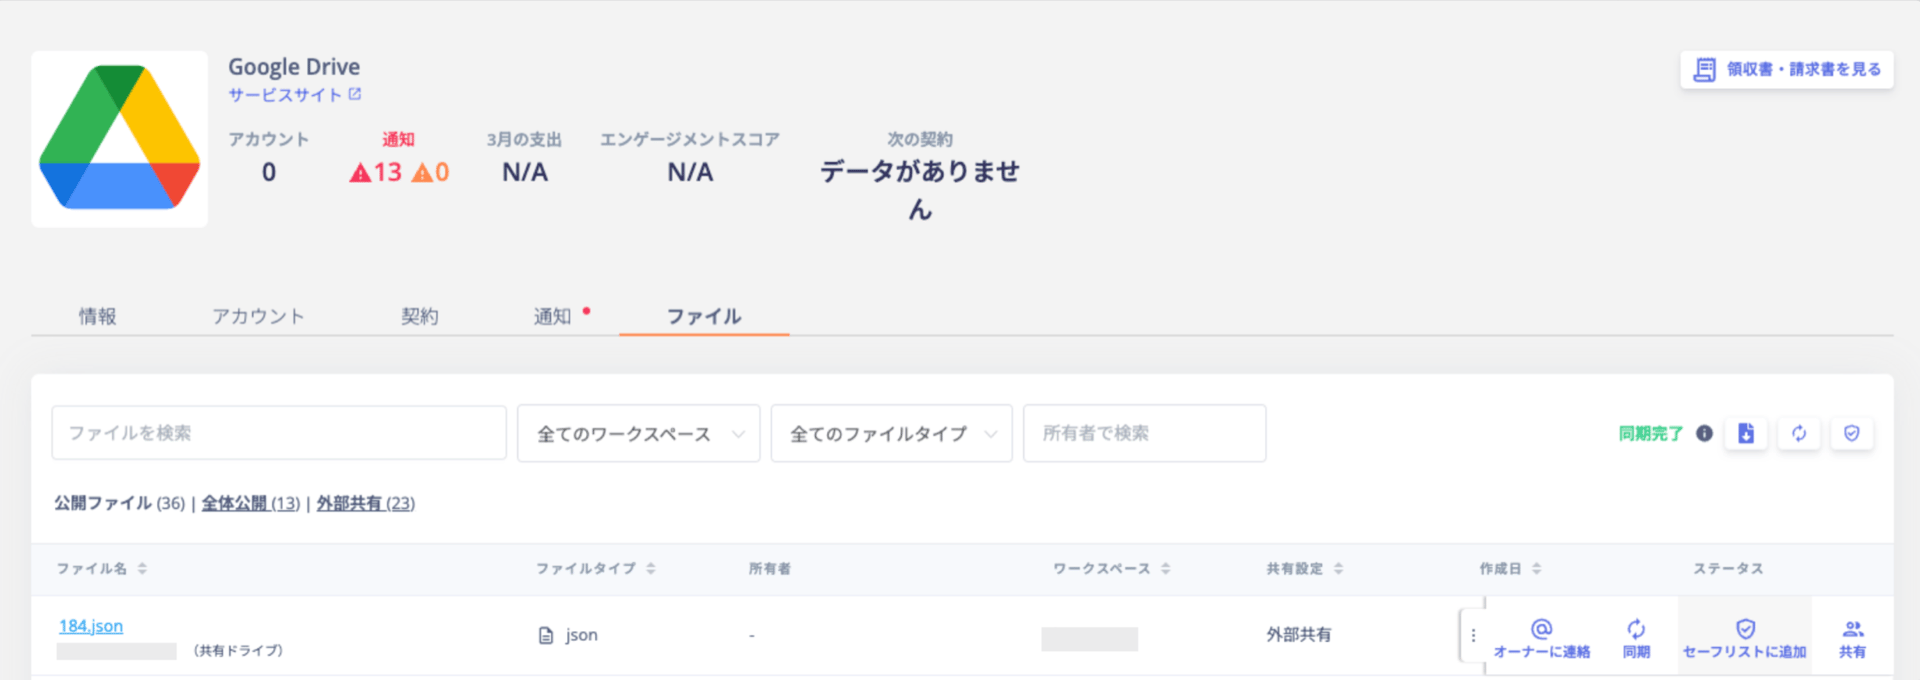
From the menu on the right side of the detected file, click [Add to Safelist].
- If no safelist exists yet, you create one in the next step.
- If a safelist already exists, you can add the condition to it directly.
Check Sharers, Then Add to a Safelist
-
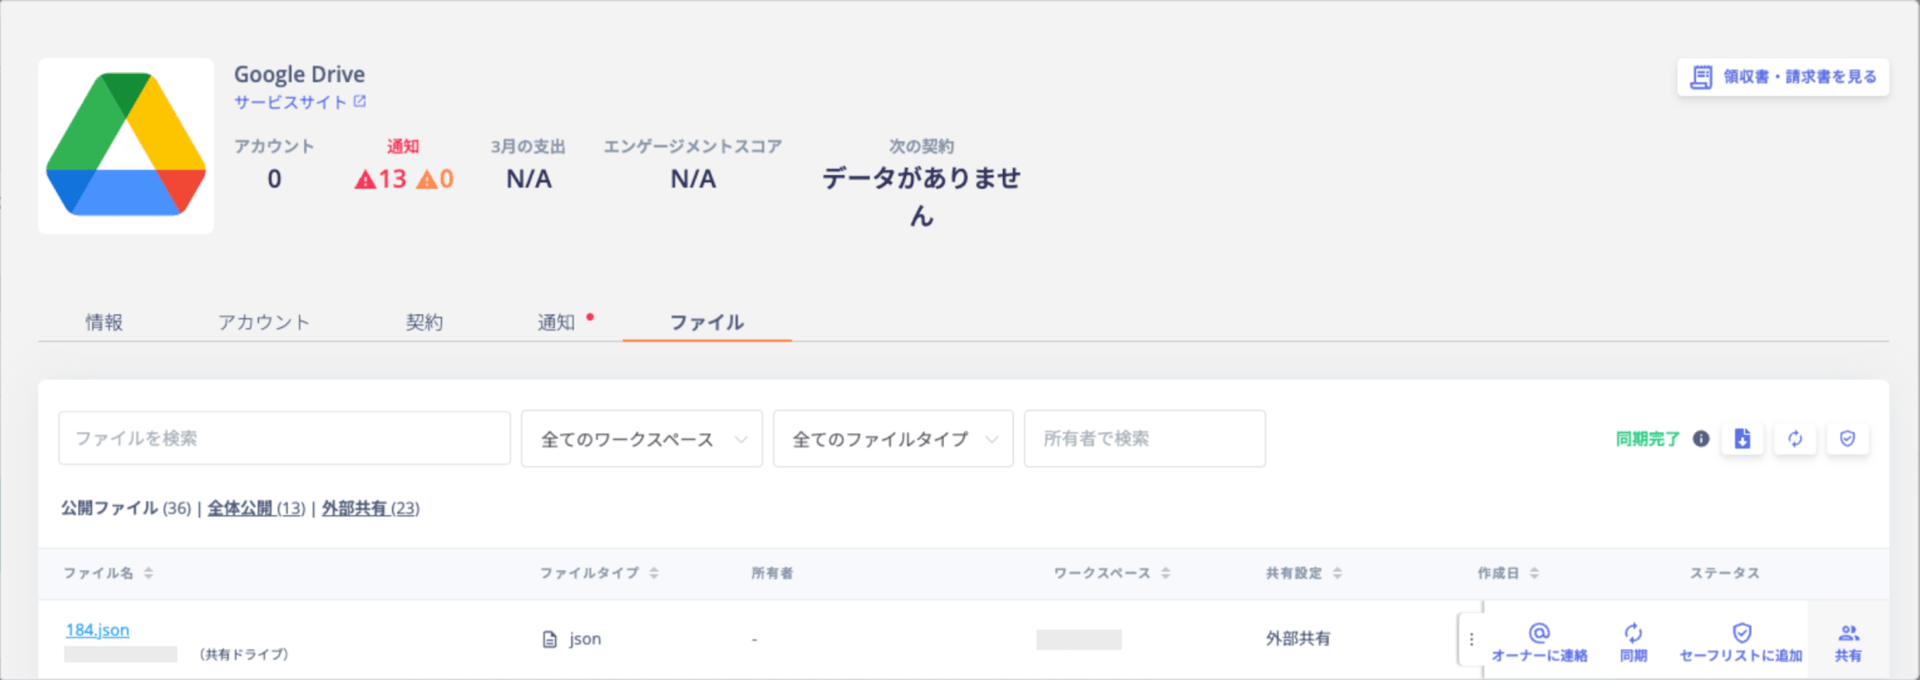
From the menu on the right side of the detected file, click [Share].
-
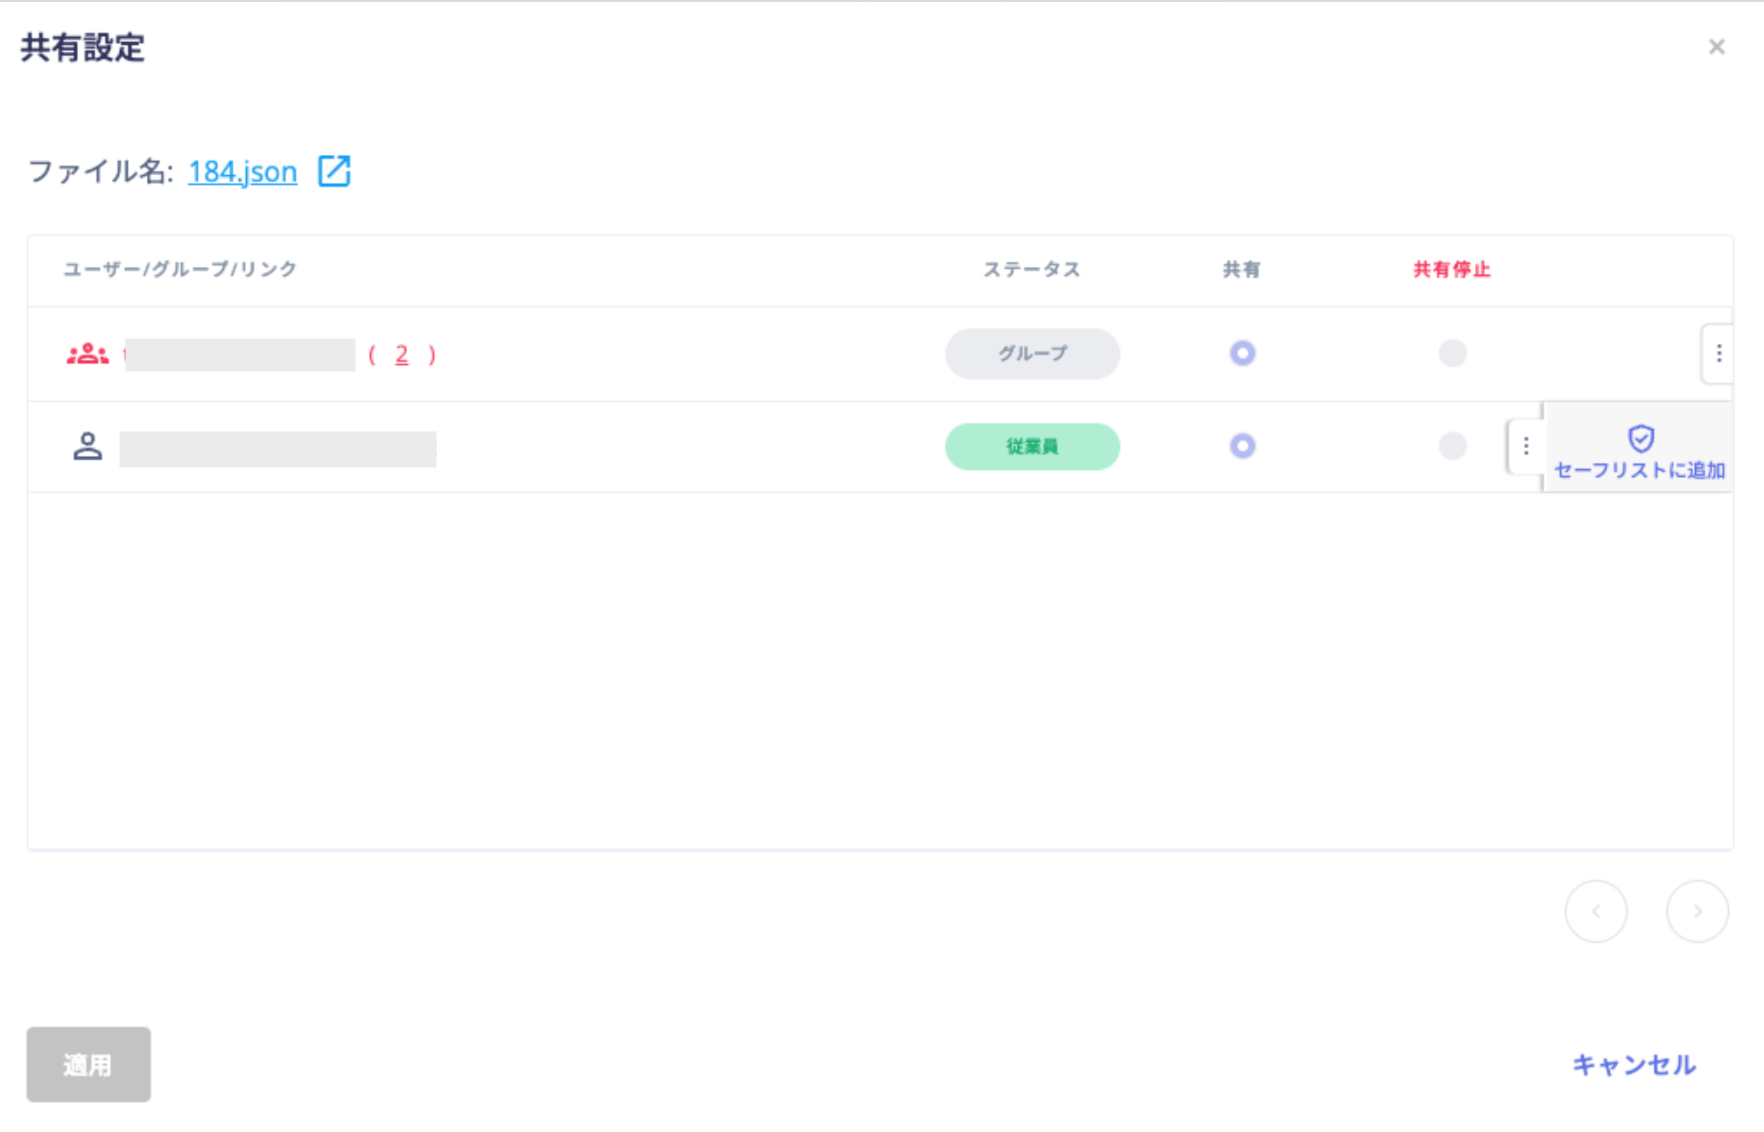
The file’s sharer list appears. Click [Add to Safelist].
- If no safelist exists yet, you create one in the next step.
- If a safelist already exists, you can add the condition to it directly.
Creating a Safelist
-
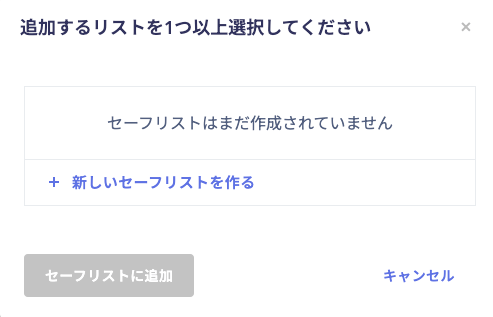
Click [+ Create a new safelist].
- Enter any name for the safelist.
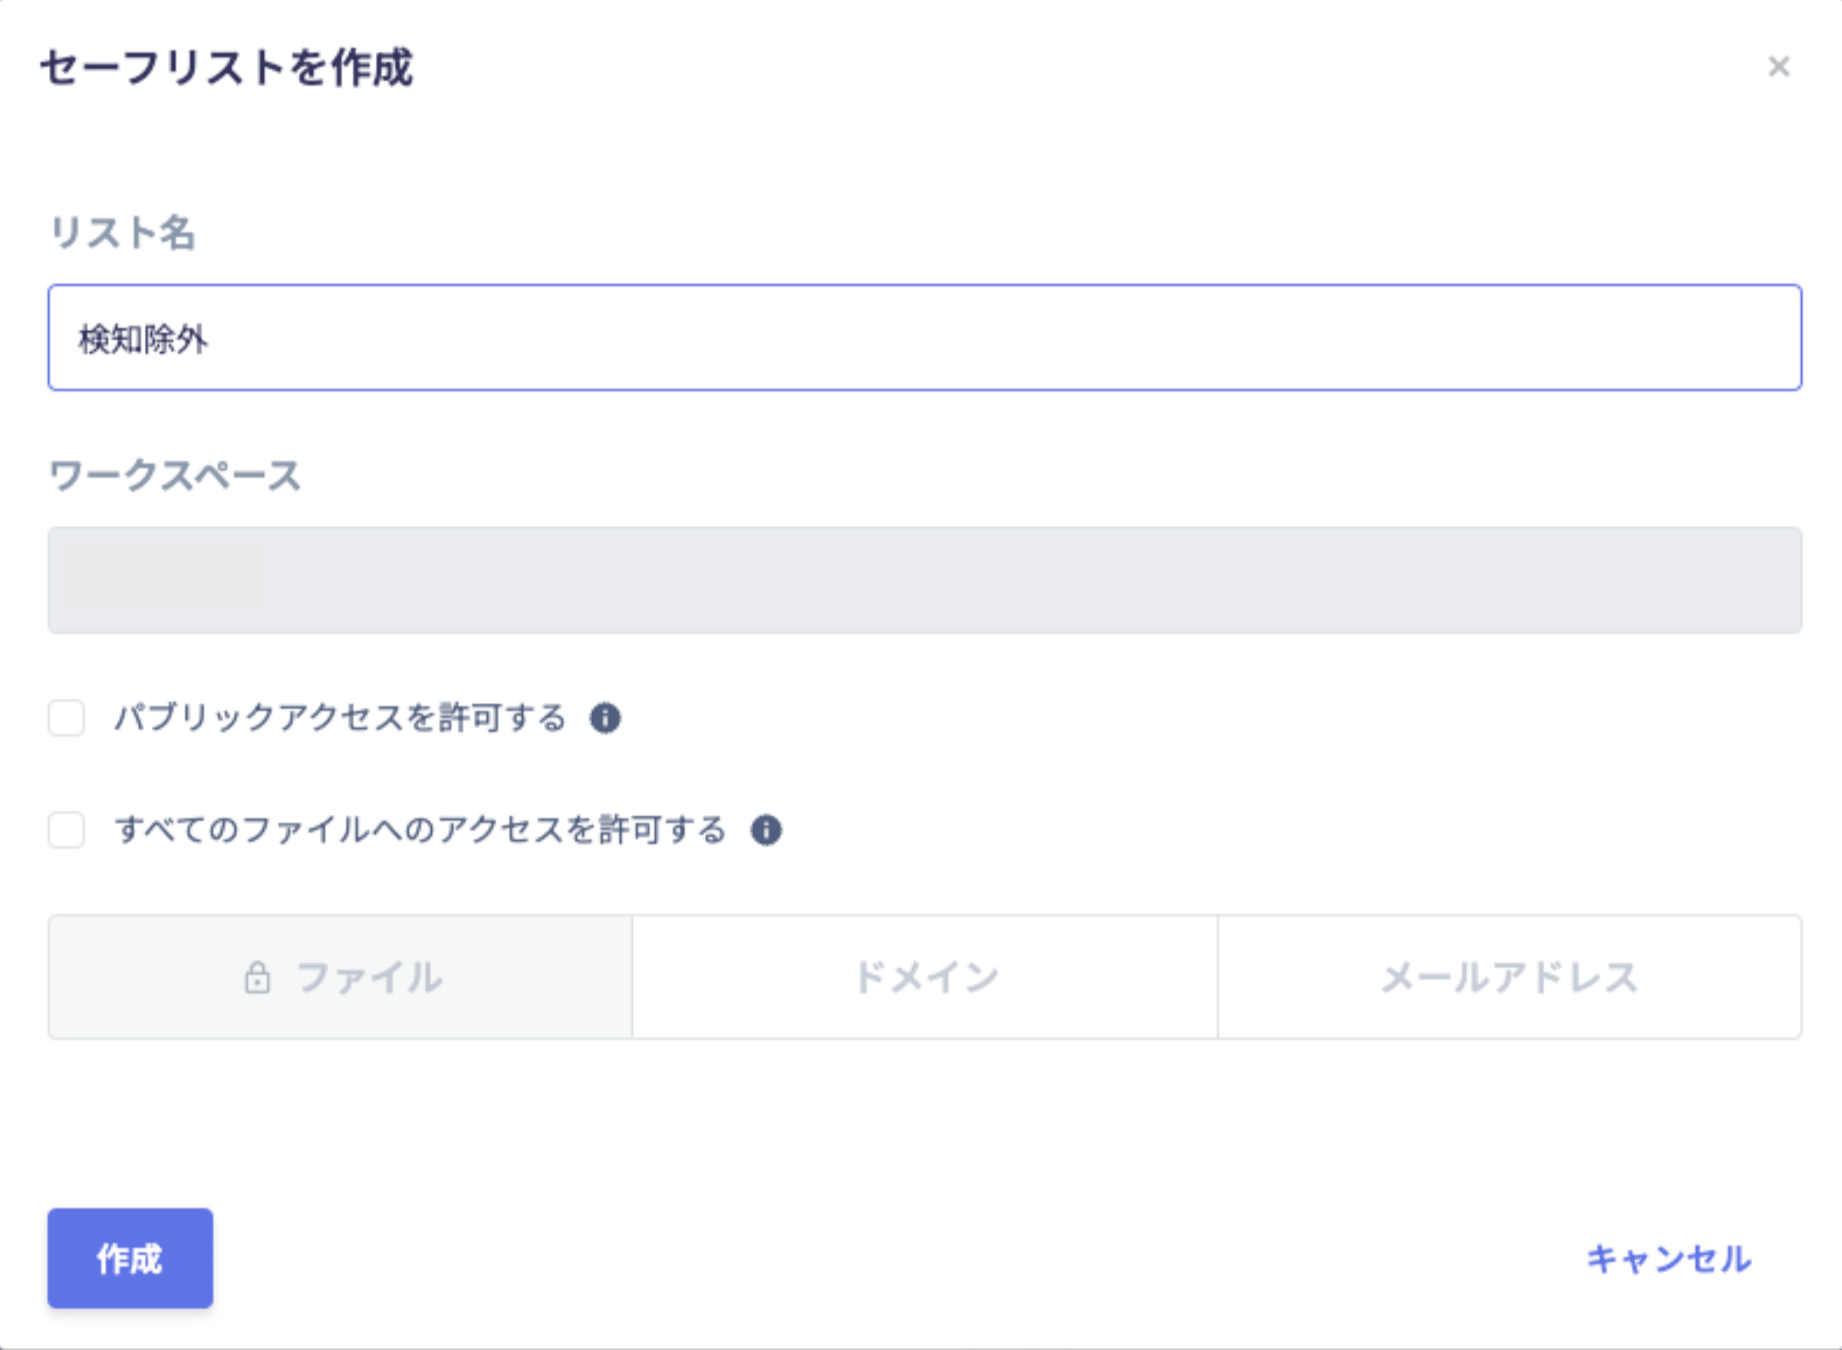
-
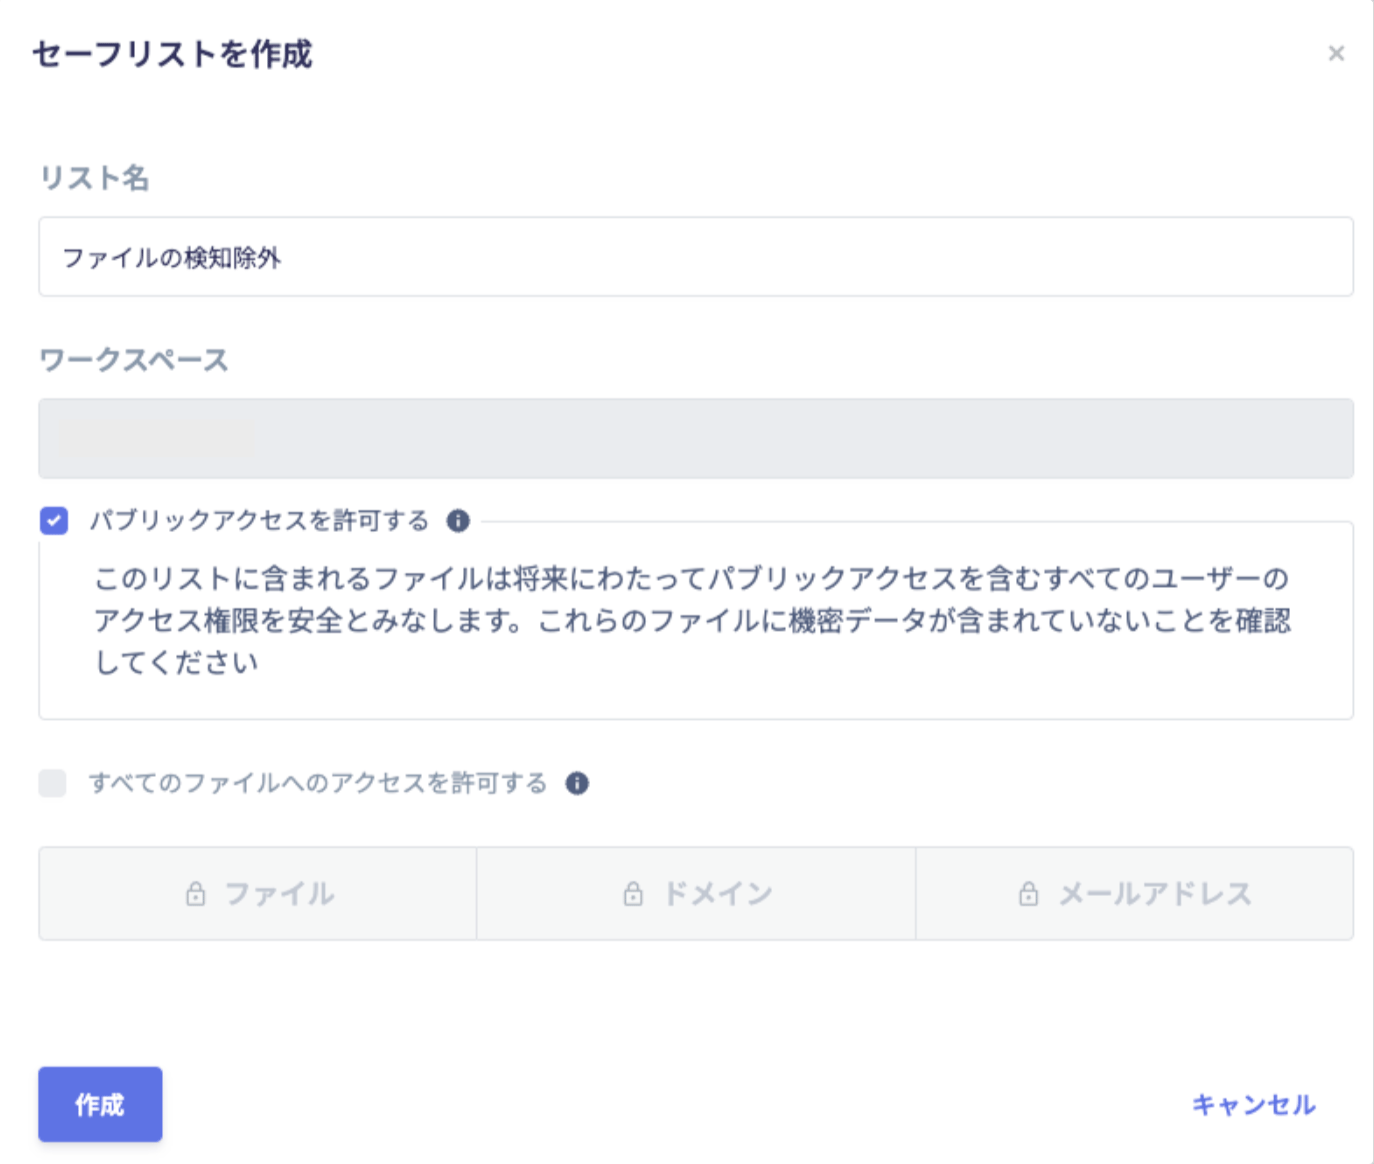
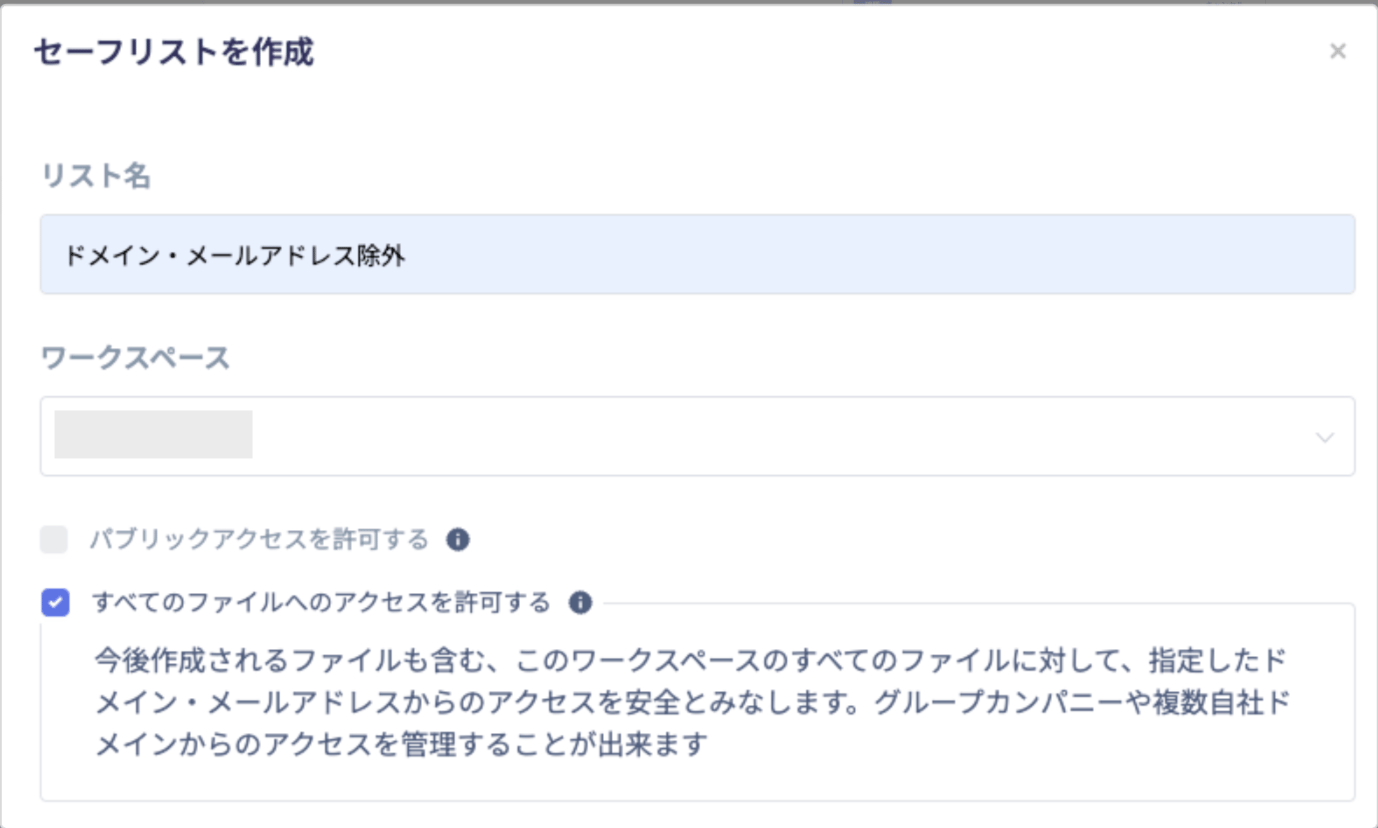
Check Allow public access. This marks all access to the file as safe and excludes it from detection. If you enable this option, you cannot set domain or email exclusion conditions.
-
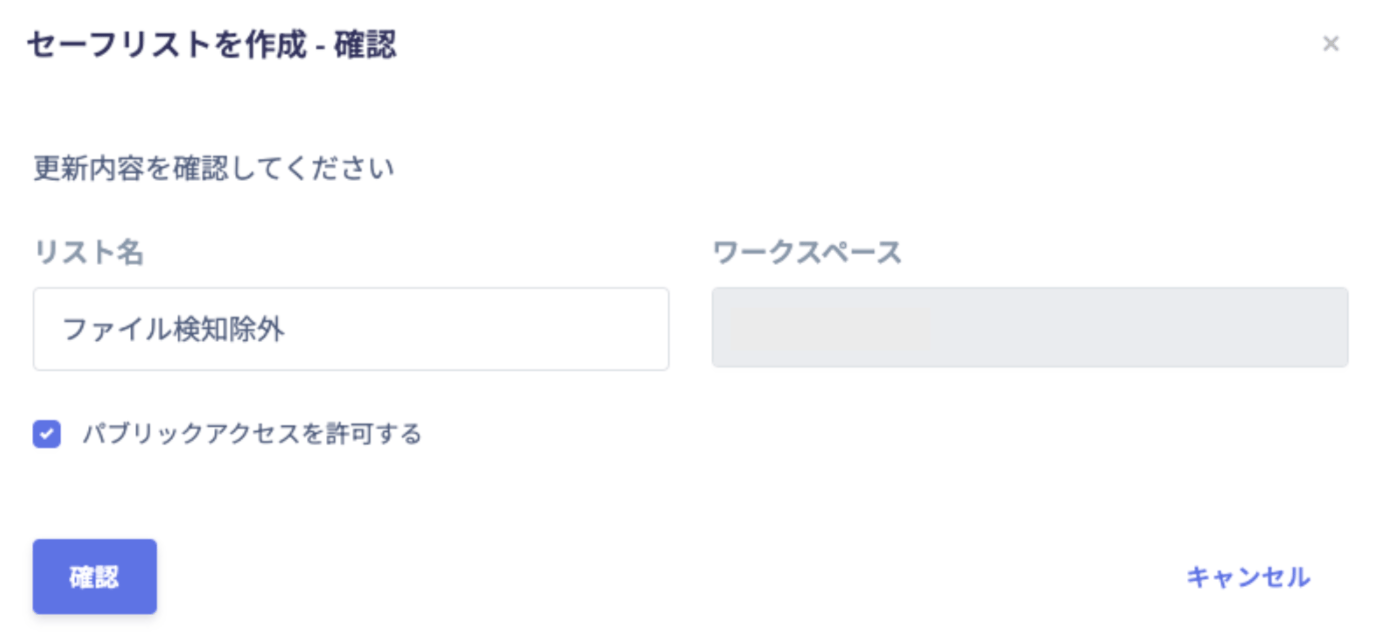
Click Create to save the safelist. In the next step, add the target file under Files: Use case 1.
Adding Exclusion Conditions to a Safelist
Files: Use case 1
-
See Add a File Directly to a Safelist and add the file you want to exclude to a safelist. Check the safelist with Allow public access enabled, then click [Add to Safelist].
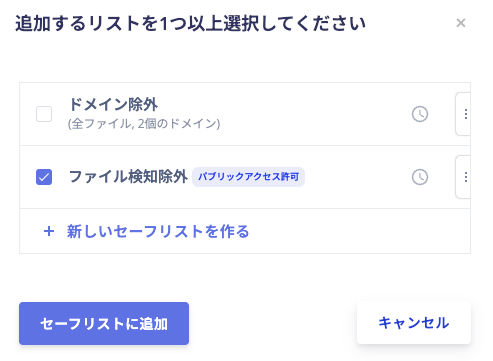
-
Review the details, then click Add.
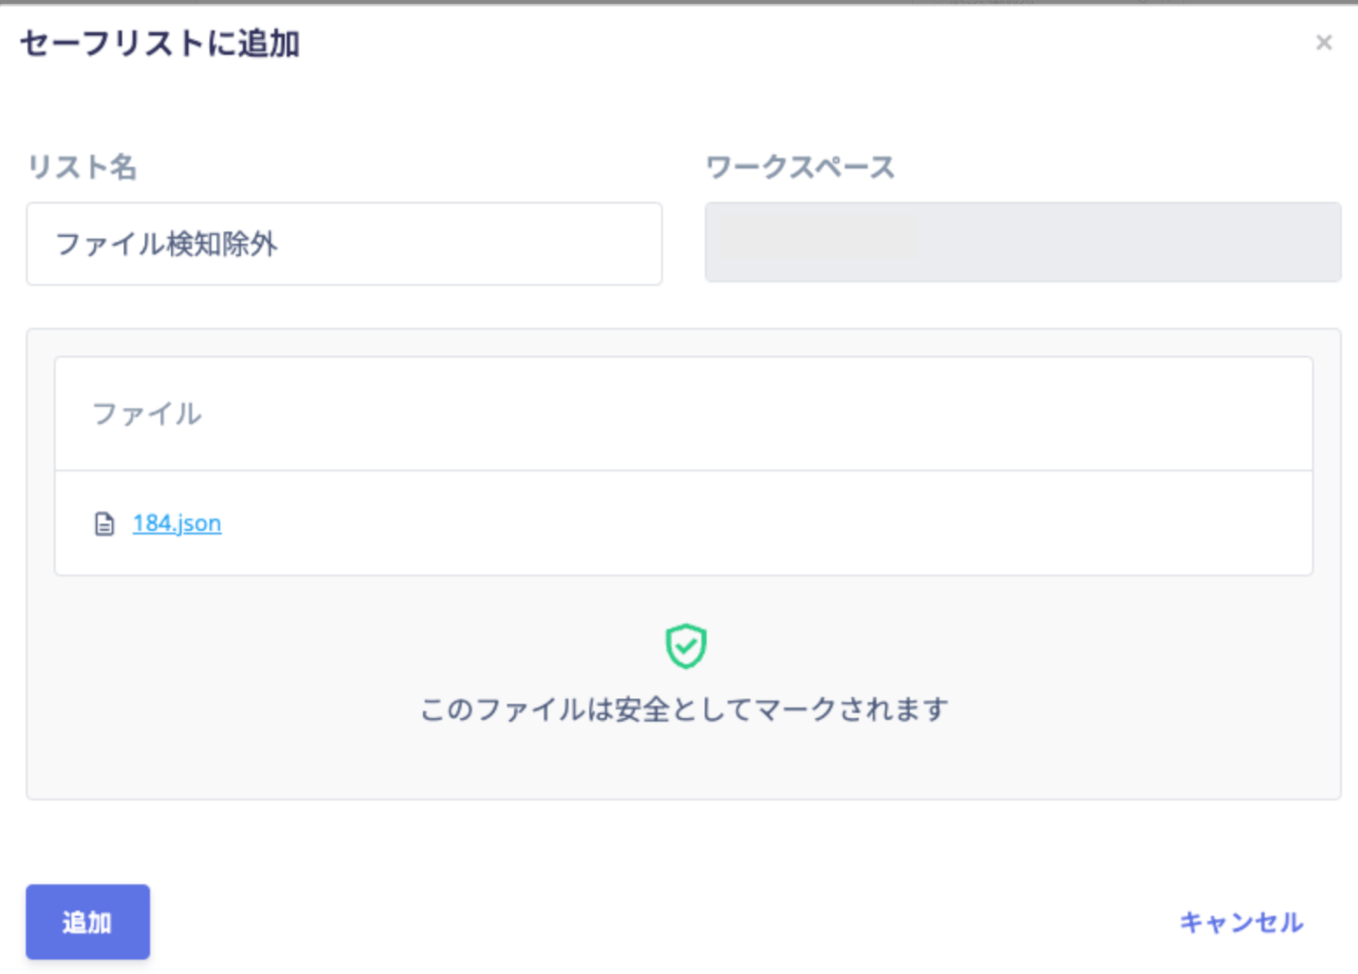
Domains: Use case 2
-
Click Domain, enter the domain you want to exclude in the domain field, then click + Add.
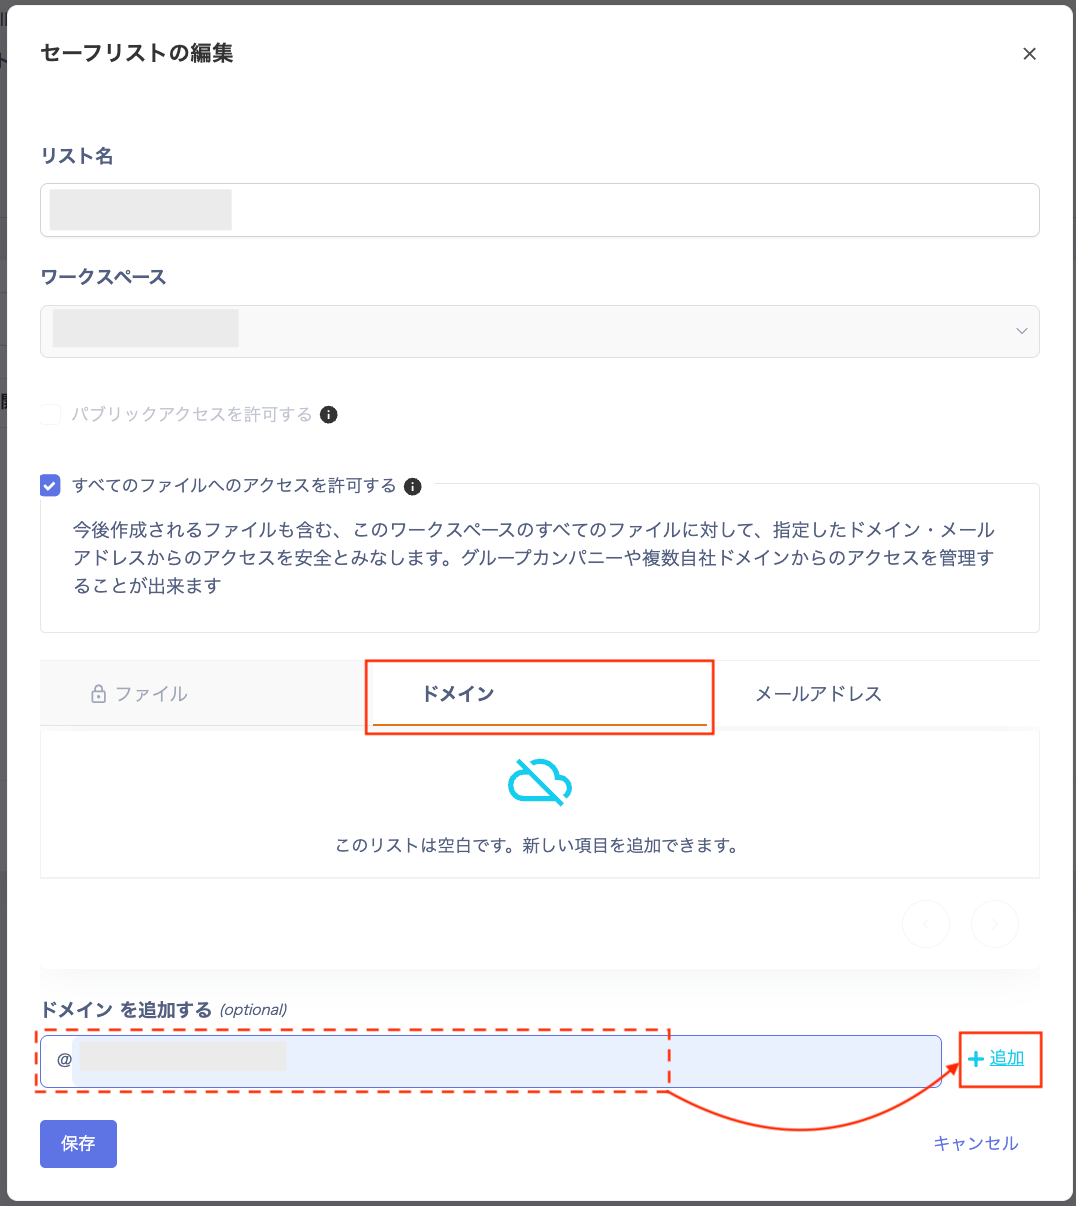
-
Click Create, then review the list of added domains. Click Confirm.
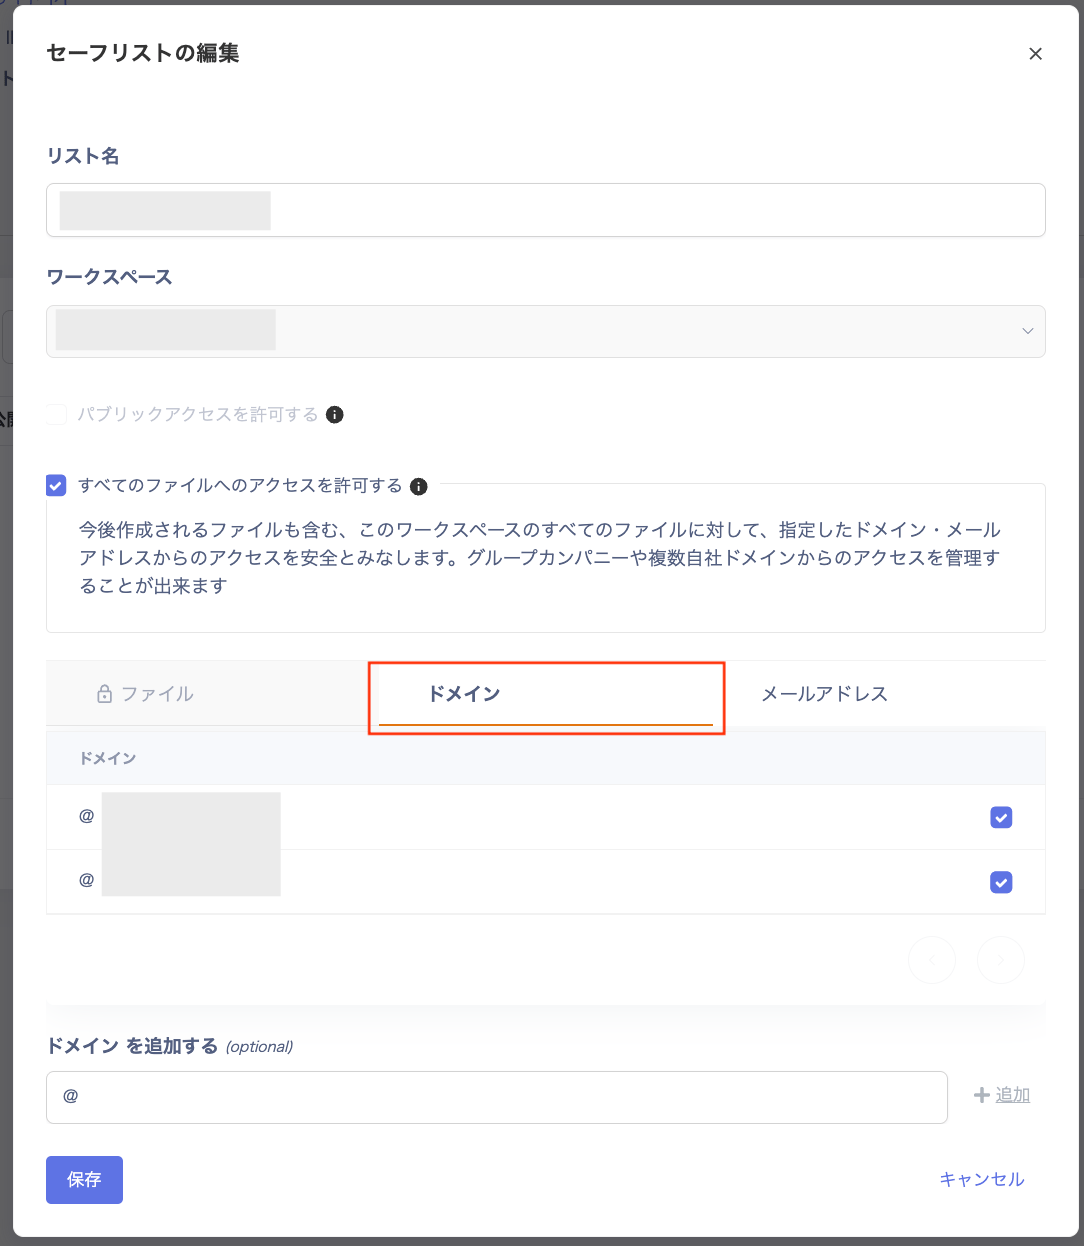
- When you specify a domain, its subdomains are automatically excluded as well. For example, if you exclude
@example.com, files shared with@hoge.example.comare also excluded. - To exclude a file shared with multiple domains as safe, the safelist must include every recipient domain for that file.
Email addresses: Use case 3
-
Click Email address, enter the email address you want to exclude in the email address field, then click + Add.
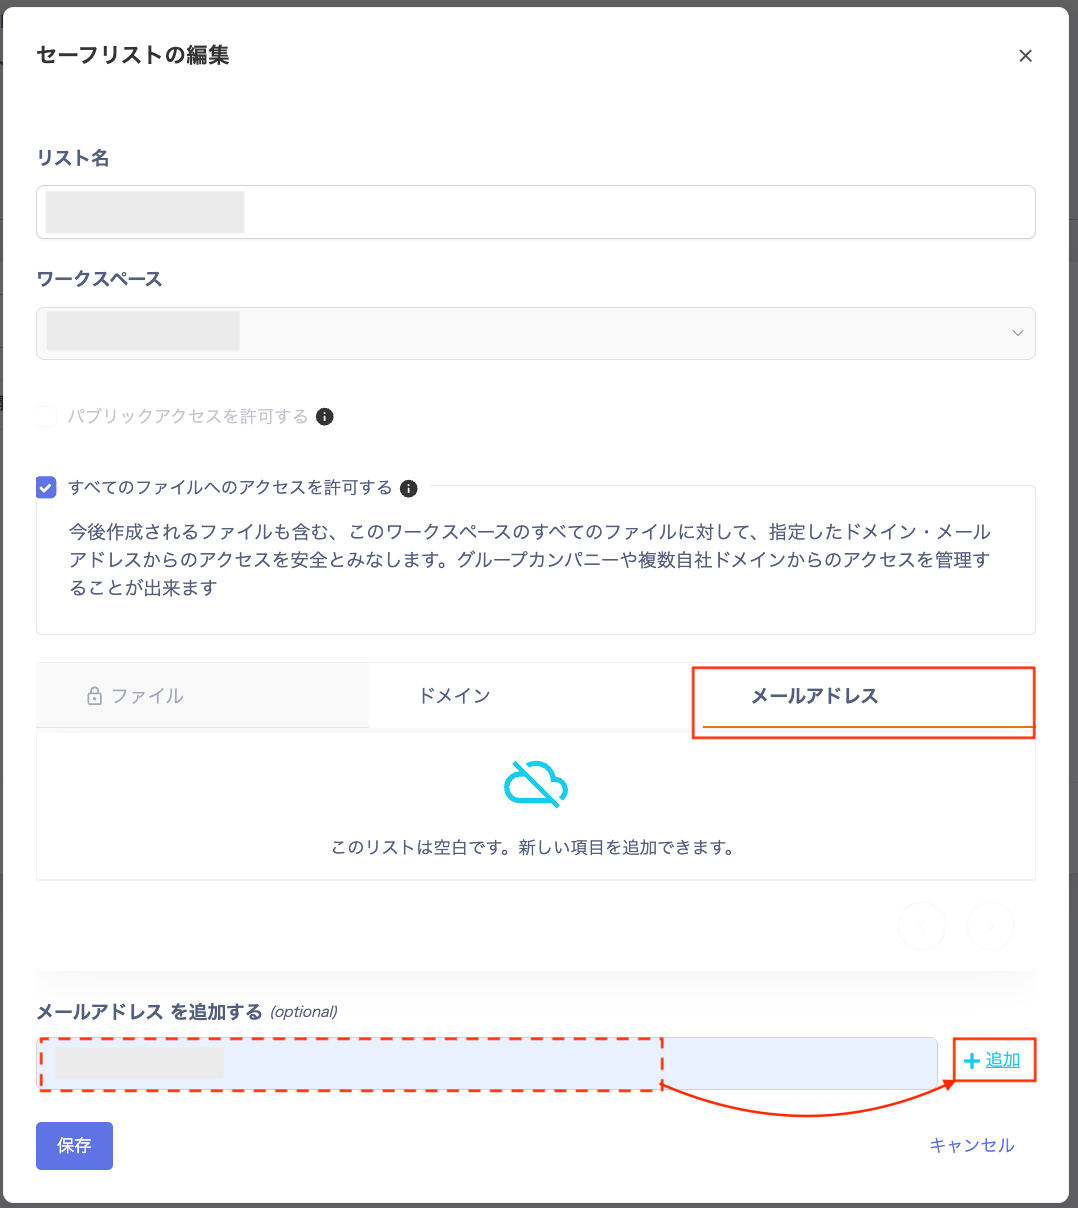
-
Click Create, then review the list of added email addresses. Click Confirm.
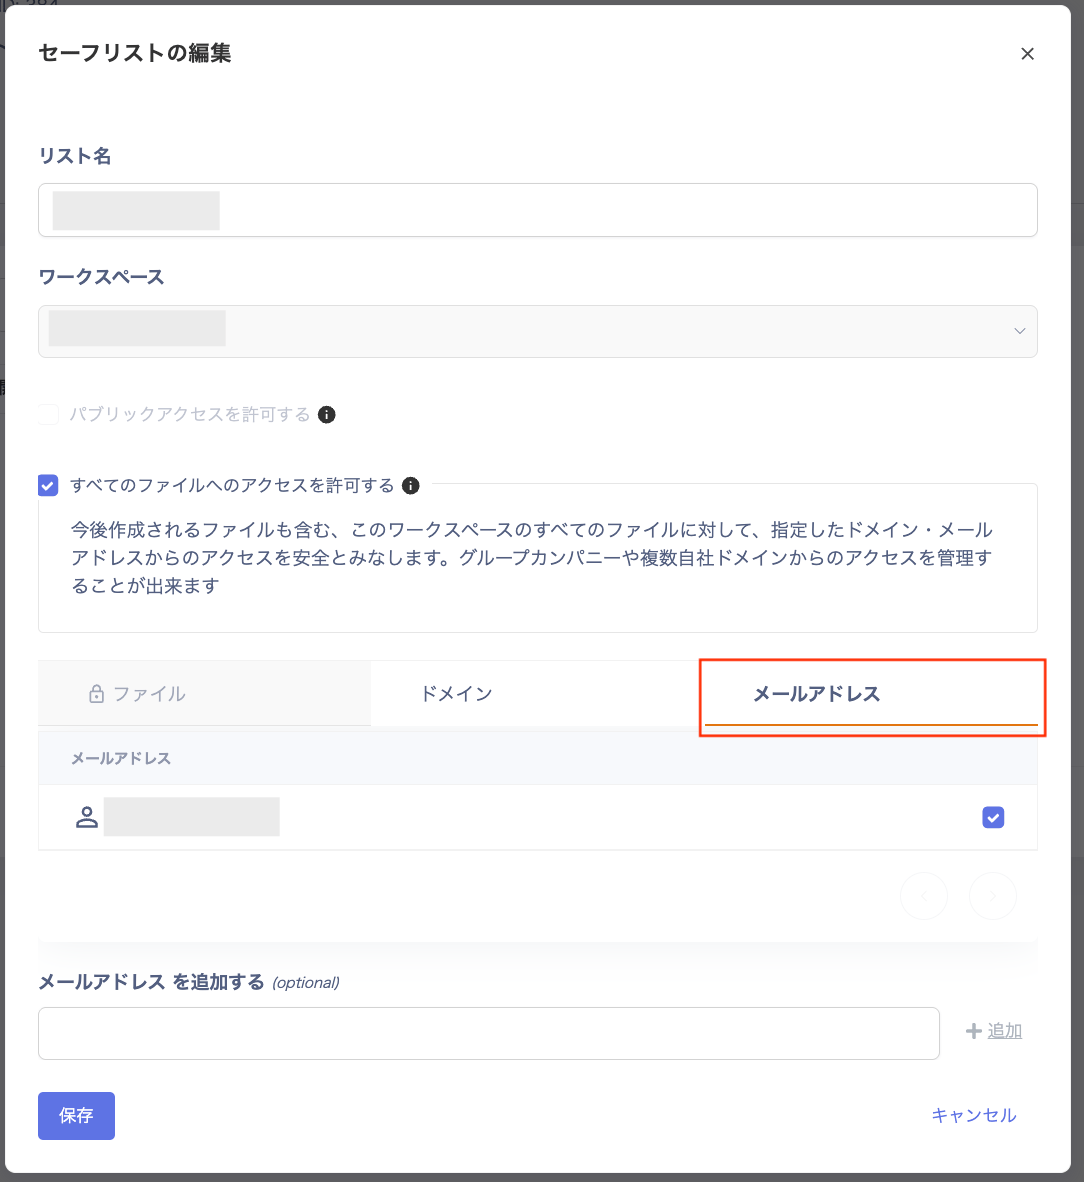
Activating a Safelist
Right after you create a safelist and add conditions, the safelist is not yet active (not yet applied).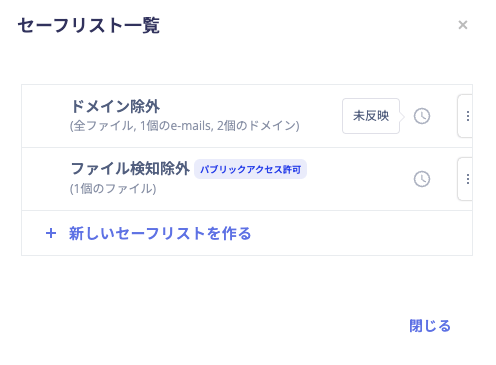
-
To activate the safelist, sync files for the target service (workspace) once. Run the sync from Sync in the Files tab. The safelist activates after the sync completes.
 Syncing a workspace from the Account tab or the Integration > Status tab does not activate the safelist. You must run the sync from the Sync button in the Files tab.
 -
After the sync completes, confirm that the safelist status shows as applied.
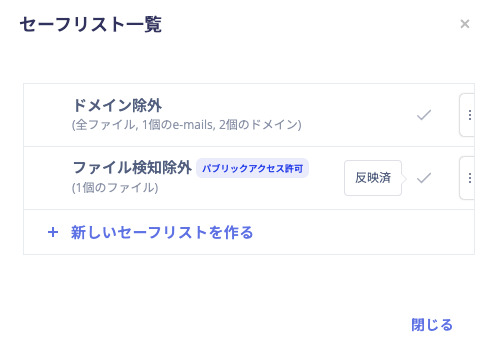
Viewing the Safelist List
You can view your configured safelists from the [Safelist List] button.
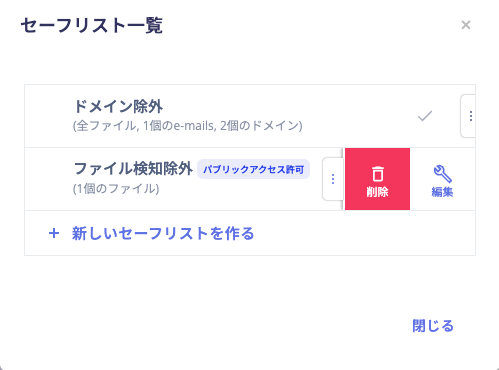
Checking the Exclusion Results
Files matching an active safelist are excluded from detection at the next file sync after the safelist activates. Check the File tab or Notifications tab to confirm the alert count. Confirm that the target files no longer appear as detected.FAQ
Q. The “Sharing settings” screen shows a group address as (0). Why doesn’t it disappear?
A. Register the address in a safelist using the following steps.-
In the Files tab, click the three-dot menu [︙] on a file in the file list, then click [Share].
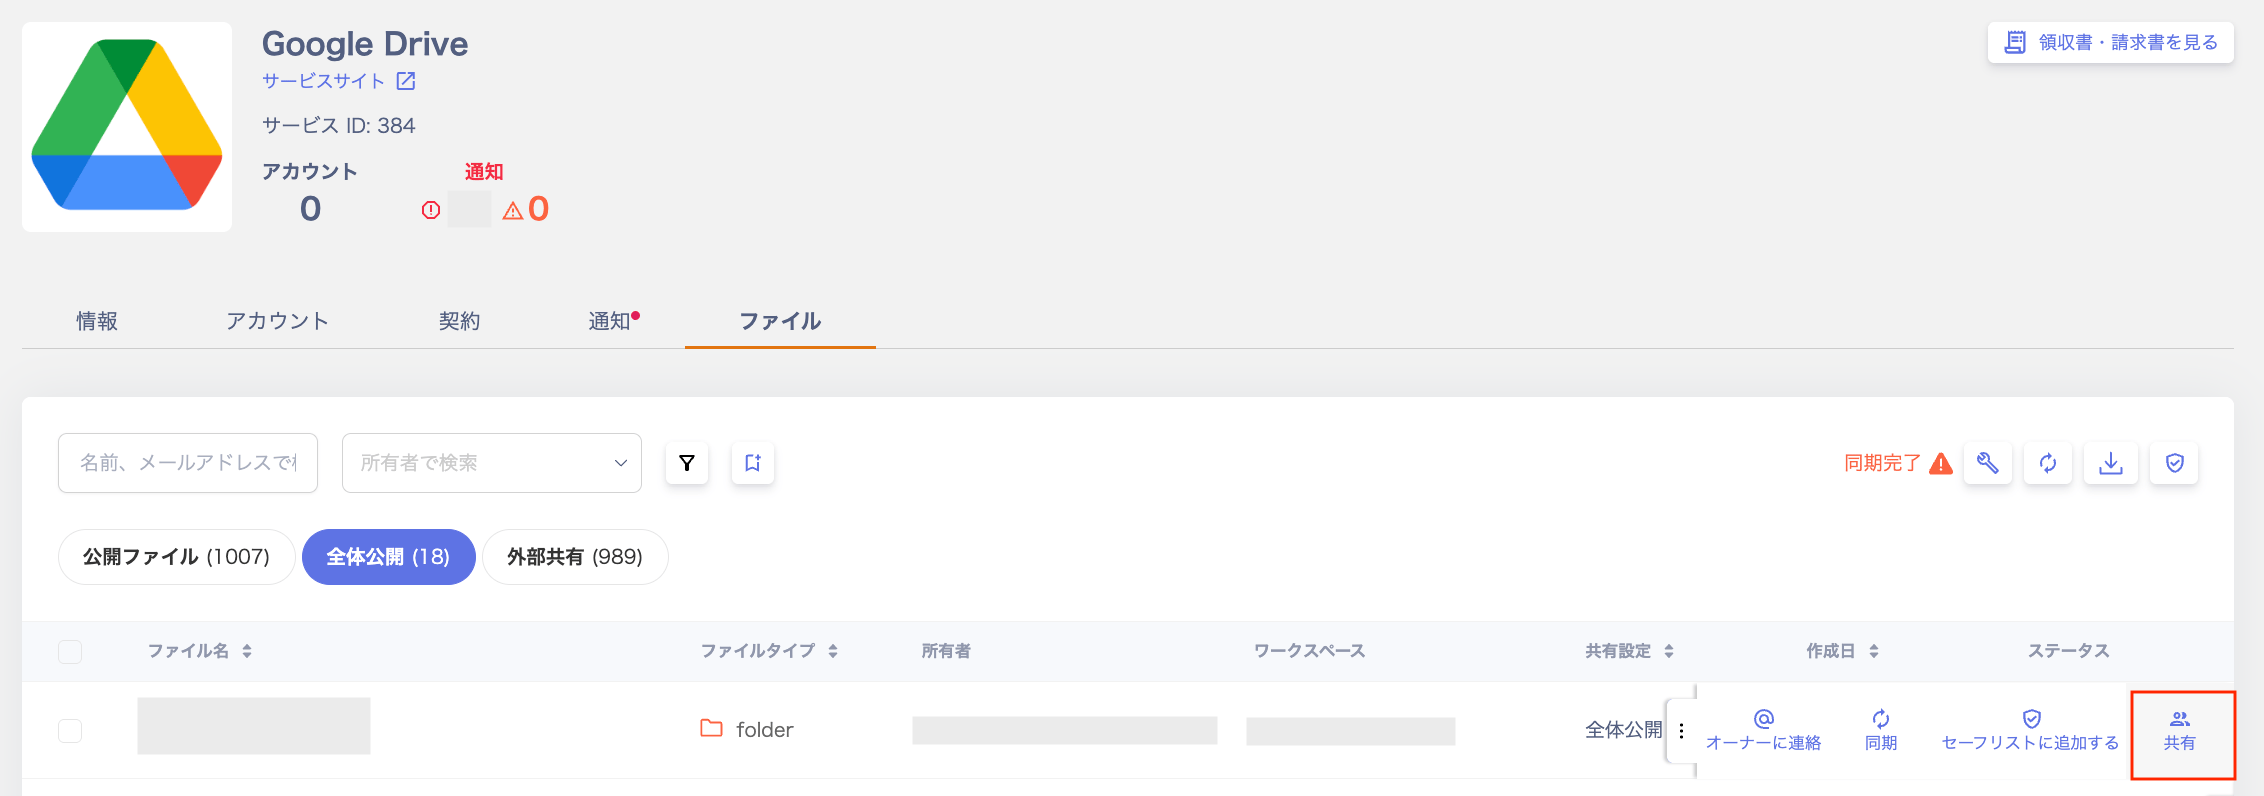
-
On the “Sharing settings” screen, click the three-dot menu [︙] next to the group address shown as (0). Then click [Add to Safelist] to register it.
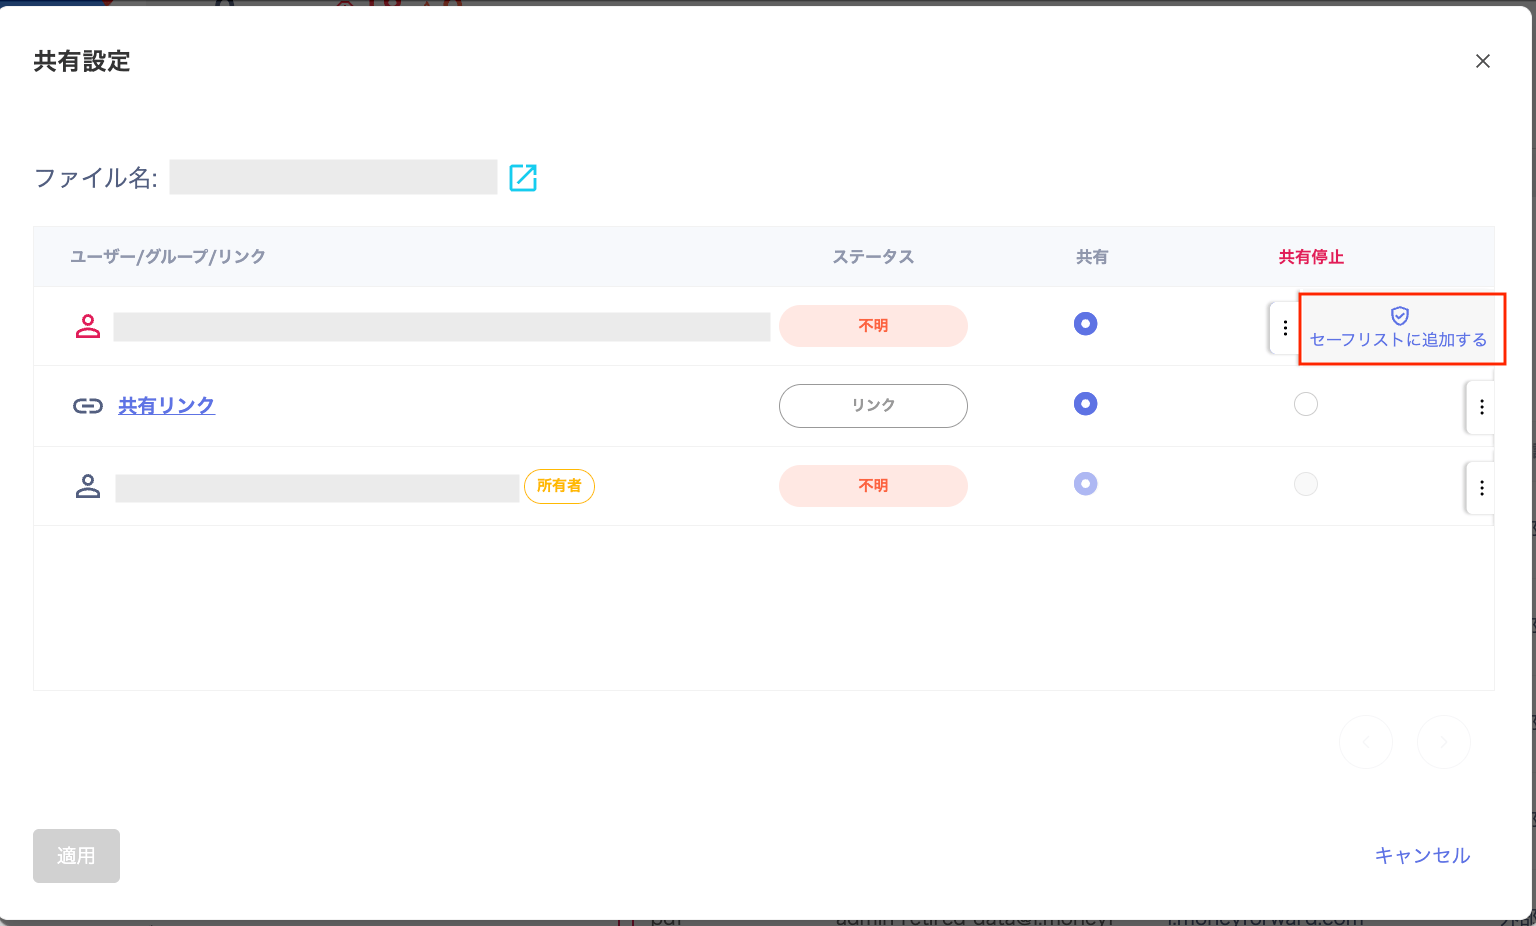
- The target file is excluded from detection at the next file sync after the safelist activates.