Retrieve your organization’s SAML settings
Go to Settings > Security and locate the SAML section. Copy and save the SAML entity ID and SAML reply URL. You will enter these values in your IdP’s SSO configuration screen.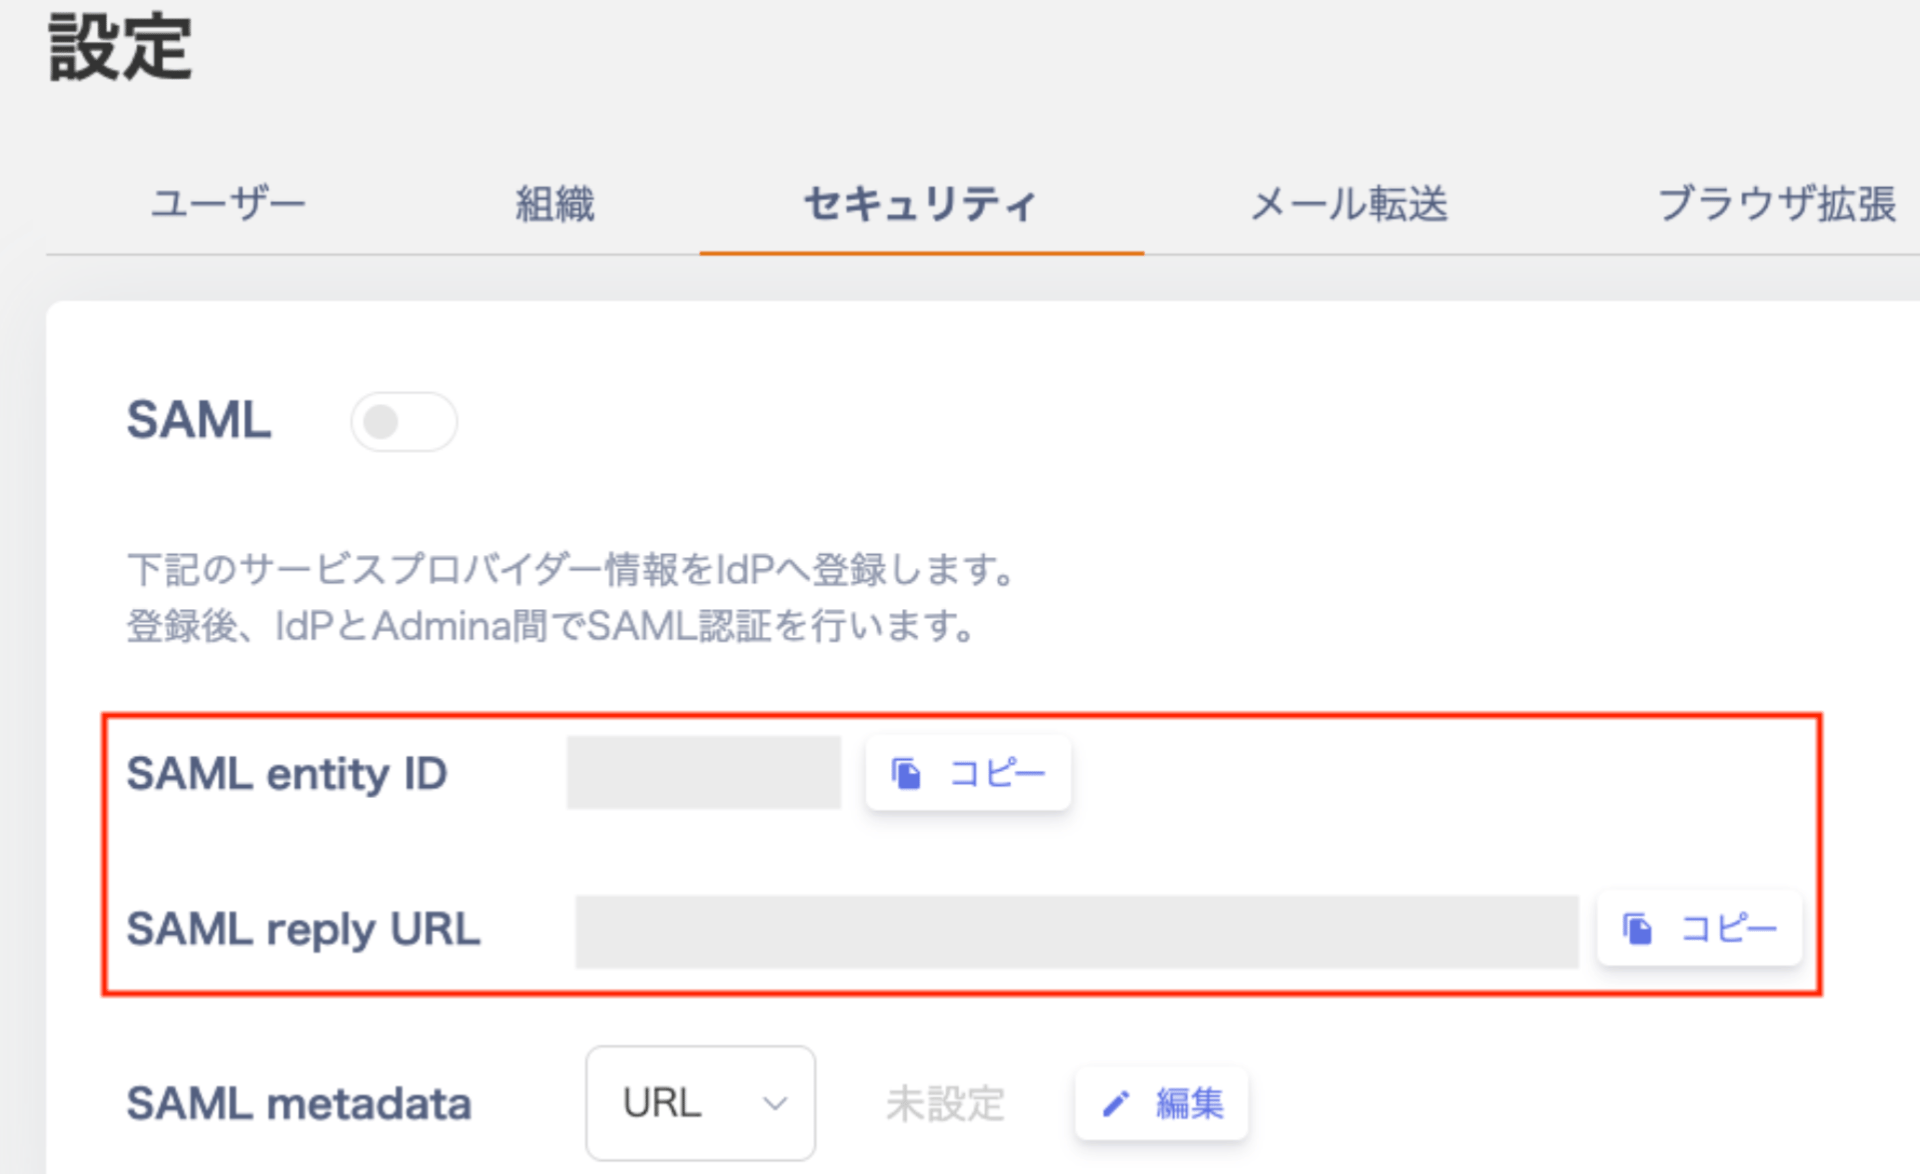
Retrieve SAML metadata from your Identity Provider
You first need to create an SSO app. The steps vary depending on your Identity Provider (IdP).Microsoft Entra ID (Azure AD)
-
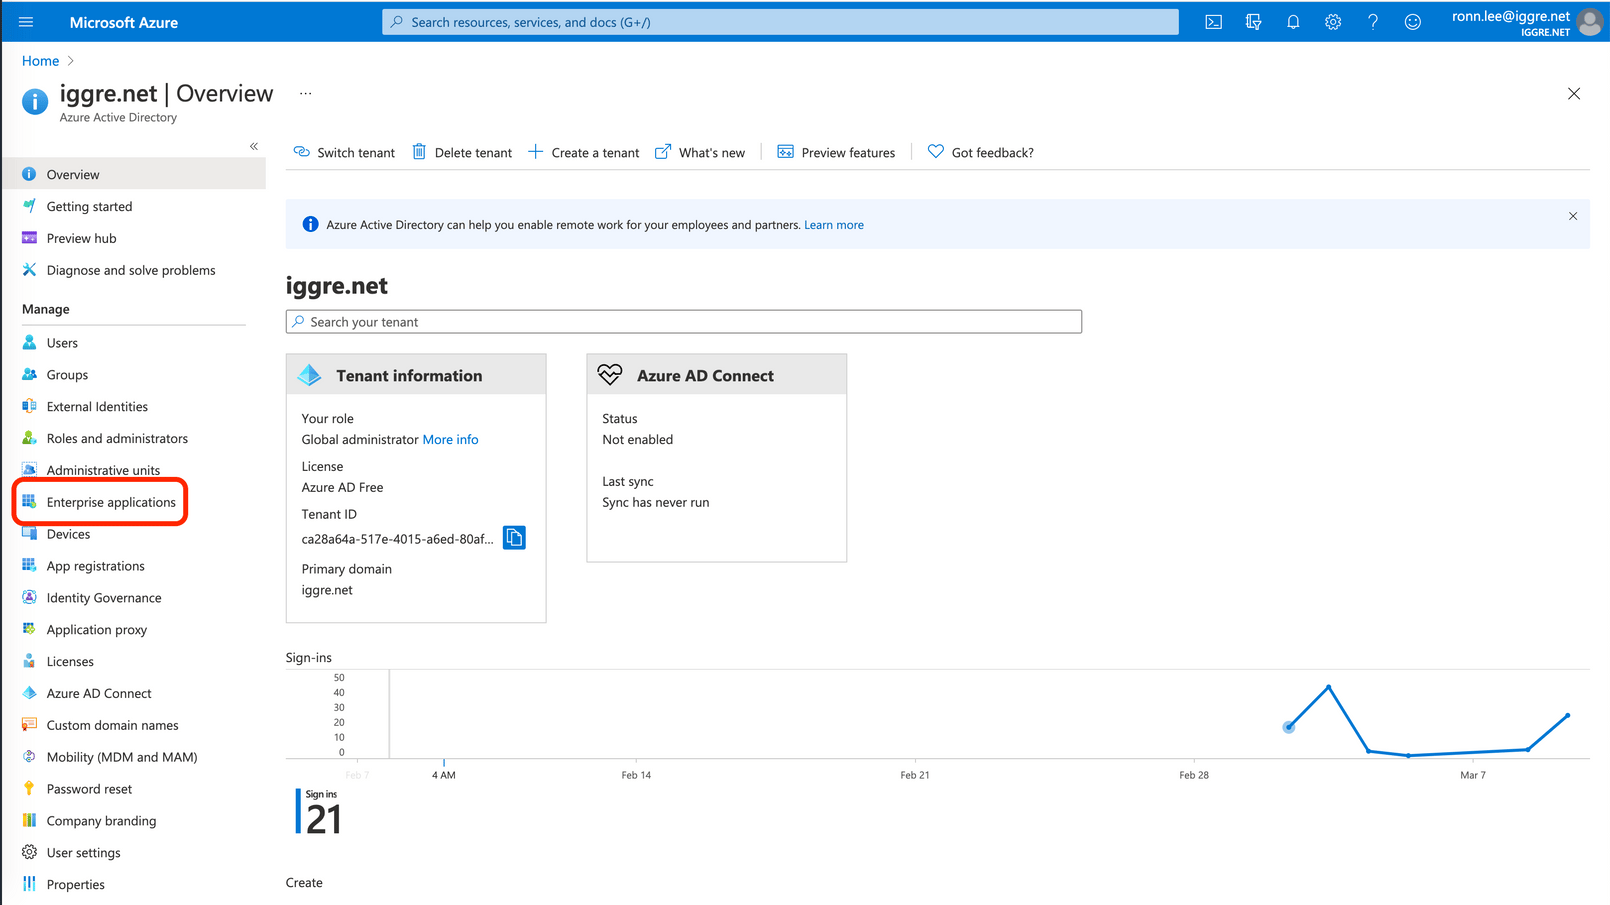
Select Enterprise Applications.
-
Click New Application.

-
Enter a name for your application (for example:
service name).
-
Click Create and wait a moment.
When the app screen appears, select Single sign-on > SAML.

-
Enter the following values.
Field Value Identifier (Entity ID) The SAML entity IDshown on our SSO settings screenReply URL The SAML reply URLshown on our SSO settings screenUnique User ID Change from user.principalnametouser.mail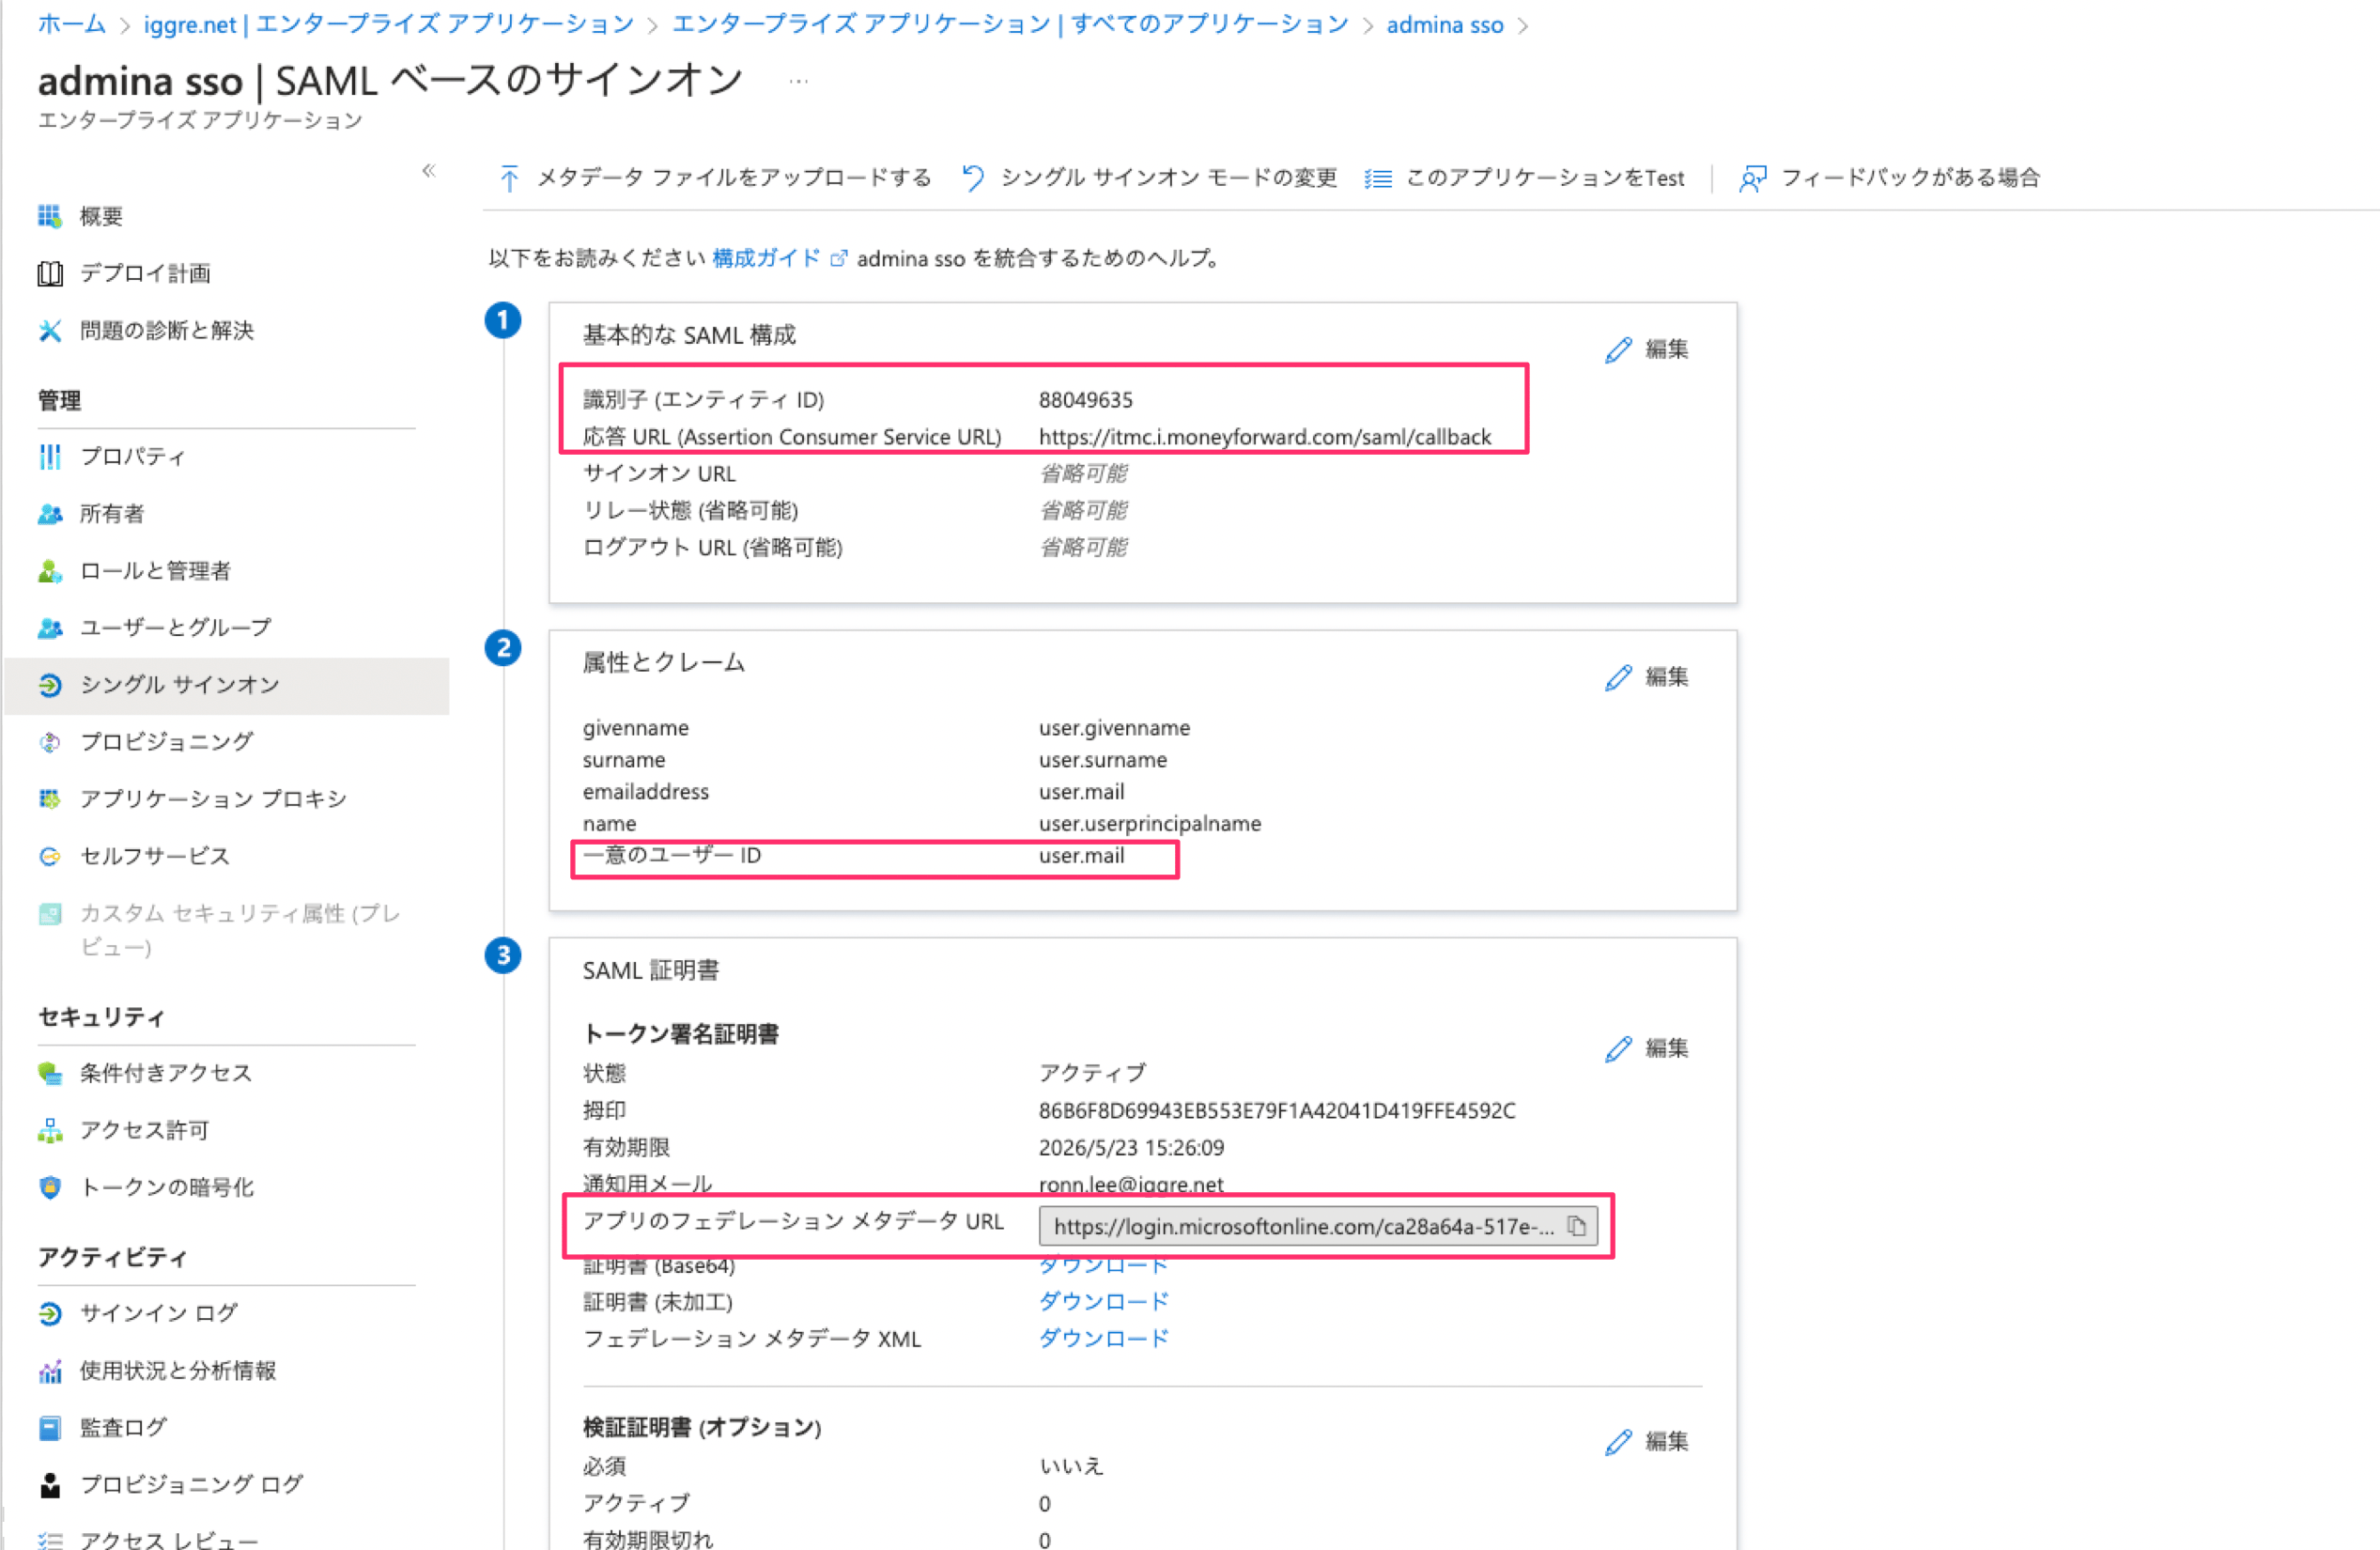
-
After saving, copy the App Federation Metadata URL.
Paste the copied URL into the
SAML metadata URLfield and save. Azure AD SAML configuration is now complete. Next, enable SAML.
Google Workspace
-
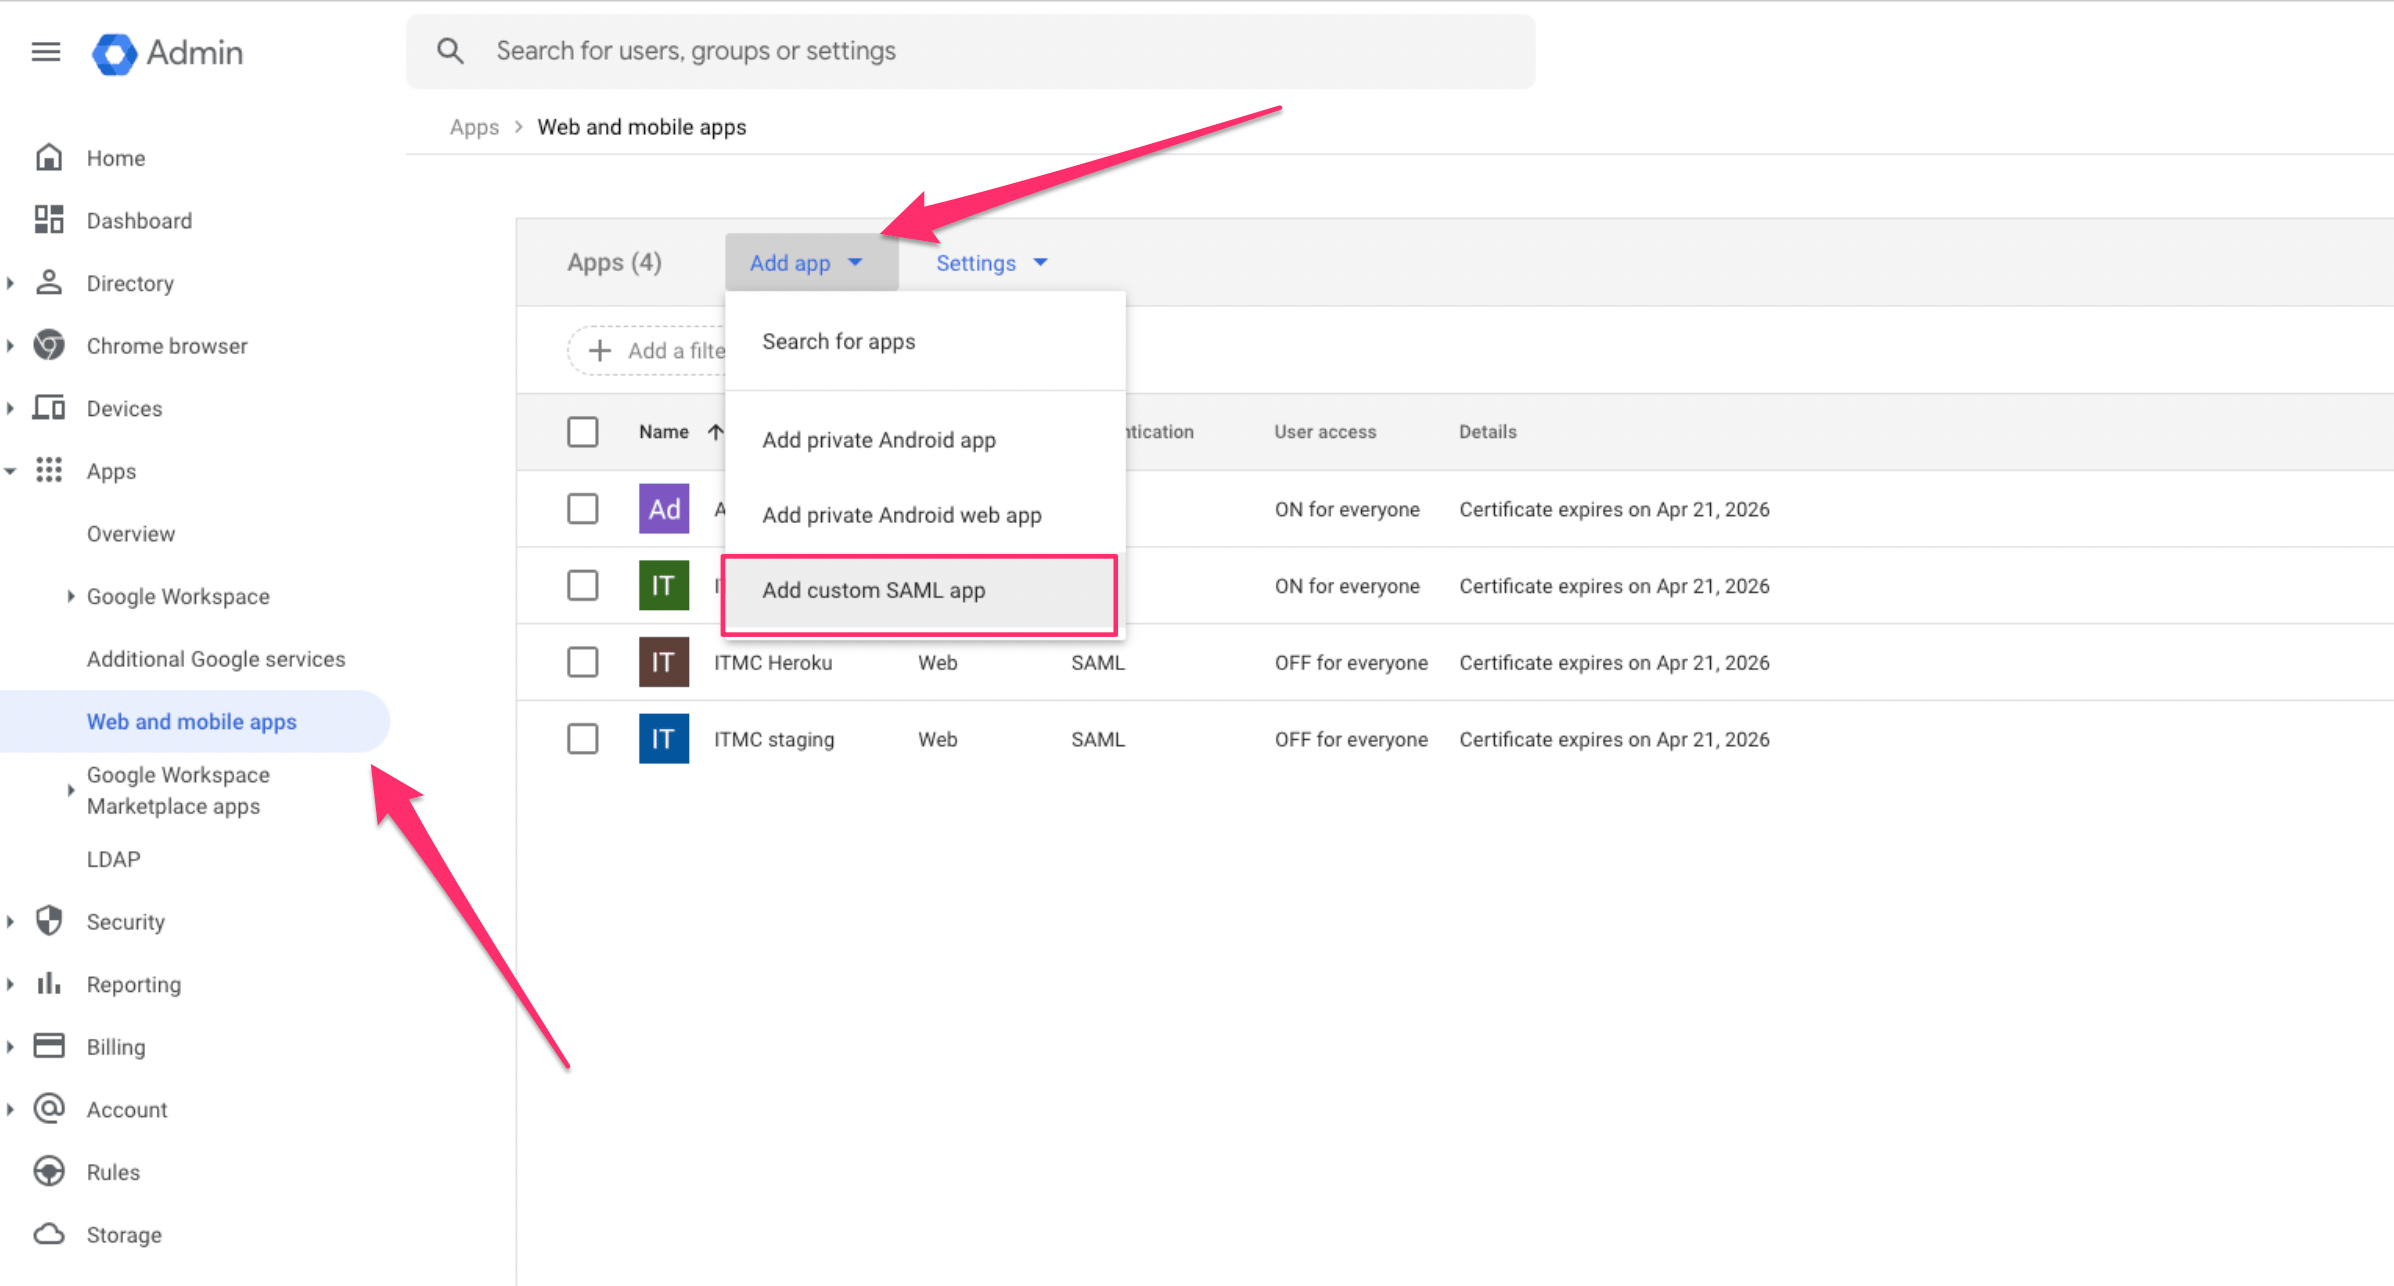
Sign in to the GWS Admin Console and go to Apps > Web and mobile apps. Select Add Custom SAML App from the Add app menu.
-
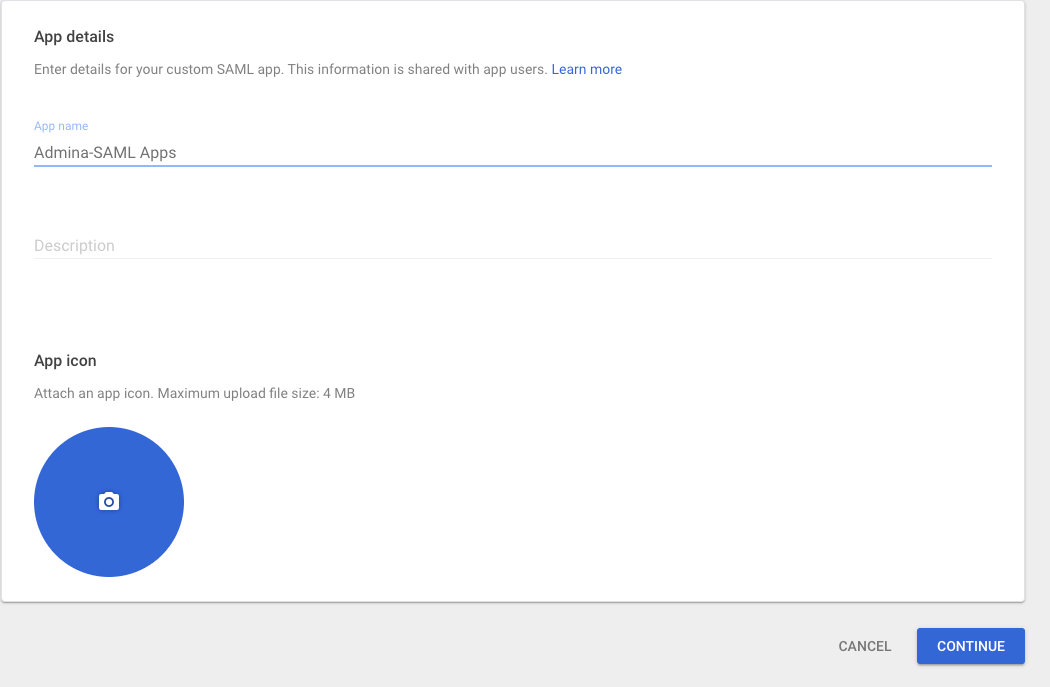
Enter an application name and click CONTINUE.
-
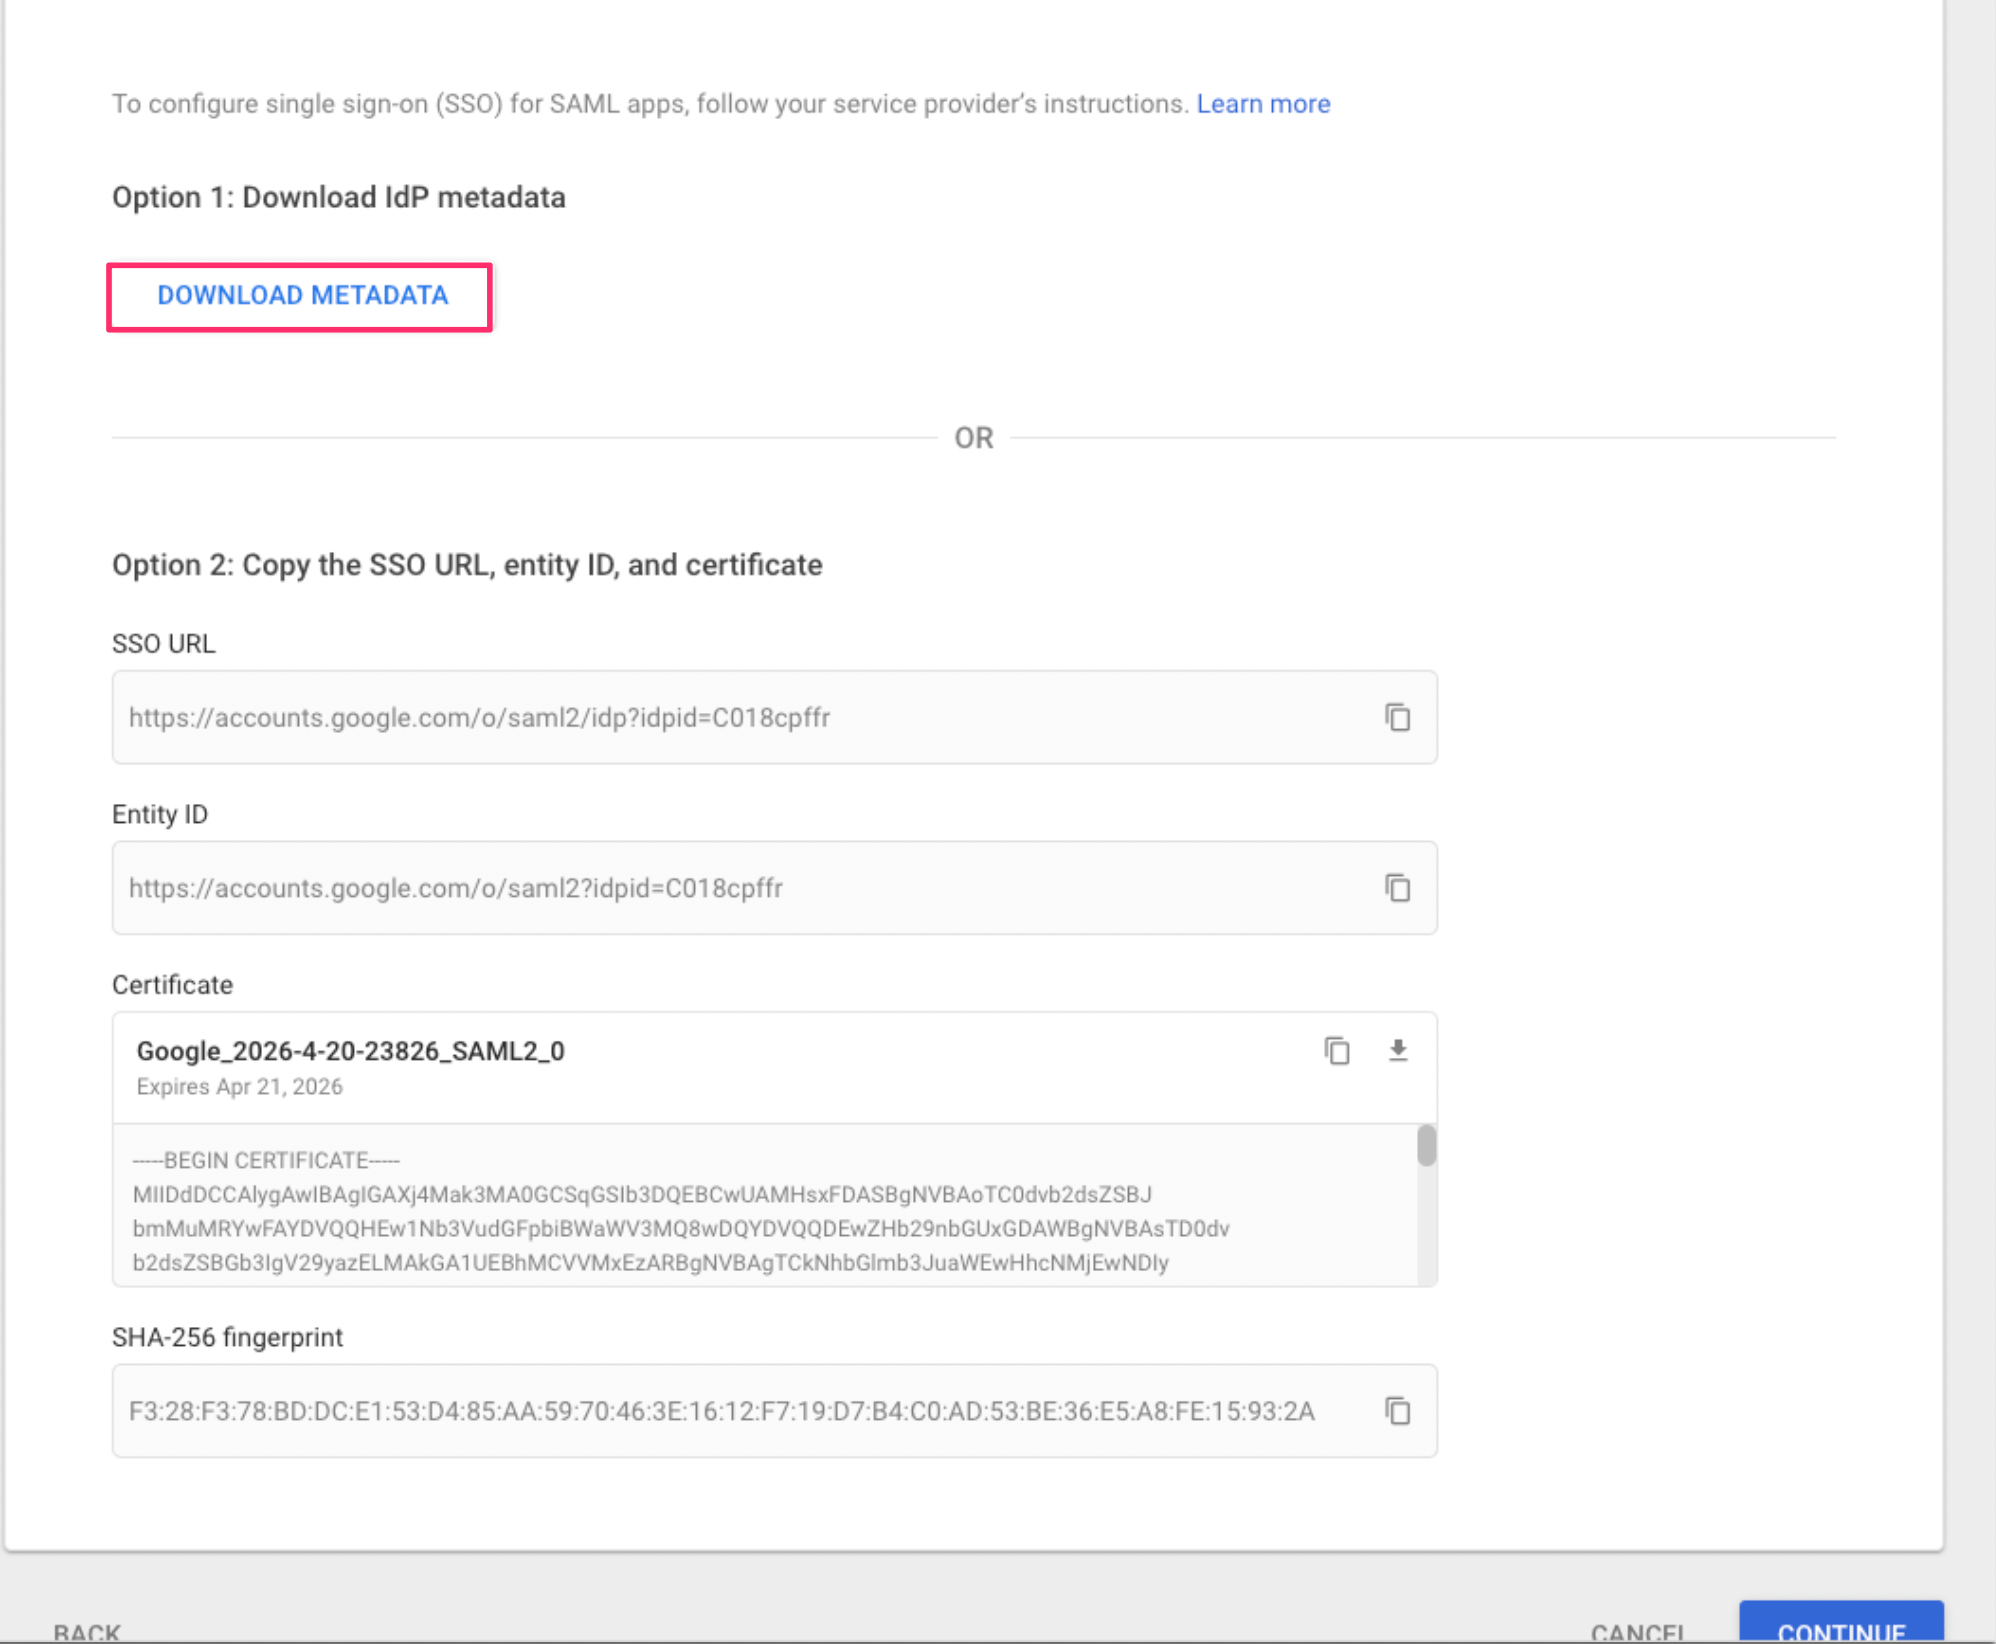
Click DOWNLOAD METADATA and save the metadata file.
-
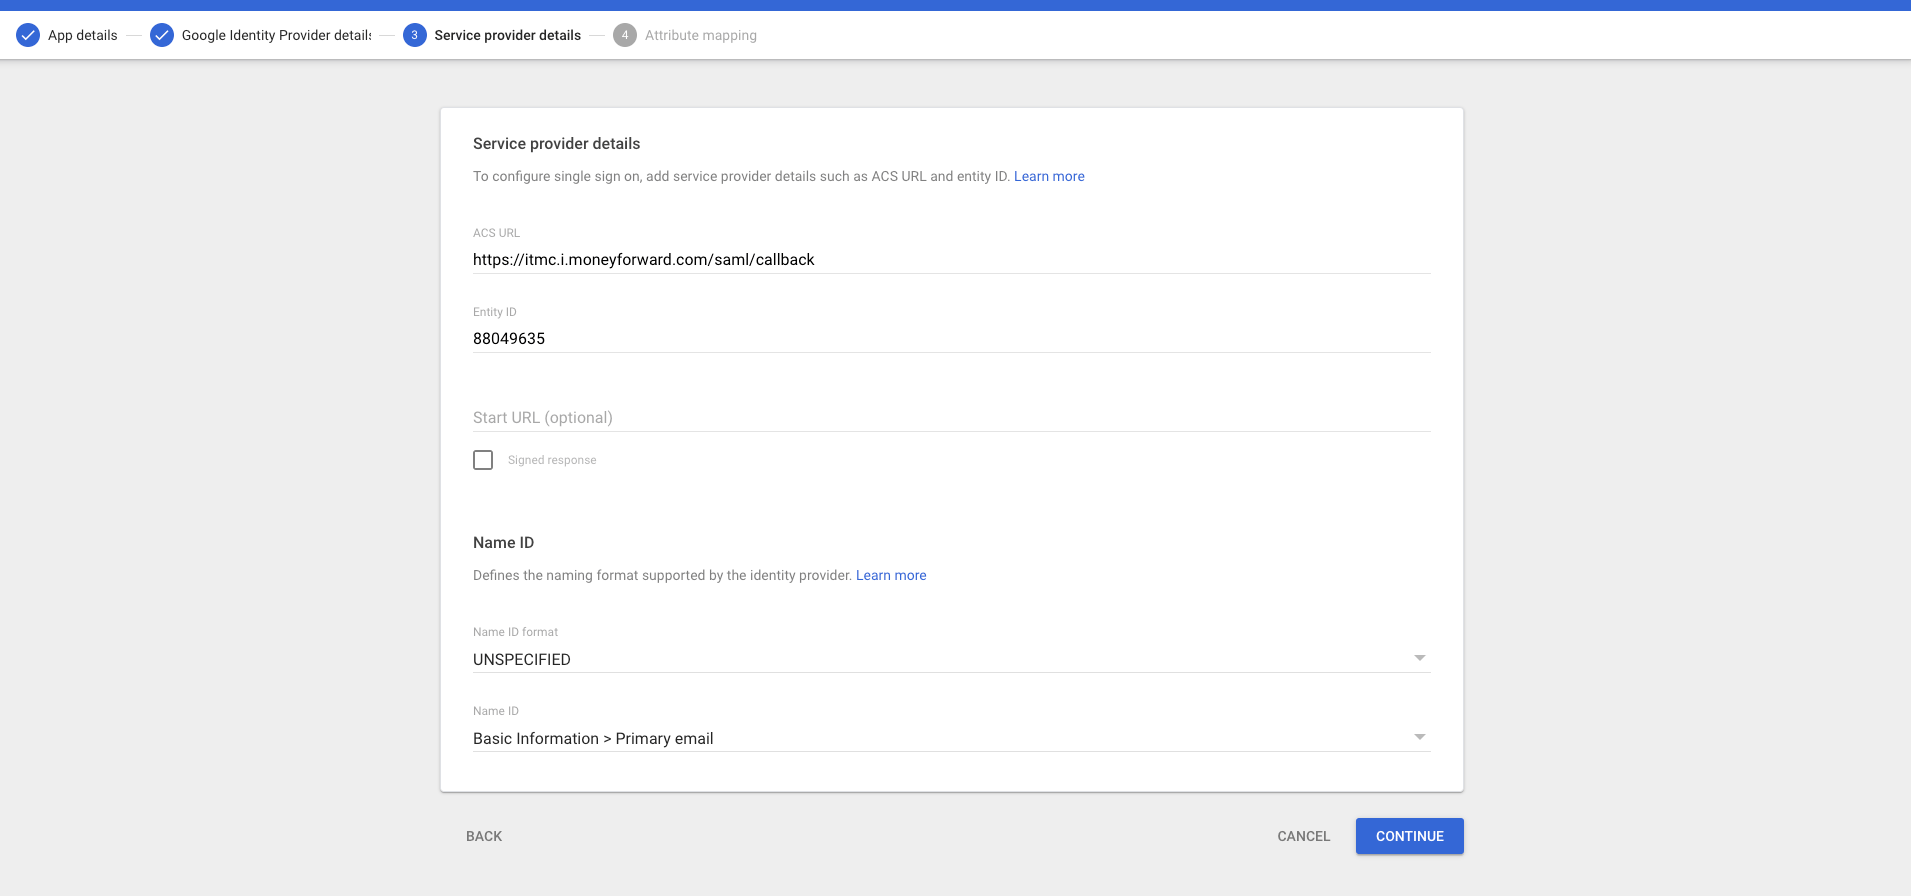
Enter the values you copied into ACS URL and Entity ID, then click Continue.
-
On the next screen, click FINISH without entering anything.
Your SAML application is now created.

Okta
Okta Integration Network (OIN) is now supported, making setup much easier. Follow the steps at the link below: SAML/SCIM setup with Okta Integration Network
-
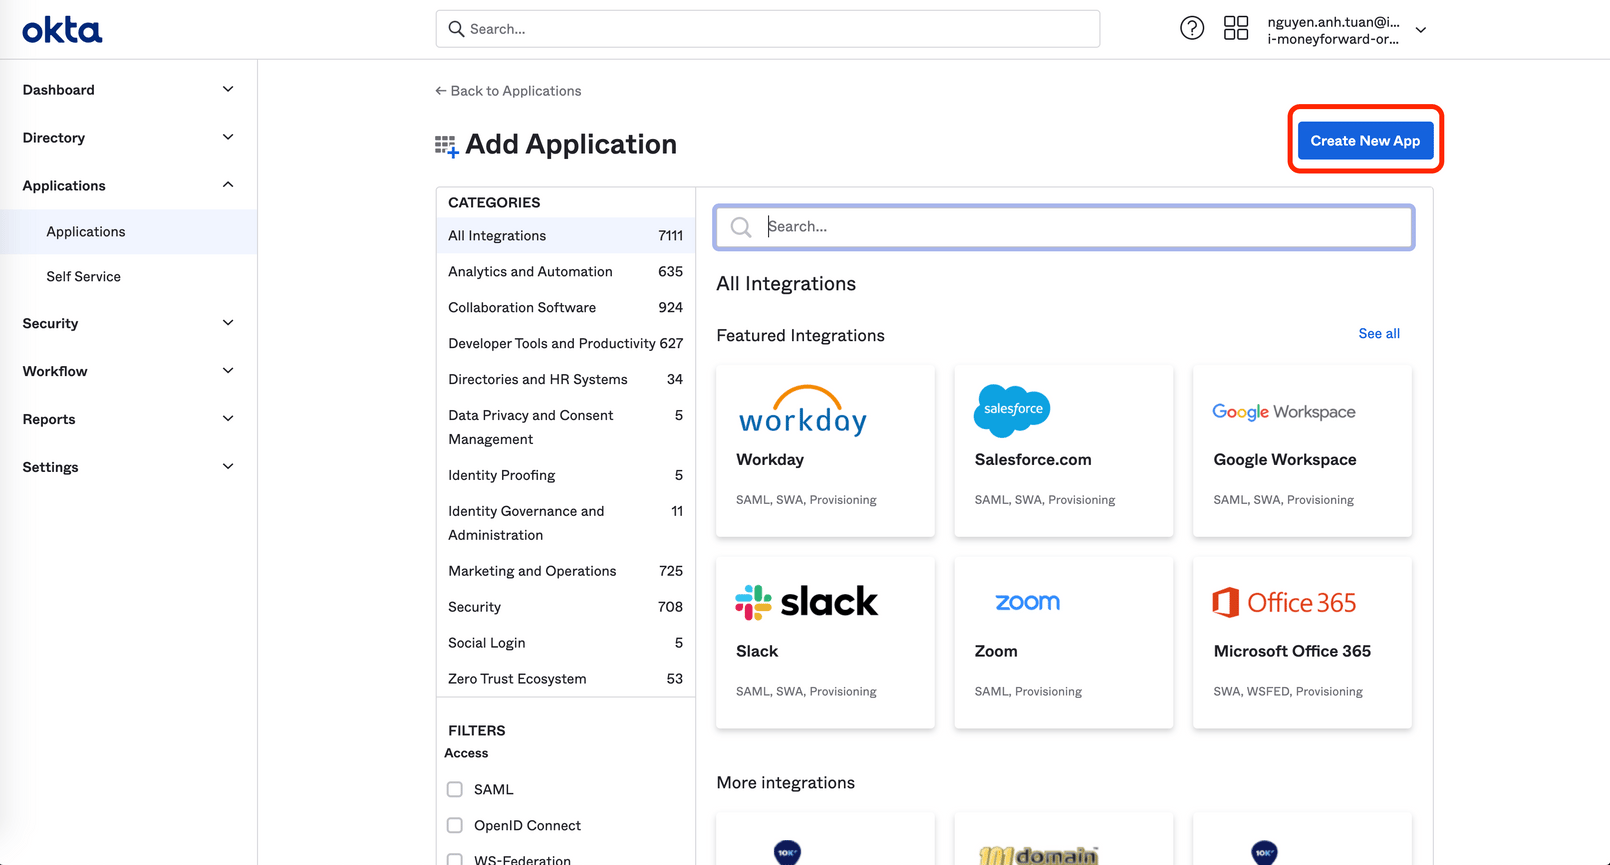
Go to the Okta Admin Console and click the button to add an application.

-
Click the button to create a new application.
-
Set Platform to
Web, selectSAML 2.0as the Sign on method, and click Create.
-
Enter an application name (for example:
service name) and proceed to the next screen.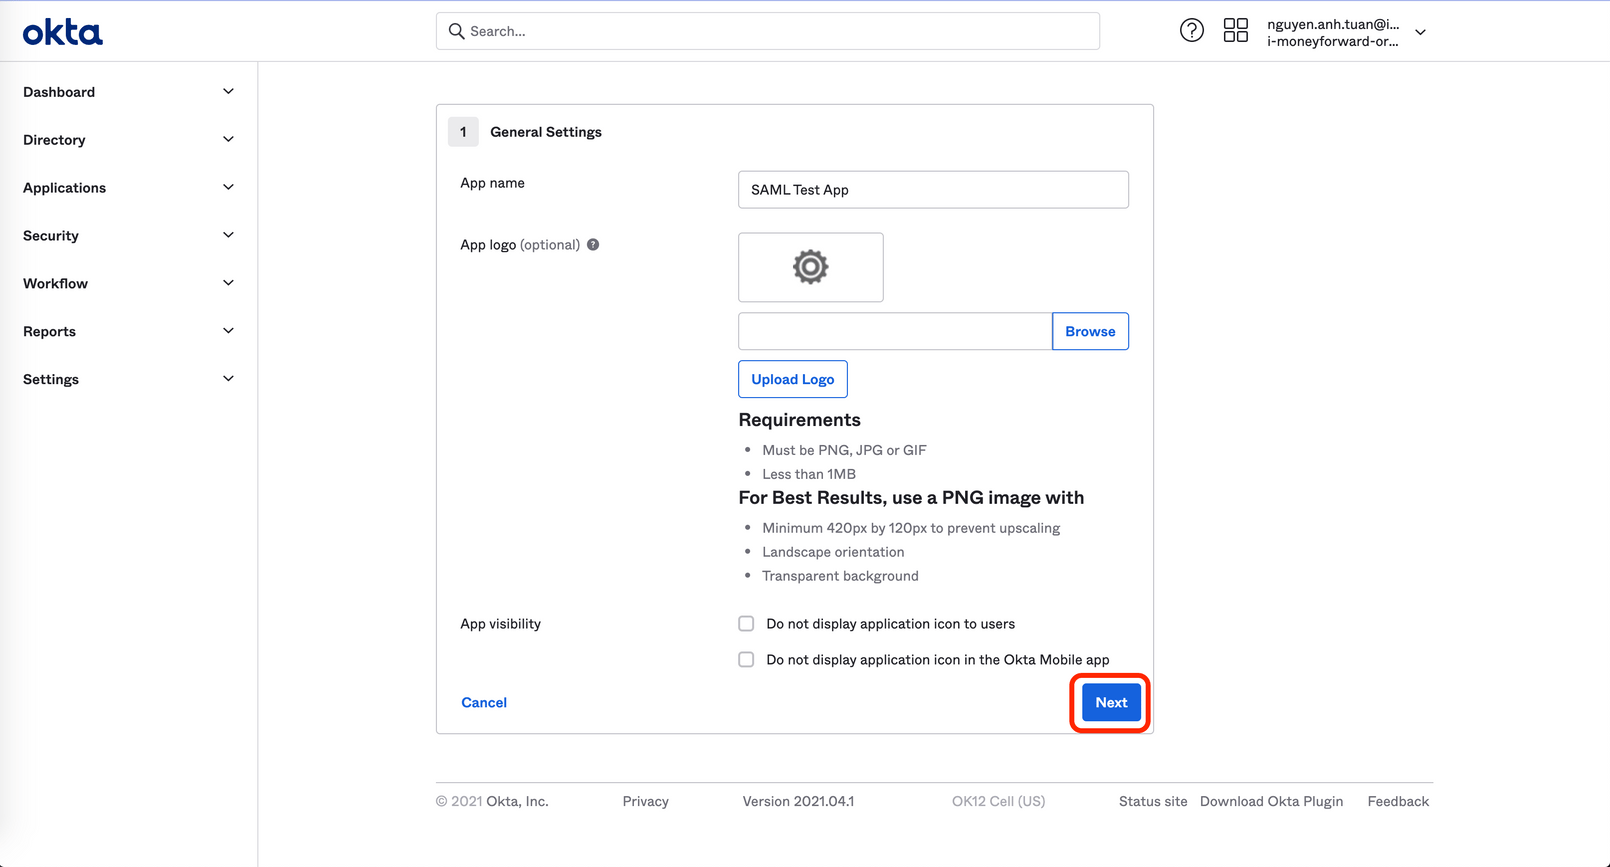
-
Enter the SAML settings and proceed to the next screen.
Single sign on URL: enter the
SAML reply URLshown earlier. Audience URI: enter theSAML entity IDshown earlier. Name ID format: selectEmailAddress.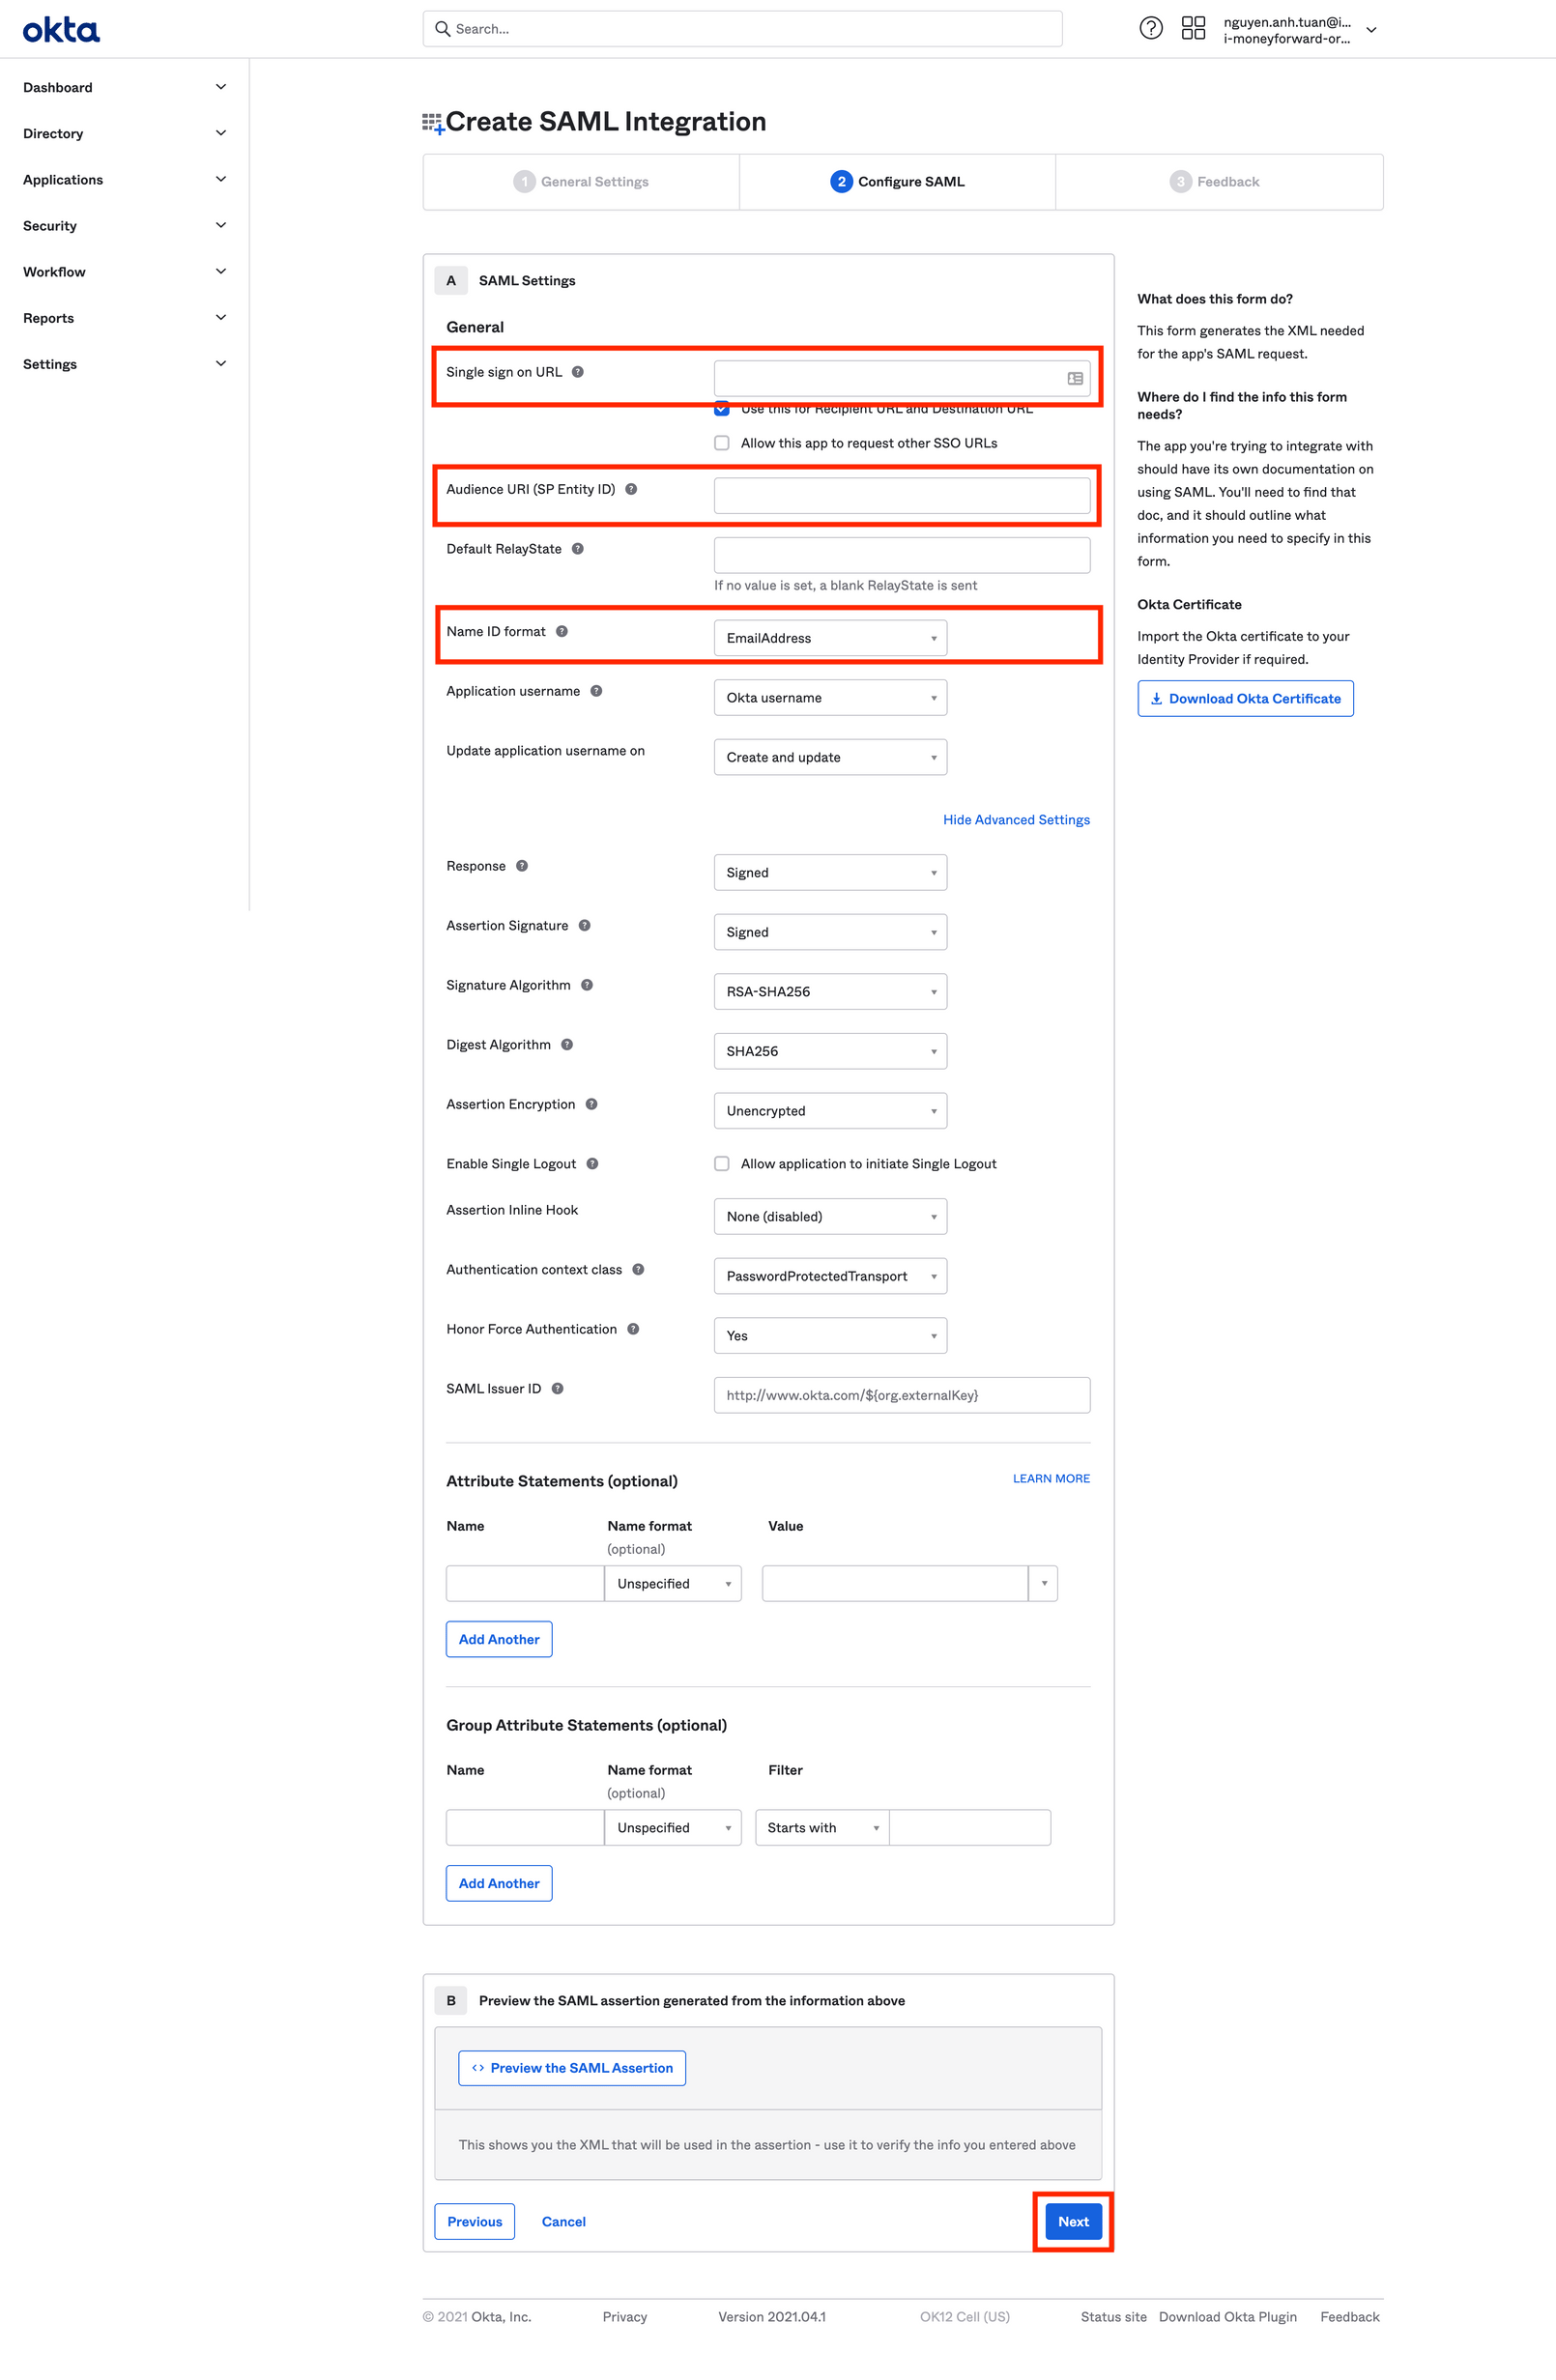
-
On the next screen, click the
Identity Provider metadatalink.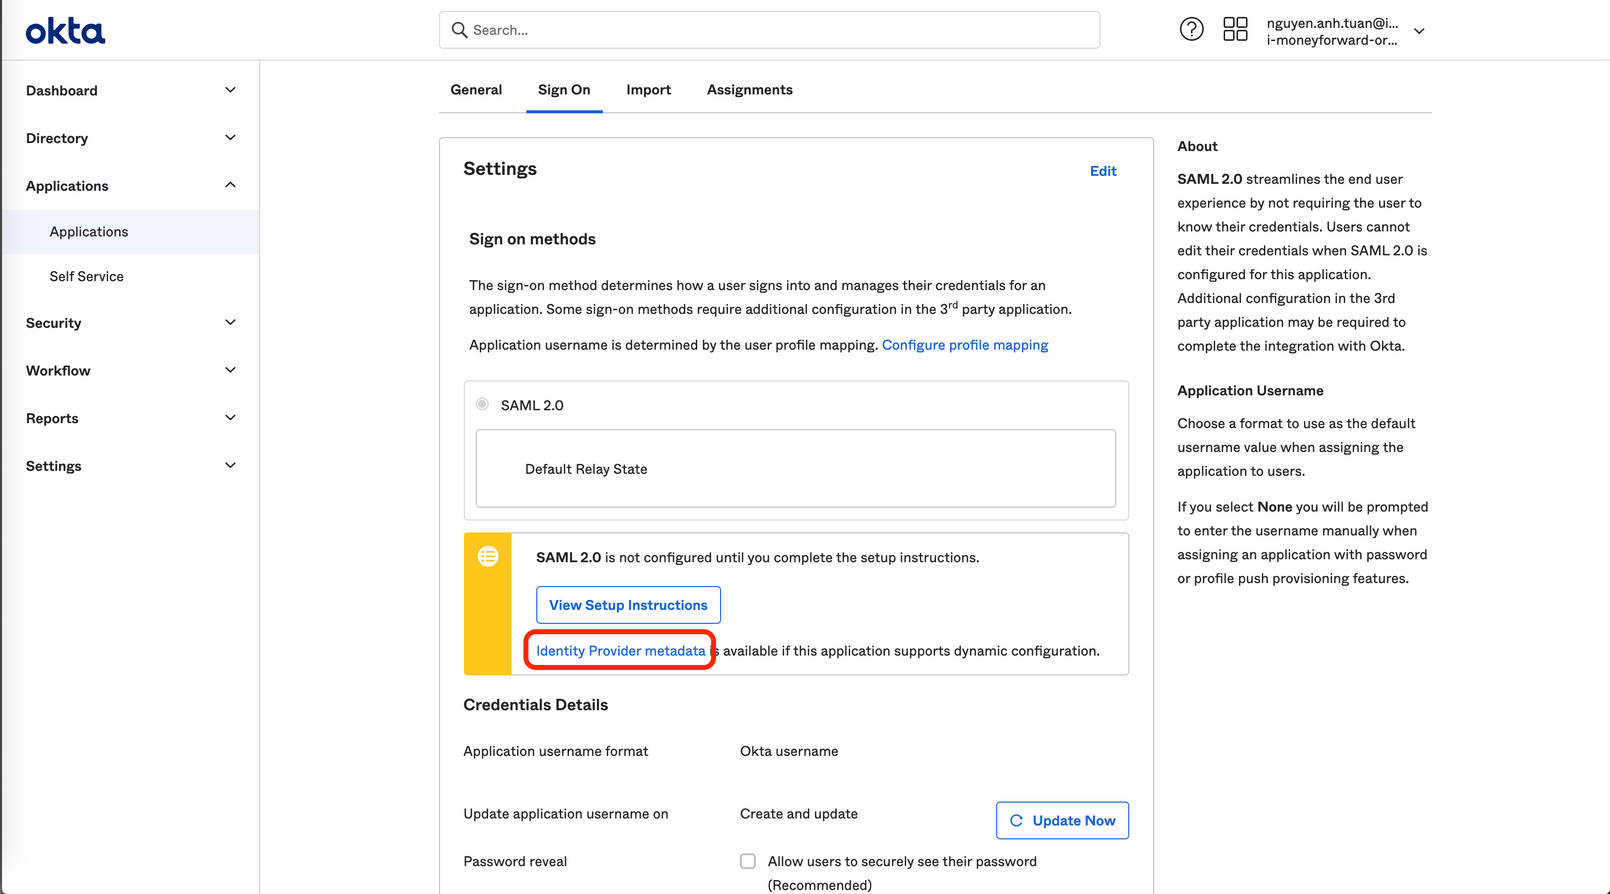
-
The XML file opens in a new tab.
Copy that URL and enter it into the
SAML metadata URLfield.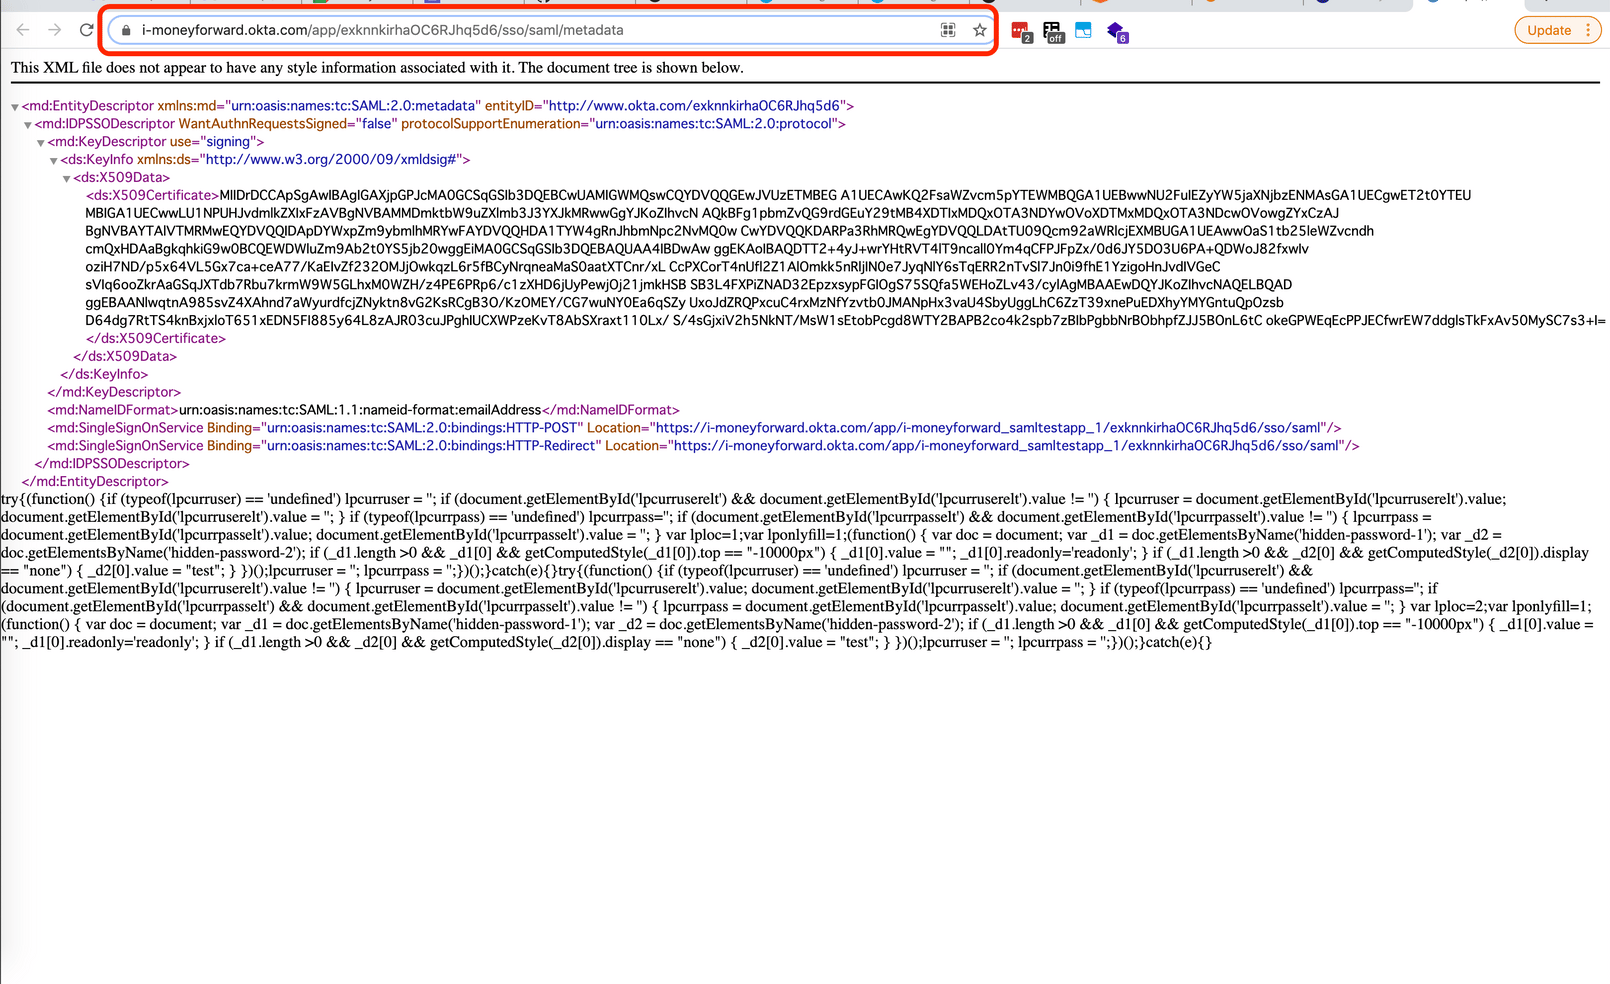
- Okta SAML configuration is now complete. Next, enable SAML.
OneLogin
-
In the OneLogin Admin Console, click the button to add an app.

-
Search for
SCIMand select SCIM Provisioner with SAML (SCIM v2 Core).
-
Enter an application name and save (for example:
company name).
-
Open the Configuration tab, enter the following values, and save.
SAML Audience URL: enter the
SAML entity IDvalue. SAML Consumer URL: enter theSAML reply URLvalue. SCIM Base URL: enter a placeholder URL for now — you will configure this later on the SCIM settings page.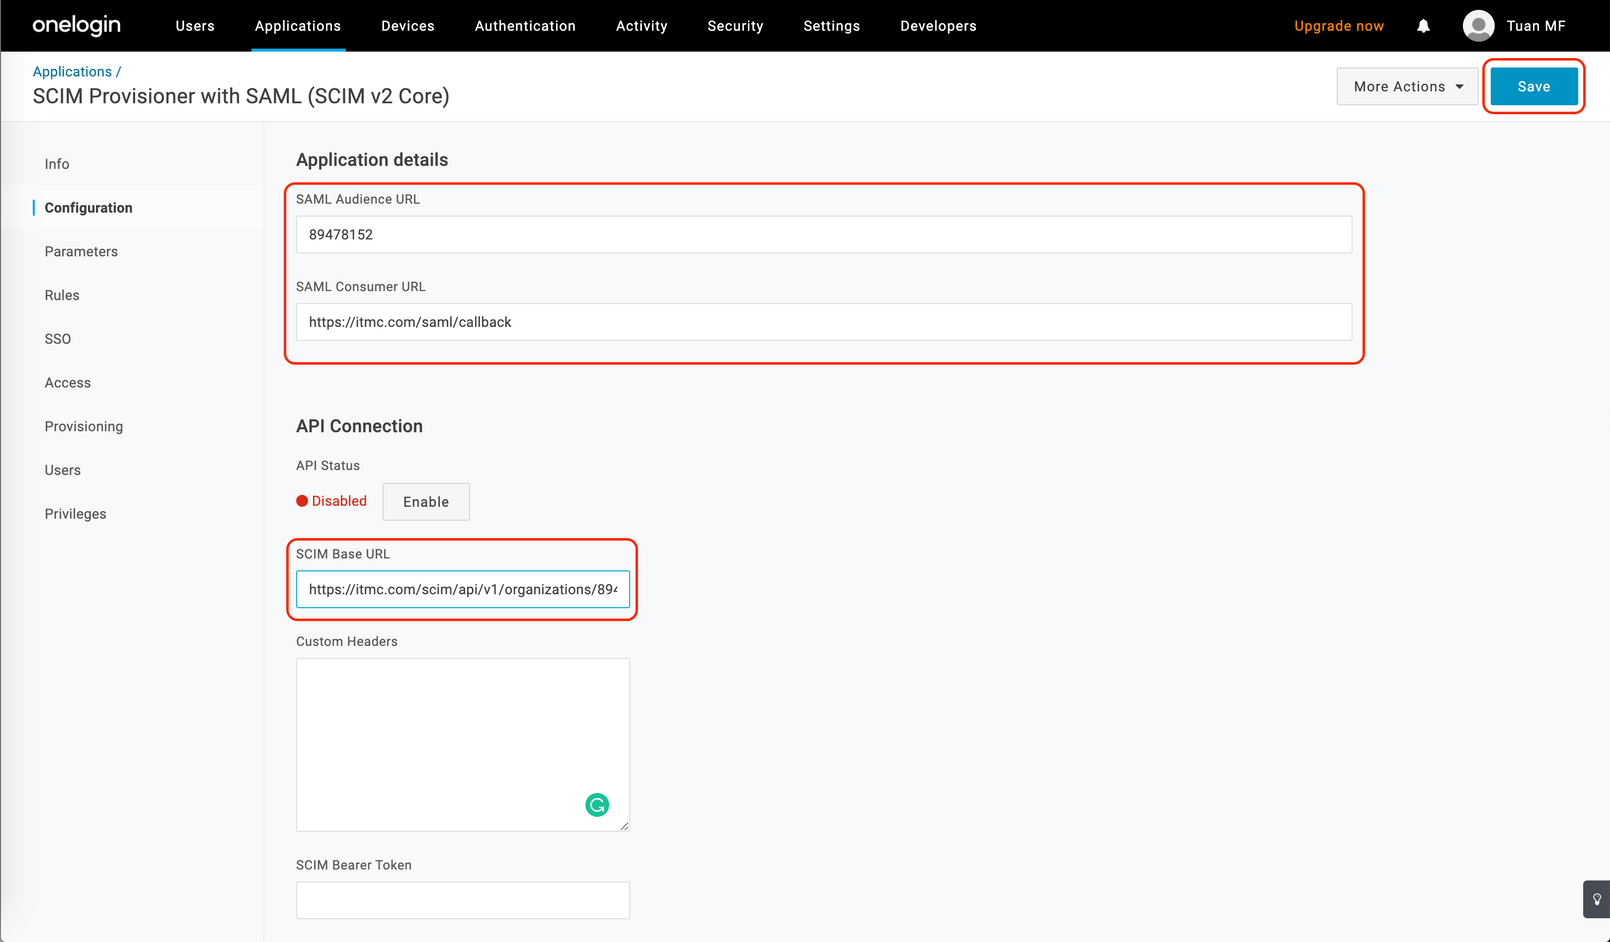
-
Select the SSO tab and copy the Issuer URL.
Paste it into the
SAML metadata URLfield and save.
- OneLogin SAML configuration is now complete. Next, enable SAML.
HENNGE One
For SAML integration with HENNGE One, contact the HENNGE support center. After completing the setup, follow the steps below to enable SAML.Enable SAML
Set the SAML metadata URL you obtained in the previous step.-
For Google Workspace, select a file and upload the metadata file.
The screenshots below show how to configure using a URL.


-
Turn on the SAML enable switch.

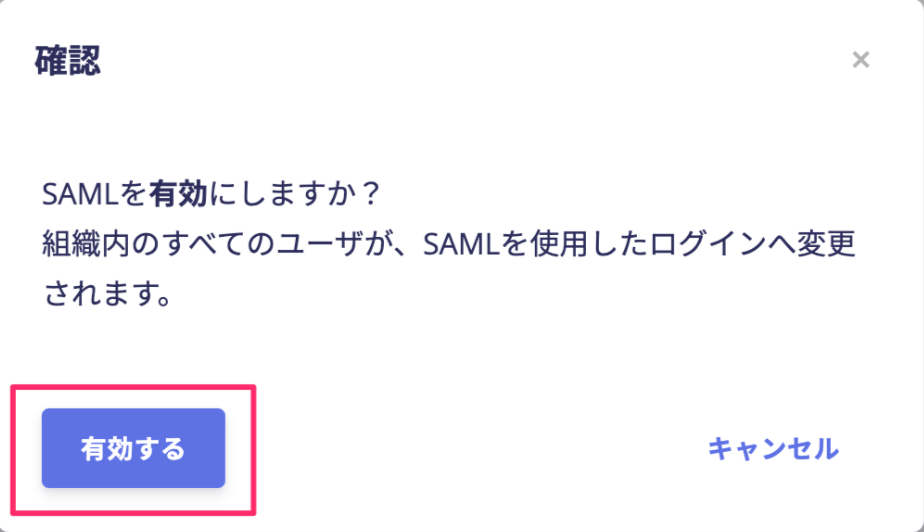
- SAML-based SSO setup is now complete. Assign users in each SaaS application and verify that single sign-on works. Next, configure SCIM for user provisioning. How to Configure SCIM
Update SAML settings
Go to Settings > Security and locate the SAML section. Before your SAML certificate expires, issue a new certificate in your IdP and update the SAML metadata URL.-
Click Edit next to SAML metadata.
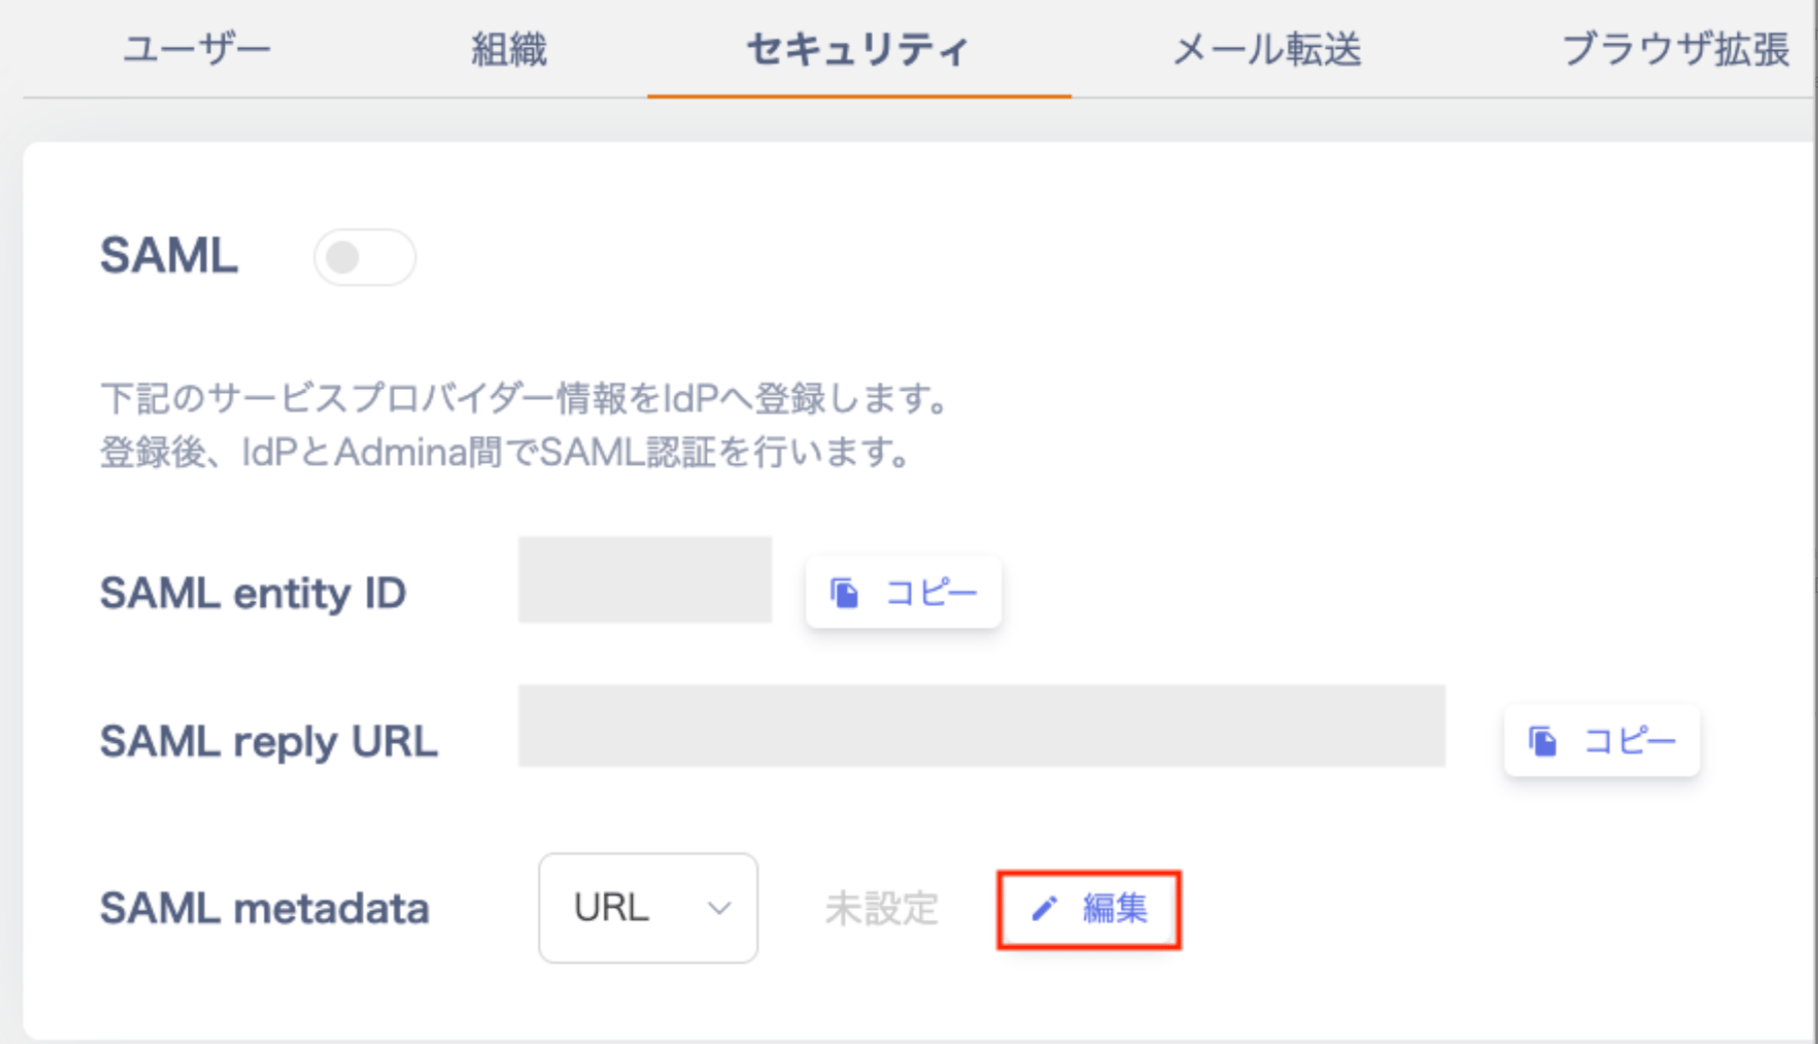
-
Before changing the SAML metadata URL, note down the current URL as a backup.
Enter the new SAML metadata URL and click Save.

For Admin users
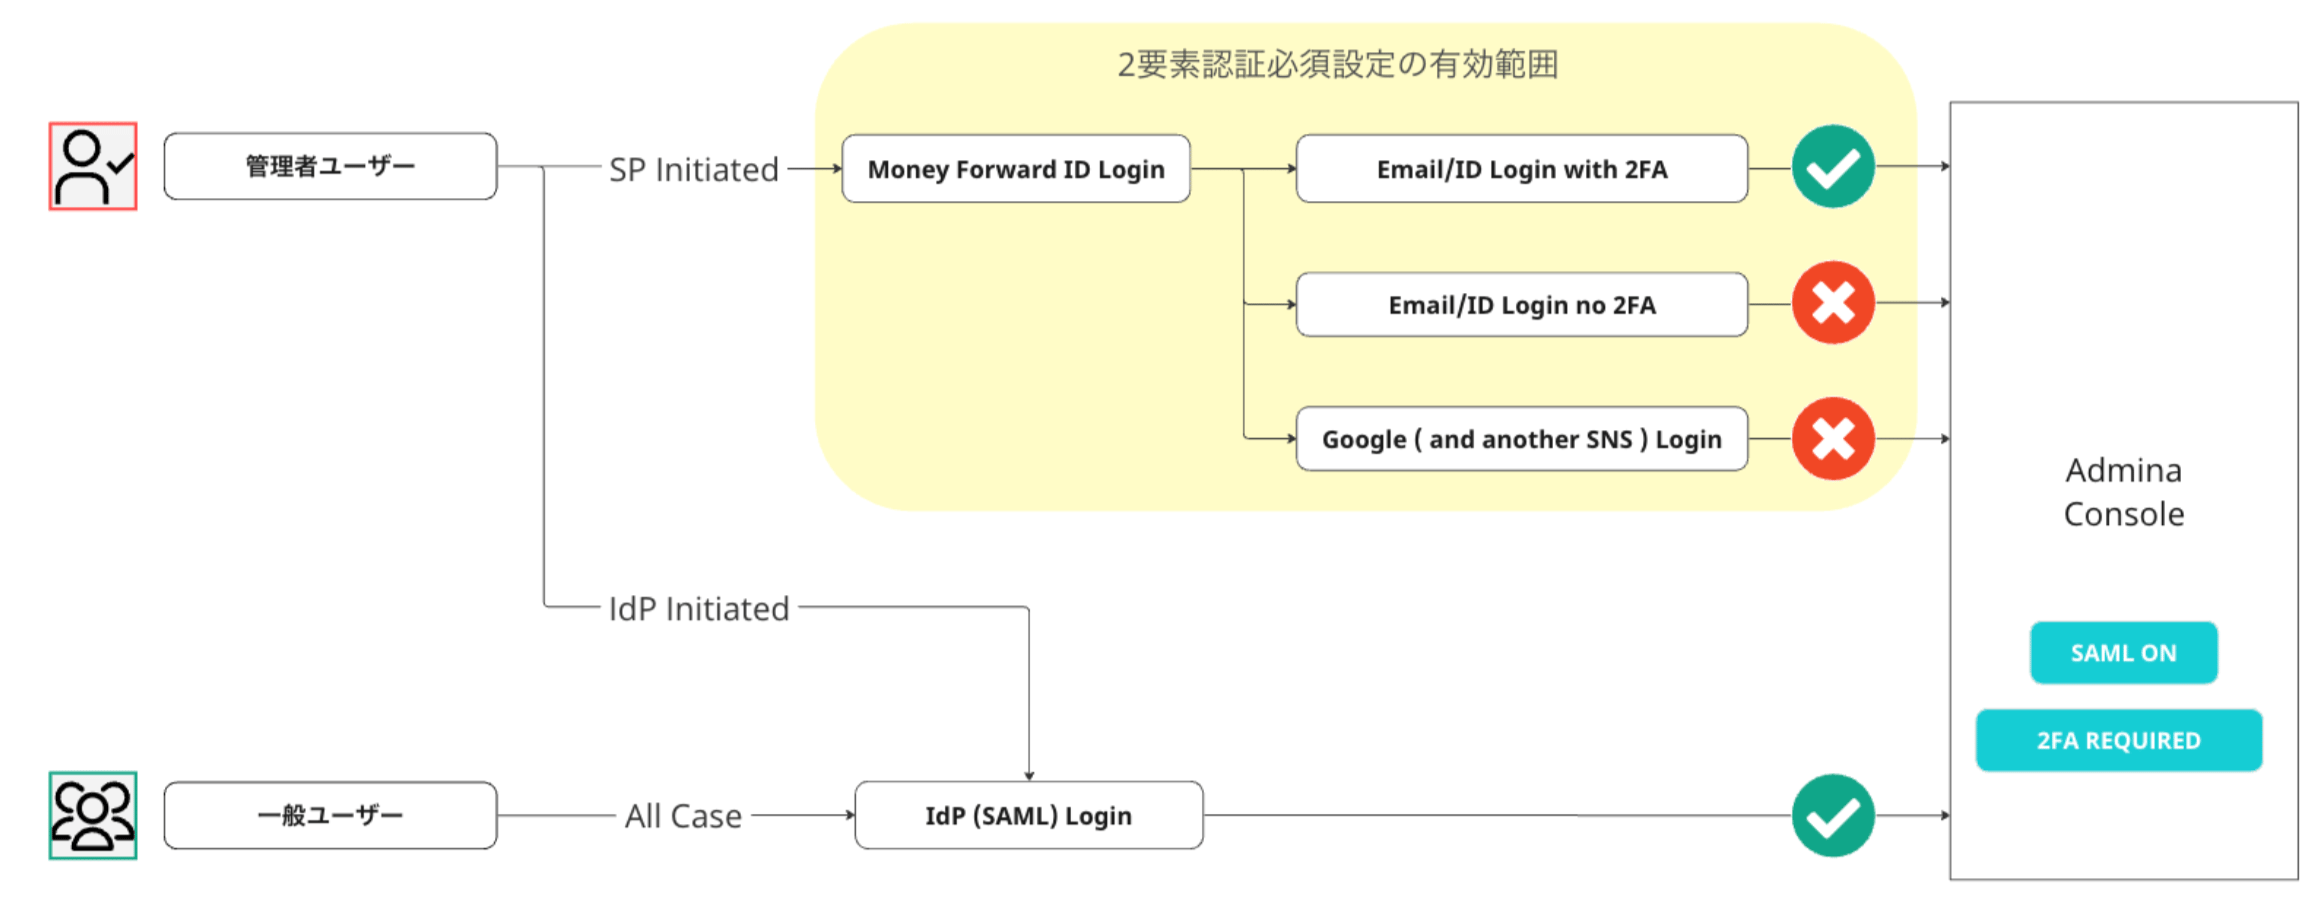
Users with the Admin role follow a slightly different login flow. This prevents Admin users from being locked out if the SAML configuration fails. We also recommend requiring multi-factor authentication (MFA) at sign-in. For users with the Admin role:- When signing in from the login screen, the user logs in directly using their MoneyForward ID. The IdP does not receive a redirect.
- When signing in from the IdP login UI, the IdP Initiated Flow (sign in via SSO) is used.