This page explains how to build a workflow from scratch by freely combining triggers and actions. This approach differs from using a template.
It covers every step through to a “dry run,” which lets you verify the workflow before you publish it to production.
Use Cases
| Scenario | Details |
|---|
| You want to build a workflow with a combination not covered by any template | Ideal when you need a custom step order or combination that the existing templates cannot provide. |
| You want to test safely (dry run) without affecting employee data or services | Before publishing to production, use the dry run feature to verify and prototype the workflow without affecting real employee data or connected services. |
Available Triggers and Actions
A workflow built from scratch has a simple design. Start with a trigger, then add the actions you want to run one by one, from top to bottom. This lets you build an automation sequence intuitively.
| Type | Name | Description / Trigger Timing |
|---|
| Trigger | New Hire | Runs when a new employee joins the organization (onboarding). |
| Trigger | Departure | Runs when an employee leaves the organization (offboarding). |
| Trigger | Scheduled Directory Update | Runs on a configured schedule: daily / weekly / monthly / custom. |
| Trigger | Device Change | Runs when a field on a device record changes. Requires the device feature and device permissions. |
| Trigger | Webhook Trigger | Runs when an external system sends a POST event to this service. |
| Action | Transform: Data Mapping | Maps each field between the target type and the variable format. Place this before provisioning, etc. |
| Action | DB Action: Identity, Device | Identity (create / read / update / delete), Device (assign / unassign / delete / update). |
| Action | Provisioning | Can be placed after the “New Hire” trigger. Specifies the workspace or connected service to grant an account. |
| Action | Deprovisioning | Can be placed after the “Departure” trigger. Specifies the workspace or connected service to revoke an account. |
| Action | Notification: Slack / Email | Specifies the channel or recipient address for notifications. |
| Action | Filter | Specifies AND / OR condition groups and the behavior (stop vs. continue) when conditions don’t match. |
| Action | Communication: HTTP Request | Configures a call to an external system: URL, method, authentication, headers, body template, timeout, etc. |
Setup Steps
-
Go to Automation > click [Create Automation], then select [Create New] from the dialog.

-
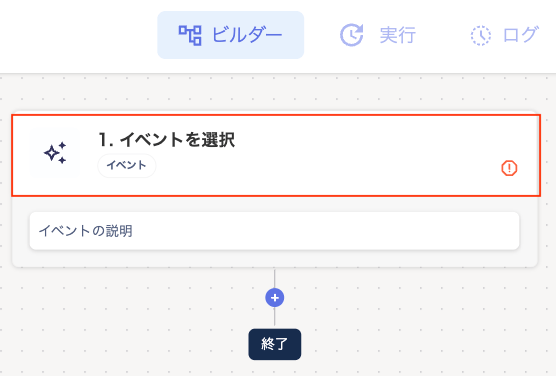
In the “Builder” screen, click “1. Select Event”.
-
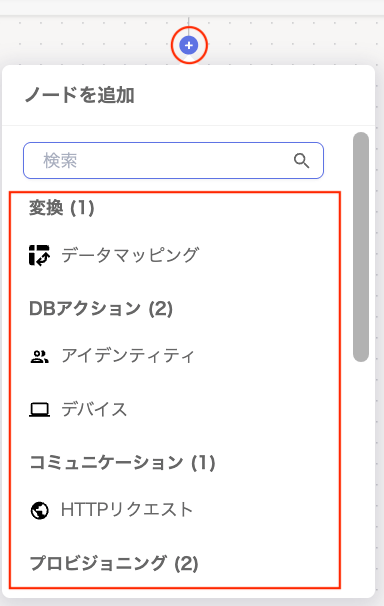
On the “Add Node” screen, select any trigger to display a detailed settings sidebar on the right side of the screen. Configure the trigger’s conditions and filters.
For setup steps for each trigger, see the following links.

-
Select a node (+), then choose any action on the “Add Node” screen. A detailed settings sidebar appears on the right side of the screen. Configure the conditions there.
For setup steps for each action, see the following links.
If you configure a Provisioning / Deprovisioning action, you must place a “Data Mapping” node in the step right before it.If the following screen appears, click [Add Data Mapping] and configure “Data Mapping” in the panel on the right.

-
Repeat these steps to add any other actions you need.
-
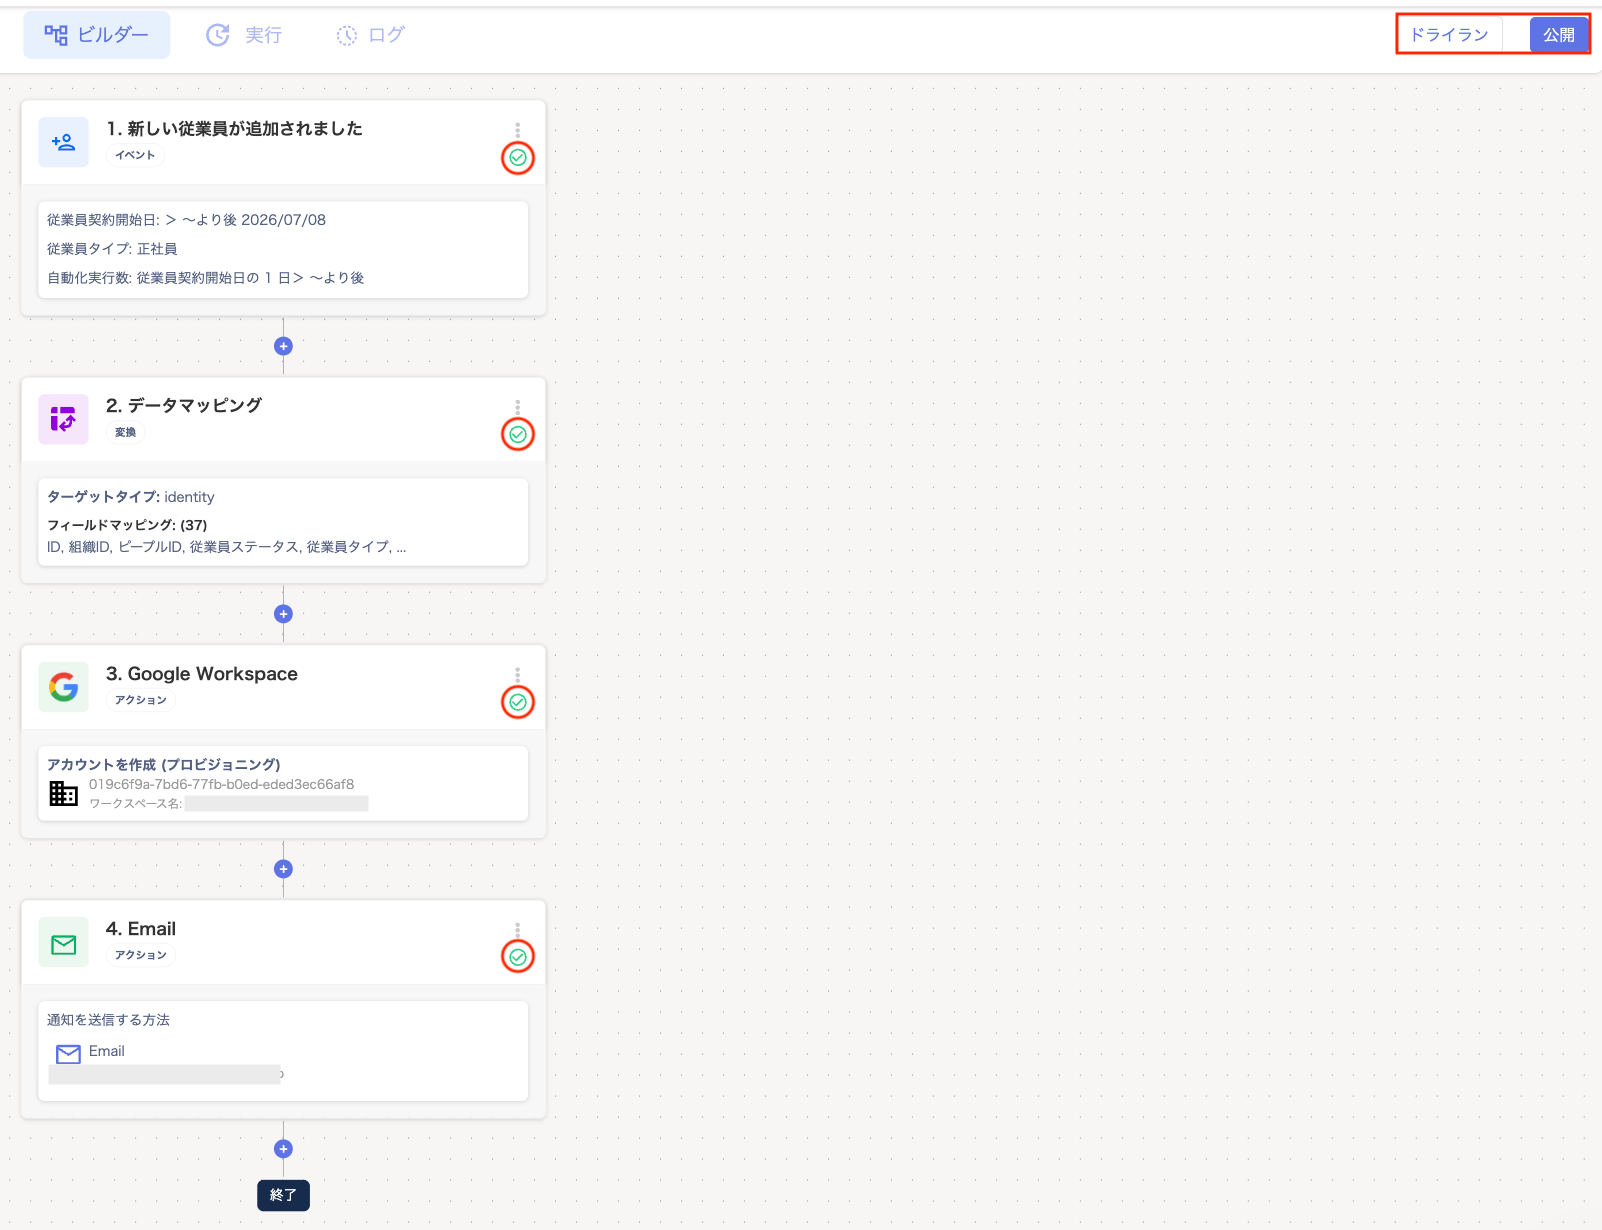
Once all checks in the “Builder” turn green, click Dry Run or [Publish].
-
The “Confirm Workflow Automation Settings” screen appears. Enter an automation name and click [Publish].
Note: You cannot reuse a name that is already registered for the automation name.

-
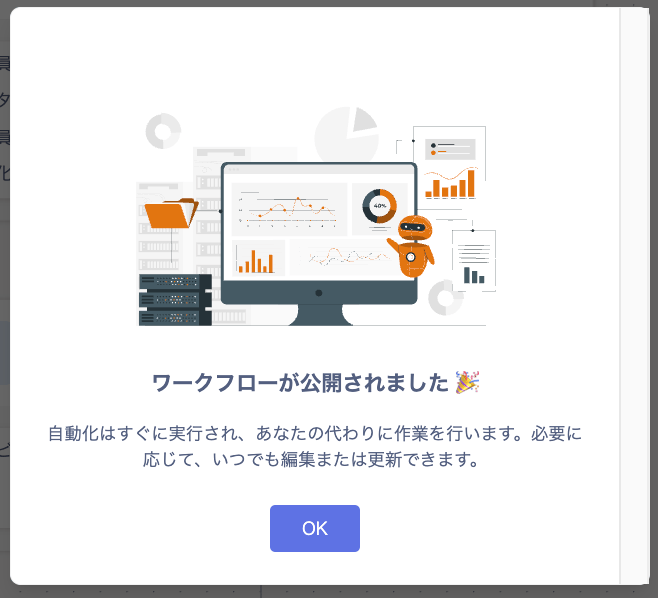
When “Workflow has been published” is displayed, click [OK].
Data Mapping
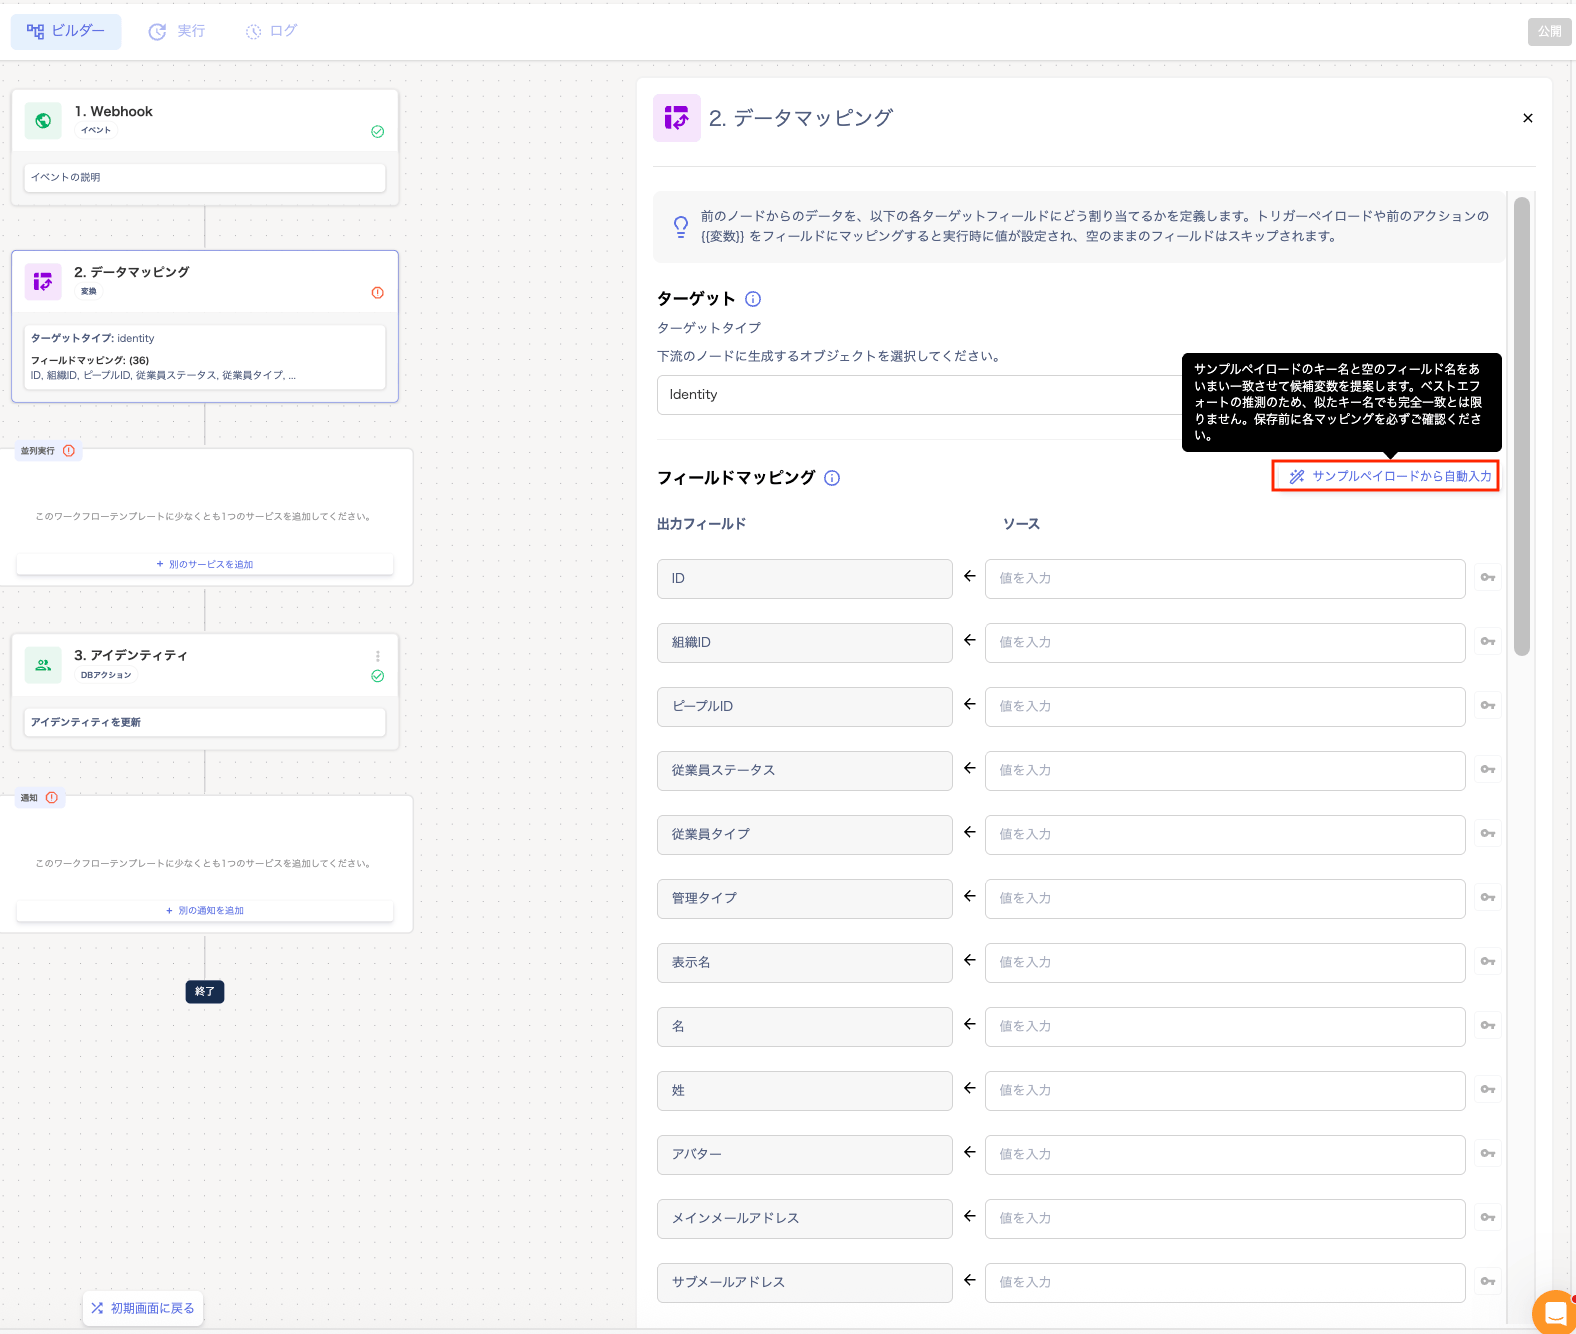
Select “Data Mapping” in the “Builder” screen to see a list of standard identity fields and your custom identity fields.
Click [Auto-fill from Sample Payload] to automatically infer each field based on the keys received during the test. Matching priority is exact match, then prefix or suffix match.
Be sure to review the content before saving. Fields that were not matched are left blank and are skipped at runtime.To override a field, click it and select a variable from [Insert Variable]. Alternatively, enter the path directly (e.g., {{trigger.user_displayName}}).Only one {{trigger.X}} can be set per field. Entering multiple values makes the field invalid.
| Item | Description |
|---|
| Target | Currently, only “identity” can be selected. |
| Field Mapping | Defines the conversion rules from the data source to the target fields. You can also configure custom fields. |
Identity
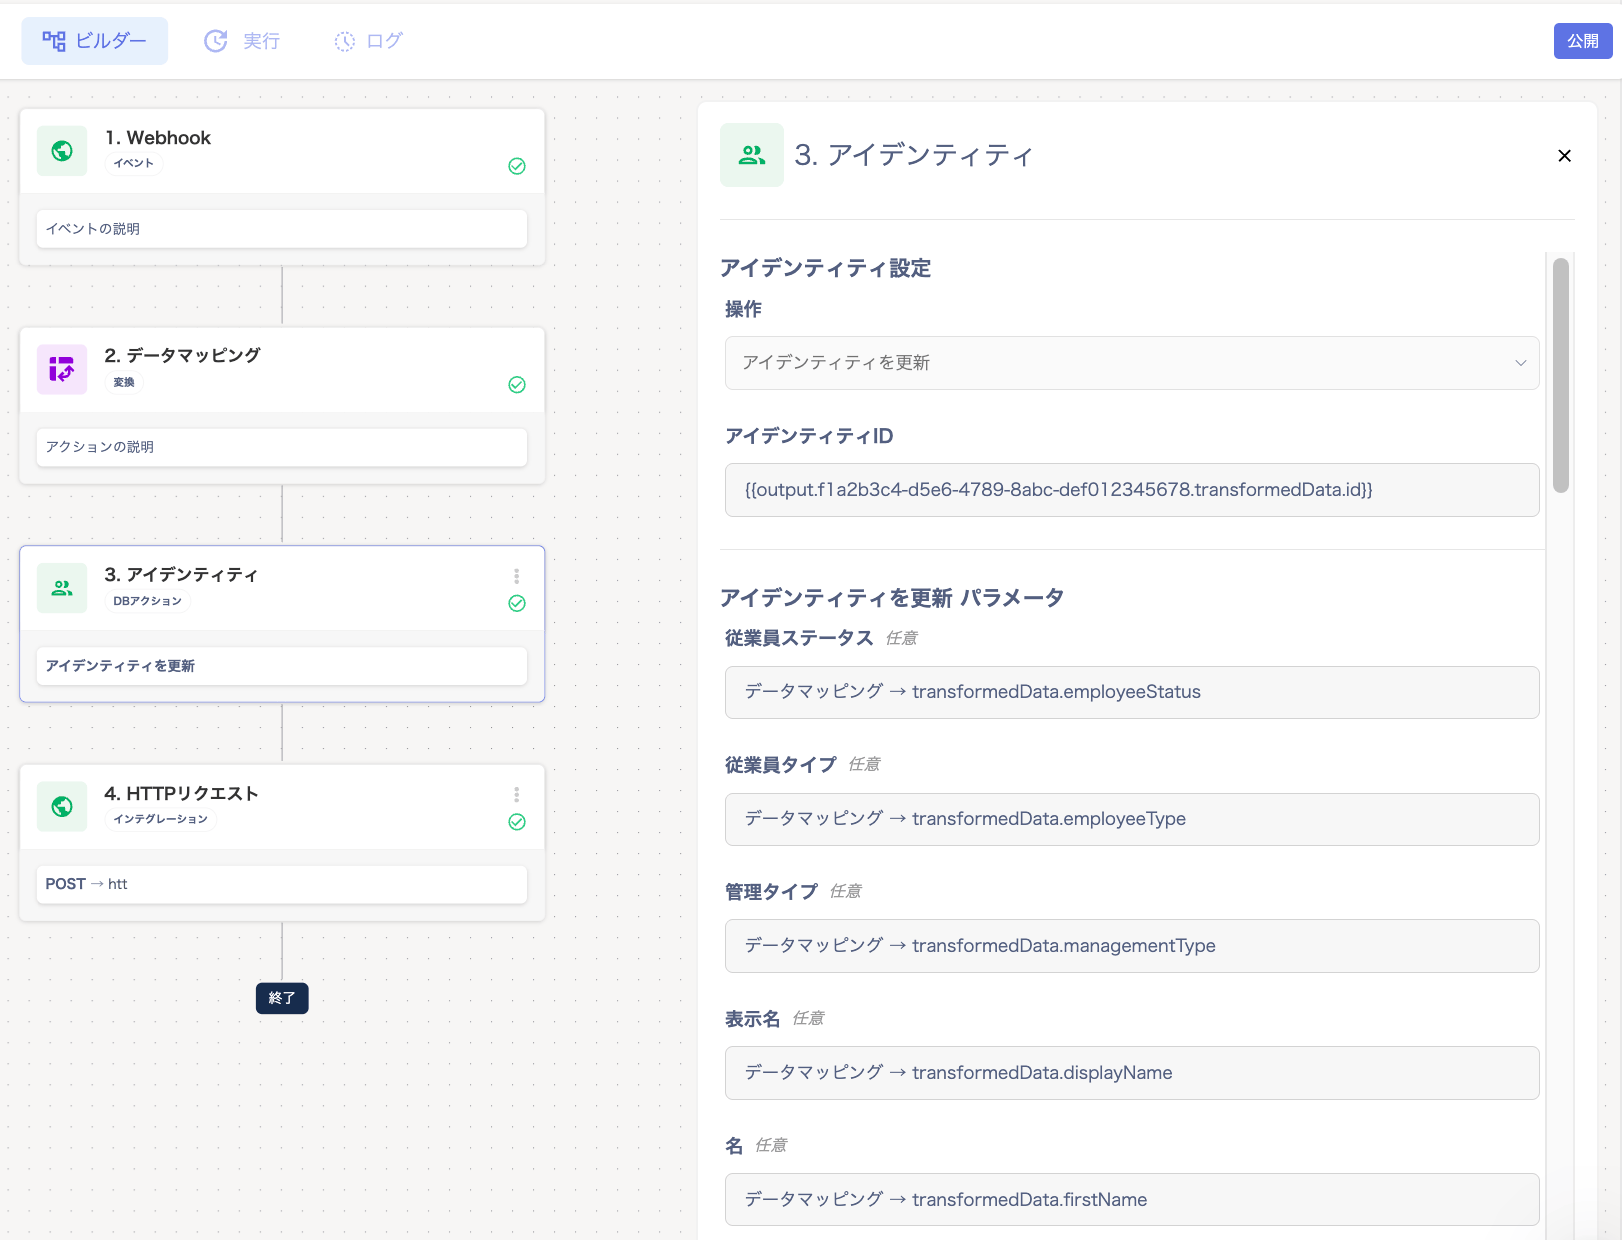
In the “Builder” screen, under “Identity”, perform the following actions on the target user.
| Item | Description |
|---|
| Action | The operation type for the identity is pre-selected as follows. Update Identity: Displayed when the template “Real-Time Identity Sync / External Offboarding Sync” is selected. Create Identity: Displayed when the template “External Onboarding Sync” is selected. |
| Parameters | Parameter fields are displayed dynamically. Depending on the action type shown above, “Update Identity Parameters” or “Create Identity Parameters” are shown. Verify that variables such as {{identity.displayName}} (display name) and {{identity.primaryEmail}} (primary email address) are correctly mapped. You can also map job title, department name, employee ID, contract end date, and other fields as needed. |
Service Selection (Parallel Execution)
-
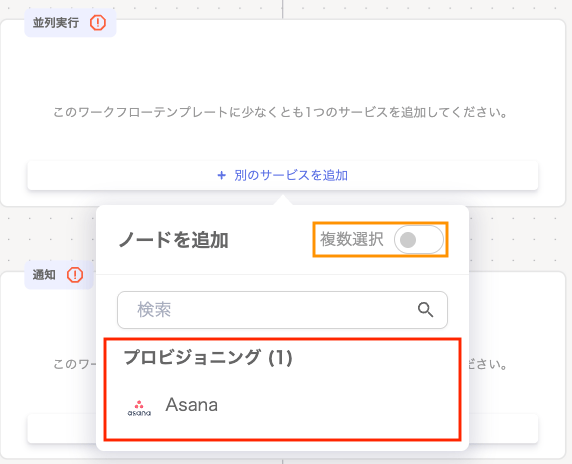
Under “Parallel Execution”, click [+ Add Another Service] to add the services you want to configure in the workflow.

-
Select the service shown under “Provisioning” or “Deprovisioning”.
The displayed services are those preconfigured (mapped). If you configure multiple services in the workflow, turn on “Multiple Selection”.
-
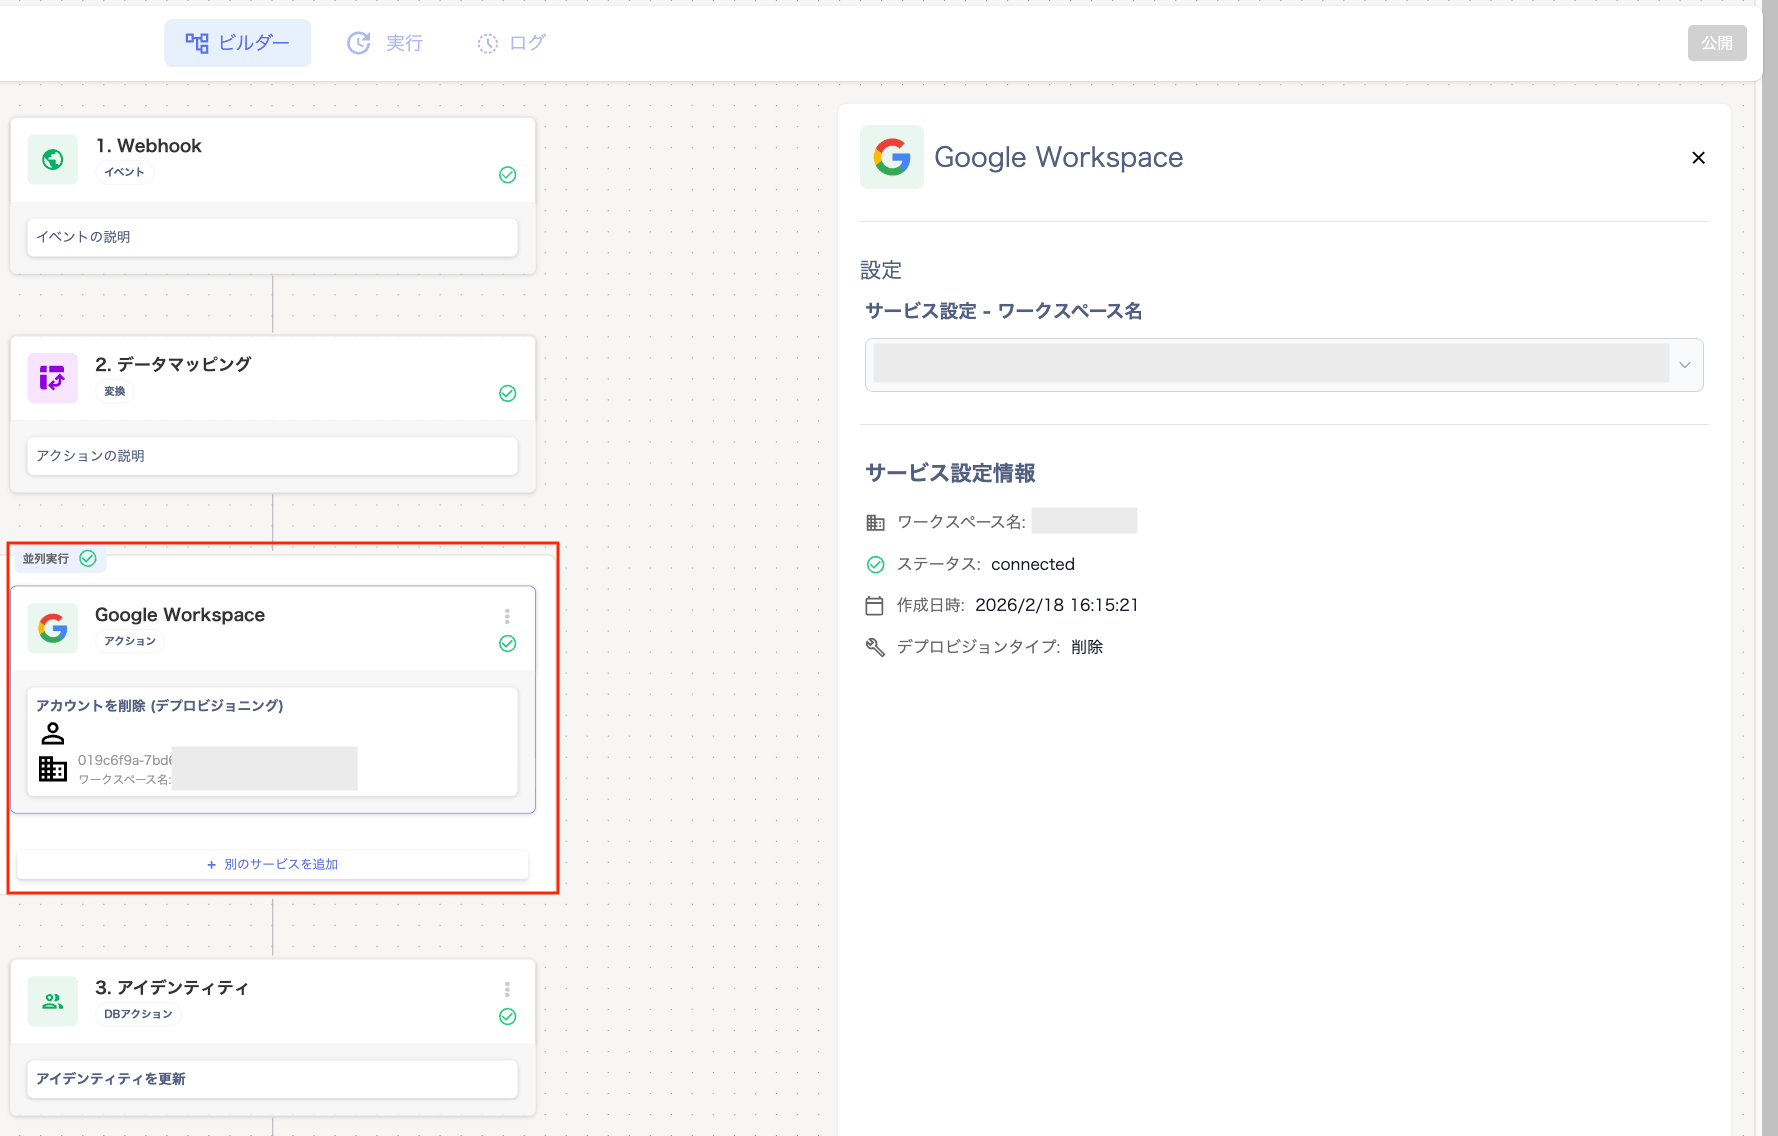
On the “Parallel Execution” screen, click a selected service to display the “Settings” panel on the right.
Select “Service Settings - Workspace Name” from the dropdown. To configure multiple services, click [+ Add Another Service].
Device
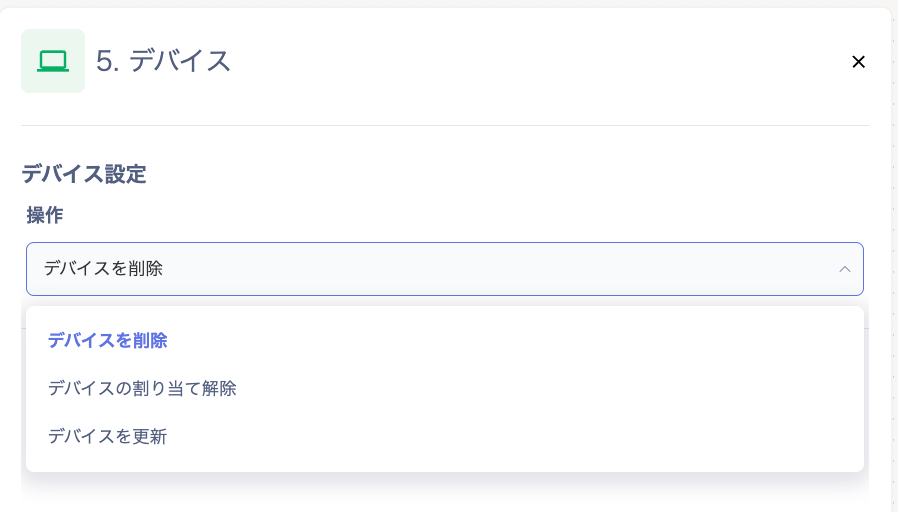
On the “Device Settings” screen, select the action: “Delete Device / Unassign Device / Update Device”.
Notification
-
Under “Notification”, click [+ Add Another Notification].

-
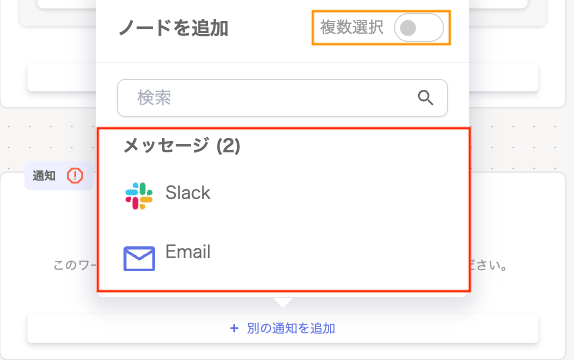
On the “Message” screen, select the notification method “Slack/Email”.
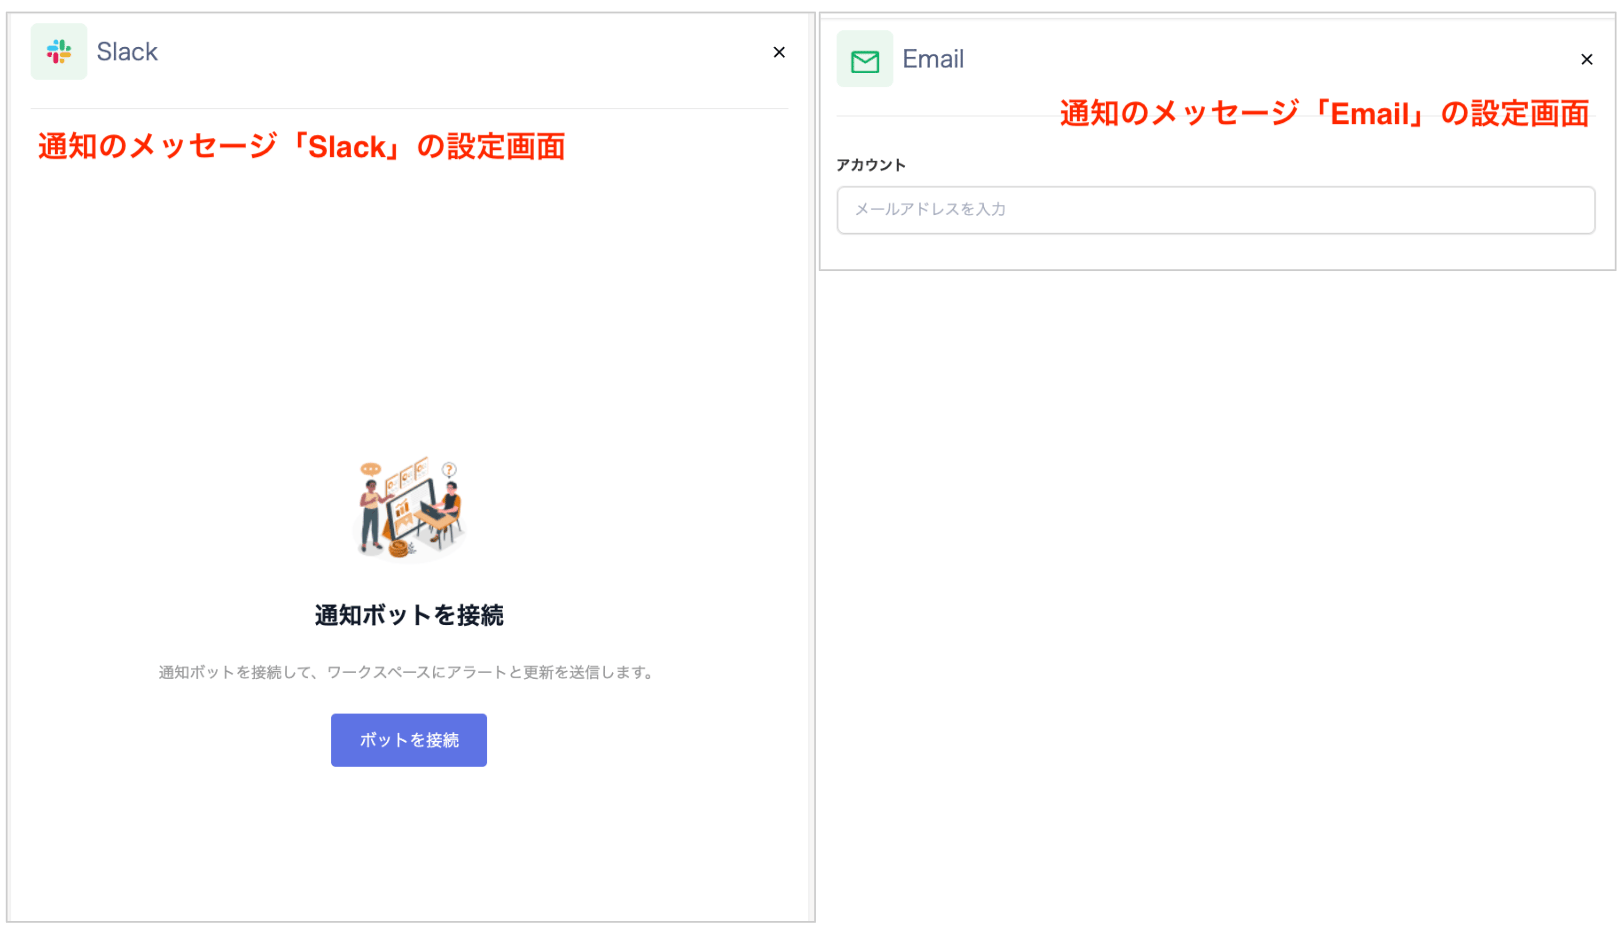
If you want to set up multiple notifications, turn on “Multiple Selection”. For Slack setup steps, see Notification Method “Slack” Setup Instructions.
-
On the “Notification” screen, click the selected message to display the “Settings” panel on the right.
HTTP Request
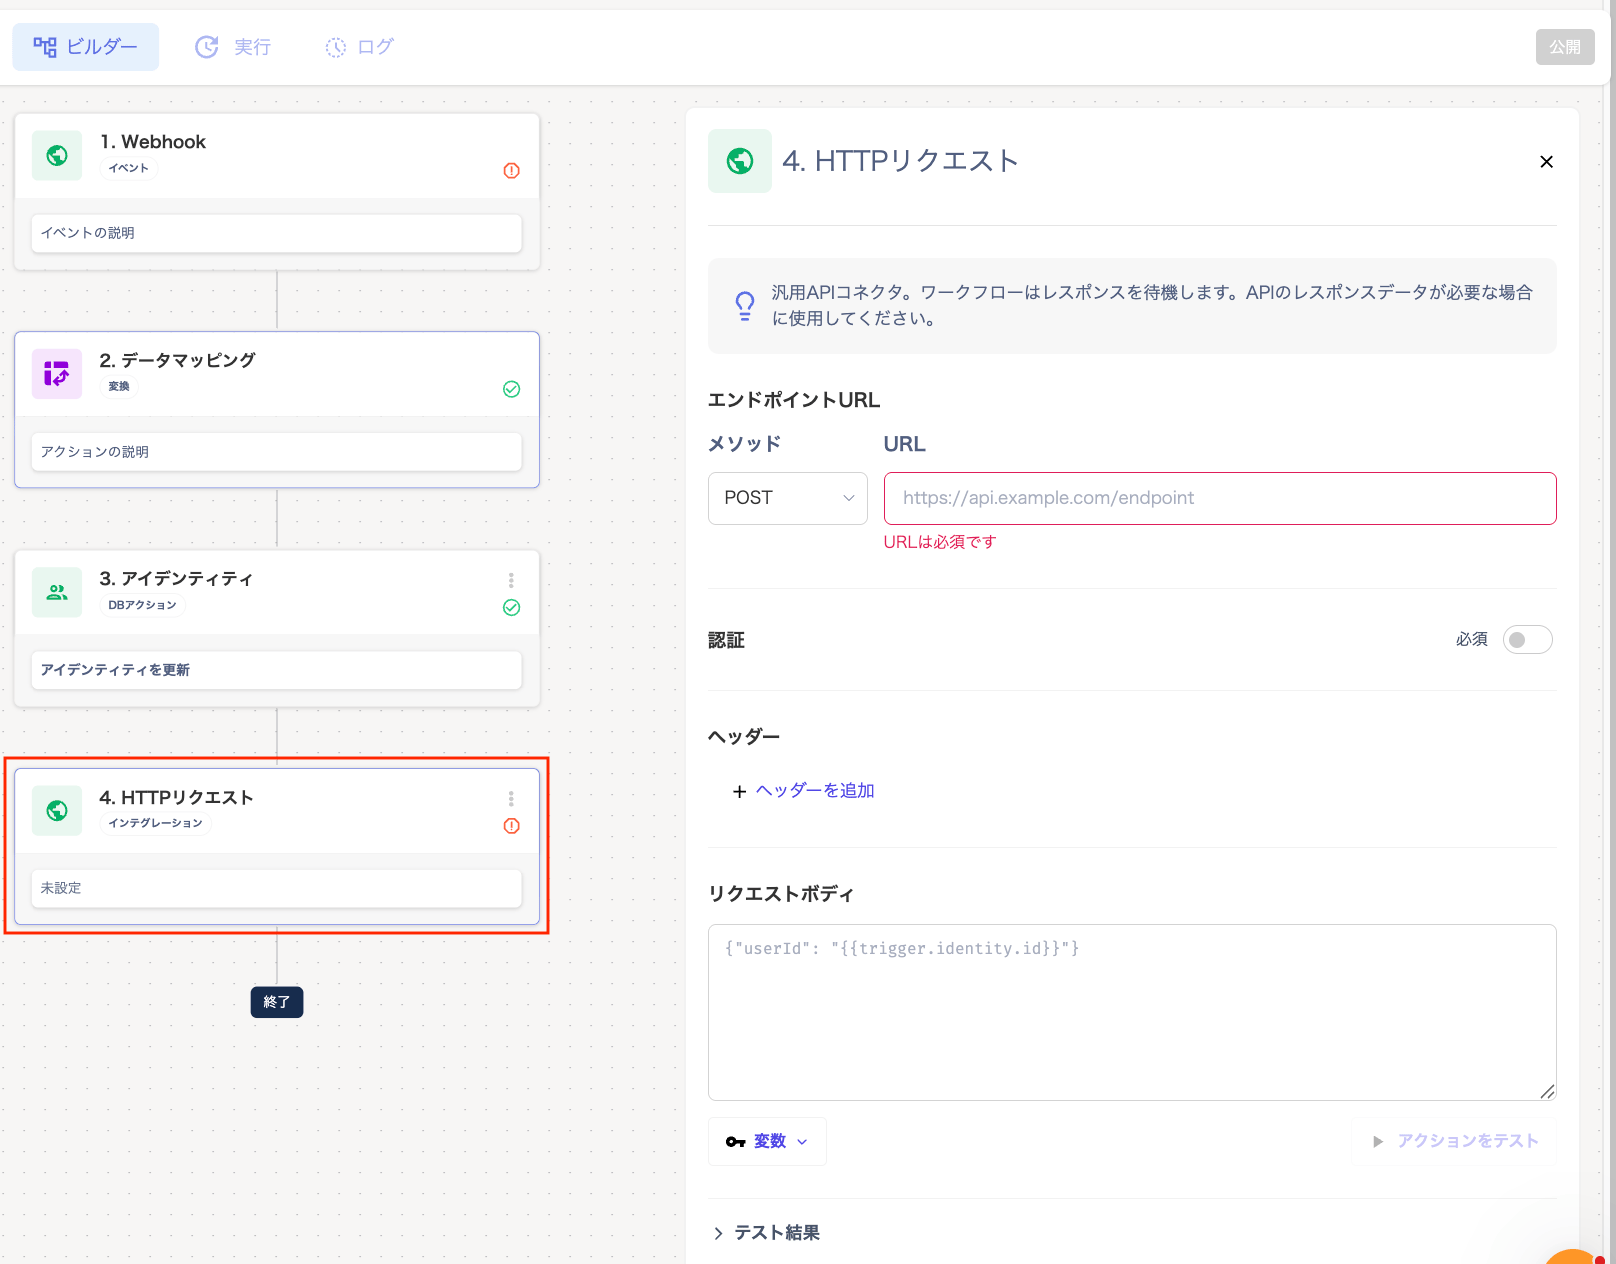
In “4. HTTP Request”, if a callback to an external API is needed, configure the method (POST, etc.) and endpoint URL.
Configure the sender to send Webhooks in the following format.
| Item | Value / Requirement |
|---|
| Endpoint | The Webhook URL generated in this service |
| Method | POST |
| Header: Content-Type | application/json |
| Header: X-Timestamp | Unix timestamp (milliseconds, string) |
| Header: X-Webhook-Signature | sha256=HMAC-SHA256(secret, ”.”) |
| Request Body | Compact JSON (no spaces or indentation). The keys you send become variables. |
Dry Run
Before publishing the workflow, run a test from [Dry Run].
-
Click [Dry Run] to display the “Dry Run” screen. Review the content, then click [Start Dry Run].

-
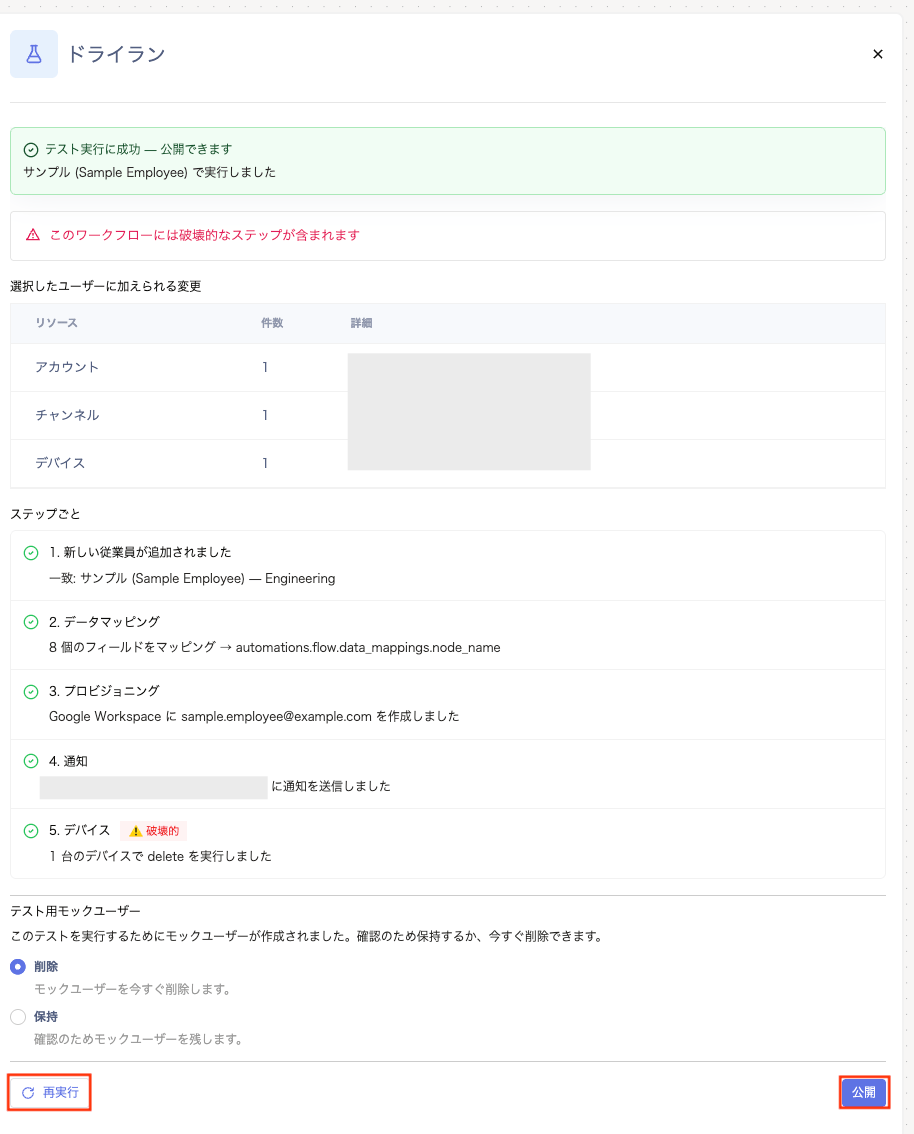
In the results list, each step lights up in real time as it runs. Review the content, then click [Rerun] or [Publish].
If you select “Real User”, the run affects real data. In that case, the run happens against production data instead of a simulation.To avoid affecting real employee accounts or production data, always select “Mock User”.
-
Once the test completes, the result appears in a banner at the top of the screen. A results list for each step also appears. If a mock user (test account) was created, choose [Delete] or [Keep].
If the test succeeds, click [Publish]. If the test fails, fix the issue and run the test again.
Troubleshooting
| Symptom | Possible Cause | Solution |
|---|
| The Dry Run button is grayed out | A node is invalid or unconfigured, or the workflow is archived. | Finish configuring all nodes (no red marks), and restore the workflow if it’s archived. |
| Start dry run is disabled | Running against a real user requires a confirmation check, or the target service doesn’t support testing. | Check “I understand this will really run on ”, or switch to a different target SaaS. |
| can’t be tested automatically | The SaaS doesn’t support dry runs. | Test manually, or continue with a different SaaS. Connect the SaaS separately. |
| The ”+” on Provisioning / Deprovisioning turns into a warning banner | A data mapping node isn’t configured above it. | Add a data mapping node before Provisioning / Deprovisioning. |
| Publish is disabled in the review dialog | There’s a guardrail violation somewhere in the flow. | Click Fix next to each violation, then reopen the review. |
| Couldn’t start the test run on the server | The actual backend trigger failed to start. | The local preview continues to display. Retry once the issue resolves, or contact support. |
| A workflow named “Dry Run draft ” appears in the automation list | An unsaved workflow was auto-saved as an invalid draft before the dry run started. | Publish it to production, or delete it once testing is done. It won’t run on production events while invalid. |
FAQ
Q. Can I combine actions in ways that aren’t covered by a template?
A. Yes. Starting from any trigger, use “Add Node” to add actions. You can set up steps in any order or combination that fits your needs.
Q. Can I run actions in parallel?
A. Not currently. Parallel execution and branching are template-only features. When you build a workflow from scratch, it always forms a single linear chain that runs from top to bottom.
Q. Does a dry run affect real data?
A. If you select “Real User”, the run affects real data. In that case, the run happens against production data instead of a simulation.
To avoid affecting real employee accounts or production data, always select “Mock User”.
Q. What happens to the mock user created for a dry run after the test?
A. After the test finishes, you can choose to [Delete] or [Keep] the mock user created during the dry run. [Delete] is selected by default, so the test data is removed immediately.
Q. Why don’t I see the “Real User / Mock User” choice for a New Hire dry run?
A. Testing onboarding always requires a new account, so the system automatically creates a mock user every time. Because of this, you don’t need to select a target user.
Q. Can I run a workflow dry run more than once?
A. Yes, you can run it multiple times before publishing. This requires that all nodes are configured correctly and the workflow isn’t archived. You can repeat the test from the header’s [Dry Run] or from [Rerun] on the “Dry Run” screen.
Q. What happens in production if I publish while some dry run steps have failed?
A. If you click [Publish] while an error remains, the workflow keeps failing in production until you fix the error. Proceed with caution.
Q. Can I edit or pause a workflow after creating it?
A. Yes. Click the workflow you want to change from the workflow list, then edit it from the “Builder” tab.
To pause a workflow, turn off the toggle switch in the “Status” column of the workflow list to [Pause Workflow]. 
