Custom App Feature (Manual Integration)
This page explains how to manually register SaaS accounts. You can use this feature to:- Manually register an account to an already-integrated SaaS. For example, do this when the SaaS plan you use does not support automatic integration
- Manually register a SaaS that does not support integration, or an in-house or on-premises system
Register a Service Manually
Register a Supported SaaS Manually
Some supported SaaS services cannot be connected automatically depending on your subscription plan. For example, Adobe requires an Enterprise plan for automatic integration. If you use a non-Enterprise plan, you can still manage Adobe accounts centrally by registering it manually. You need Admin or Service Manager permission to register a custom app. For details, see admin users and permission (role) settings.-
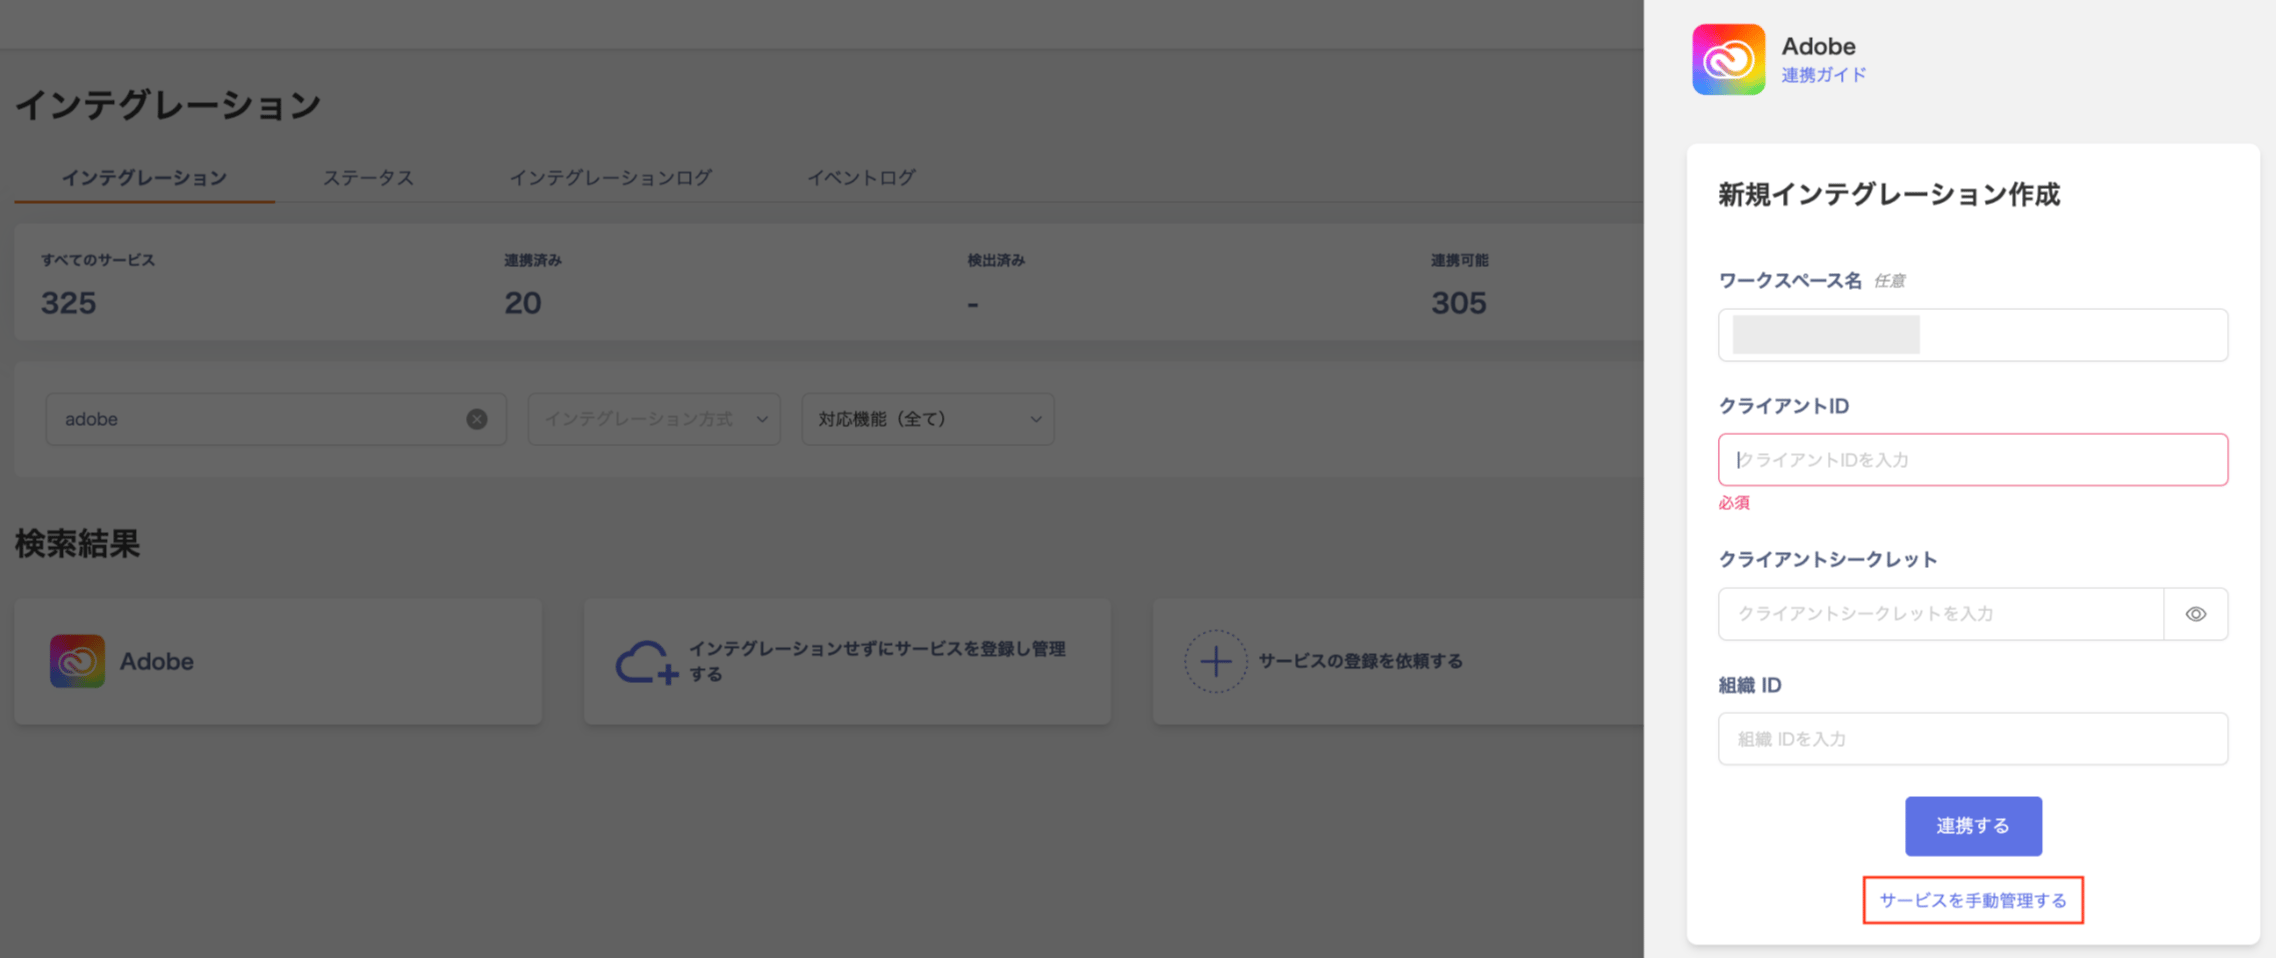
Go to Integrations > Integrations, search for “Adobe”, and click [Register service manually].
-
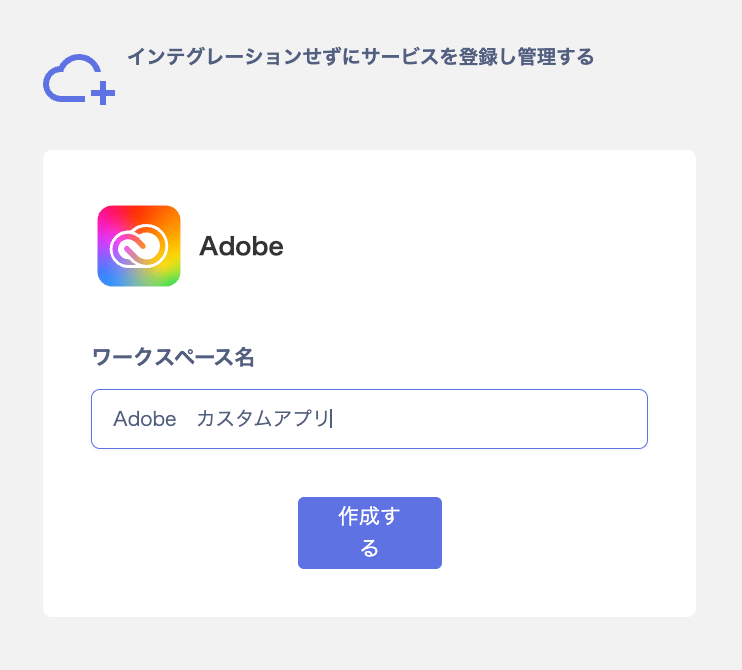
Enter any name for the workspace and click [Create]. (The default value is your organization name.)
-
After creation, you can find the service under the service name “Adobe” on the service screen. The workspace name shows “Custom”.
To change the service name after creation, click [Edit].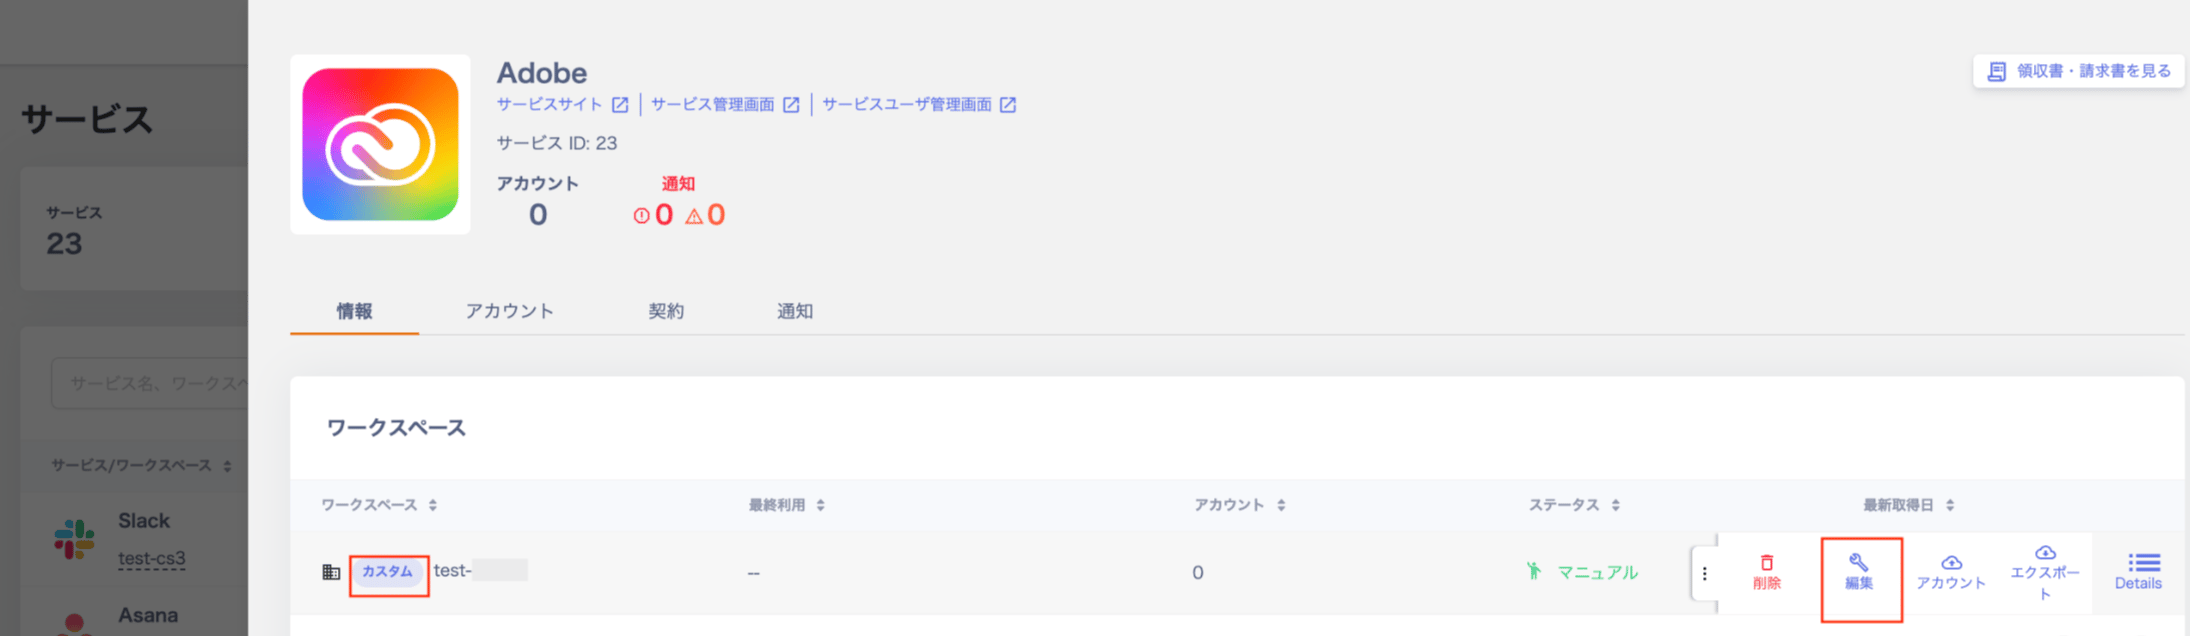
Register an Unsupported SaaS or In-House System Manually
Follow these steps to manage accounts for a SaaS or system that does not appear in the integration list. This includes, for example, an in-house system.-
Go to Integrations > Integrations and click [Register and manage a service without integration].
Tip: Click the icon in the upper right, or enter a random string in the service name field. This makes the button easier to find.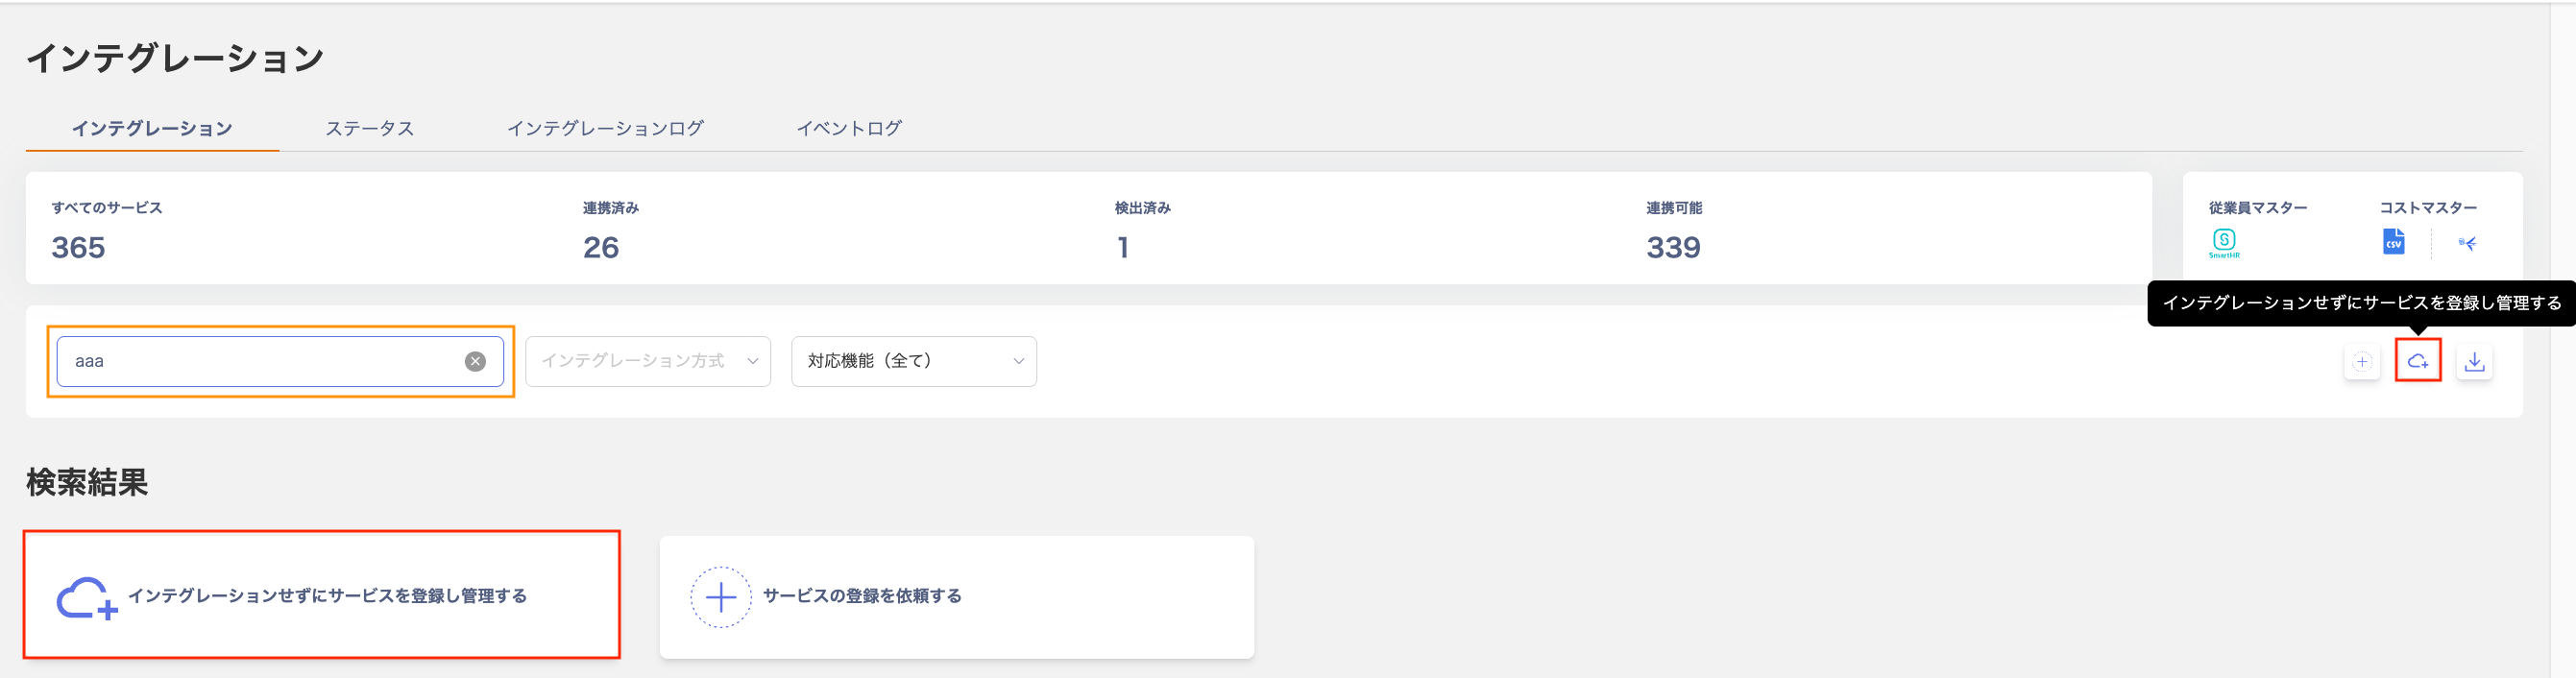
-
Fill in the following fields under “Search for service” and click [Create].
Selecting a service name that appears automatically enables cost visibility and SaaS event log matching. Choosing “Enter a custom name” disables those features and prevents matching.
Field Description Service name If the service exists in the database, search and select it under “Search for service”. If it does not exist, enter a name under [Enter a custom name]. Workspace A default value appears, but you can change it to any name you prefer. Data source Select “Manual import / Google Spreadsheet”. See also Connect via Google Spreadsheet. 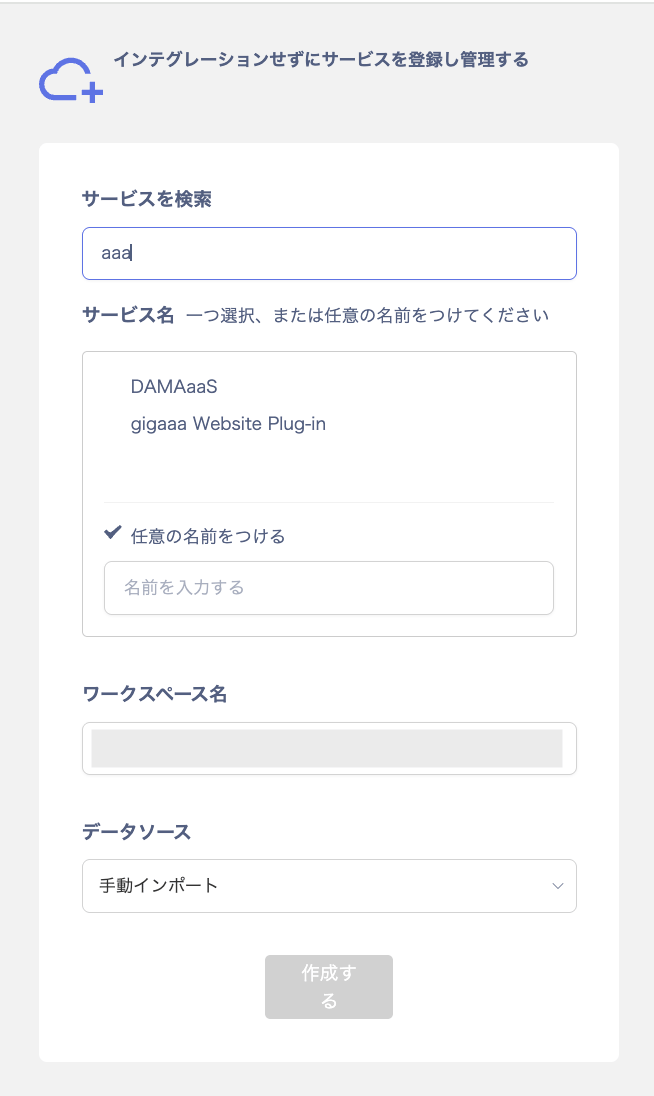
-
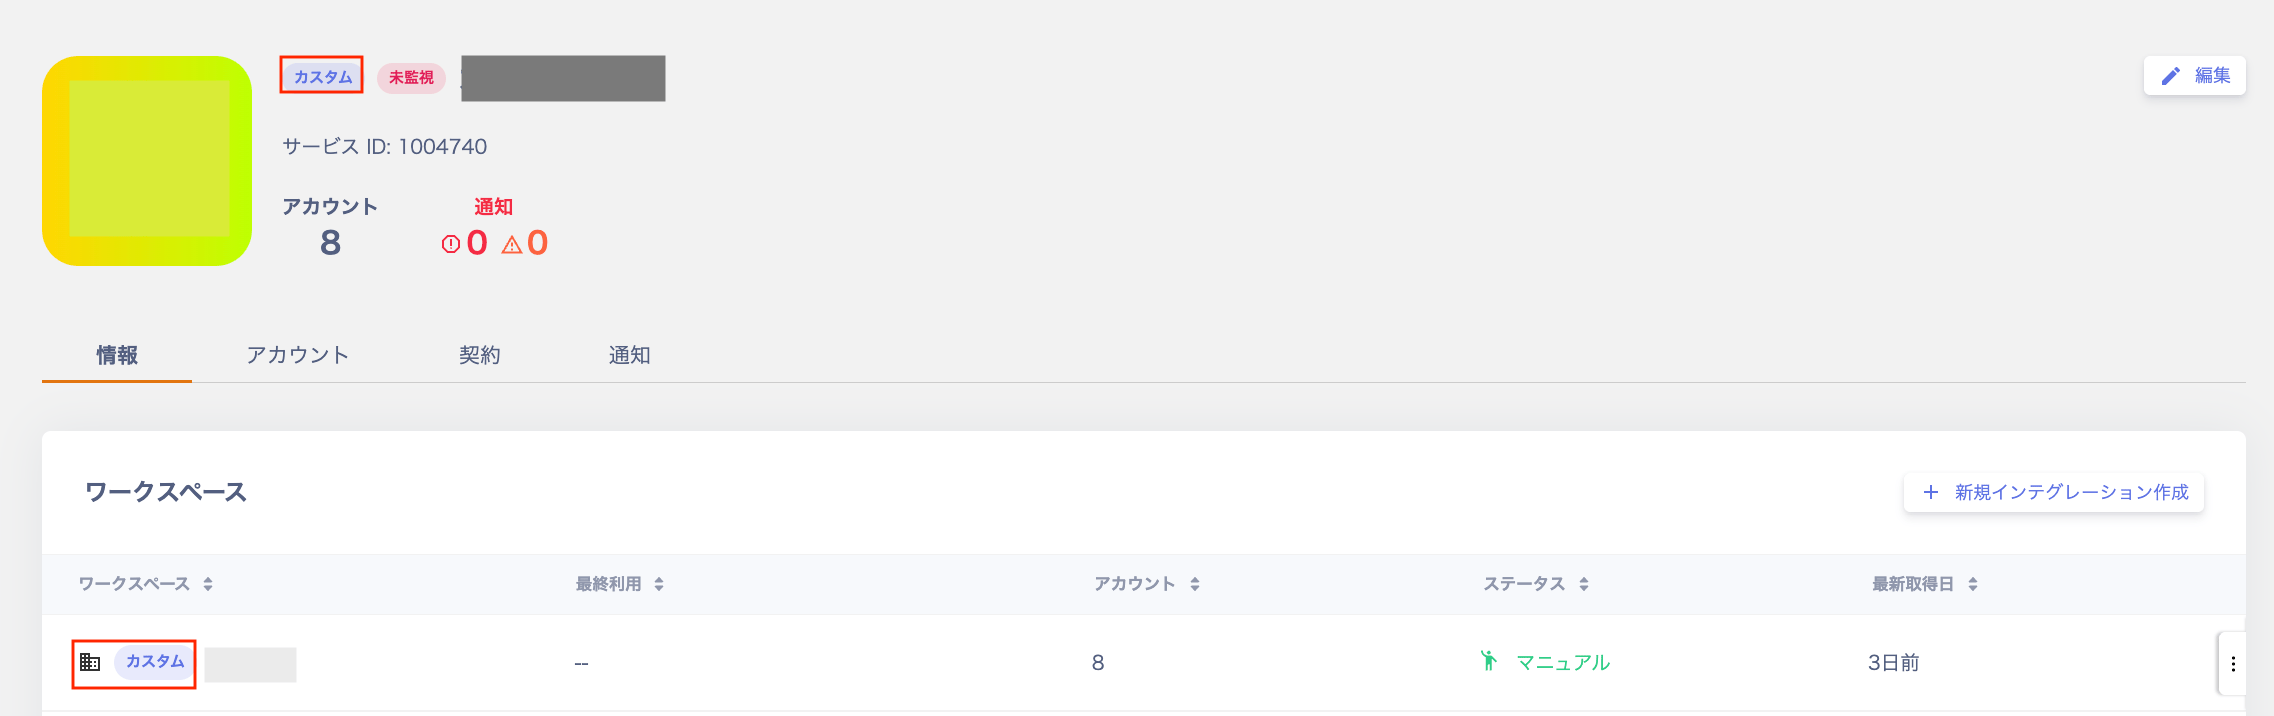
Confirm the registered service on the service screen. The service name and workspace name both show “Custom”. To change the URL or service name, click [Edit] in the upper right.
Add or Edit Account Information for a Registered Service
Add or edit account information for a service you have already registered.Register Accounts Manually
-
Go to Services > Service List and click the custom app.
Custom apps show(Custom)under “Service / Workspace” in the left panel. -
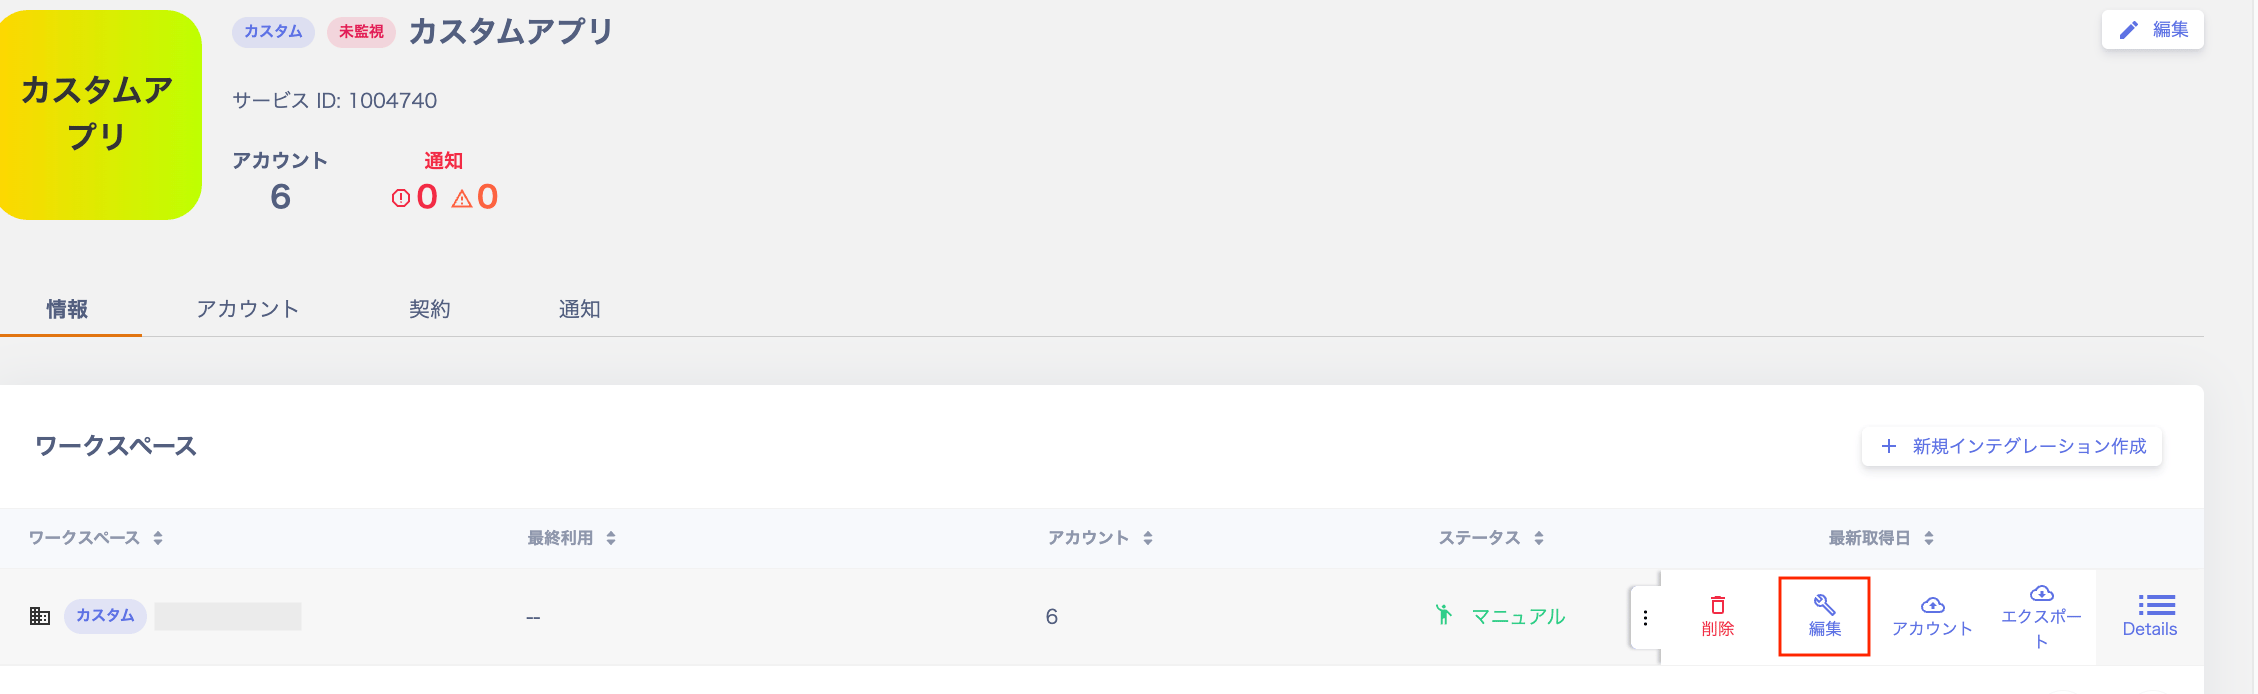
Go to the service detail “Info” tab > find the workspace row > click the three-dot menu [︙] on the right > click [Edit].
-
The “Edit Custom Workspace” screen appears. Add or edit the fields shown.
Editable fields
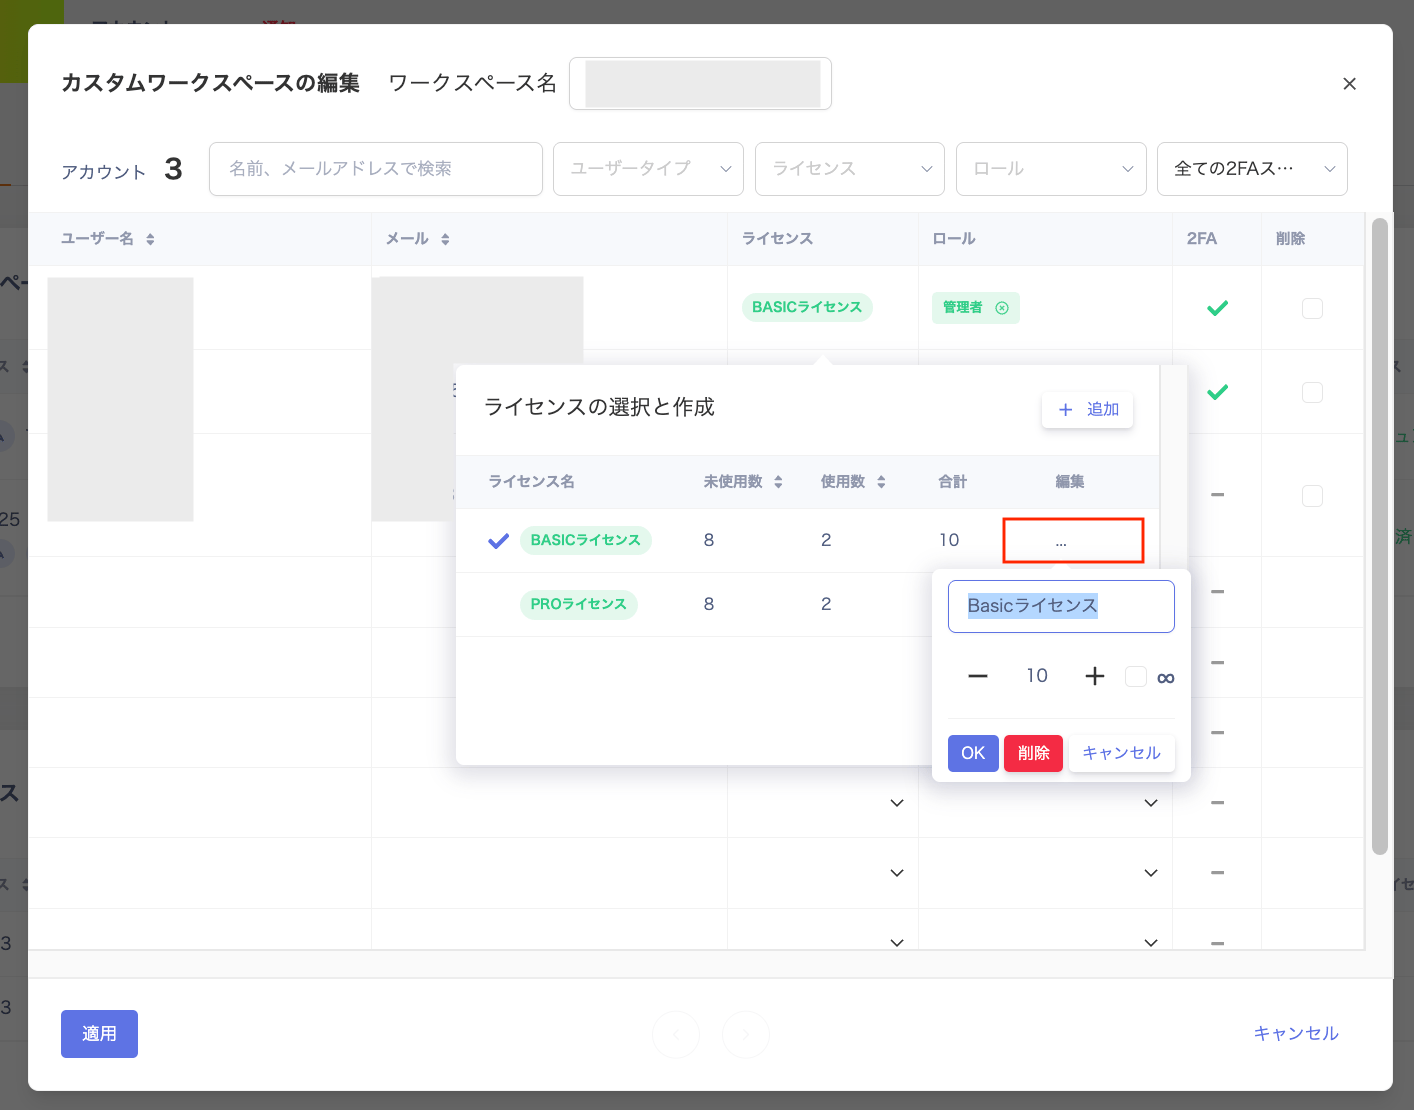
Field Description Username Select an existing registered username or enter any value. Email address (required) If you select a user with an email address, this field auto-fills. You can also enter any value manually. License Set a license name and total quantity, then assign it to a user. Only the Admin role can do this. (Example: Create a Basic license and a Pro license, then assign the Pro license to a user. The usage count increases by 1 and the unused count decreases by 1.) Role Choose from “Admin / Guest / Other”. If the role you need is not listed, you can type a custom role name. 2FA Choose from “Not set / Enabled / Disabled”. This indicates whether the user logs in with 2FA, and whether 2FA is enabled or disabled. 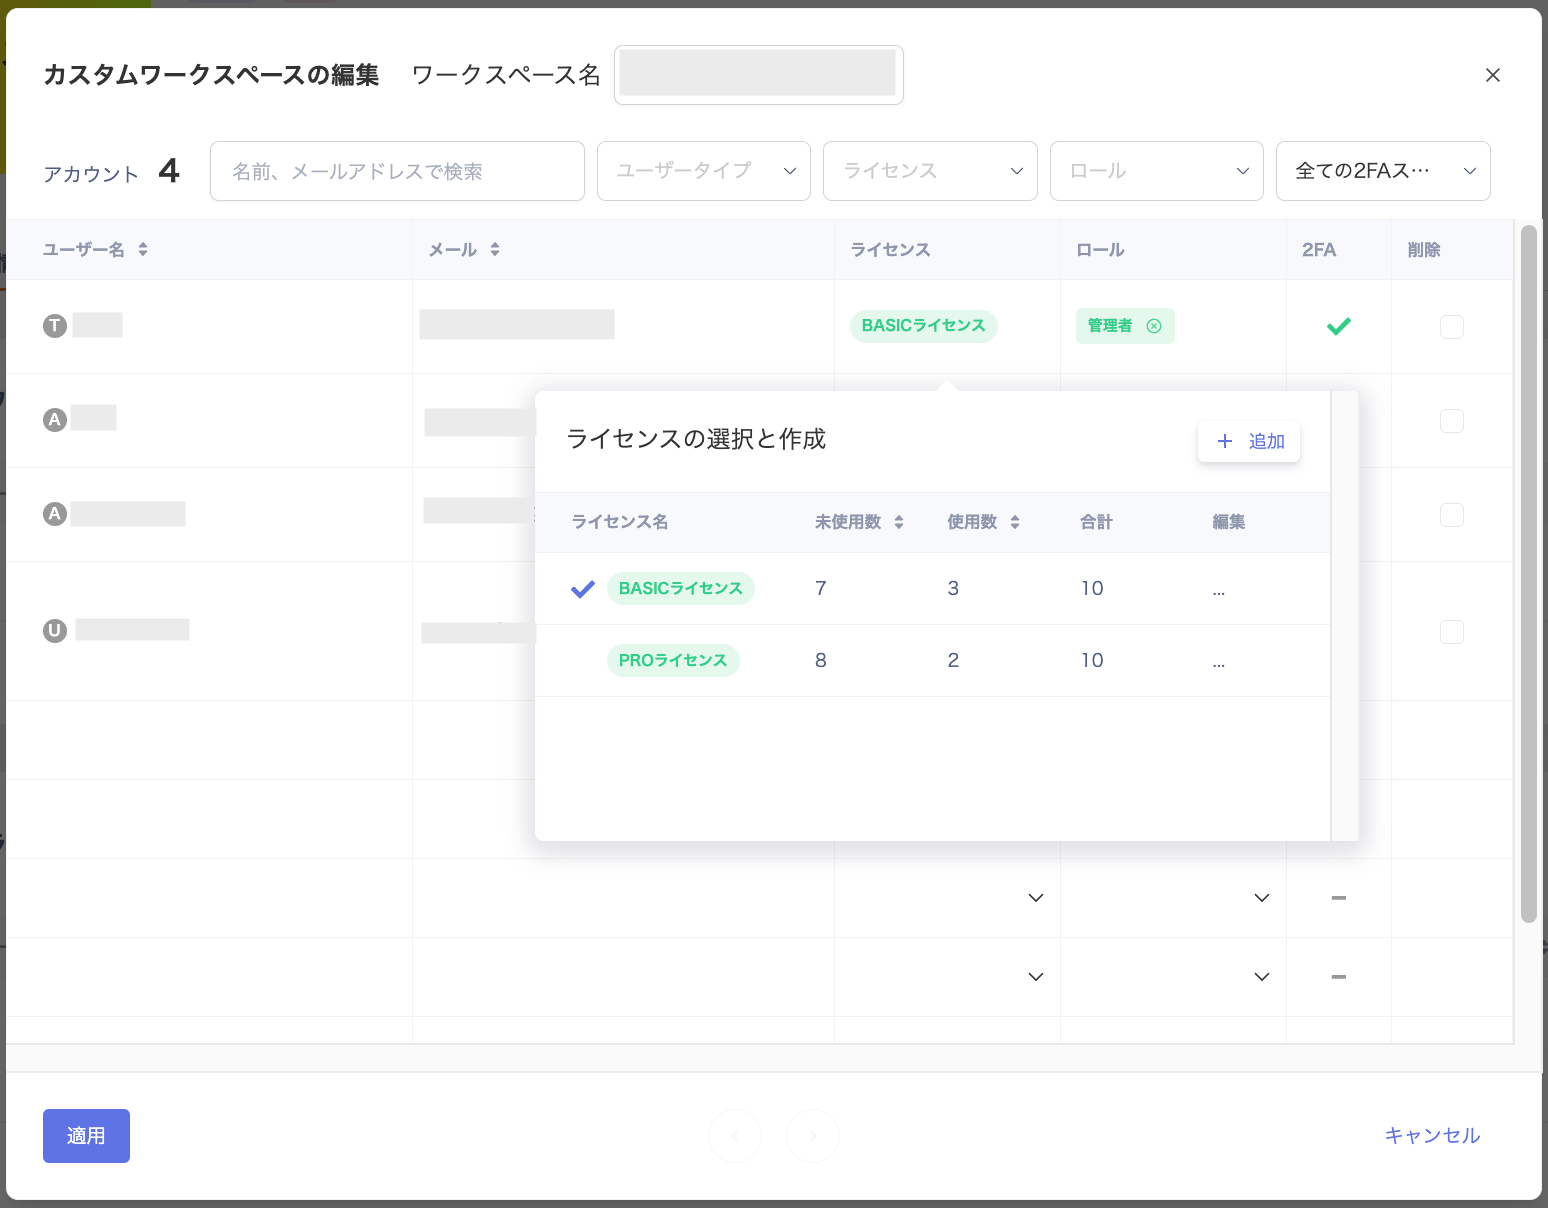
- After filling in all fields, click [Apply] to start the account registration process.
Change the Custom Service Name
- Go to Services > select the custom app > click [Edit] in the upper right.
-
In “Edit Custom Service”, change the service name and click [OK].
Setting a URL in the “URL” field enables service monitoring.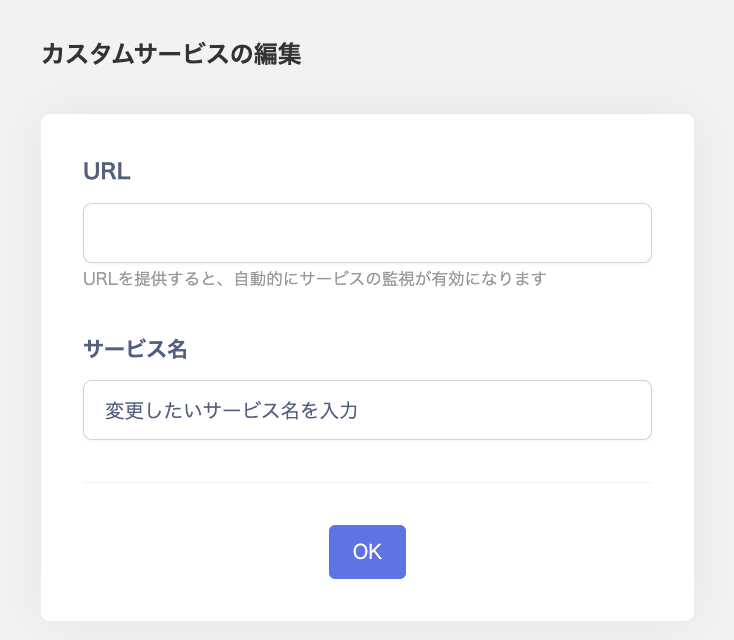
Delete a Workspace from a Registered Service
Follow these steps to delete a workspace from a registered custom app.-
Go to Services > Service List and click the custom app.
Custom apps show(Custom)under “Service / Workspace” in the left panel. -
Go to the service detail “Info” tab and find the workspace row.
Click the three-dot menu [︙] on the right, then click [Delete].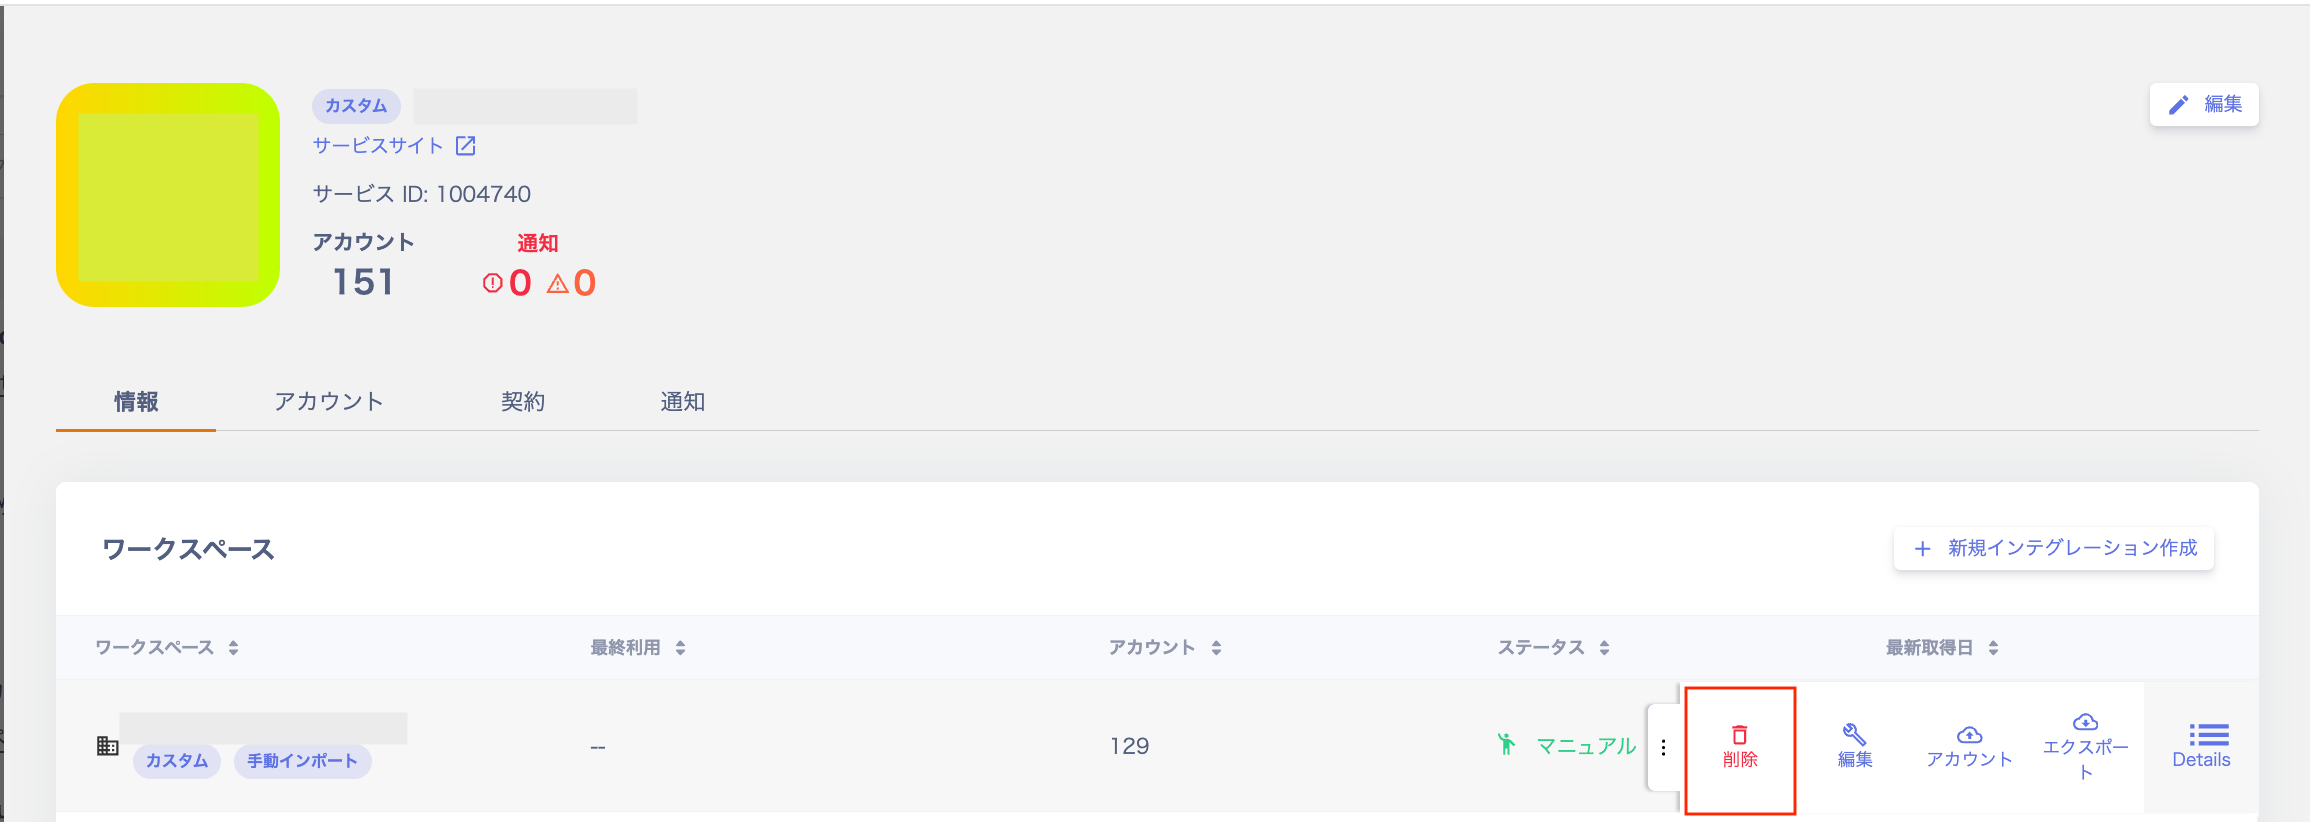
Bulk Operations
Bulk Account Registration
Register accounts for a registered system in bulk.-
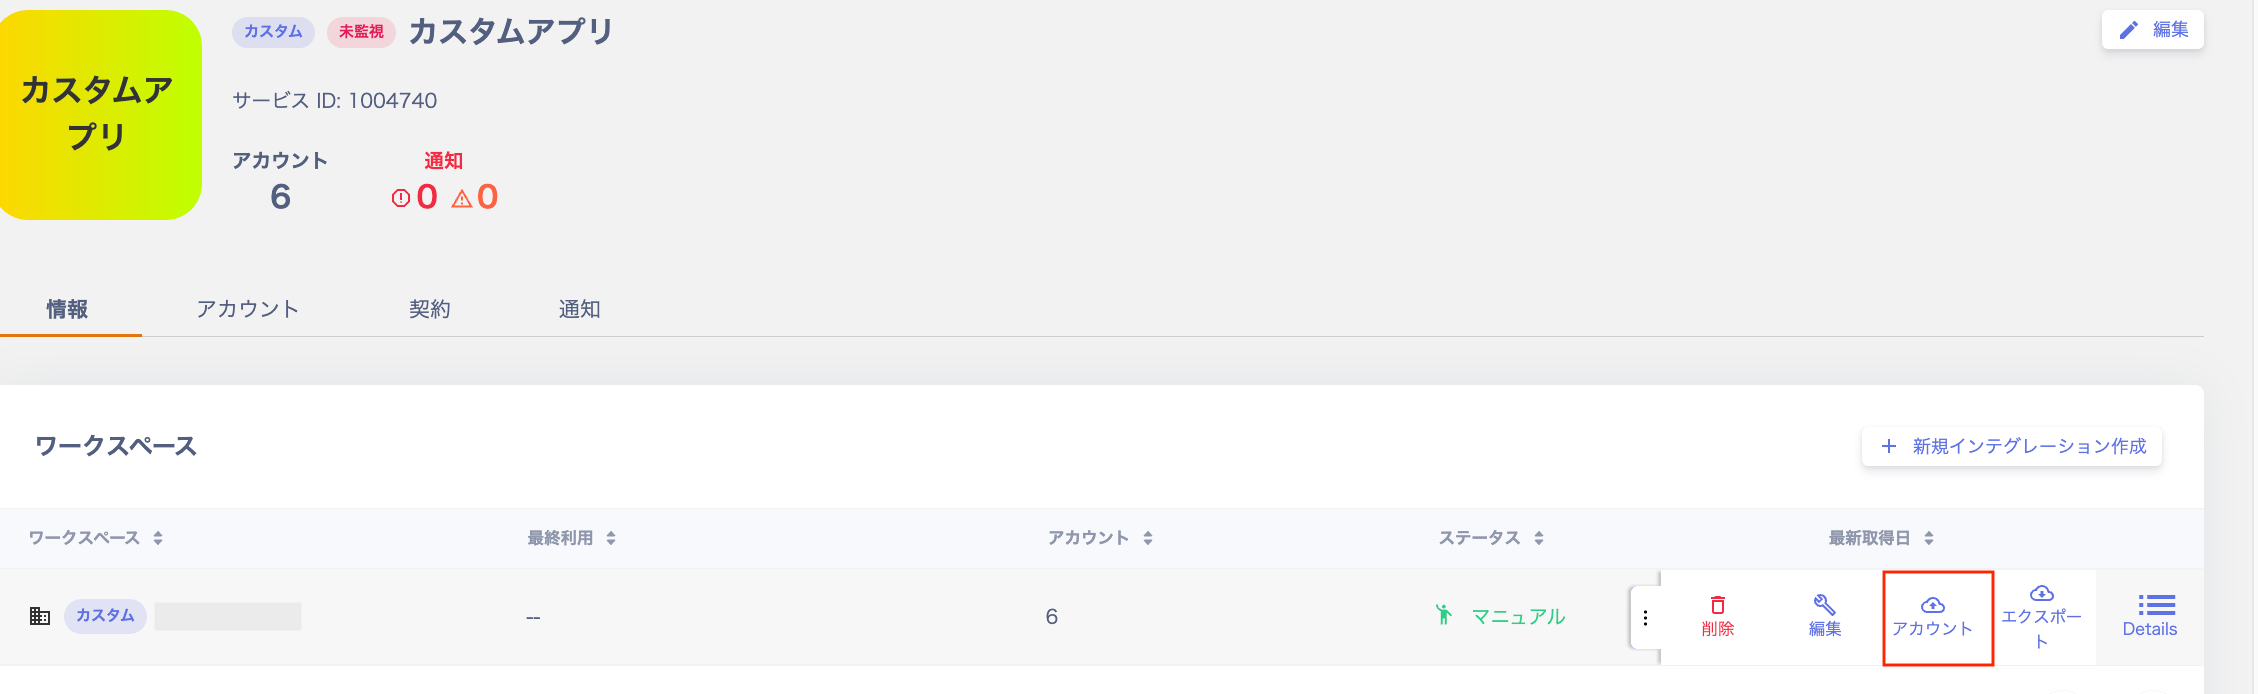
Go to Services > Custom App > Info > click the ”︙ (three-dot menu)” > click [Accounts].
-
The “Import Account List” screen appears.
Click [Download Template] to download the template file (.csv).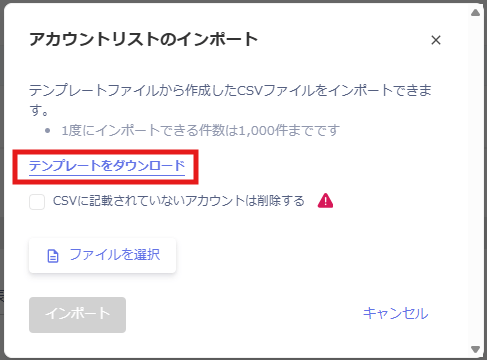
-
Fill in the downloaded template following its format and save the CSV file.
Delete the content in row 7, which is a sample entry.
- Supported CSV character encodings: UTF-8, EUCJP, JIS, SJIS
- Characters with OS-specific encoding are not supported.

-
Click [Select File], choose the CSV file, and click [Import].
You can check “Delete accounts not listed in the CSV” before uploading. If you do, any account not in the CSV file will be deleted.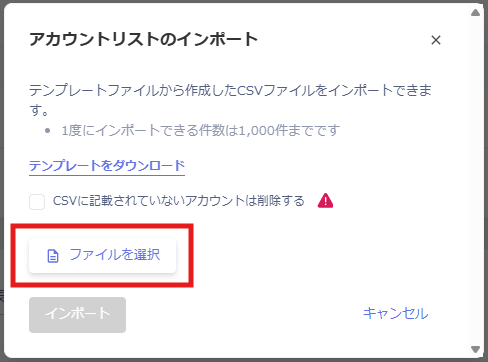
- Confirm that the uploaded accounts have been registered.
Export Accounts
You can export accounts from a registered system.-
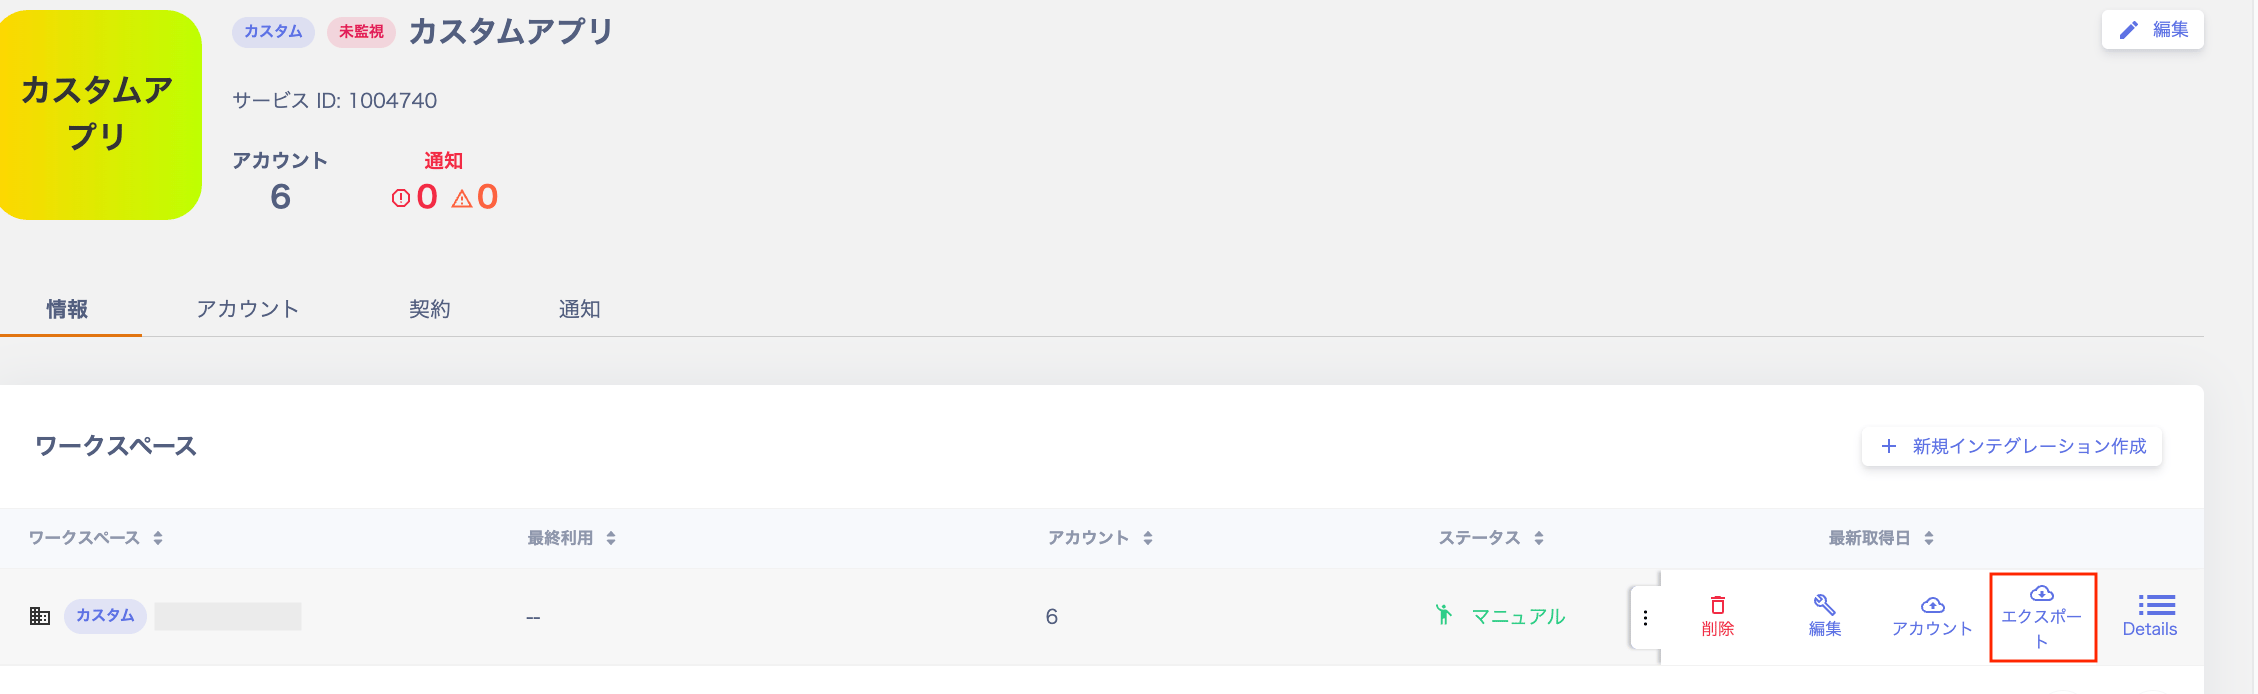
Go to Services > Custom App > Info > click the ”︙ (three-dot menu)” > click [Export].
-
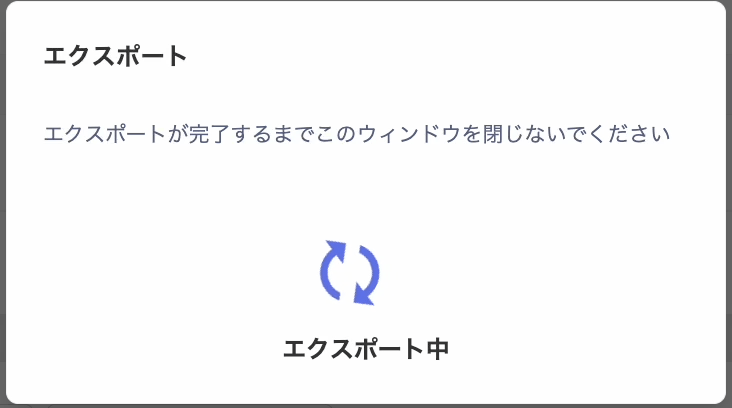
The “Export” screen appears. While the export is in progress, it shows “Exporting”.
-
After the export completes, save the CSV data to your preferred location. You can also edit the CSV data and bulk-import it from Accounts.

FAQ
Q. Can I register multiple licenses or roles in a custom app?
A. Yes. See Register multiple licenses or roles in a custom app for details.Q. How do I set a URL for service monitoring in a custom app?
A. Go to Services > click the custom app > click [Edit] in the upper right > set the URL.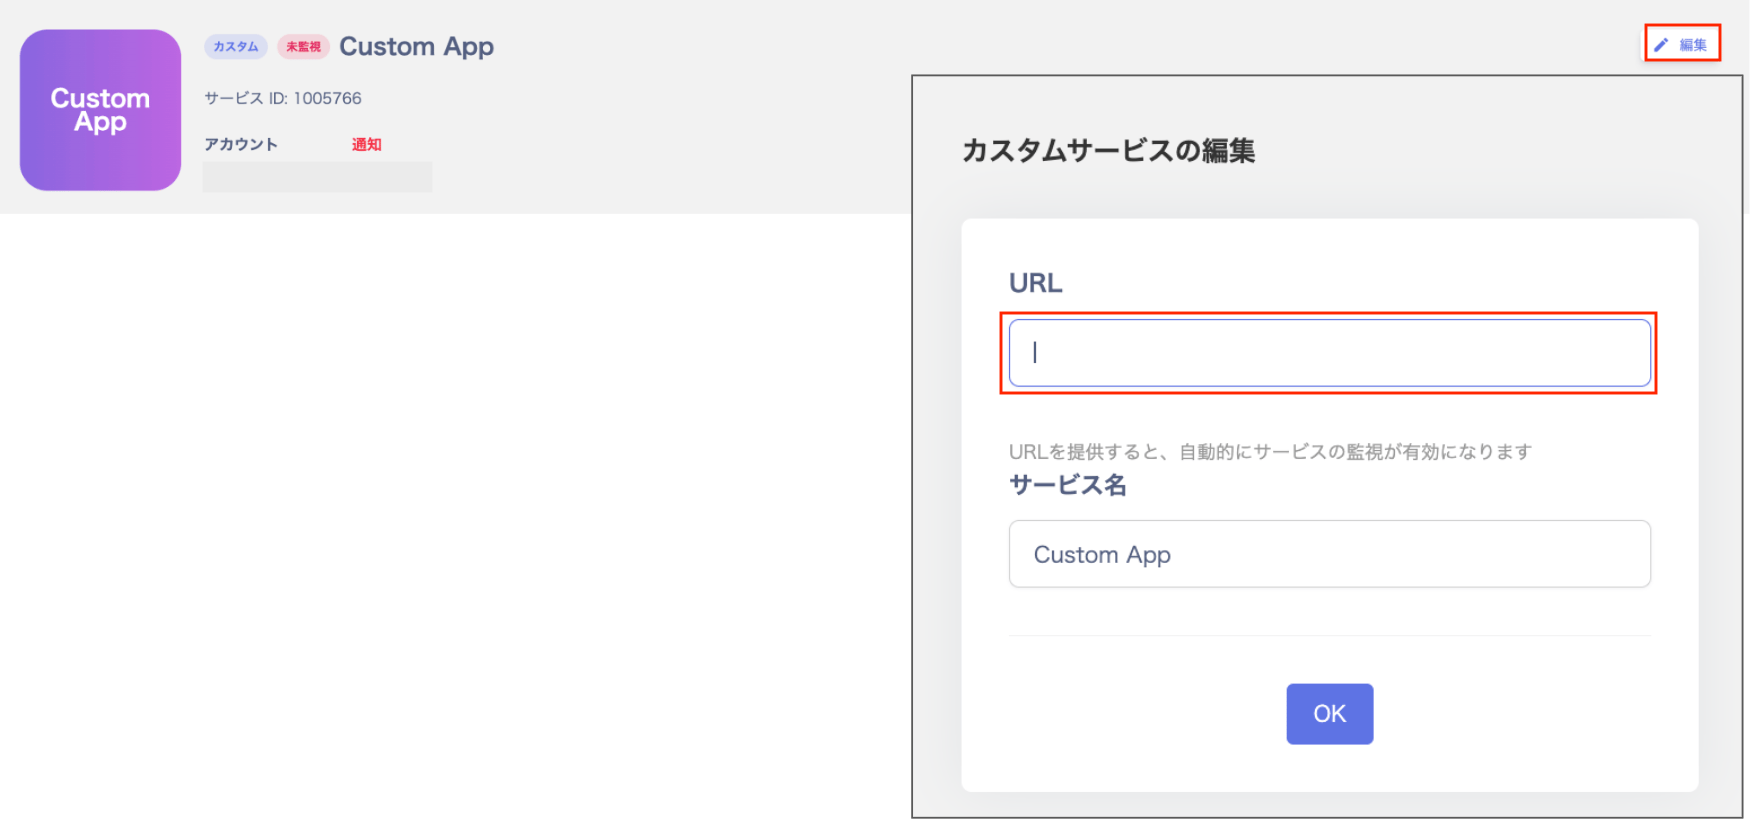
Q. How do I change the license count in a custom app?
A. Go to the service detail “Info” tab, then click the three-dot menu [︙] on the right of the workspace. Click [Edit], then click the license field in the “Edit Custom Workspace” screen. On the “Select and Create License” screen, click the “Edit” column. This opens the screen where you can increase or decrease the license count.