

Supported Features
Account Deletion Account Creation Device AggregationPrerequisites (Jamf Pro)
Creating an API Role
To grant permissions to an API client in Jamf Pro, you must first create an API Role that defines the permission set. You can assign one or more API Roles to a client to grant permissions. For more details, see API Roles and Clients (external site).- In the Jamf Pro sidebar, click Settings.
- Under the System section, click API Roles and Clients.
- Click the API Roles tab at the top of the pane.
- Click New.
- Enter a display name for the API Role. You can enter any name you like.
-
Enter the permission set. Set the following permissions:
Read AccountsDelete AccountsCreate Accounts- (
Jamf Pro User Accounts & Groups (Read))
Read BuildingsRead DepartmentsRead Mobile DevicesRead ComputersRead Sites
- Click Save.

Creating an API Client
- In the Jamf Pro sidebar, click Settings.
- Under the System section, click API Roles and Clients.
- Click the API Clients tab at the top of the pane.
- Click New.
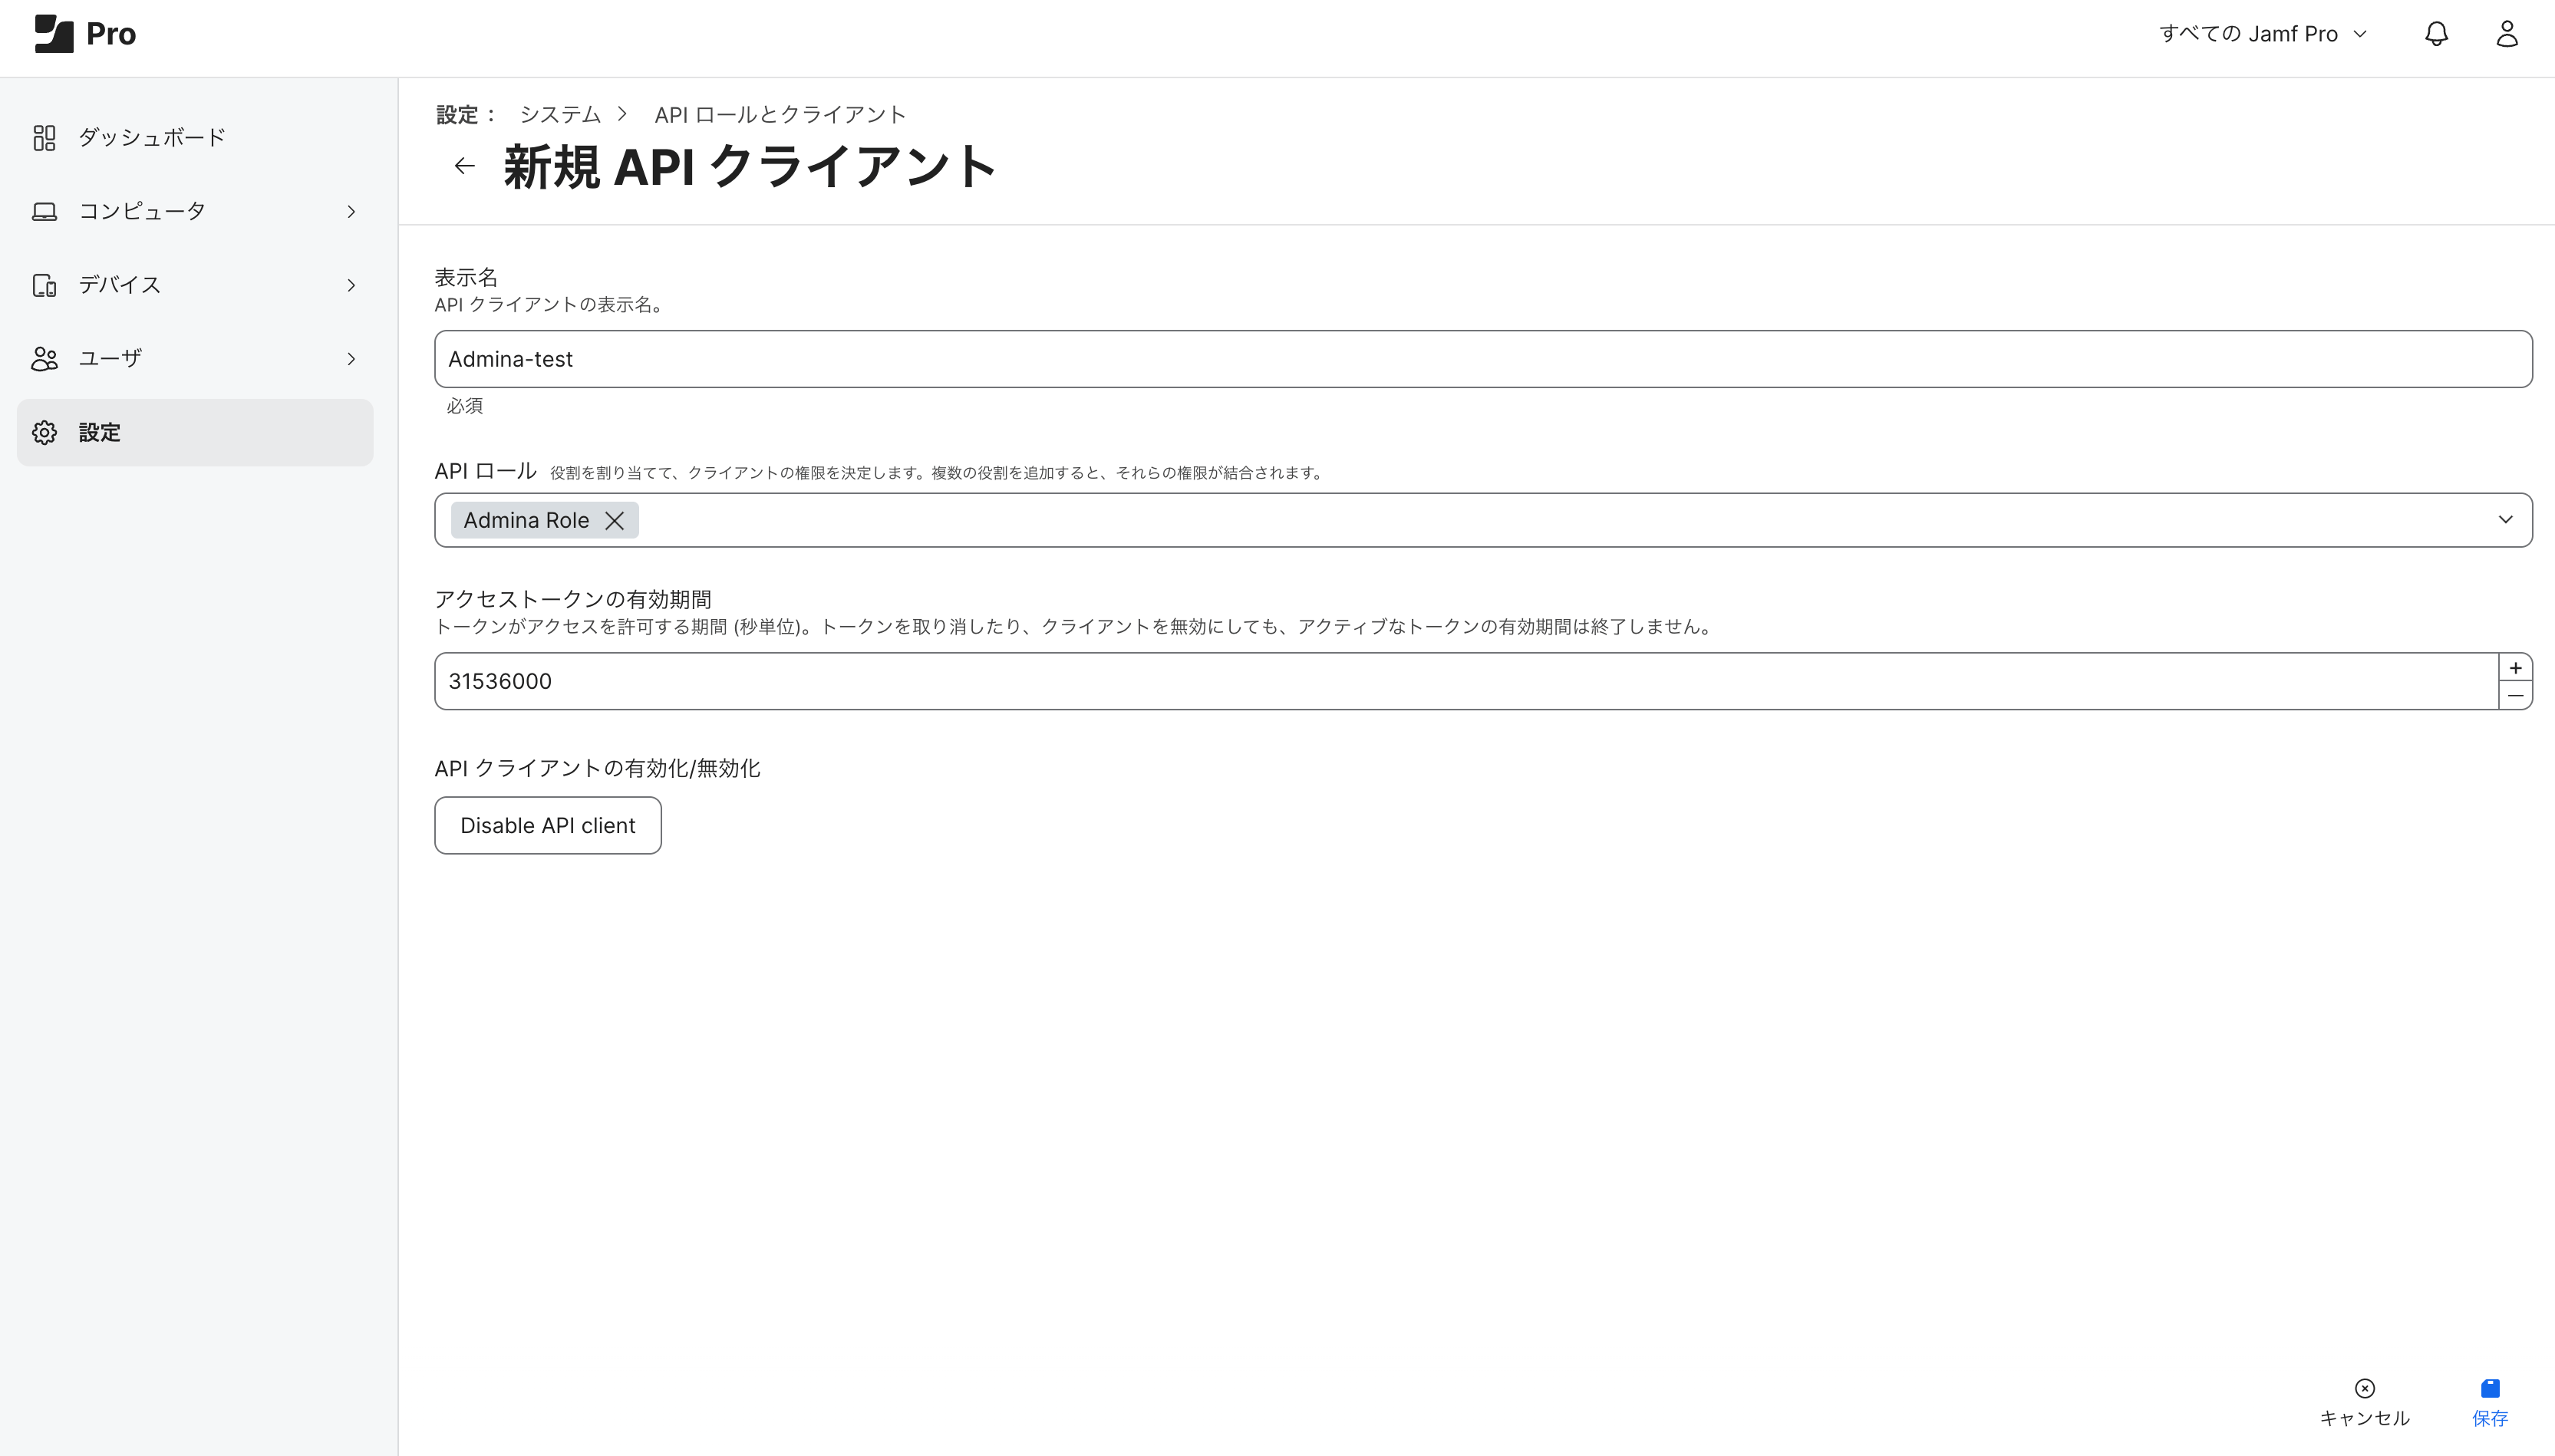
- Enter a display name for the API Client.
- In the API Roles field, add the API Role you created.
Changing the access token lifetime value later does not affect access tokens previously generated from the API client. Similarly, deleting or disabling a client does not revoke previously generated access tokens that are still valid. It is recommended to set a longer value. However, any changes to the API Roles assigned to a client will immediately affect all access tokens.
- To generate a client secret, click Enable API Client.
- Click Save.
Creating a Client Secret
- In Jamf Pro, navigate to the API Client from which you want to generate an access token.
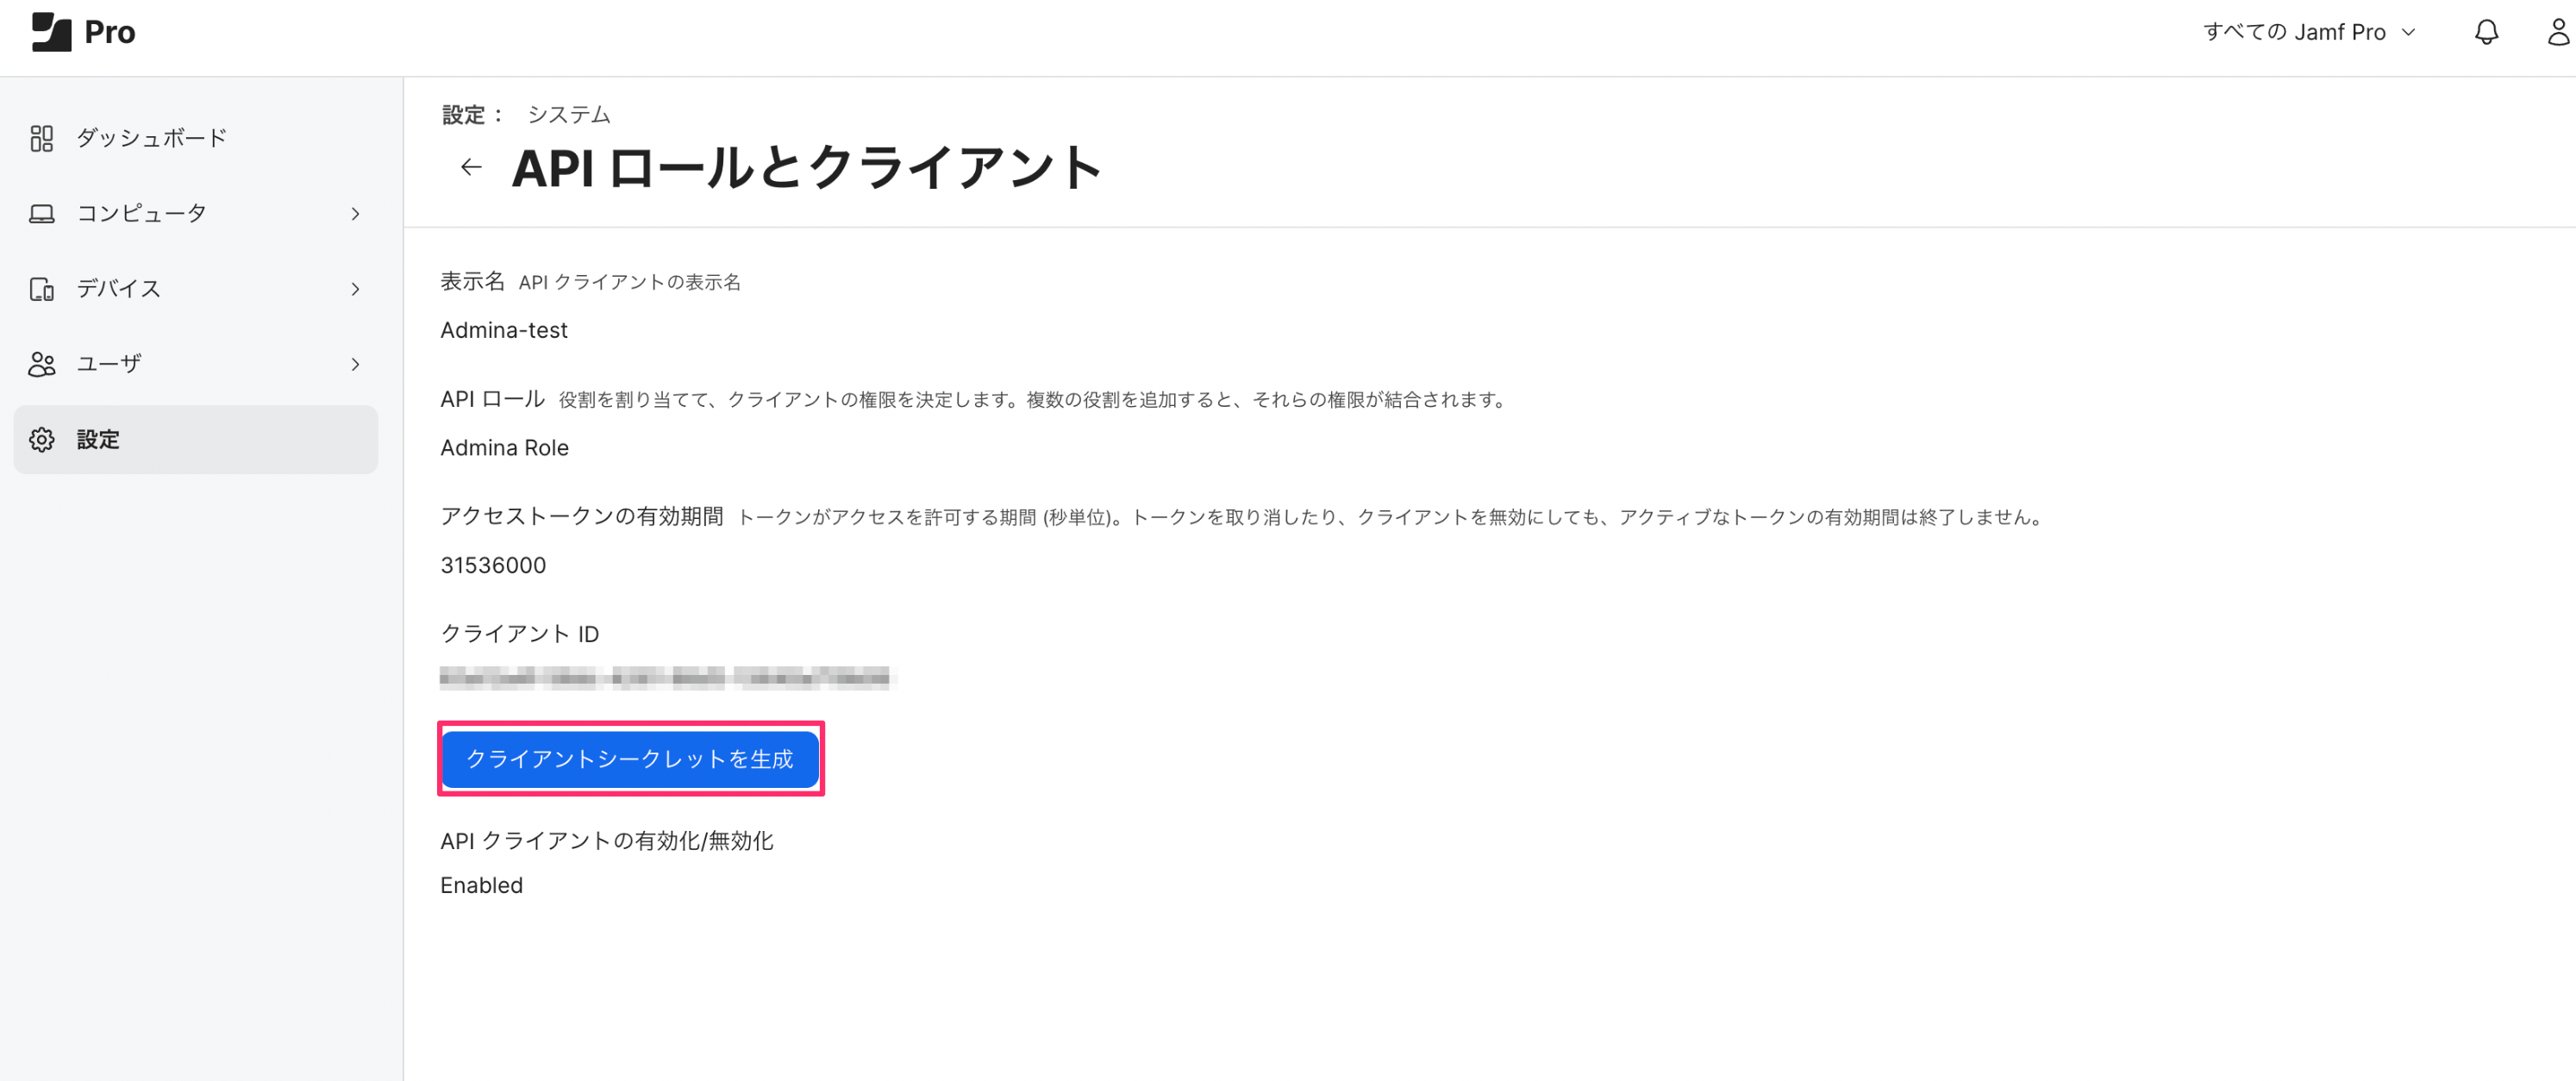
- Click Generate Client Secret. A confirmation dialog will appear.
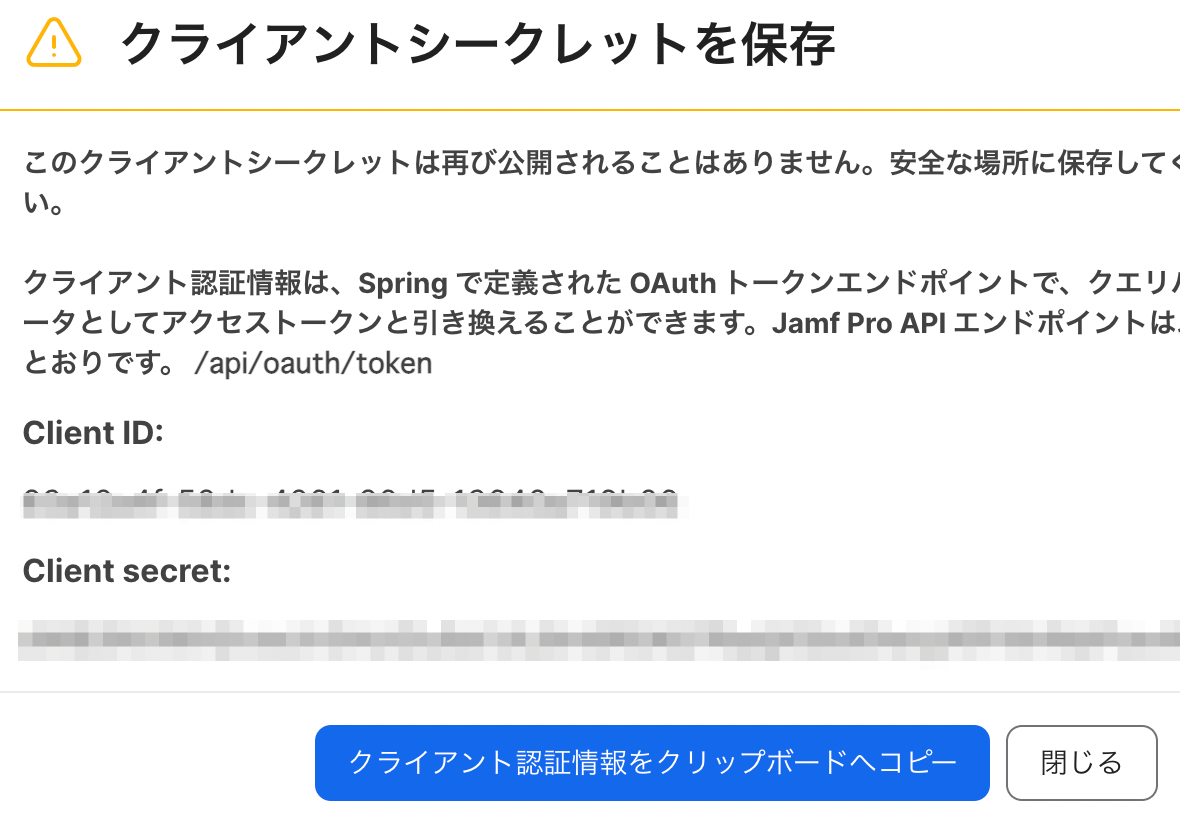
- Click Create Secret. A popup window will display the Client ID and Client Secret — save them.
The client secret is only displayed once. Be sure to save it in a secure location before closing the dialog.
Getting the Workspace Key
After logging in to Jamf, part of the URL is the workspace key — save it. http://{workspace-key}.jamfcloud.com

Integration Setup (Admina)
- In Admina, go to Integrations > Integrations and search for Jamf.
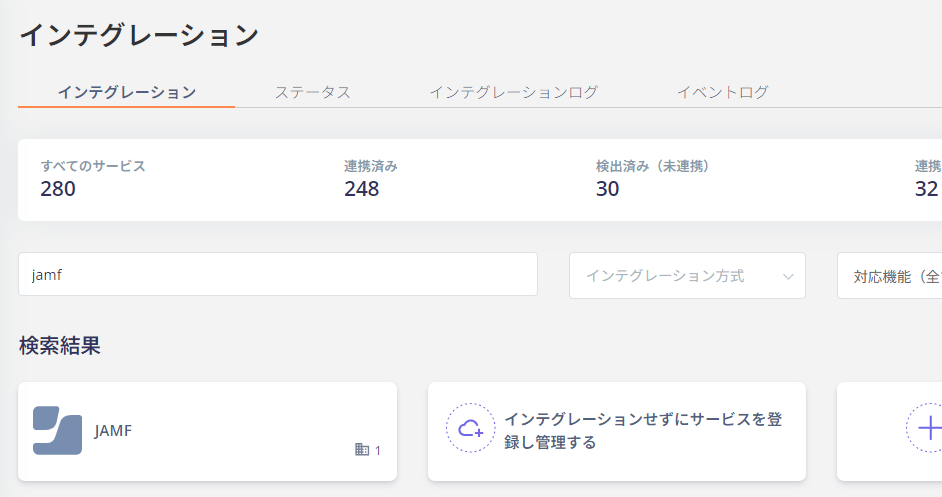
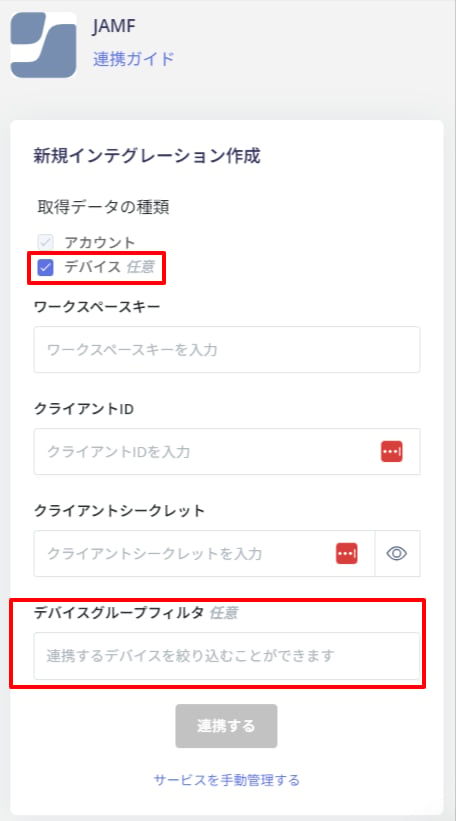
- Enter the Workspace Key, Client ID, and Client Secret obtained in the previous steps, then click Connect.

- For MDM integration, check
Data type to retrieve: Devicesand click Connect.
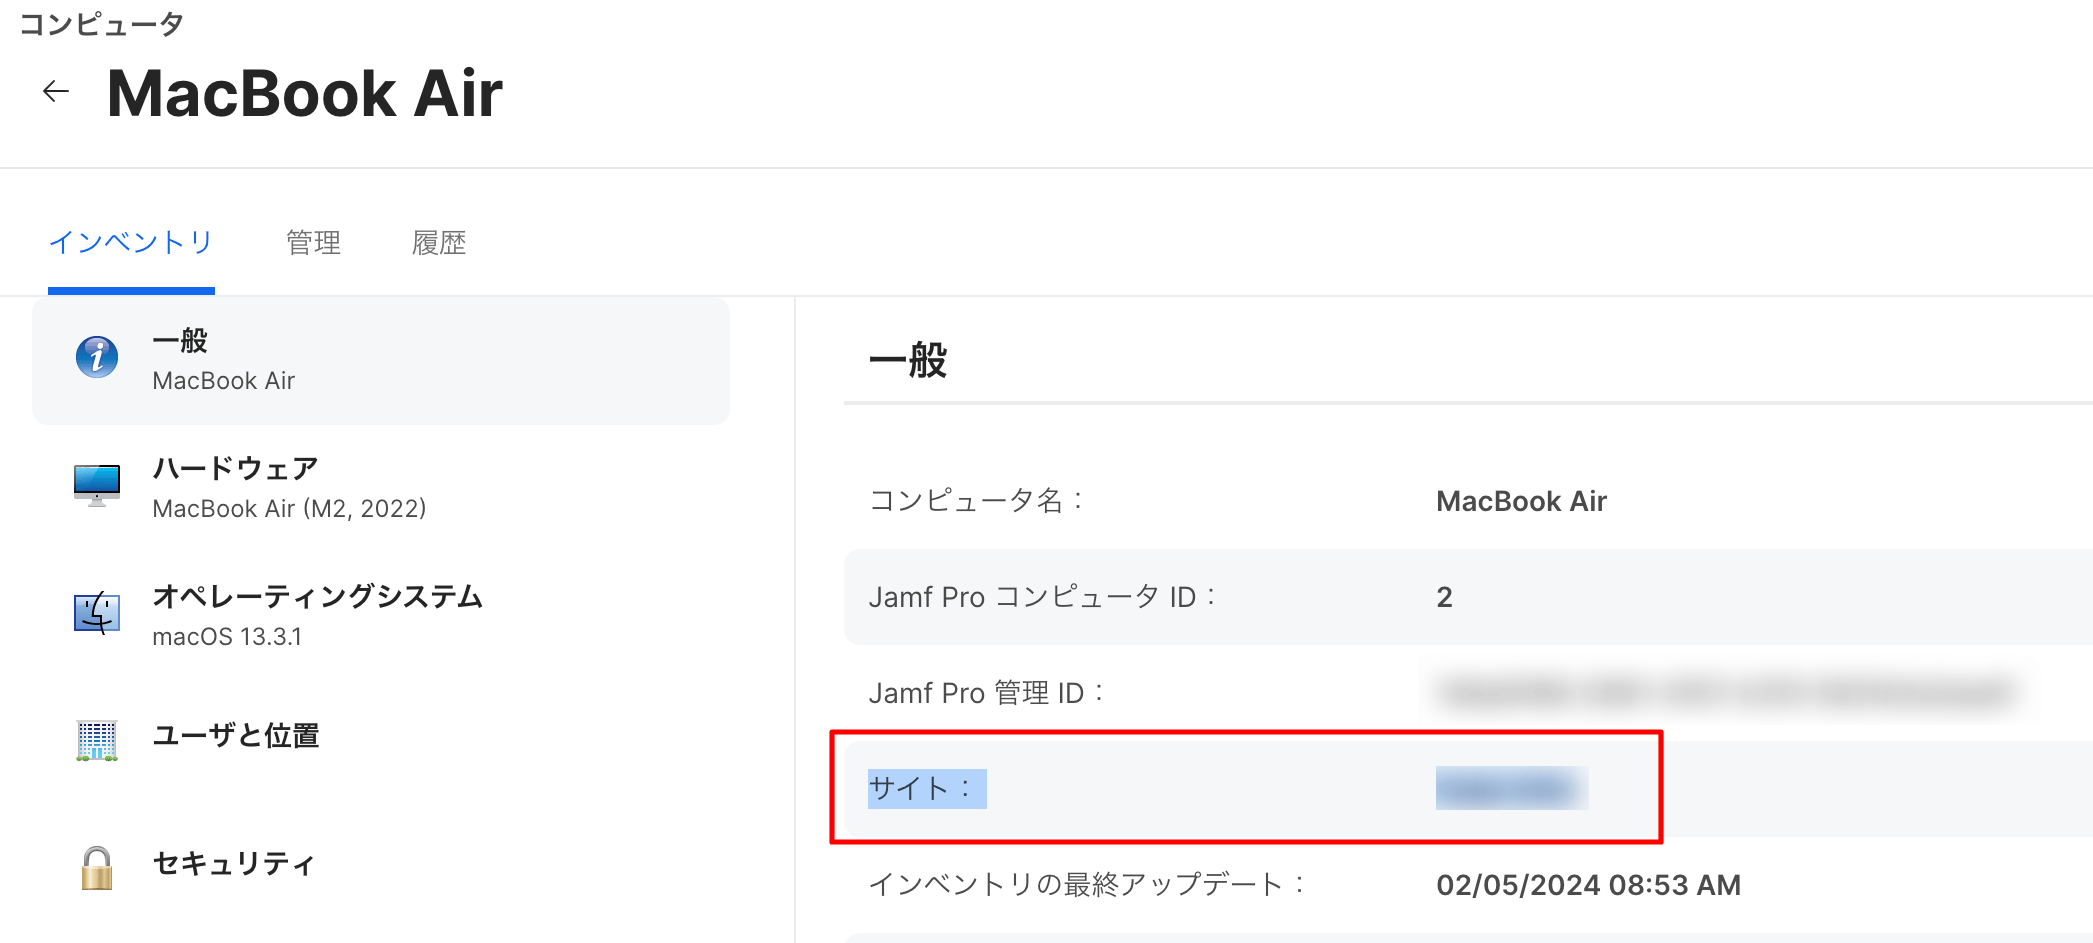
- Once the integration with Jamf is successful, registered user information will be displayed in the account list.
MDM Integration
4-0. Linking MDM-compatible SaaS with the Admina Device Ledger If you are using the device management feature, you can sync devices with Jamf. For details, see Linking MDM-compatible SaaS with the Admina Device Ledger.Synchronized Fields
| Admina Field | Sync Pattern | Jamf (computer) | Jamf (phone) | Notes |
|---|---|---|---|---|
| Asset Number | (2) Admina-based | <mdmname>_<hostname> | <mdmname>_<hostname> | A prefix is added in case of duplicates. |
| Model Name | (2) Admina-based | Hardware > Model | Hardware > Model | |
| Serial Number (IMEI) | (1) MDM-based | Hardware > Serial Number | Hardware > Serial Number | Merge key. |
| (2) Admina-based | User and Location > Email Address | User and Location > Email Address | Even if the email address does not exist in the Admina directory, the directory-device link will be executed. The email address will also be added to the directory field at that time. | |
| Type | (2) Admina-based | Hardware > Model Identifier | Hardware > Model Identifier | iMac = Desktop PC; others = Laptop PC; Phone = Phone |
| Status | (2) Admina-based | Determined from User and Location > Email Address | Determined from User and Location > Email Address | If an email address is registered on the Jamf side, status is “In Use”; otherwise “In Stock”. |
| Phone Number | (1) MDM-based | — | Network > Phone Number | |
| Location 1 | (2) Admina-based | User and Location > Building | User and Location > Building | |
| Location 2 | (2) Admina-based | User and Location > Department | User and Location > Department | |
| Purchase Date | (2) Admina-based | Purchasing > Purchase Date | Purchasing > Purchase Date | |
| Manufacturer | (1) MDM-based | Hardware > Make | ”Apple” | |
| Model Number | (1) MDM-based | — | Hardware > Model Number | |
| CPU | (1) MDM-based | Hardware > Processor Type | — | |
| Memory | (1) MDM-based | Hardware > Total RAM | — | |
| HDD/SSD | (1) MDM-based | Storage > Drive Capacity | — | |
| OS | (1) MDM-based | Operating System > Operating System | Device Type | |
| Version | (1) MDM-based | Operating System > OS Version | General > iOS Version | |
| Keyboard Layout | (1) MDM-based | General or Hardware > Extension Attributes | — | Field name: searches from Text Field for fields containing “Keyboard” or “キーボード”. If the text field contains “US or U.S”, it is identified as English keyboard; if “Japanese or JIS or JP”, as Japanese keyboard. |
| Hostname | (1) MDM-based | General > Computer Name | General > Mobile Device Name | |
| SIM Number | (1) MDM-based | — | Network > ICCID | |
| Procurement Method | (2) Admina-based | Purchasing > Purchase or Lease | Purchasing > Purchase or Lease | |
| Vendor | (2) Admina-based | Purchasing > Vendor | Purchasing > Vendor | |
| Purchase Price | (2) Admina-based | Purchasing > Purchase Price | Purchasing > Purchase Price | |
| Warranty Period | (2) Admina-based | Purchasing > Lease Expiration | Purchasing > Lease Expiration | |
| Last Used (MDM) | (1) MDM-based | General > Last Check-in | General > Last Inventory Update | This field is automatically created when MDM integration starts, without creating a new custom field. |
| Managed | (1) MDM-based | General > Managed | General > Managed | |
| Managed | (3) MDM field | Managed: MDM Enabled | Managed: MDM Enabled |